Deploy Your First CorDapp
Now that you have a running Corda environment, let's deploy a basic CorDapp and issue a simple transaction. If you have not yet configured your Kaleido environment, return to the previous section and follow the steps to stand up your Corda blockchain.
Prerequisites
First, hop over to the Kaleido Corda Samples repository and follow the steps of the README through the Build step. This library contains the business logic for the CorDapp and a simple RPC client program to communicate with your Corda node. You will first need to clone the kaleido-corda-samples repo and follow the steps to build out the required components listed below:
- IOU Contract
- IOU Flow
- RPC Client
The java dependencies and associated prerequisites are outlined in the README.
Install the CorDapp
Once you have completed the Build step of the README, it's now time to Deploy the jar files to your Kaleido environment. Login to the Kaleido console and navigate to your Corda environment.
Before uploading the CorDapp jar files, we need to ensure that the nodes have correctly initialized and entered their P2P messaging loops.
- Click into each node and use the Logs tab to see the current state.
- Scroll to the bottom of the logs and confirm that each node has a state of
Running P2PMessaging loop. - If your logs are empty (due to a rotation) or if you see a different state, use the SETTINGS tab to restart the runtime. This will take a few minutes for the node to fully re-initialize.
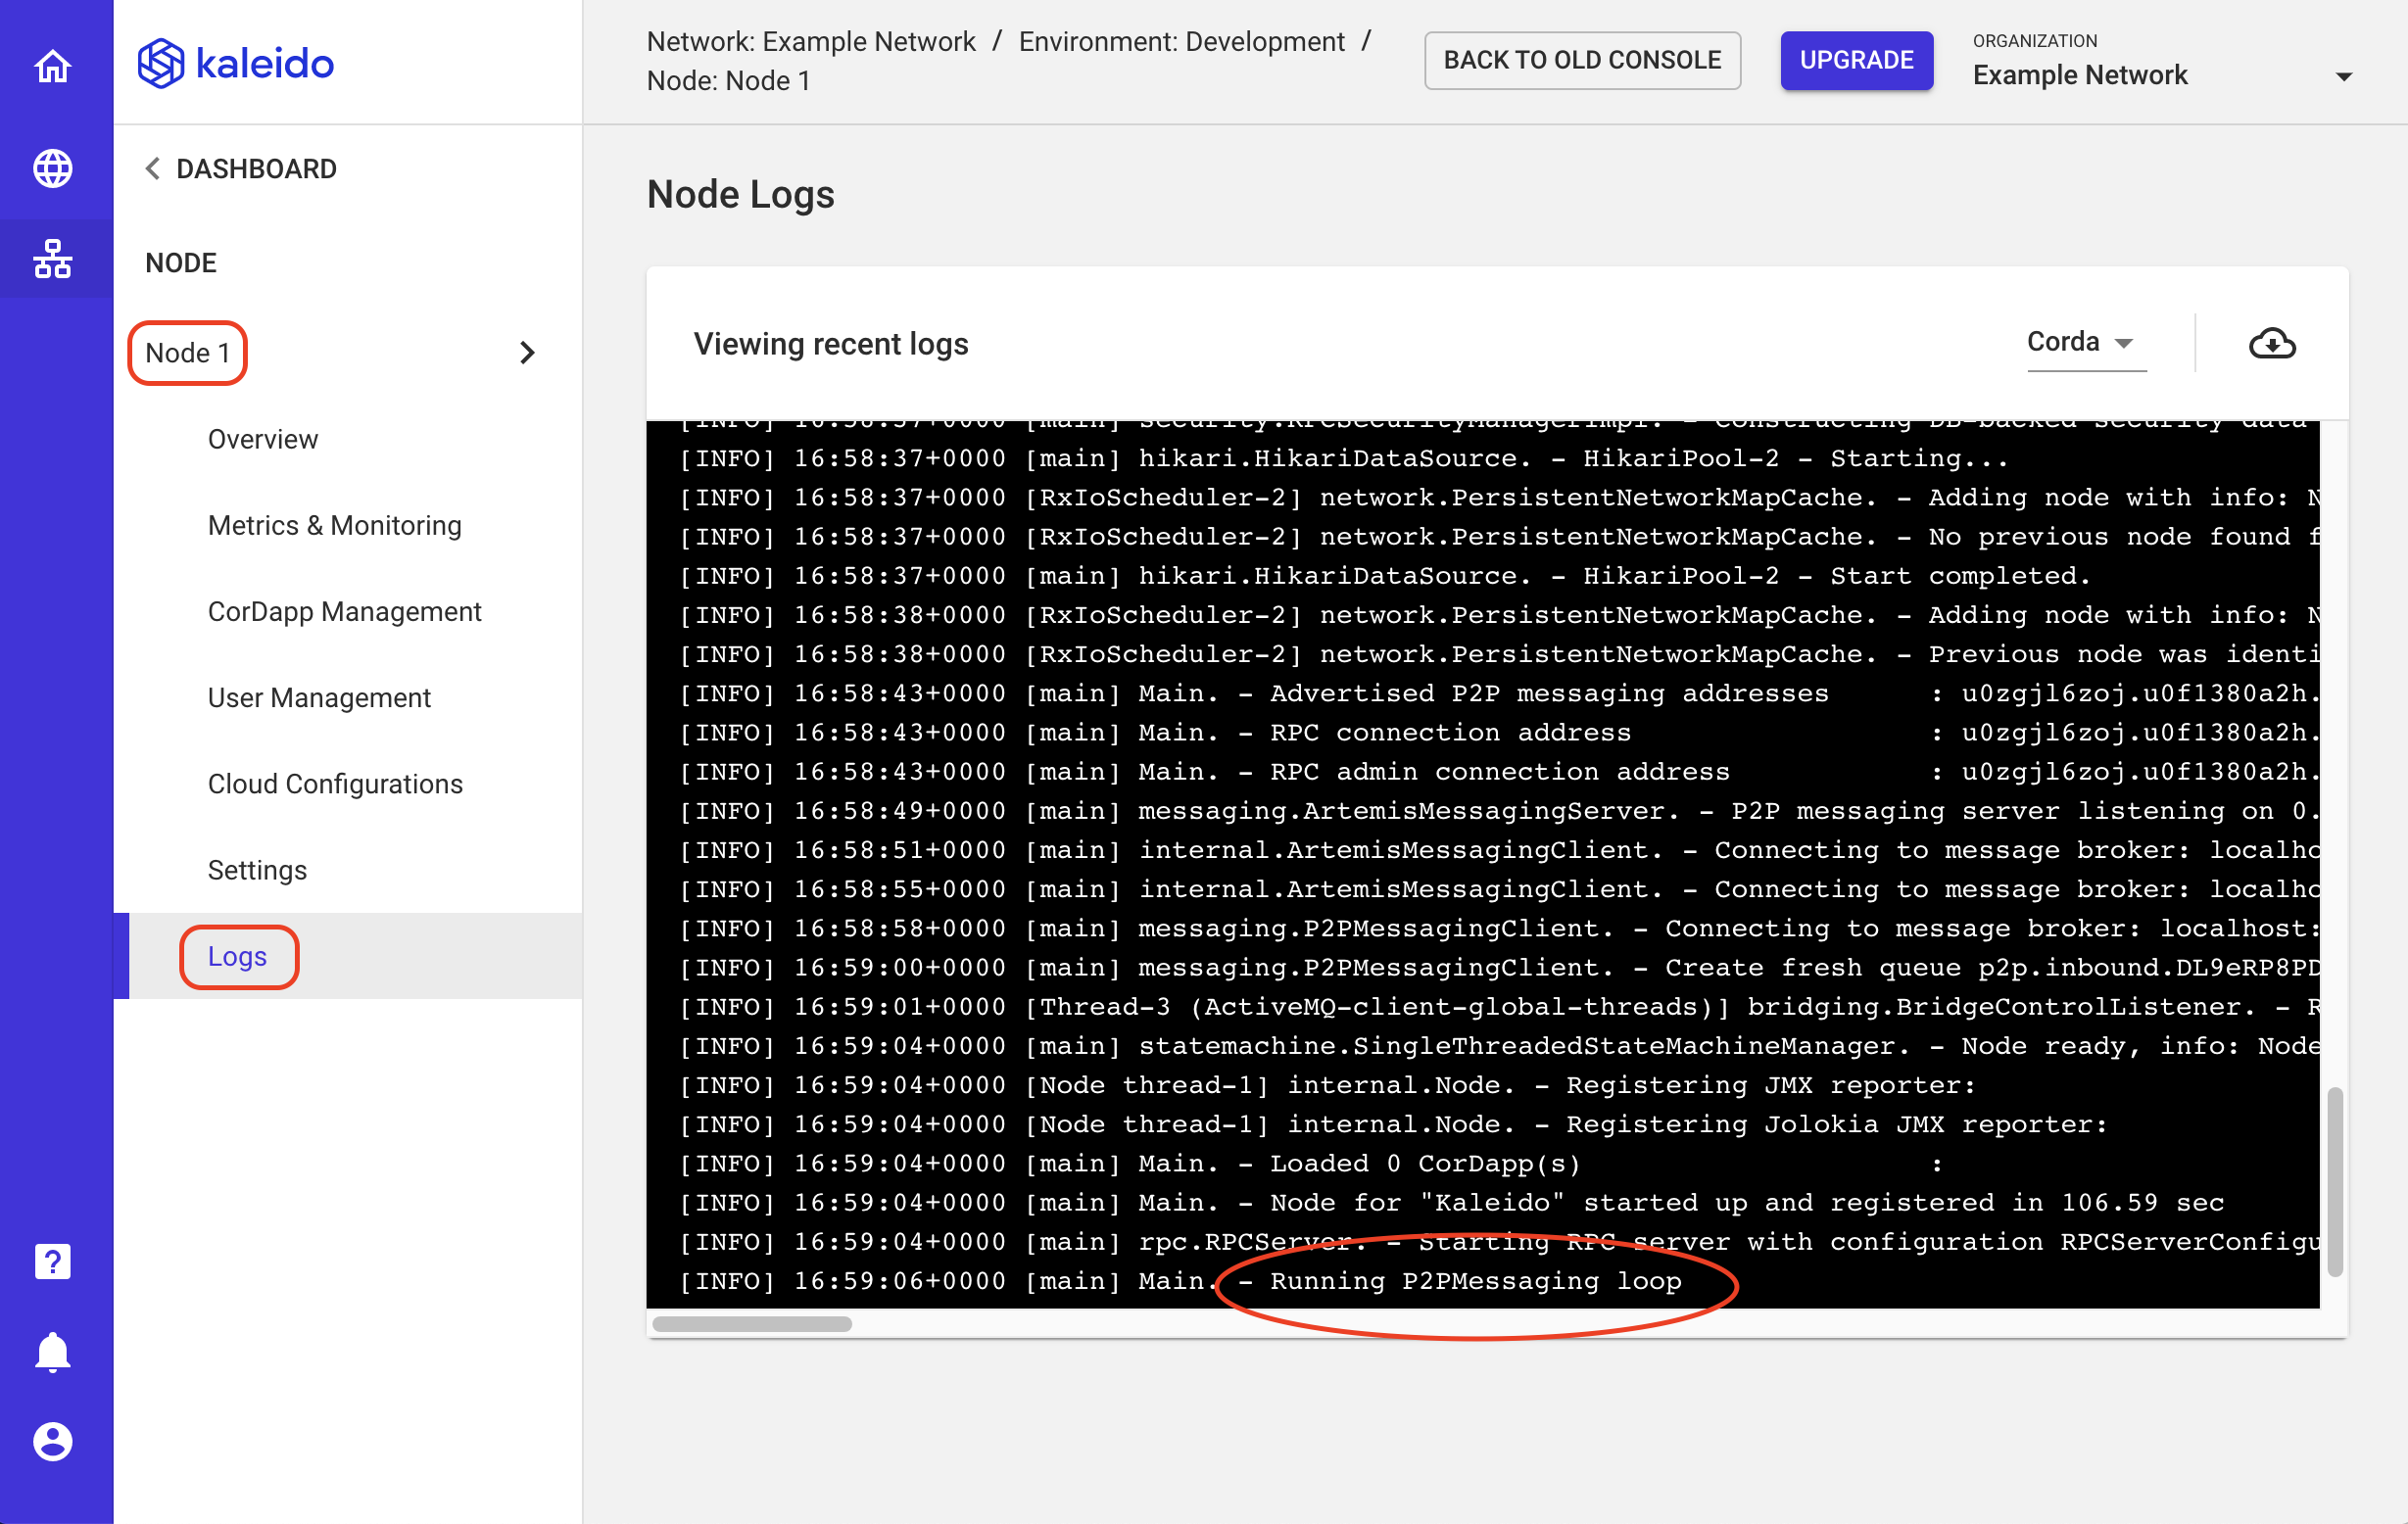
NOTE: The Corda logs always contain a witty pun. Scroll through if you're in the mood for a quick chuckle.
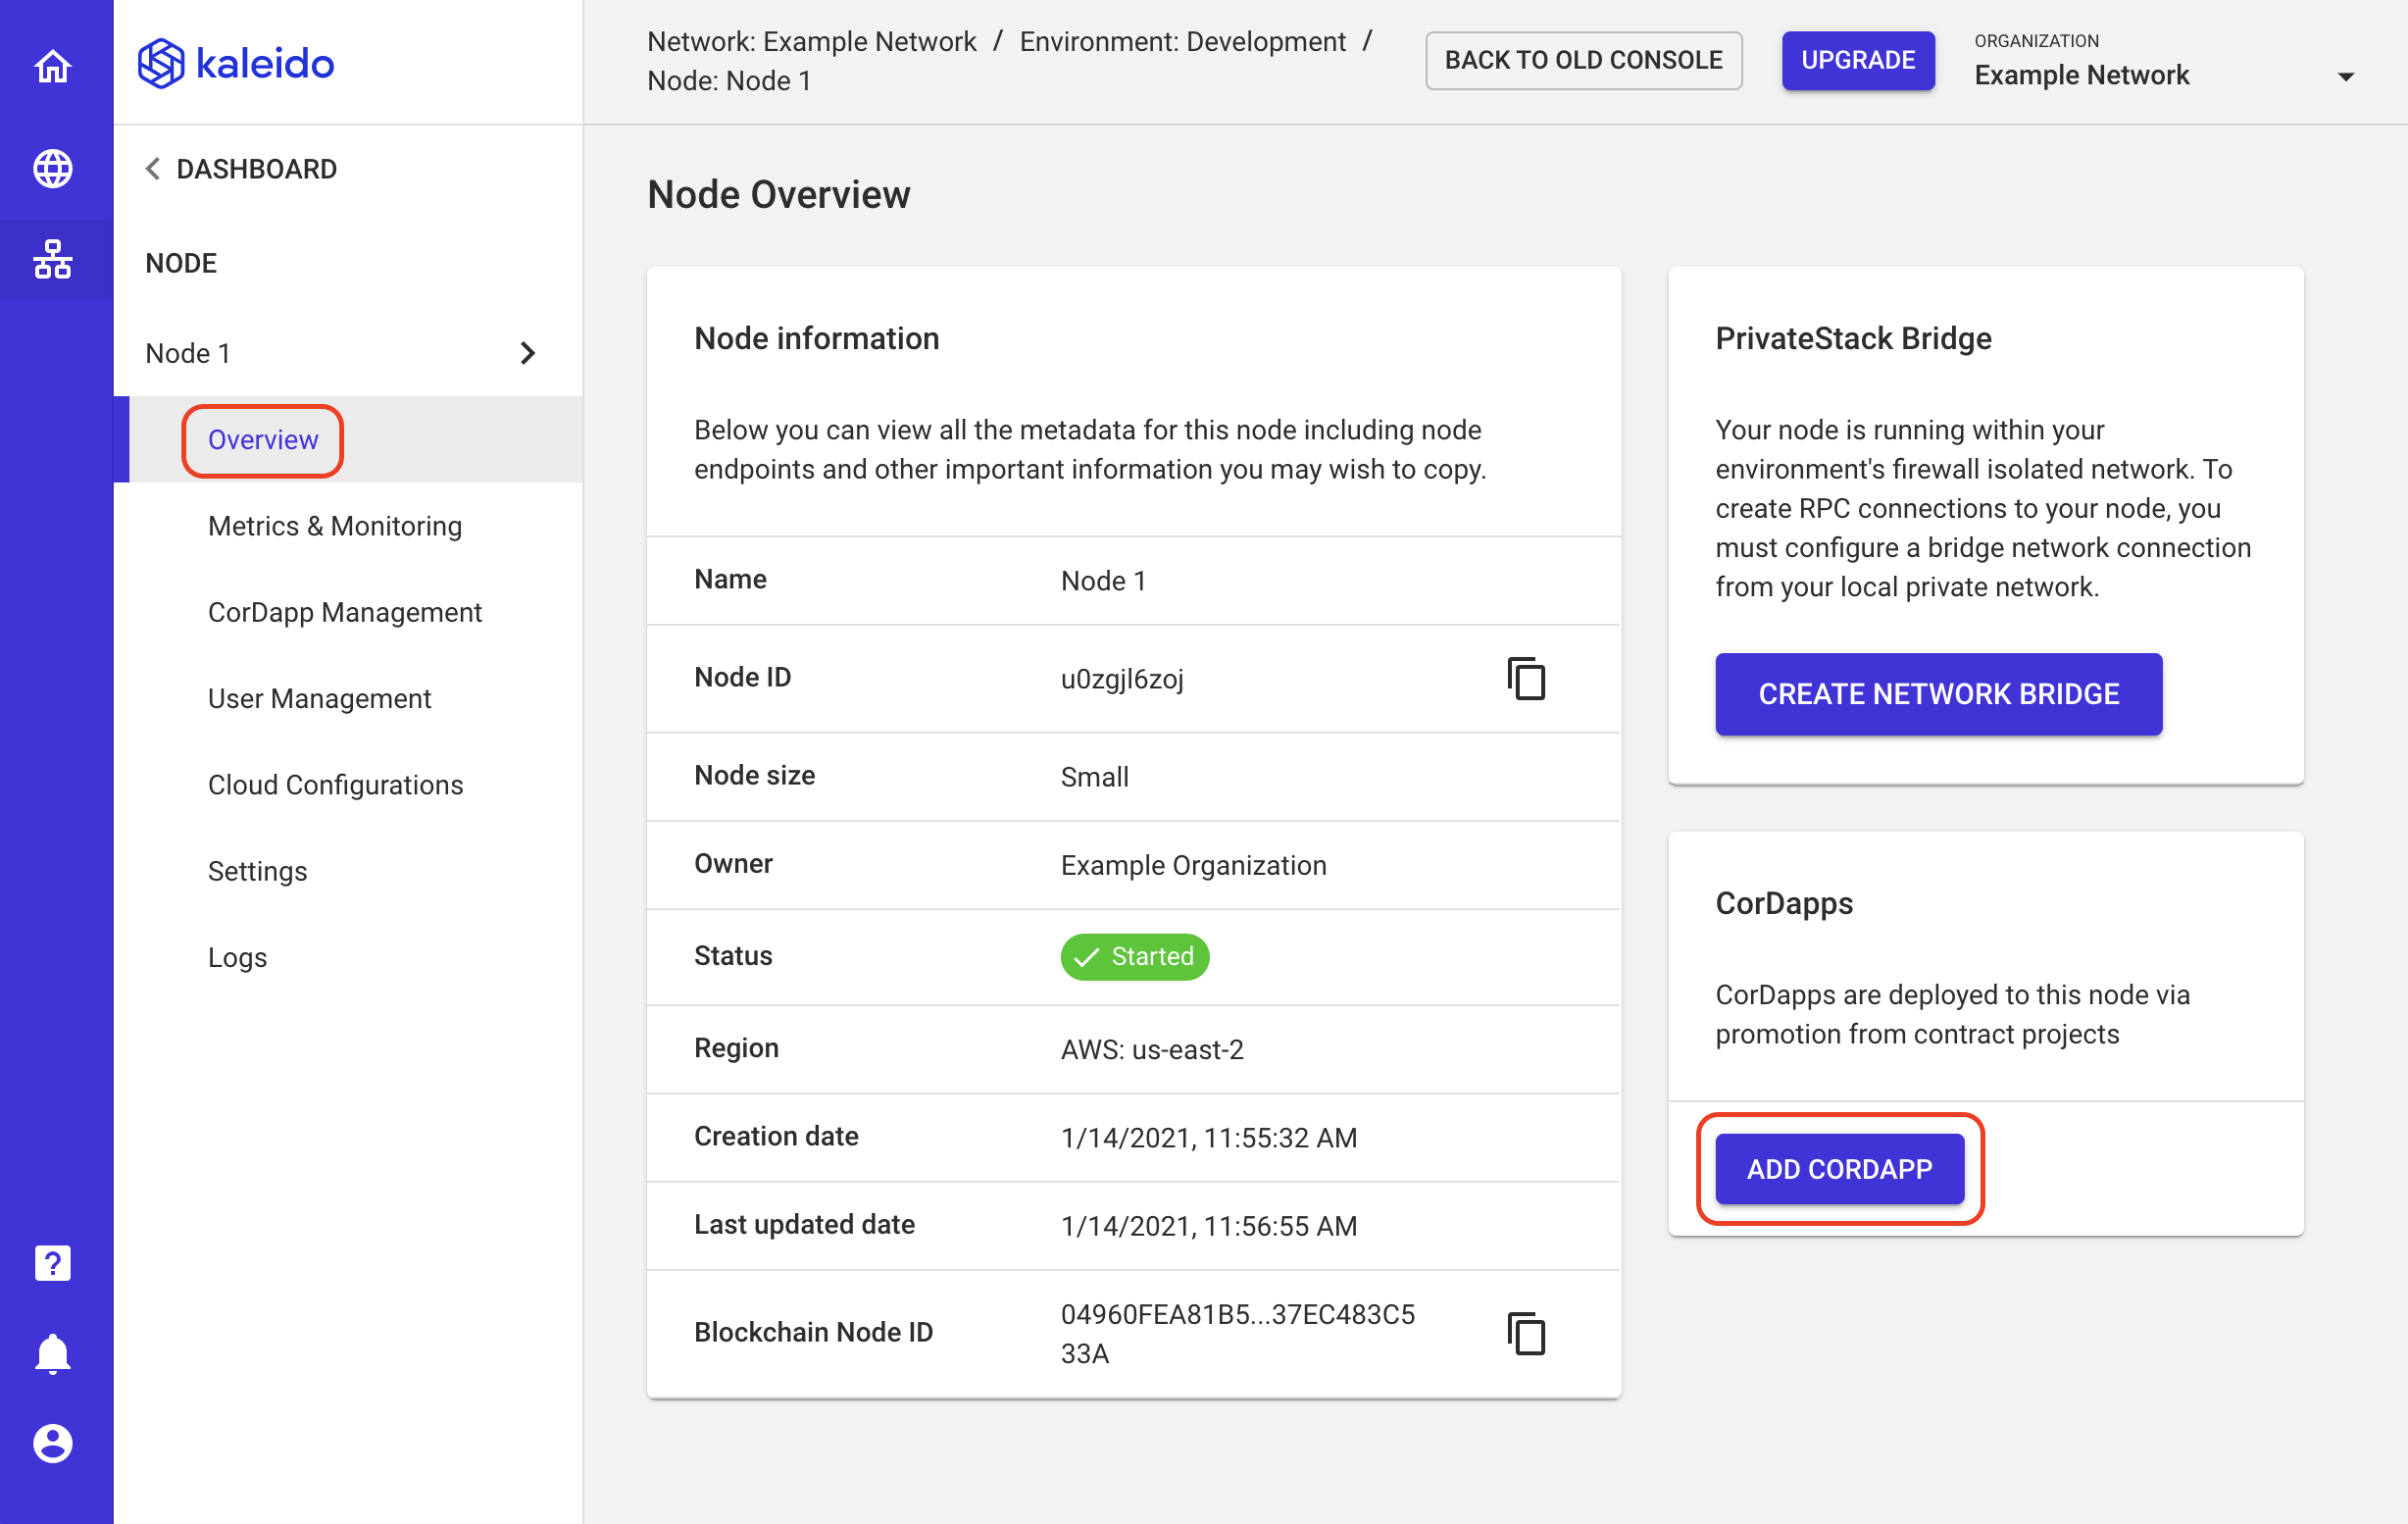
- Once you have confirmed that your nodes are properly peering, click the Overview tab.
- Select the ADD CORDAPP option in the bottom right of your screen.
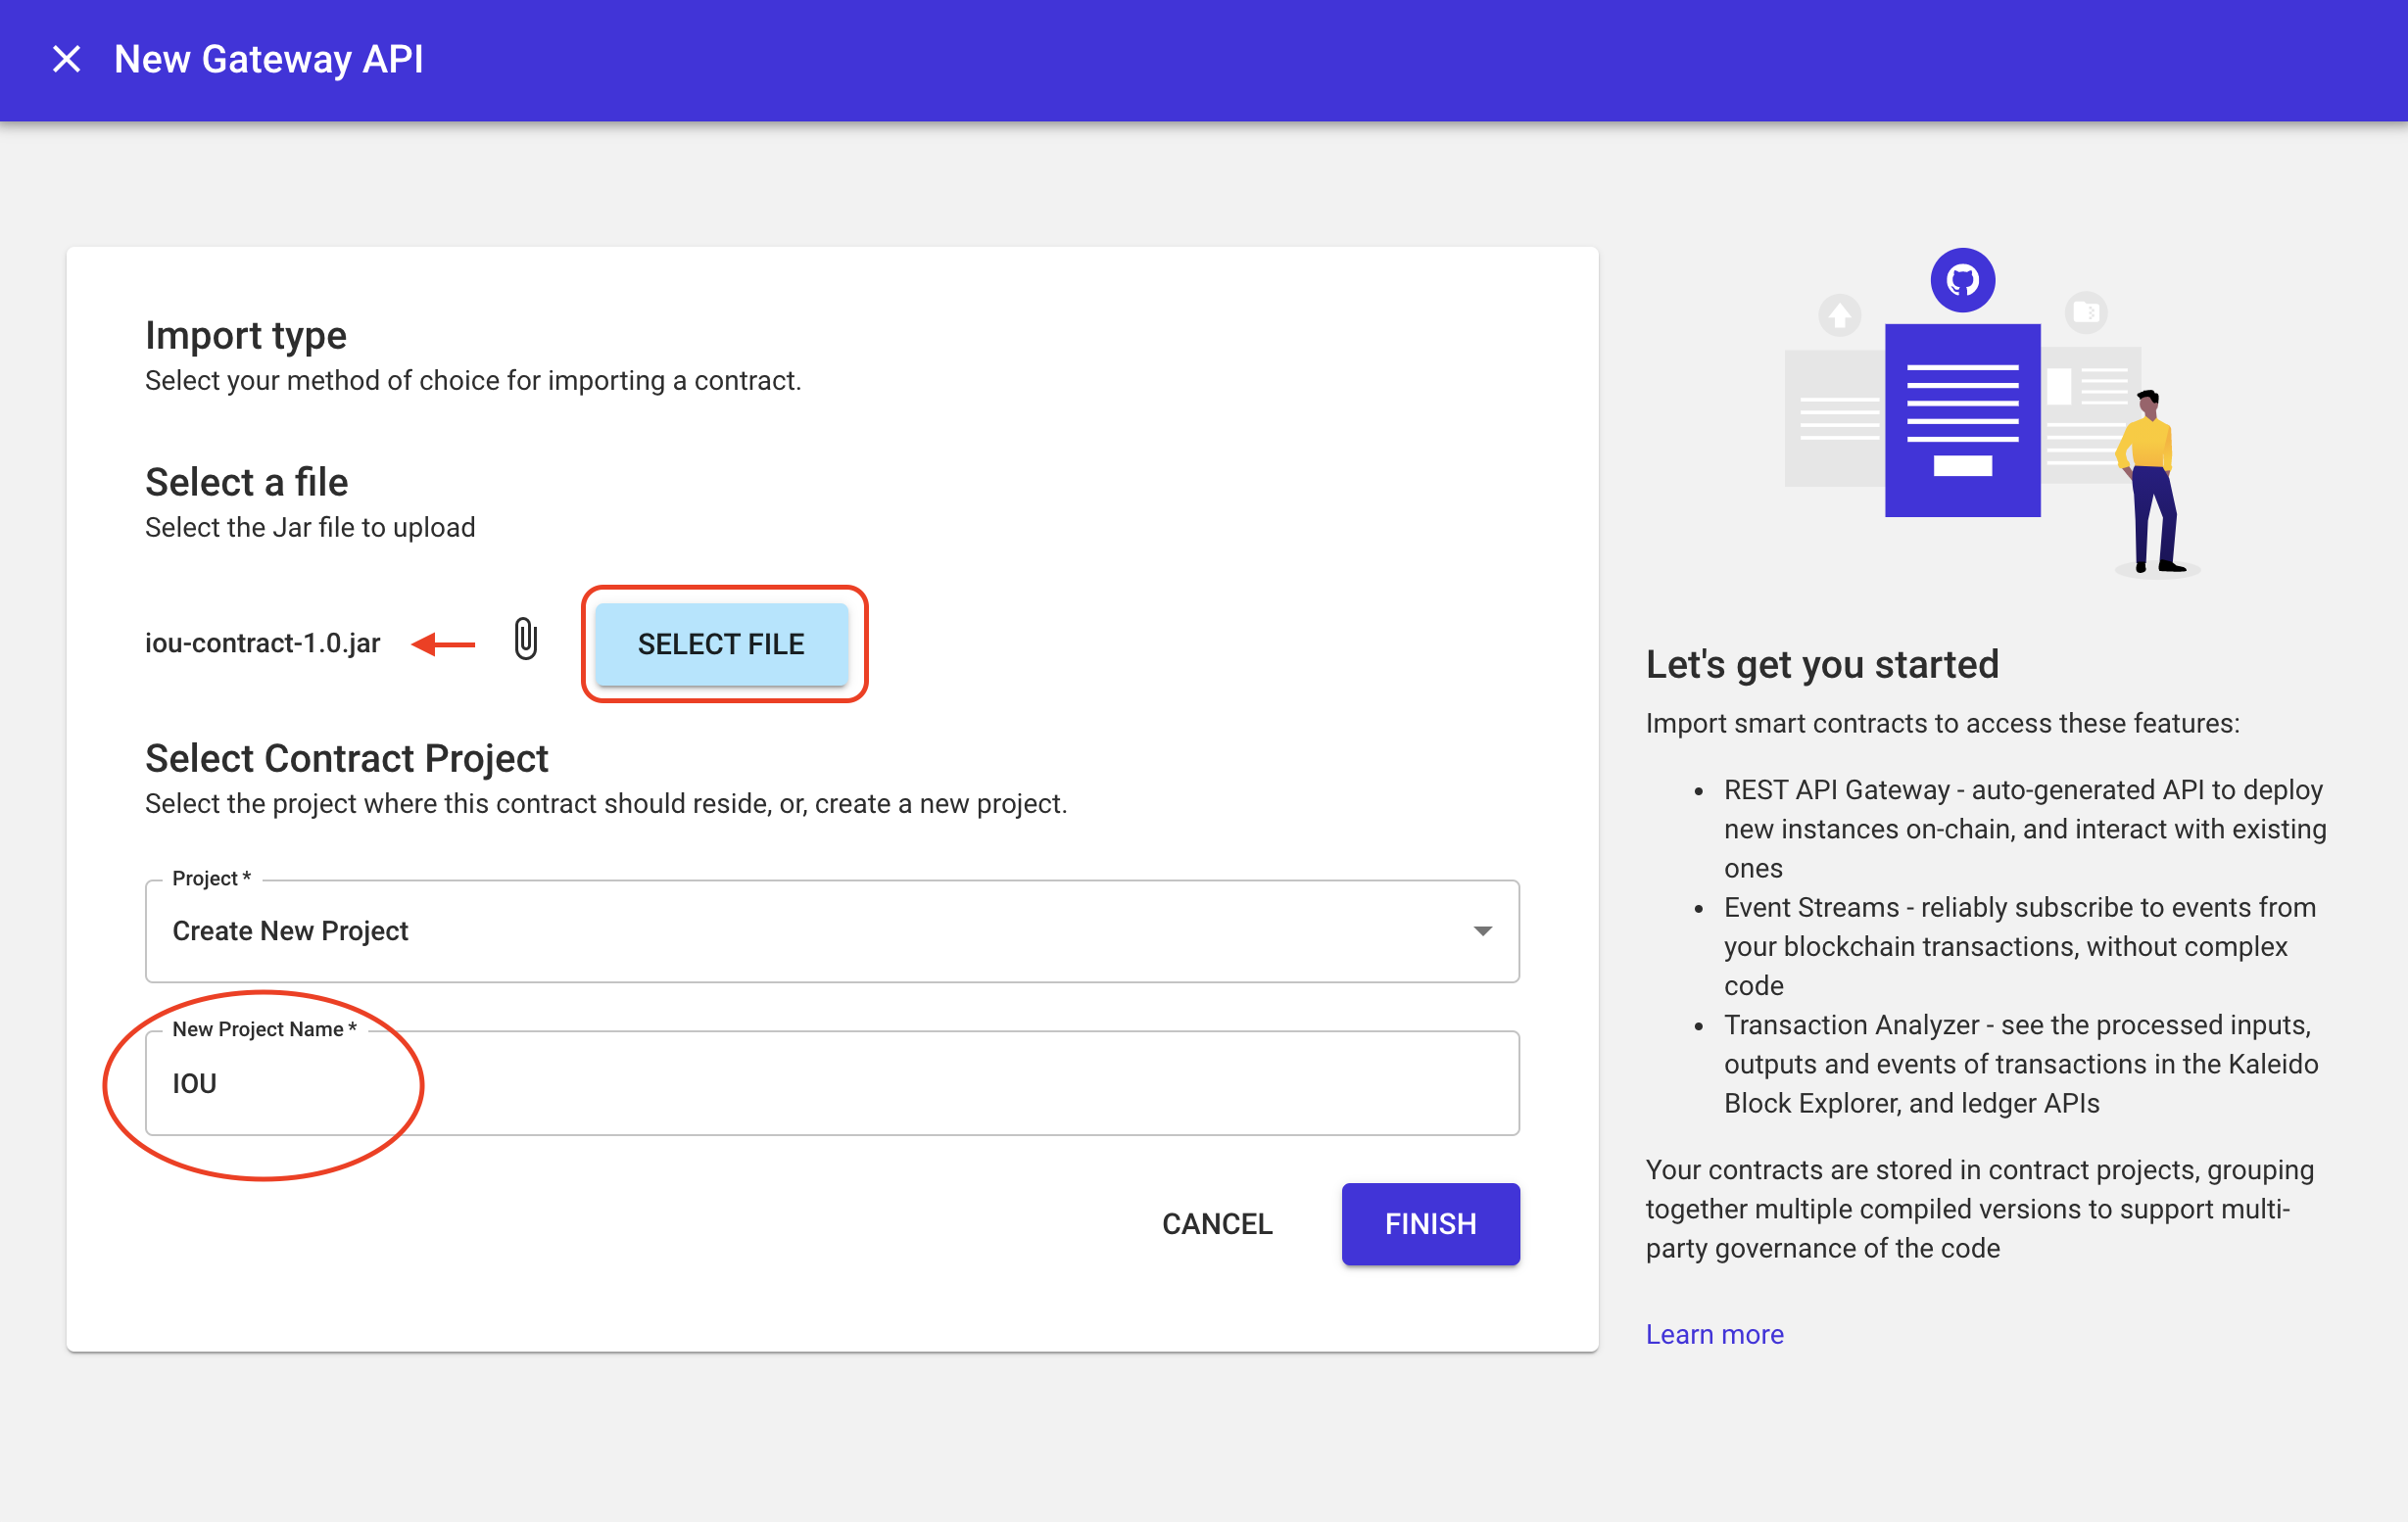
- Now, we'll create a Contract Project that can store our CorDapp logic and provide us with easy accessibility.
- Provide a name for the project. Our sample app is a lender/borrower scenario, so let's name it IOU.
- Click the SELECT FILE button and start by uploading your
iou-contract-1.0.jarfile.- The file lives in the
/libssubdirectory of your IOU Contract folder -kaleido-corda-samples/iou-contract/build/libs/iou-contract-1.0.jar. - If you don't have the jar files, return to the Prerequisites section above and make sure you followed the steps outlined in the Kaleido Corda Samples README to generate the packaged business logic.
- The file lives in the
- Click FINISH to add the jar to the project.
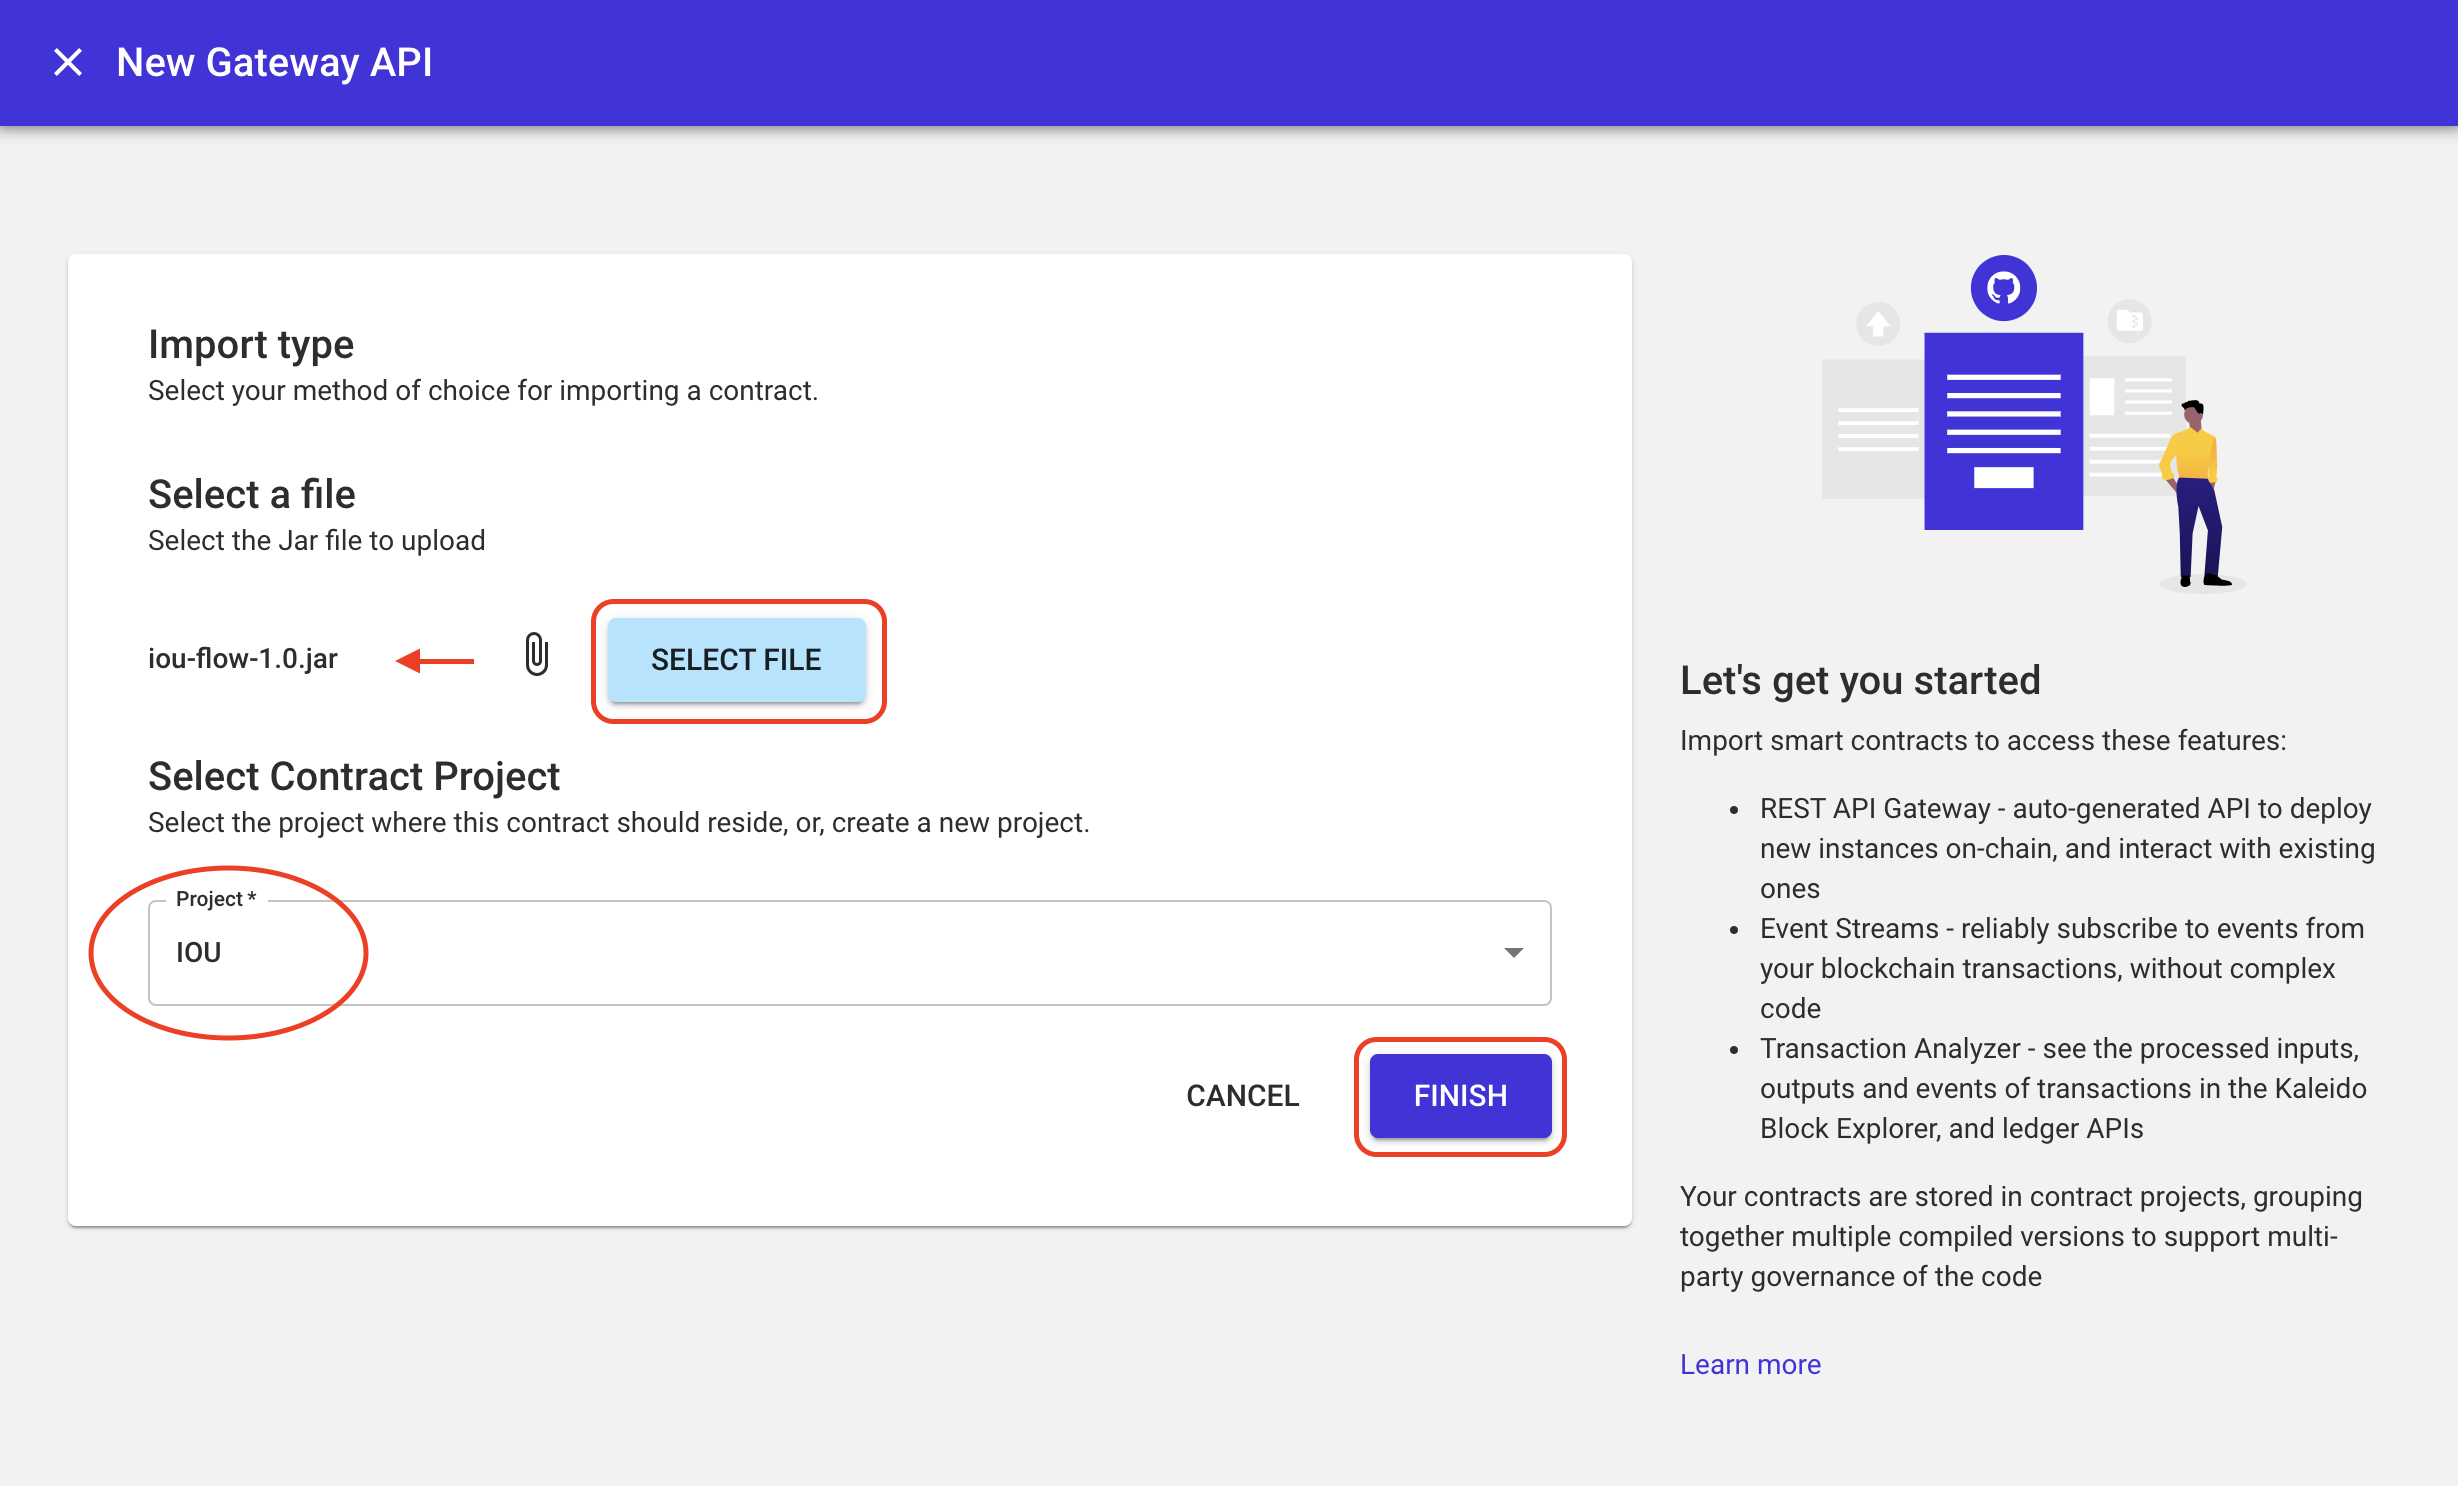
- Now follow the same steps and upload the
iou-flow-1.0.jarto the IOU Contract Project.- Similar to the contract jar, the flow lives in the
/libssubdirectory of the IOU Flow folder -kaleido-corda-samples/iou-flow/build/libs/iou-flow-1.0.jar.
- Similar to the contract jar, the flow lives in the
- IMPORTANT: Make sure you expand the Project dropdown selector and choose the IOU Contract Project. We don't want separate contract projects for our business logic; they need to be packaged together.
- Click FINISH to add.
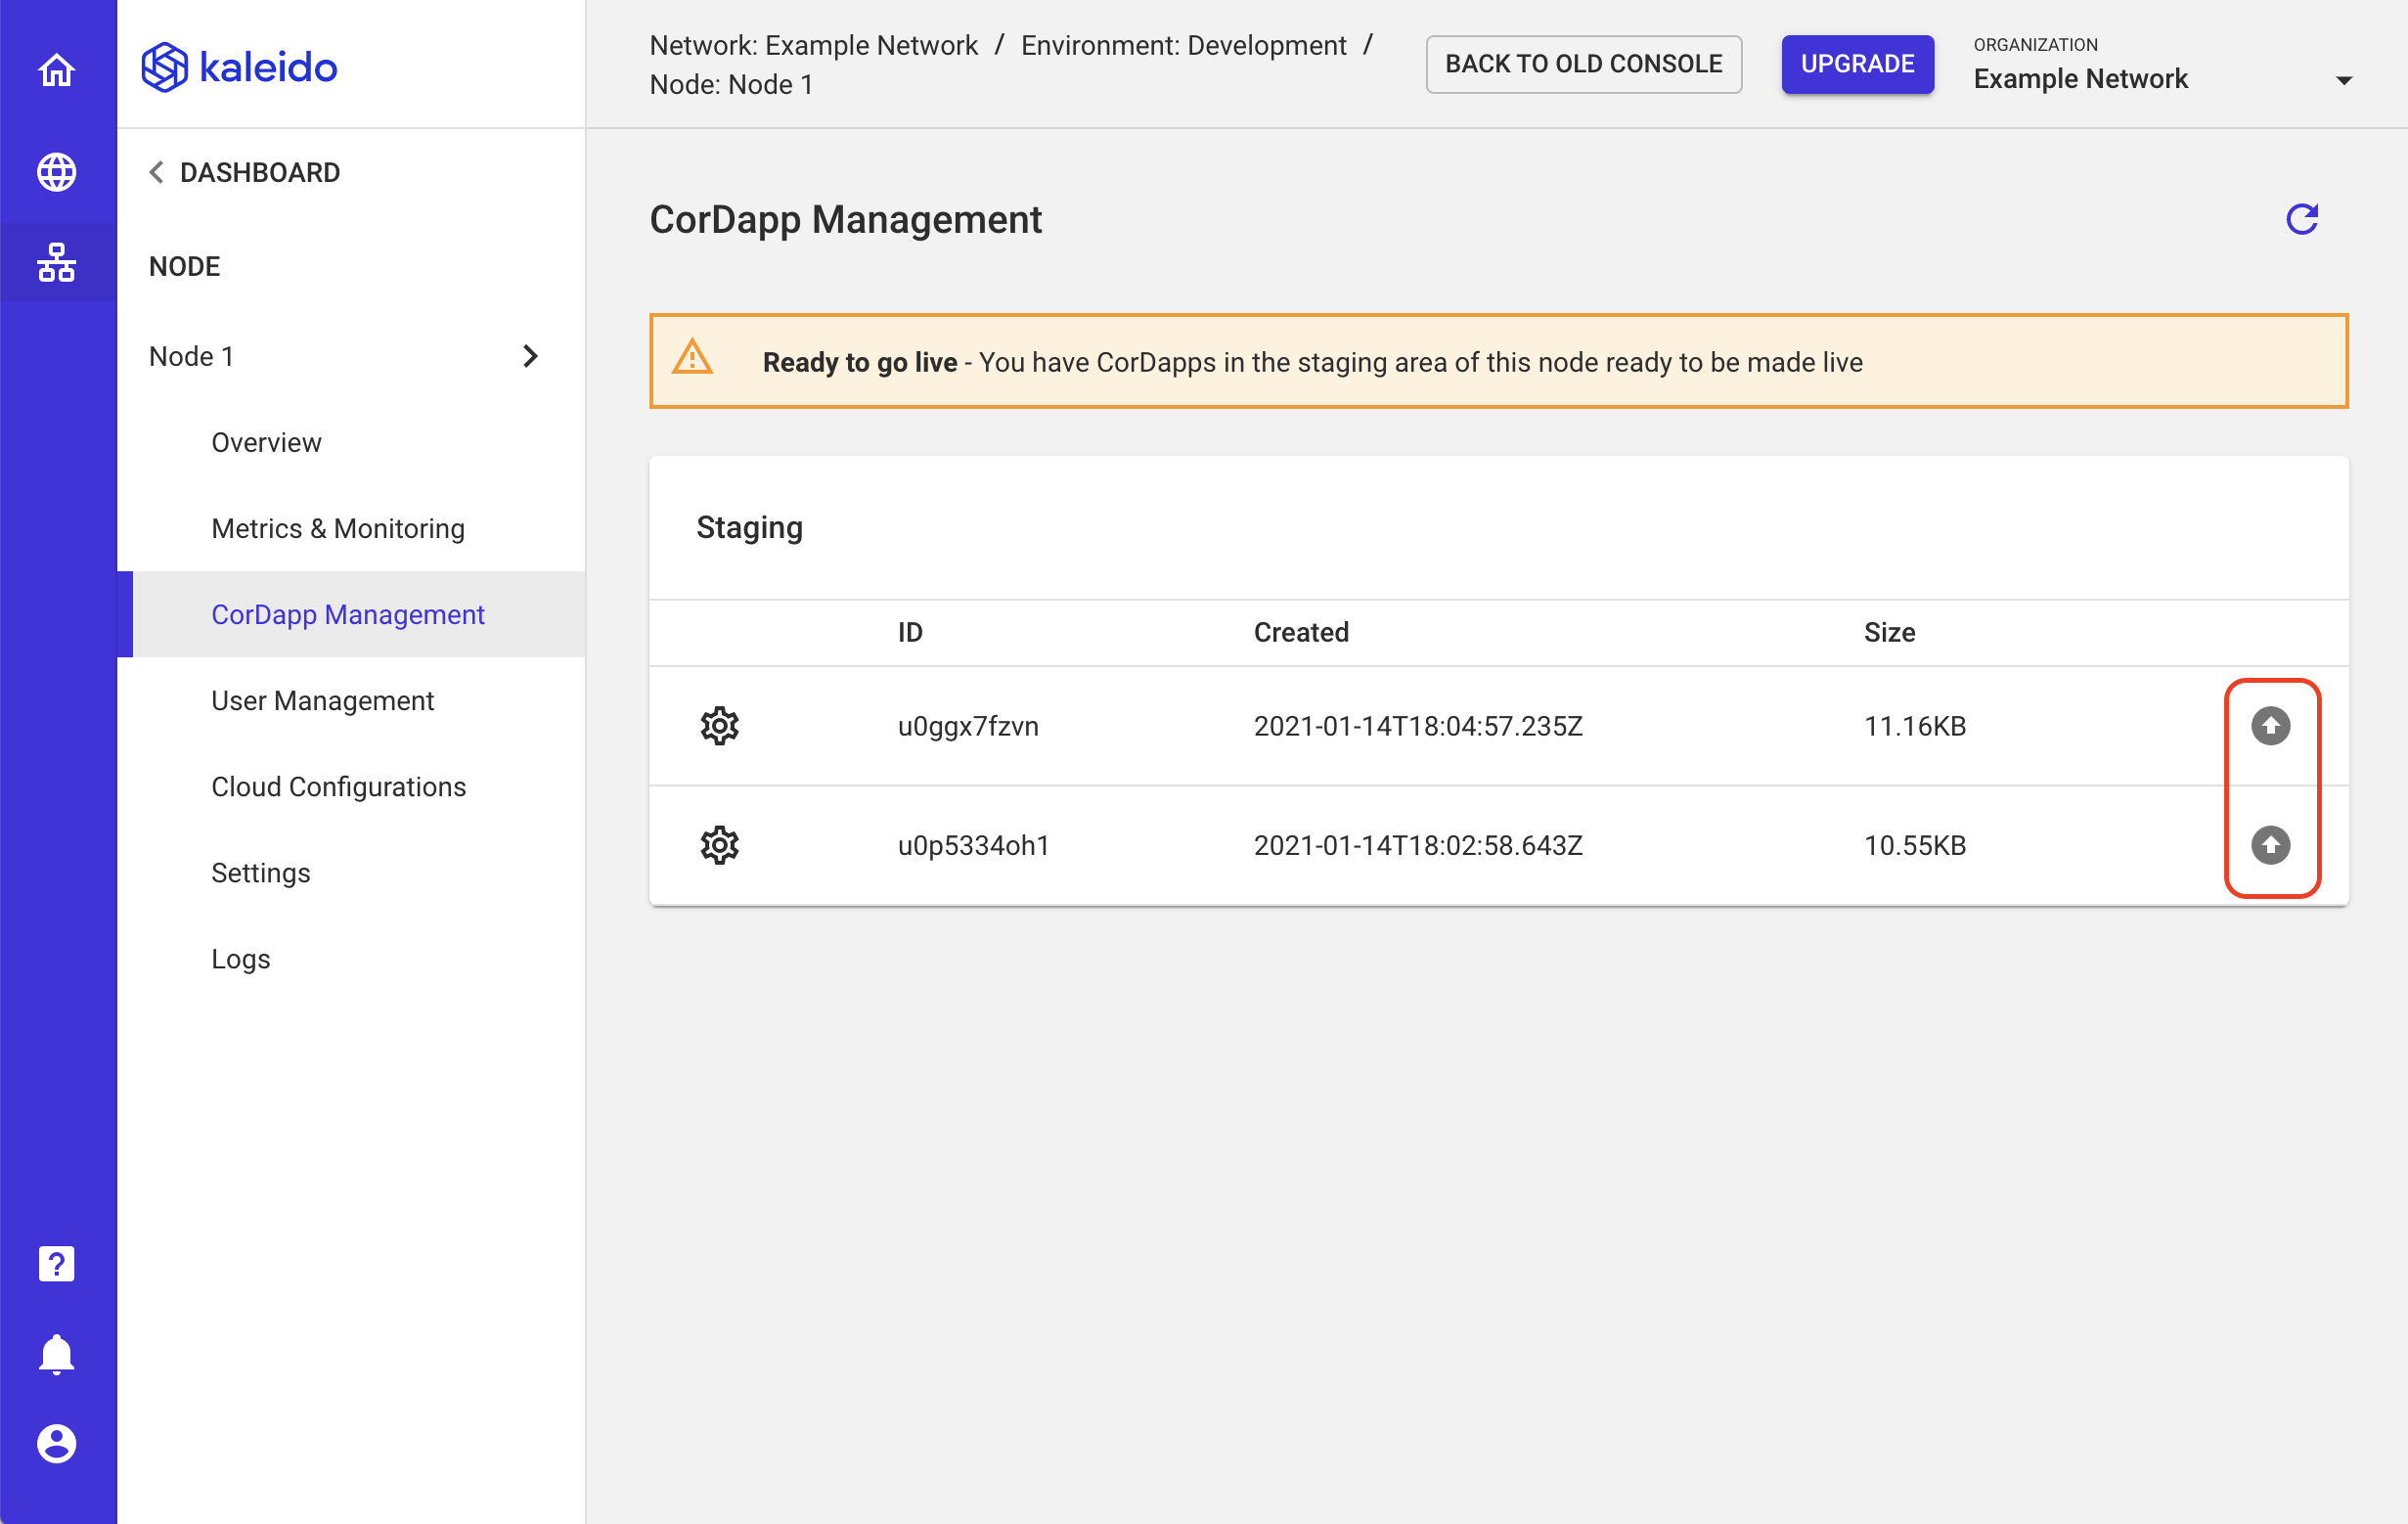
- Click the CorDapp Management tab to see the two uploaded jars.
- They are currently "offline" and in the staging bucket for your Corda nodes. They need to be promoted into the core runtime so that the business logic can be processed by the JVM.
- Use the up arrows to promote both files.
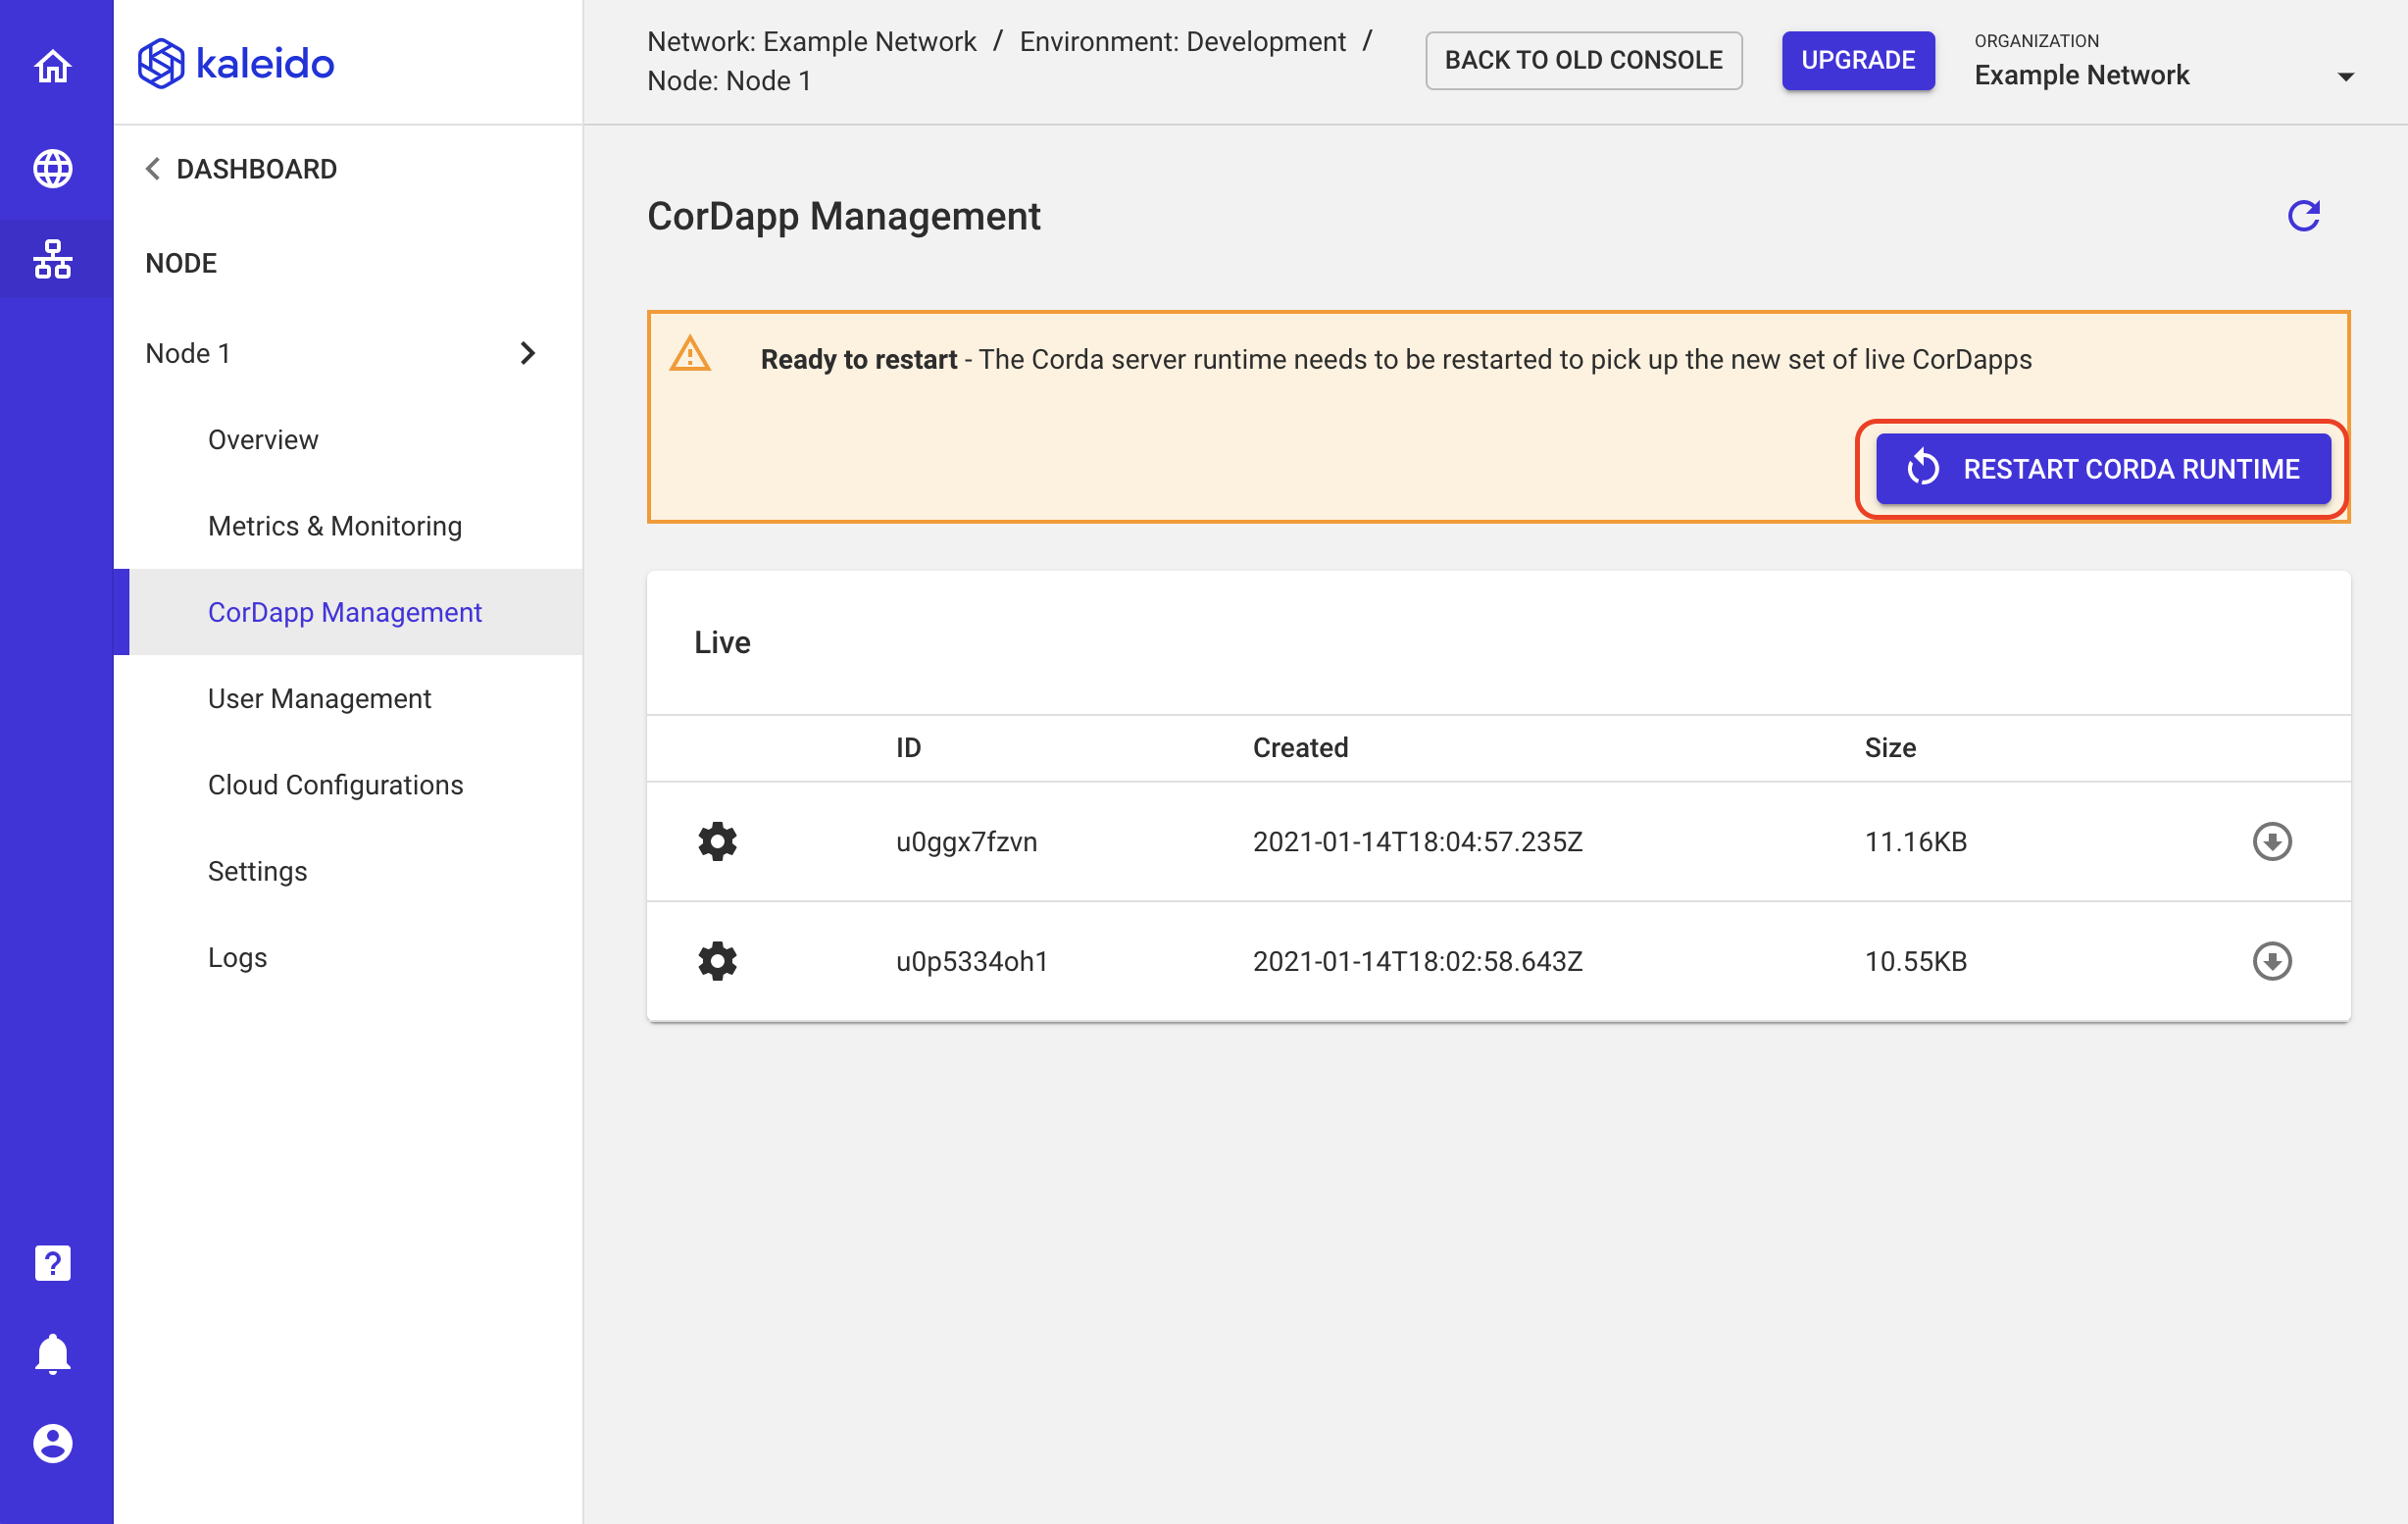
- Once the jars have been promoted, click the RESTART CORDA RUNTIME button to re-initialize the node and load the jar files. Don't worry about signing the jar files. Kaleido will handle this operation under the covers. Your only responsibility is to promote the files and restart the runtime.
- IMPORTANT: Be sure to perform this same process for your second node, as each node will need access to the business logic.
- Since the jars are already uploaded, simply navigate to the second node, click on CorDapp Management, use the up arrows to promote both files and click Restart Corda Runtime to re-initilize the node.
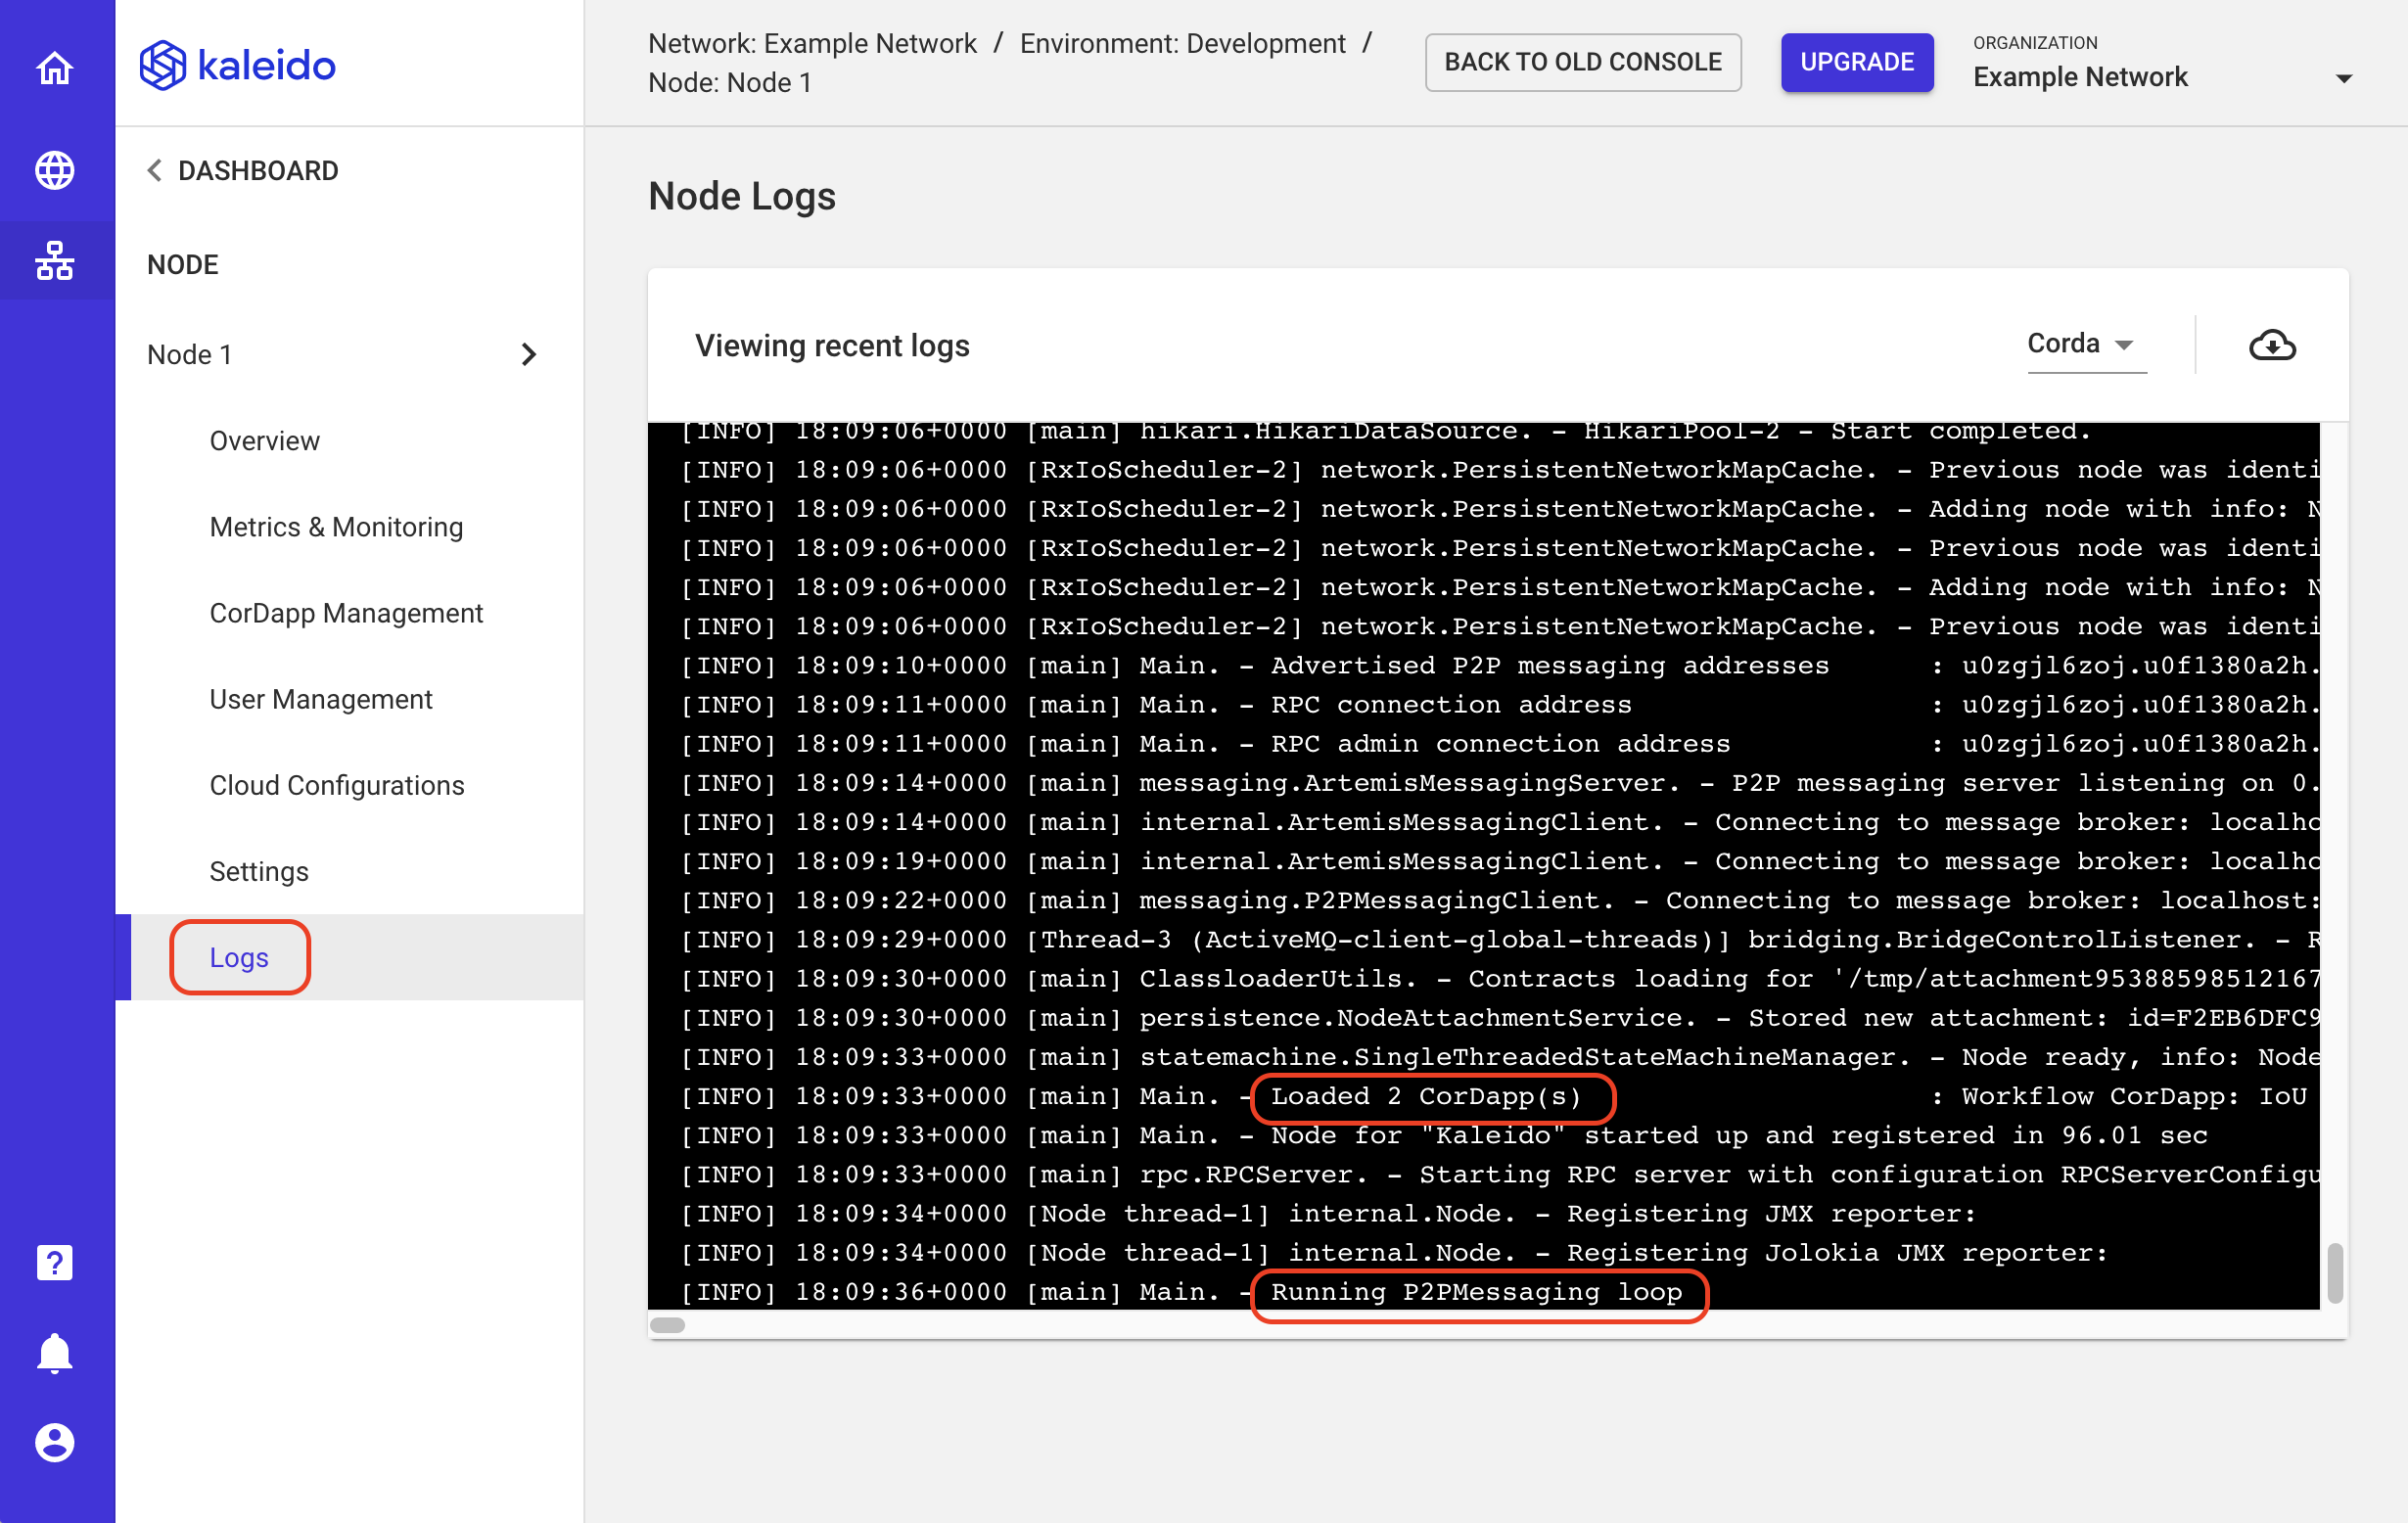
- Give the nodes a few minutes to fully re-initialize, then click the Logs tab to see the status.
- Look for an acknowledgment of
Loaded 2 CorDapp(s)and a state ofRunning P2PMessaging Loop. - Perform this check on each of your nodes.
Create a User and Role for RPC Client access
As your Corda nodes run inside Kaleido in a secure container armed with layers of firewalls and load balancers, you need special credentials to access the node to submit transaction requests. Kaleido provides user management via a built-in user registry compatible with Corda specifications, so that you can easily create user accounts, define user roles and assign permissions.
The client application will interface with a network bridge that is configured to communicate with the Kaleido backend securely. Incoming transactions are then further authenticated based on a defined set of user roles and permissions that are specific to each node. The username (with an underlying role defined) and its corresponding password will be passed as arguments when we drive our application.
Let's start by generating a user + password, and then defining the permissions for the user.
- Make sure you are configuring against your first node (e.g.
Node 1). This is the node that is acting as the lender in our IOU scenario, and will receive the incoming transaction from our application. As a result, the username, password, and role need to be defined on this node. - Click on the User Management tab.
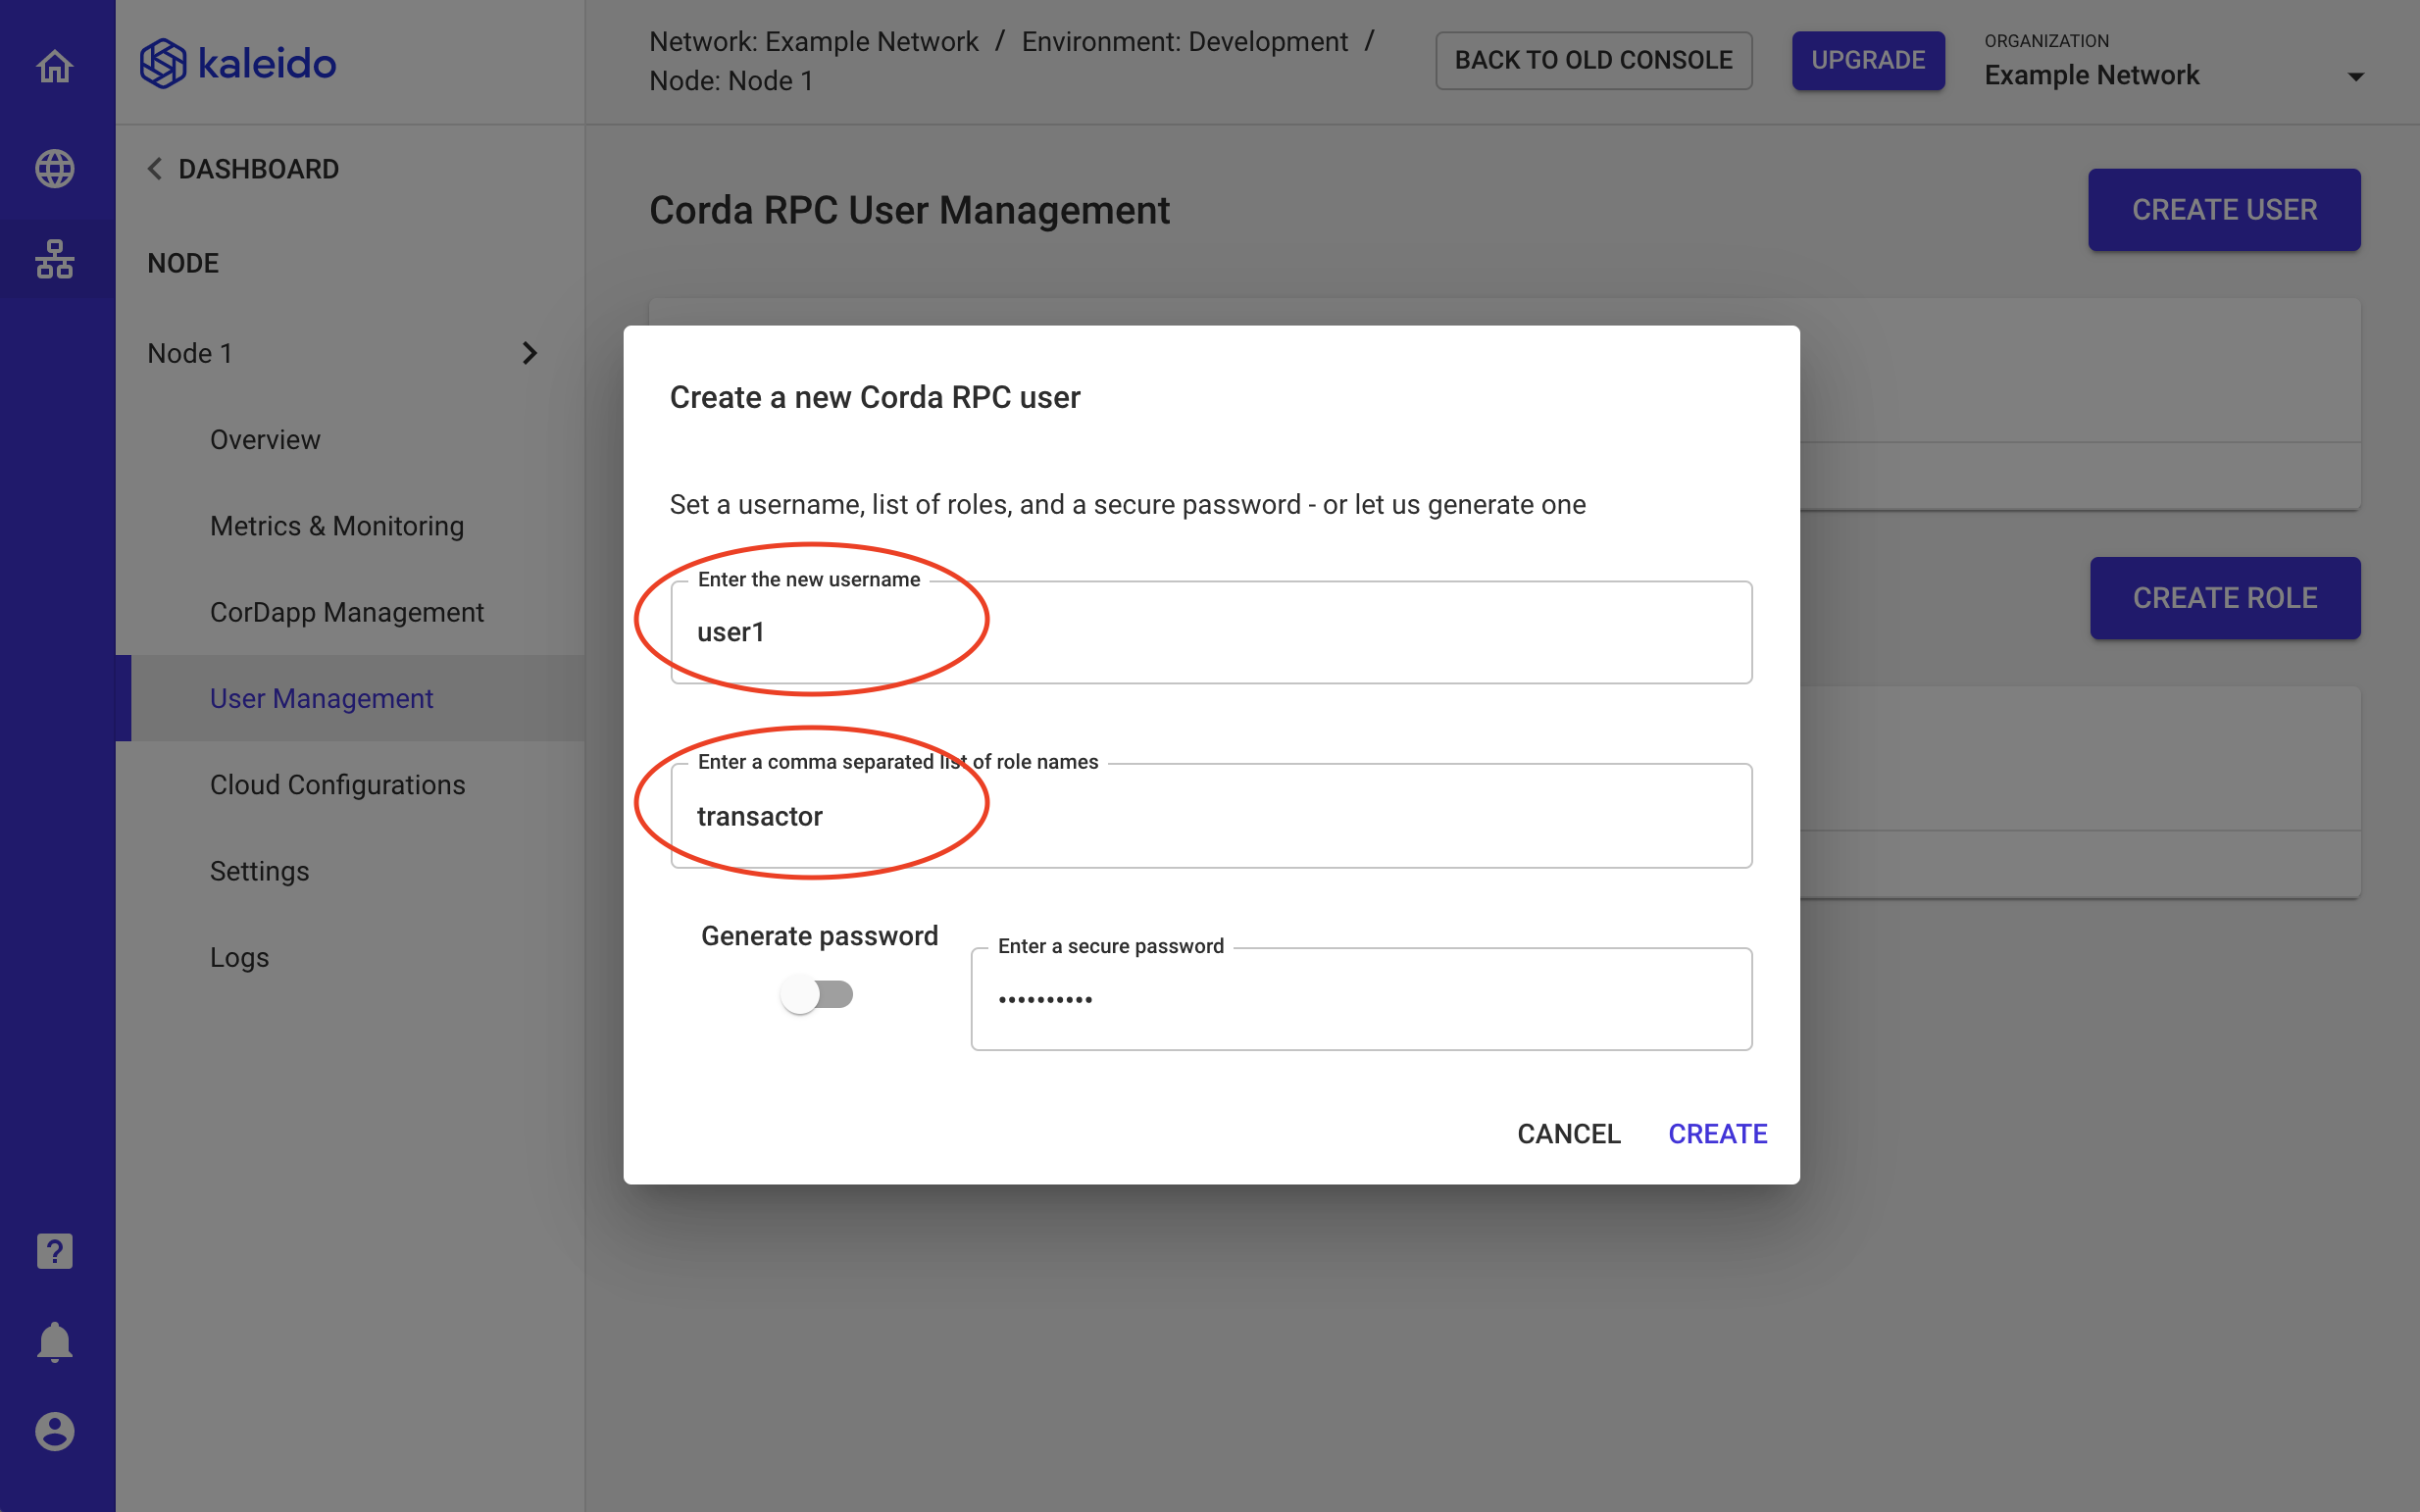
- Click the CREATE USER button in the upper right of your screen.
- Supply a username - e.g.,
user1. - Supply an arbitrary role name - e.g.
transactor. - Create your own custom password that complies with the requirements or let Kaleido autogenerate a secret for you.
- Click CREATE to generate the user.
- You'll see a notification next to your newly created user that the attached role is missing.
- Click the CREATE ROLE button to create the object and define its permissions.
- Enter the name of the role - e.g.
transactor. - Enter
ALLfor permissions. There are more bespoke RBAC permissions that can be applied, but these are out of scope for the quick start. - Click CREATE to generate the role.
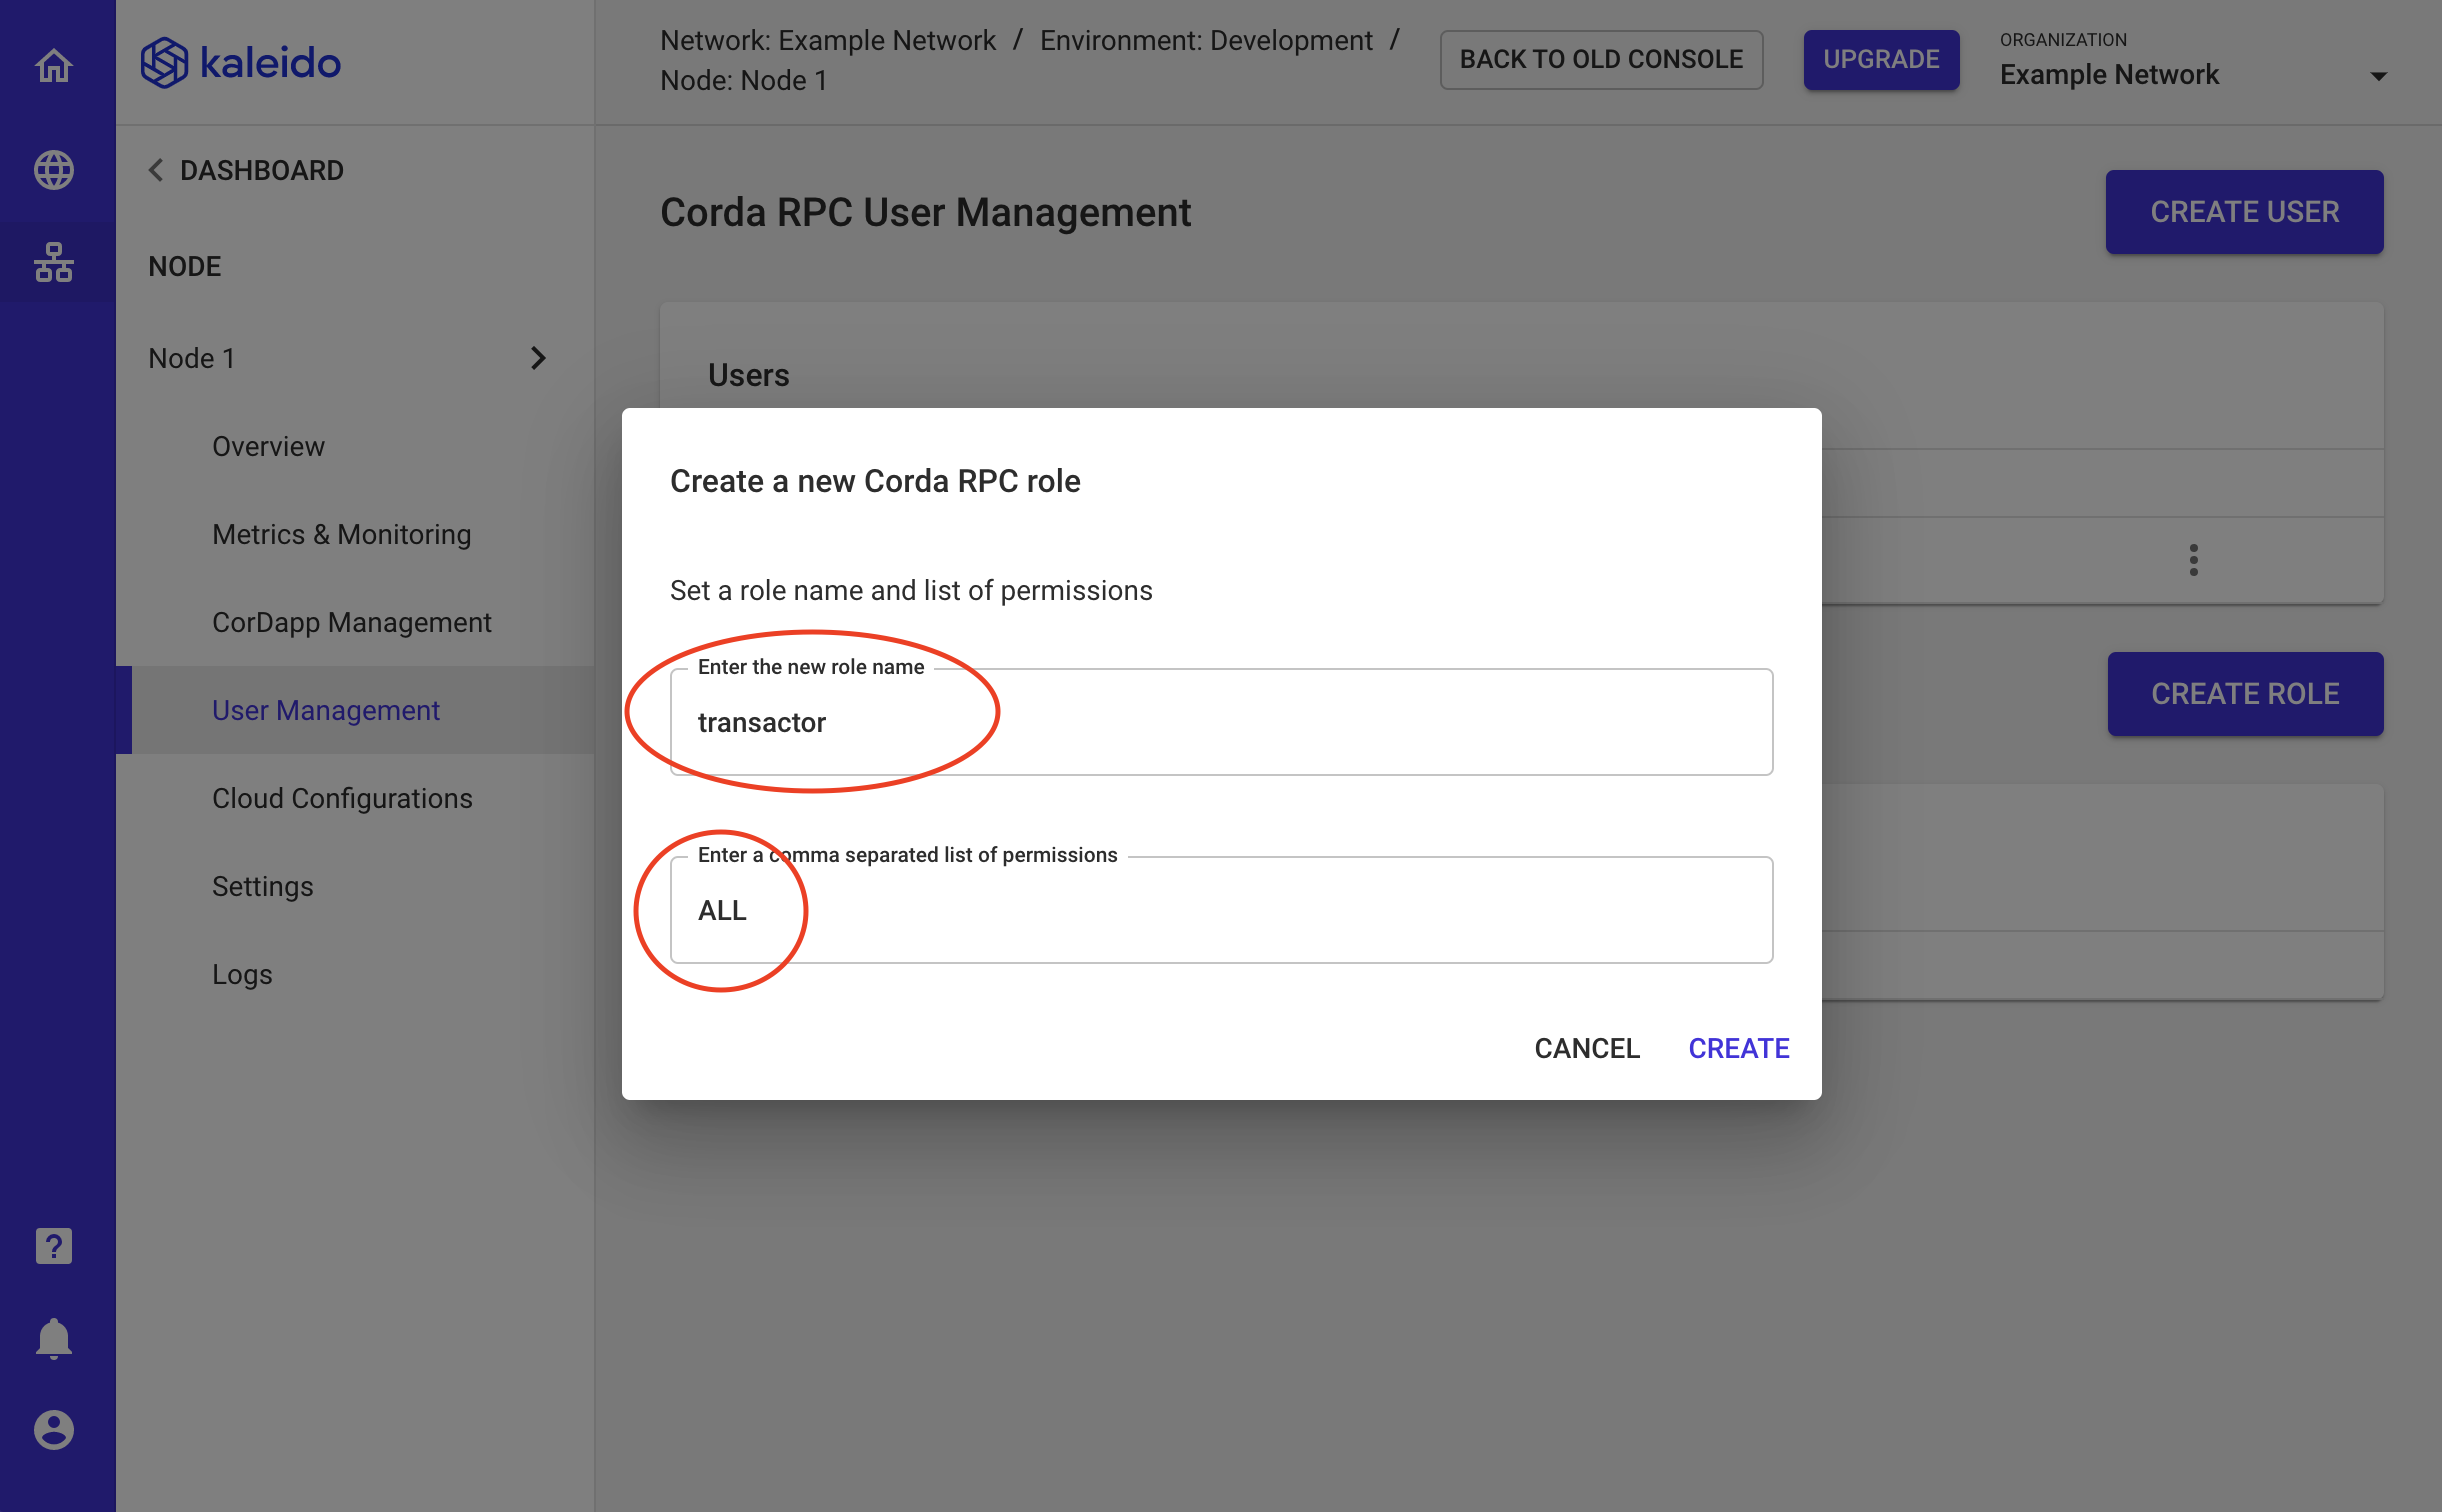
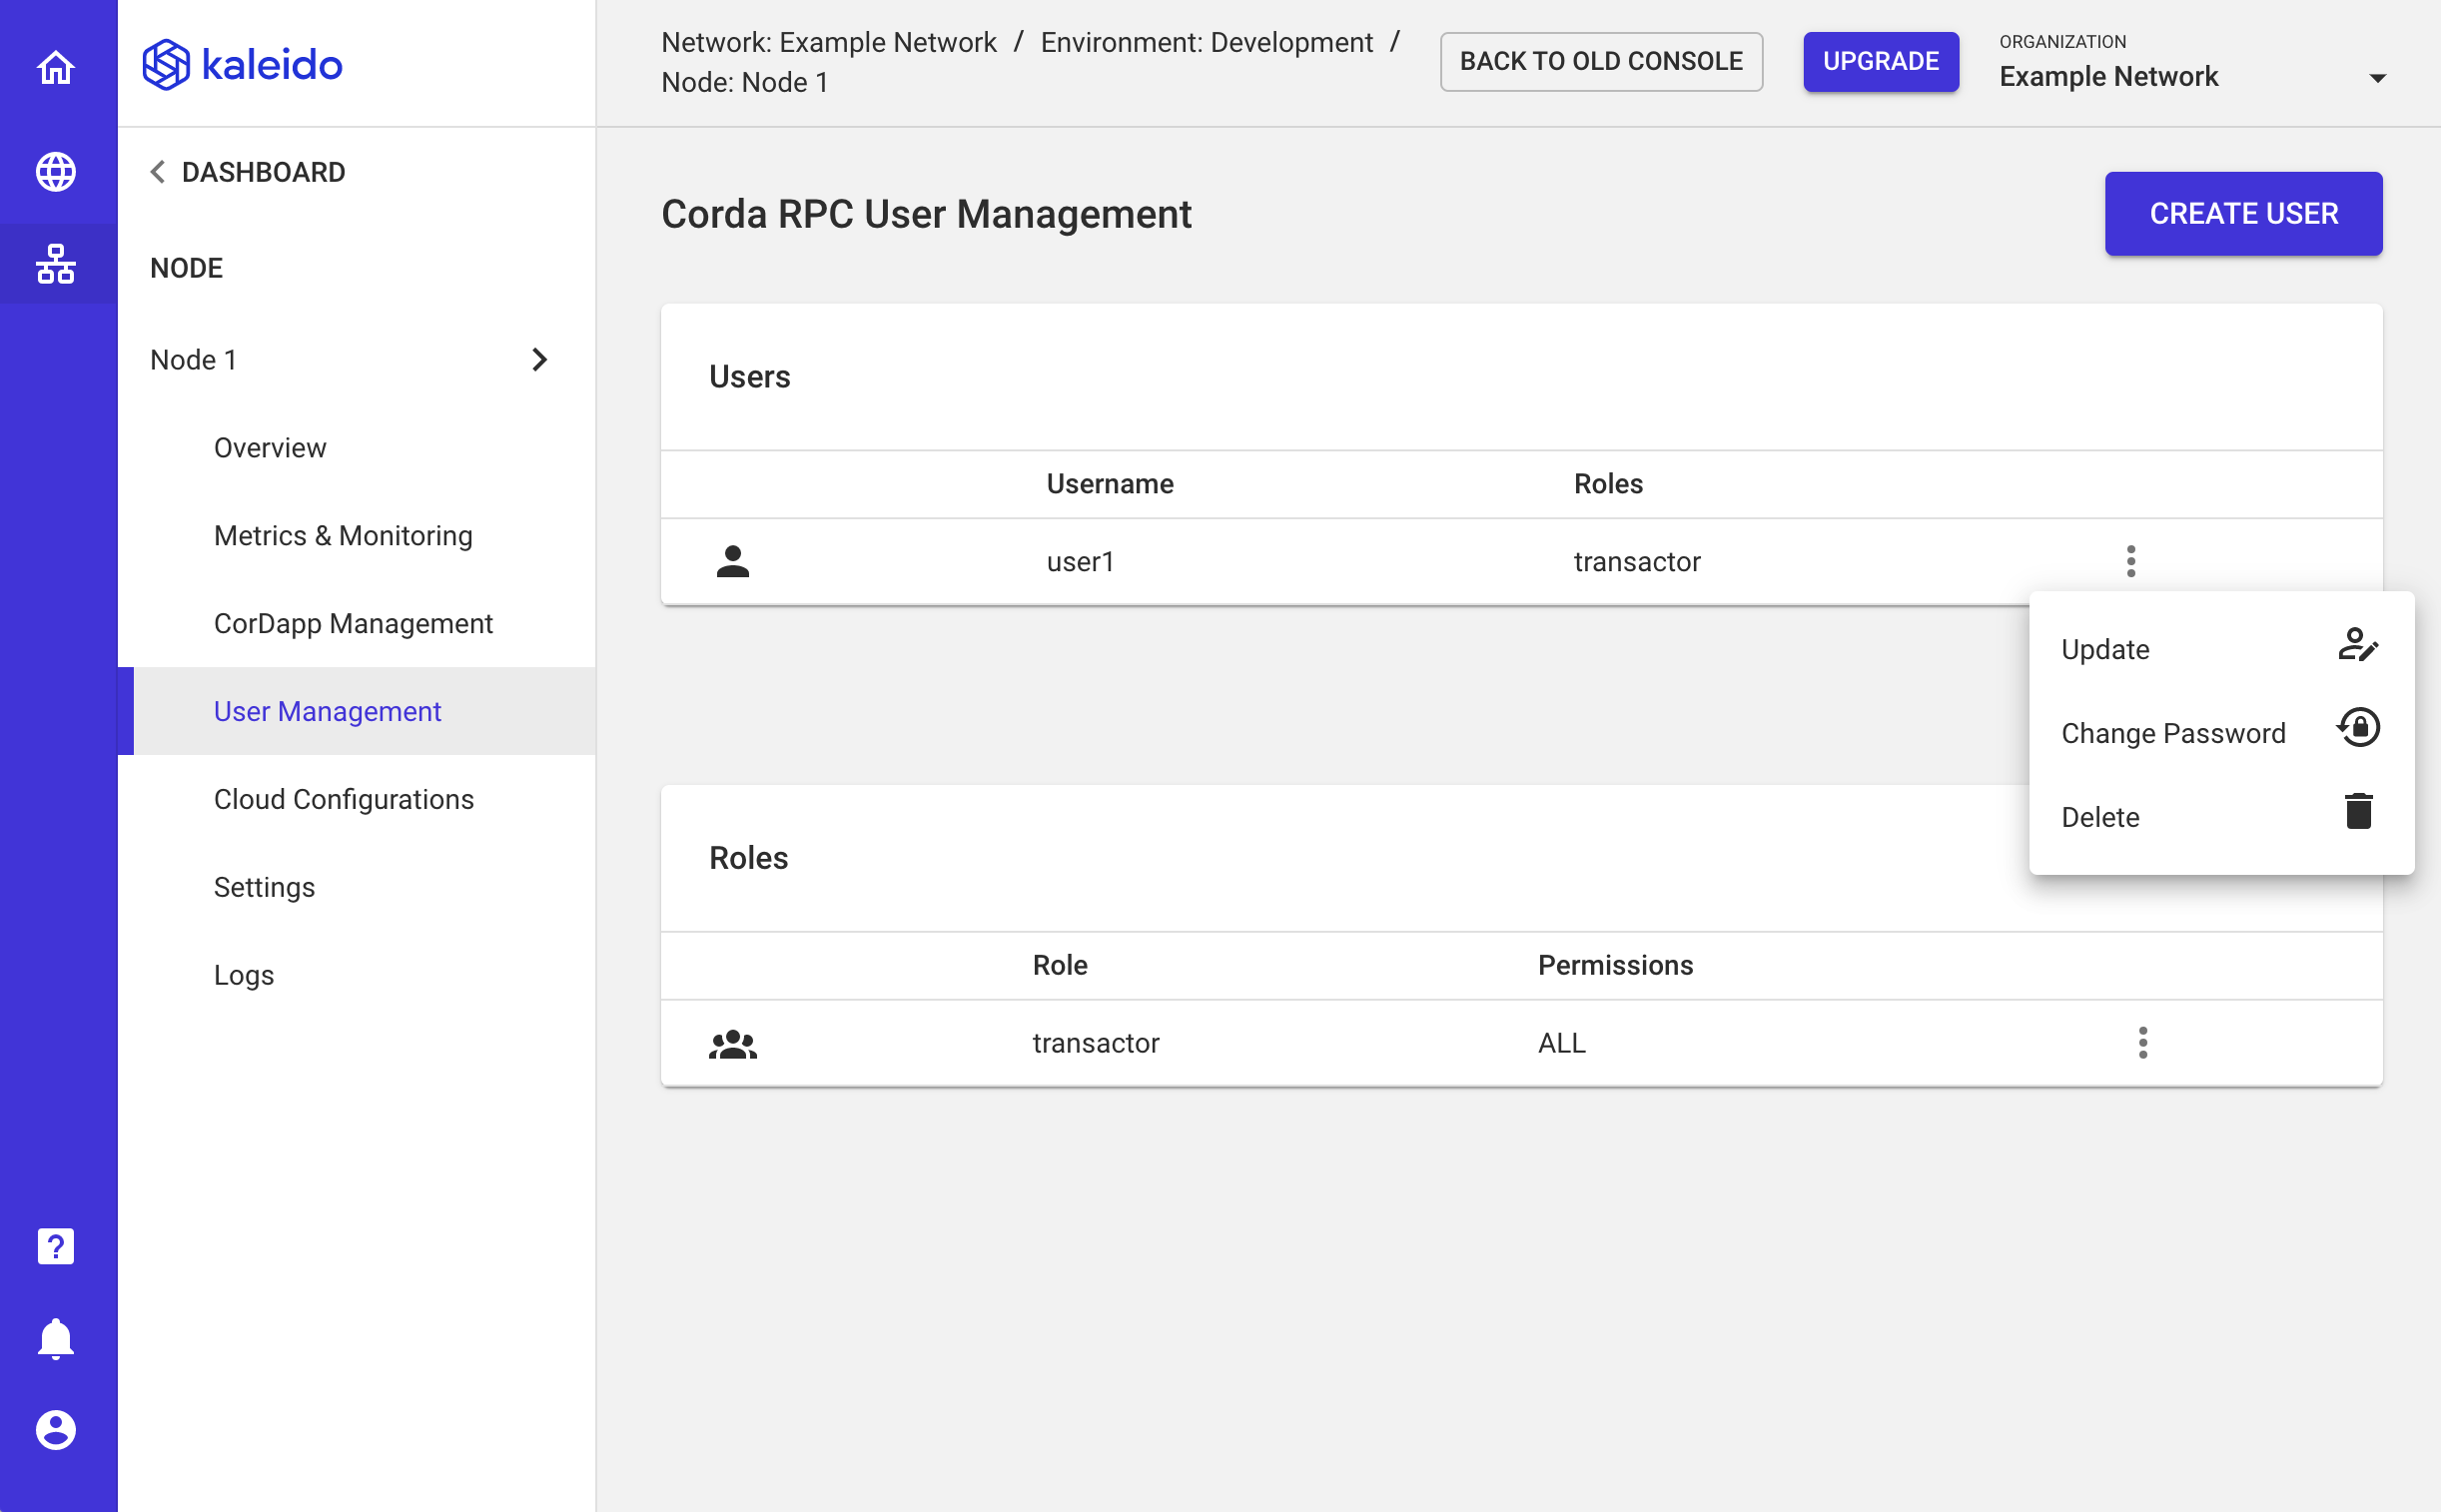
Now you're all set with your client user and the associated role.
- Use the dropdown ellipses next to the user or role rows to manage these objects.
- They can be updated with new names or secrets, and can also be deleted.
Create the Network Bridge and Download a Local Client
Our last piece of housekeeping is to deploy a tunneler service or a "network bridge" that can speak TCP to our Corda nodes. Once it's deployed, we will download a local bridge client to interface with the Kaleido-hosted service securely. The end flow will be as follows: RPC client (i.e. app) -> local bridge -> Kaleido-hosted bridge -> Corda Node.
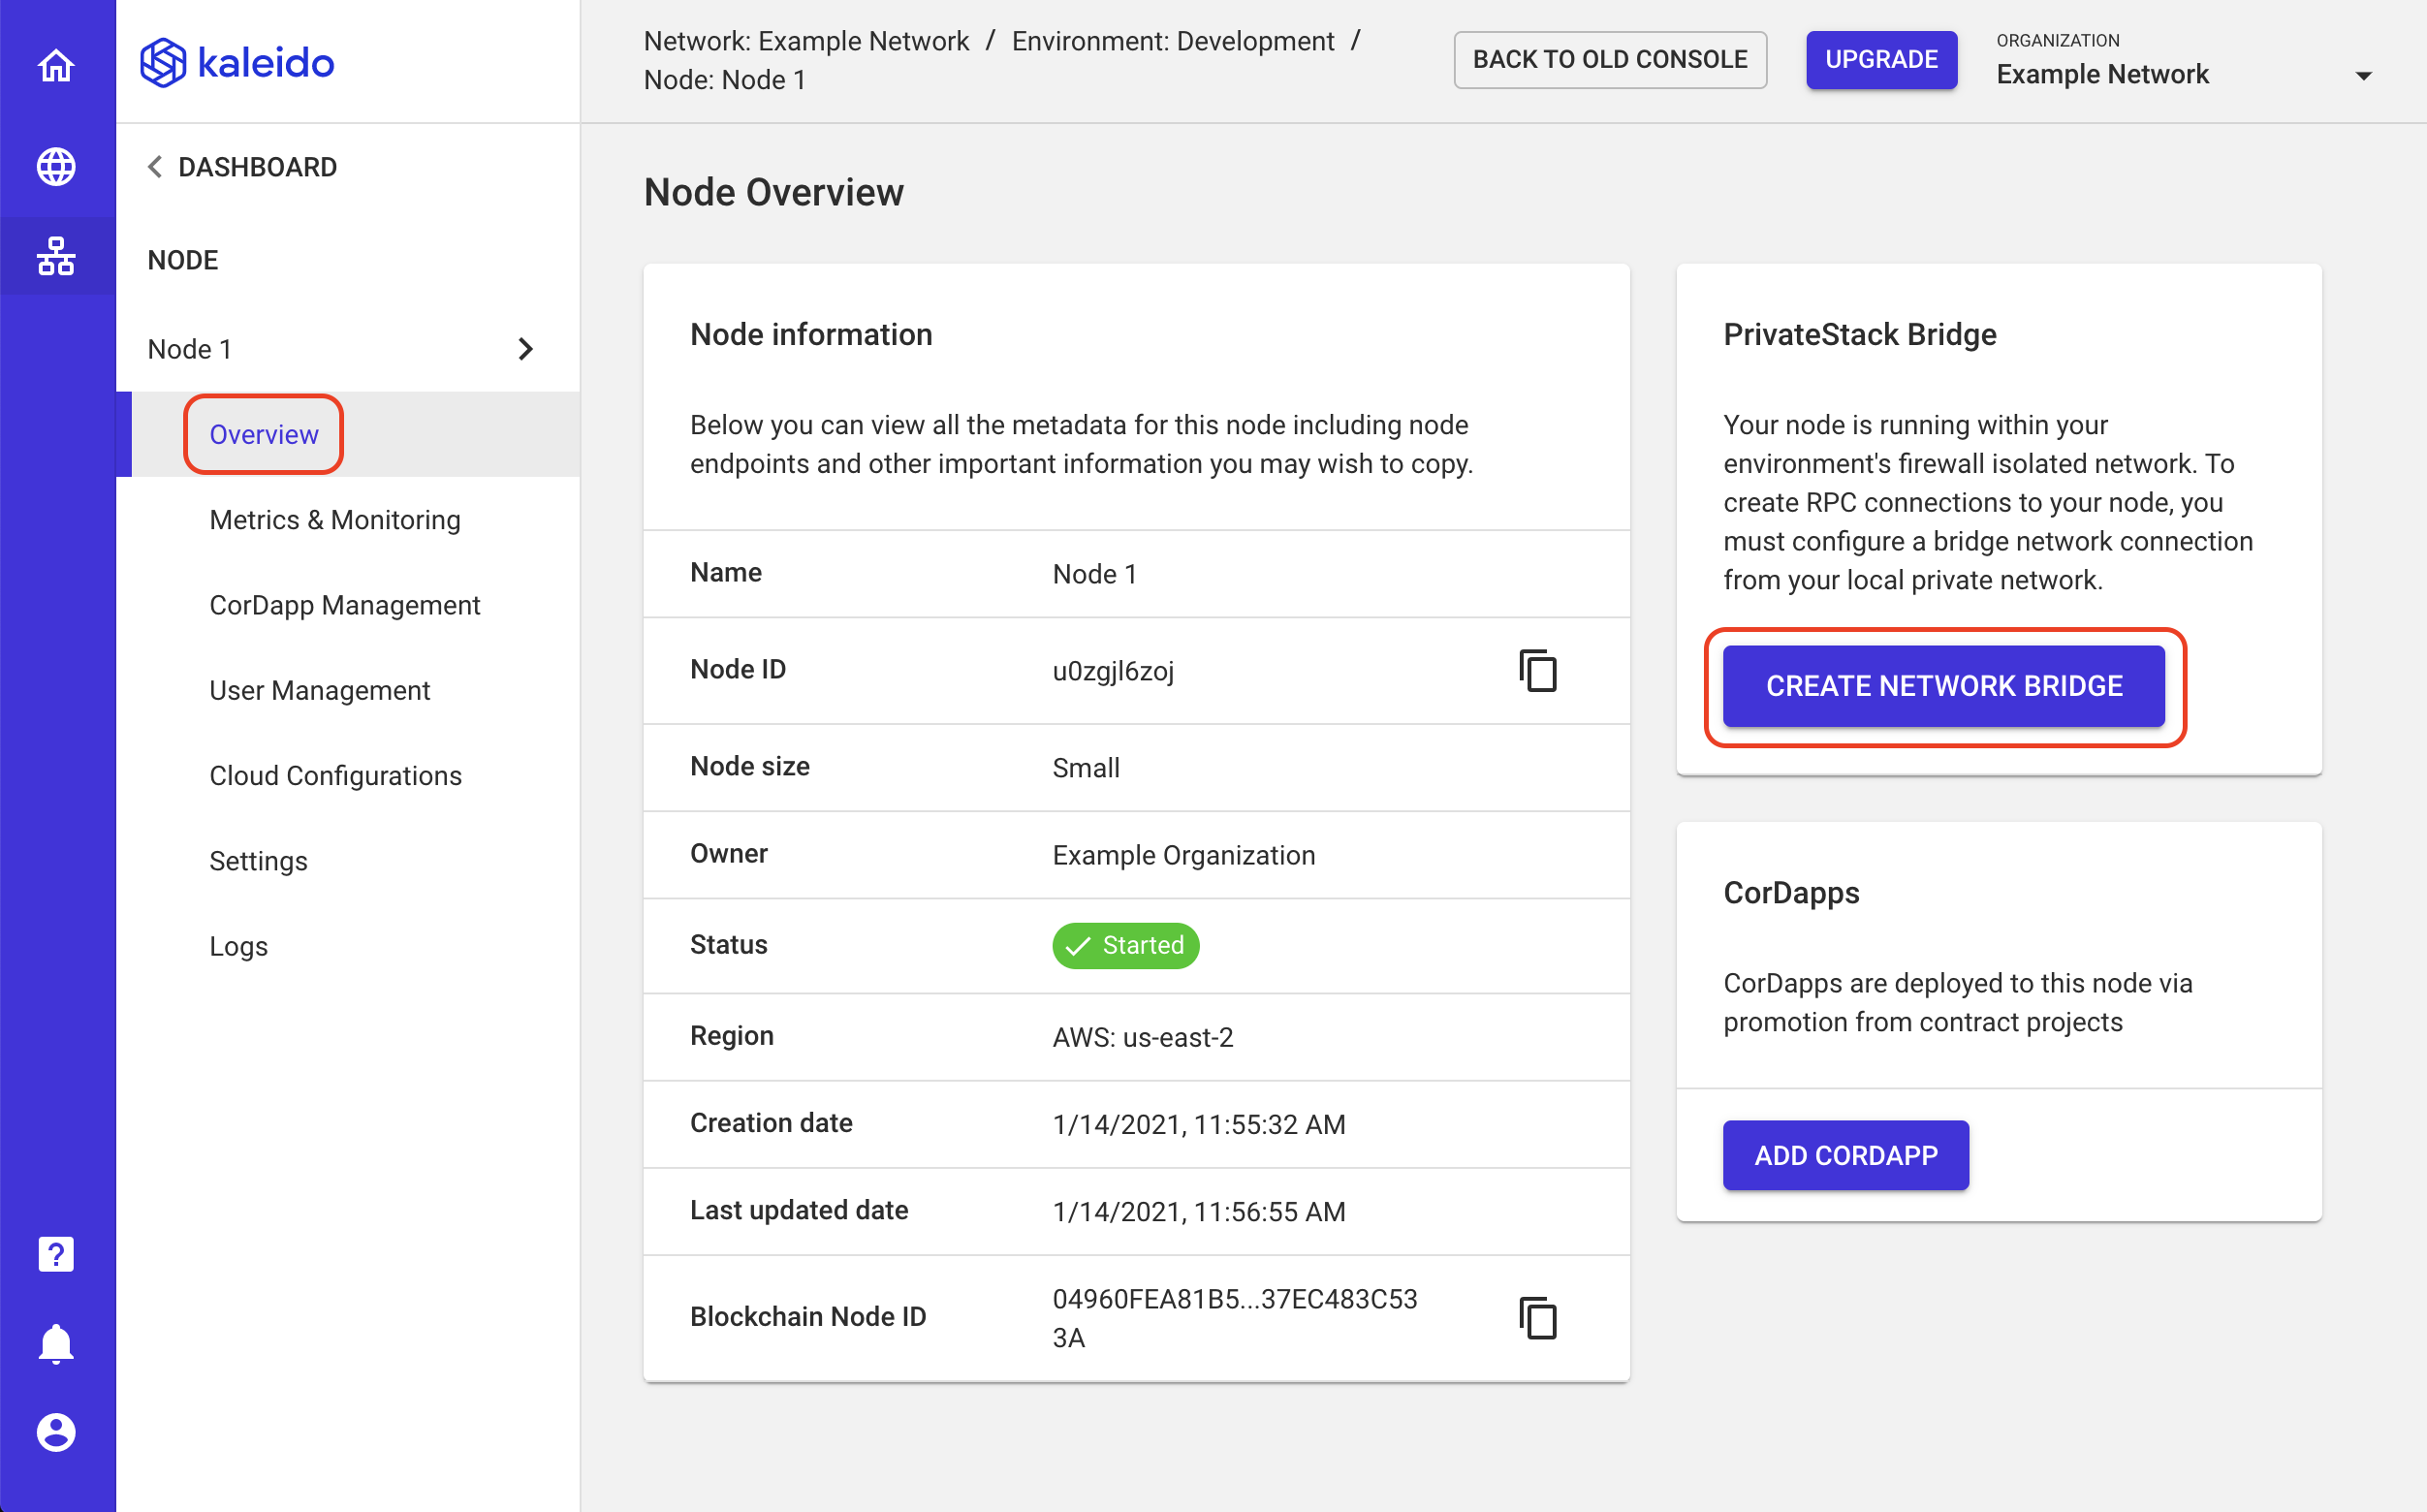
- Click on the Overview tab of your first node.
- Click the CREATE NETWORK BRIDGE button on the right side of the screen.
- Provide a name for the service. For example,
kaleido-bridge. - Click FINISH to deploy the service.
- The service should take about 60 seconds to provision fully. Once the service has been deployed, click the CONNECT NETWORK BRIDGE button to generate the configuration file required by the local bridge client.
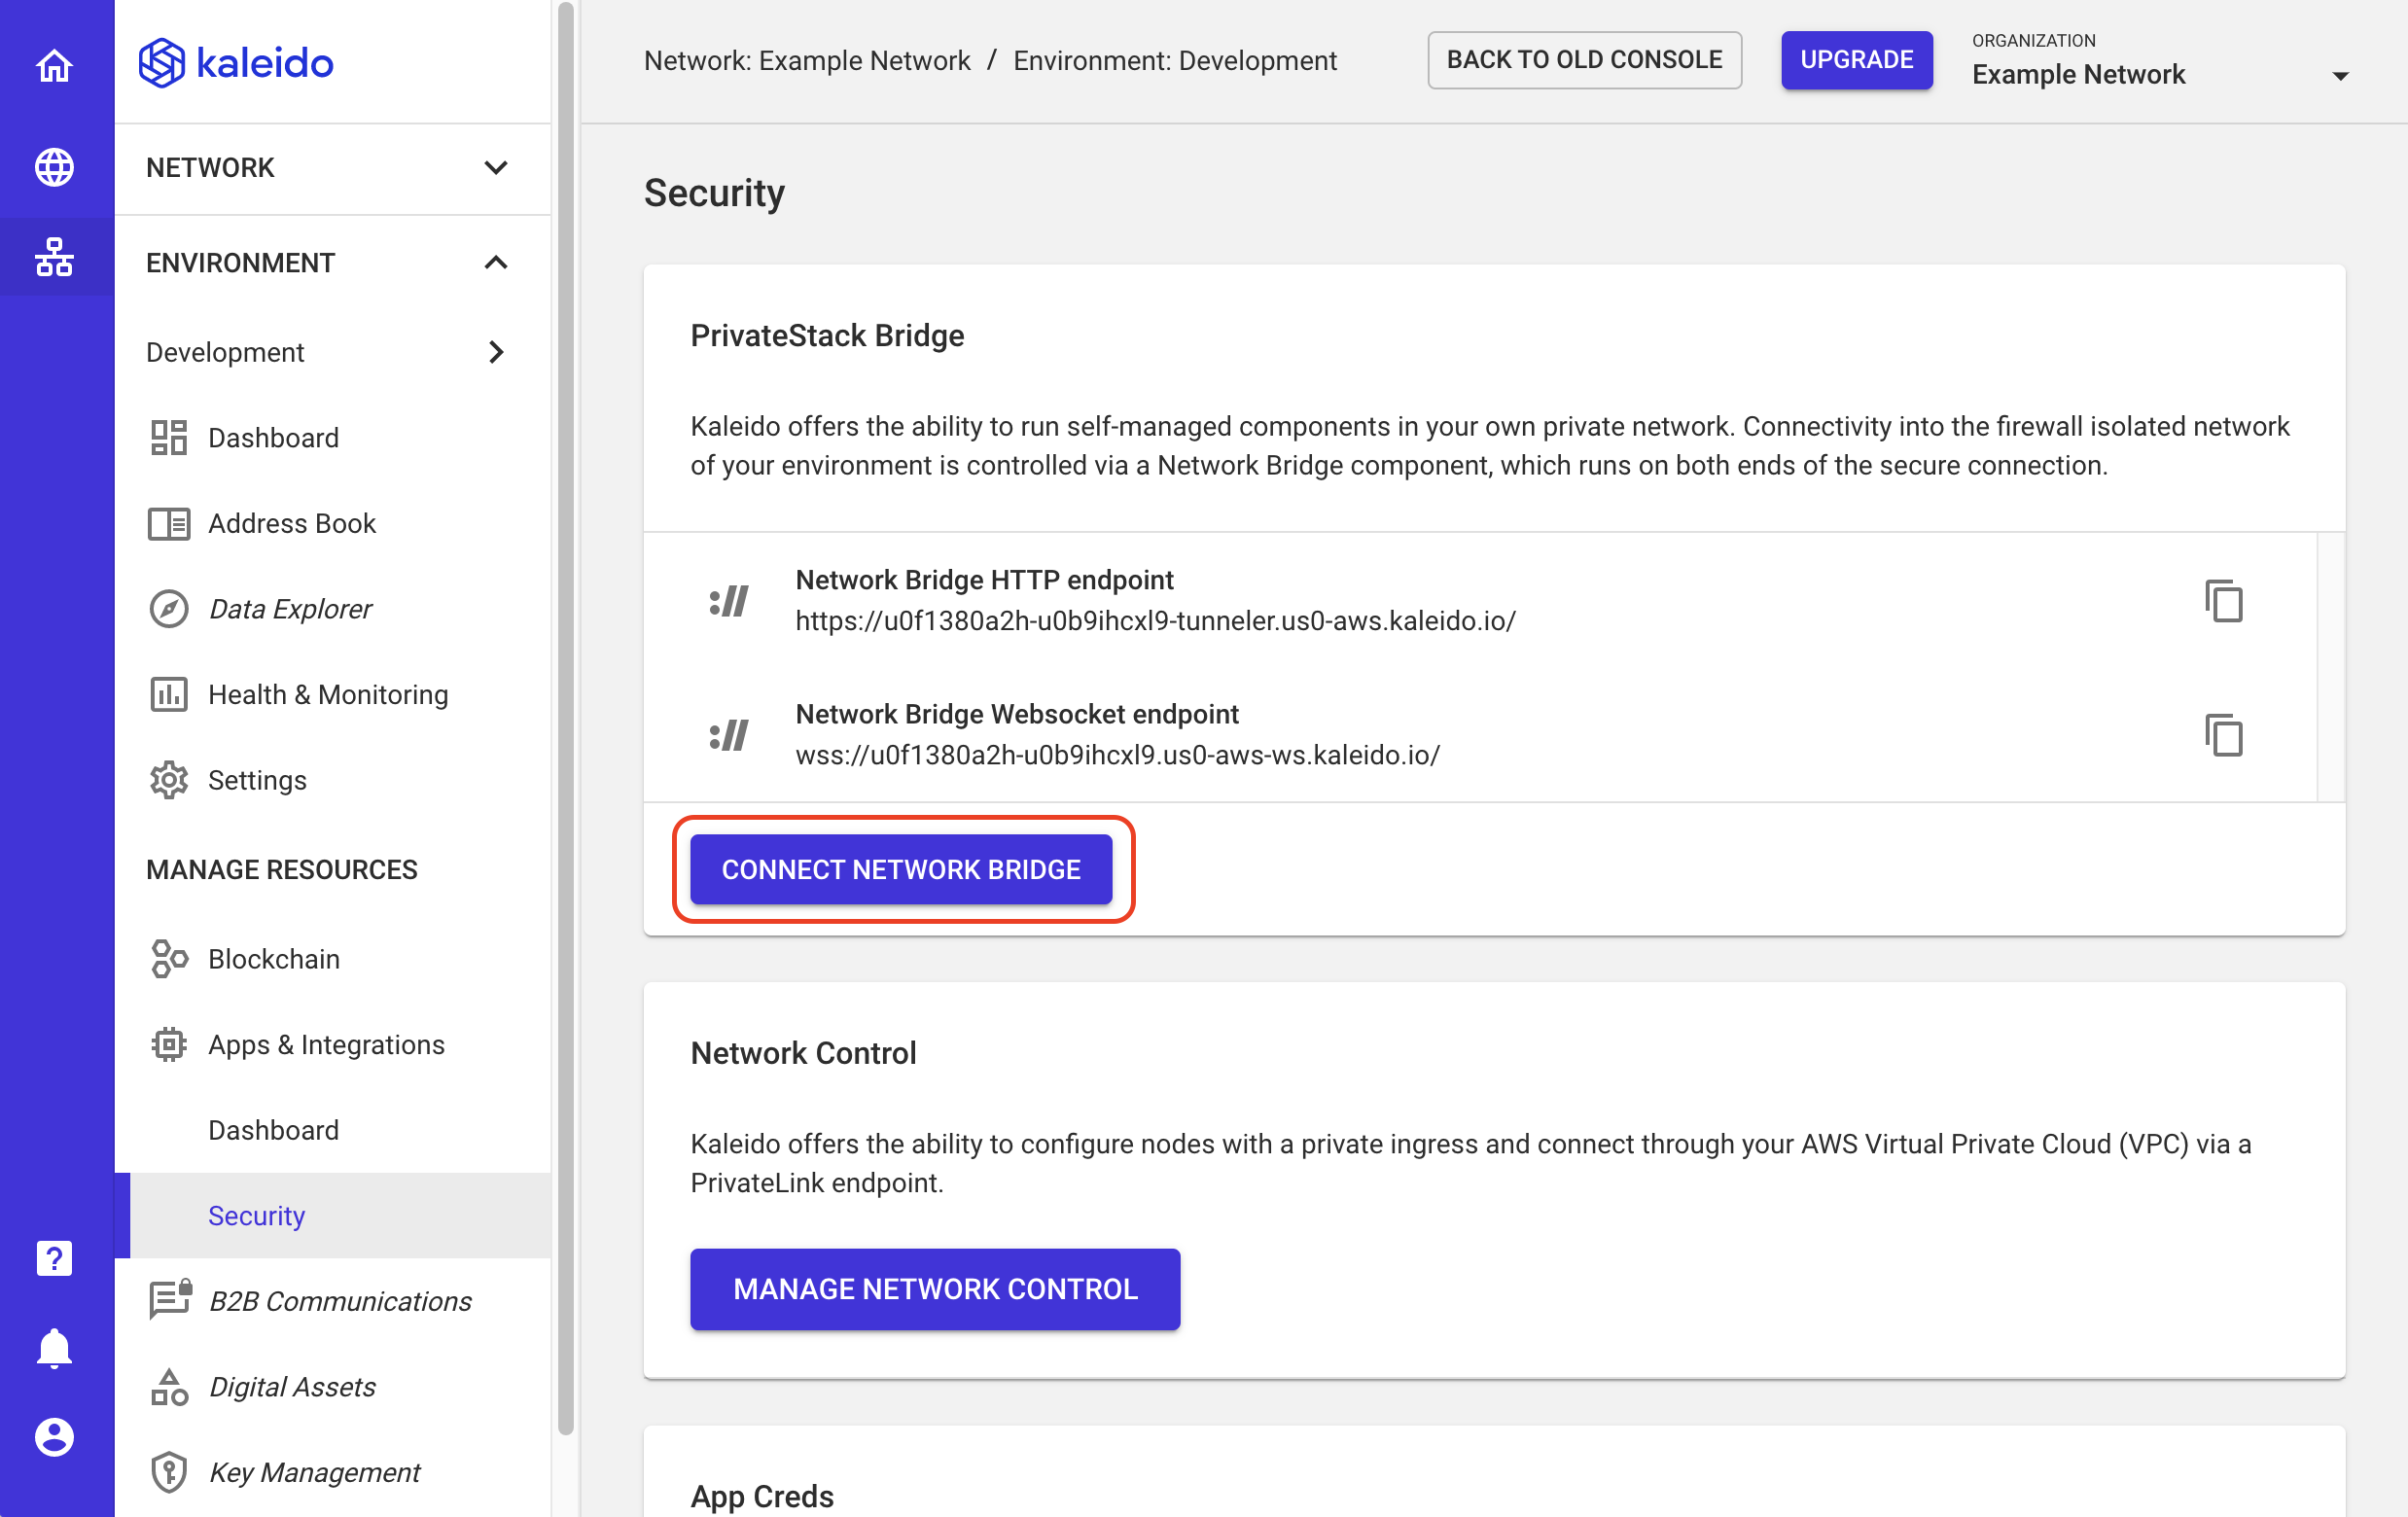
- A modal will open instructing you to create application credentials. These are strongly generated username/secret pairs that offer secure TLS connection back to Kaleido endpoints (i.e., the Kaleido Bridge we just created), all of which are protected by boundary security.
- Enter a name for your credentials and click CREATE.
- Kaleido does not store the secret and uses a salted hash to authenticate incoming calls. Therefore, as an operator, you are responsible for the custody/cycling/deletion of ALL security credentials.
- The file of interest is a JSON configuration that has these credentials automatically injected into the body. It also contains the critical endpoints and port mappings for the Kaleido Bridge service and our Corda nodes.
- Click the DOWNLOAD CONFIG button so that you have the JSON file available for your local bridge client.
- The naming syntax is
environmentID-bridgeServiceID-client.json.
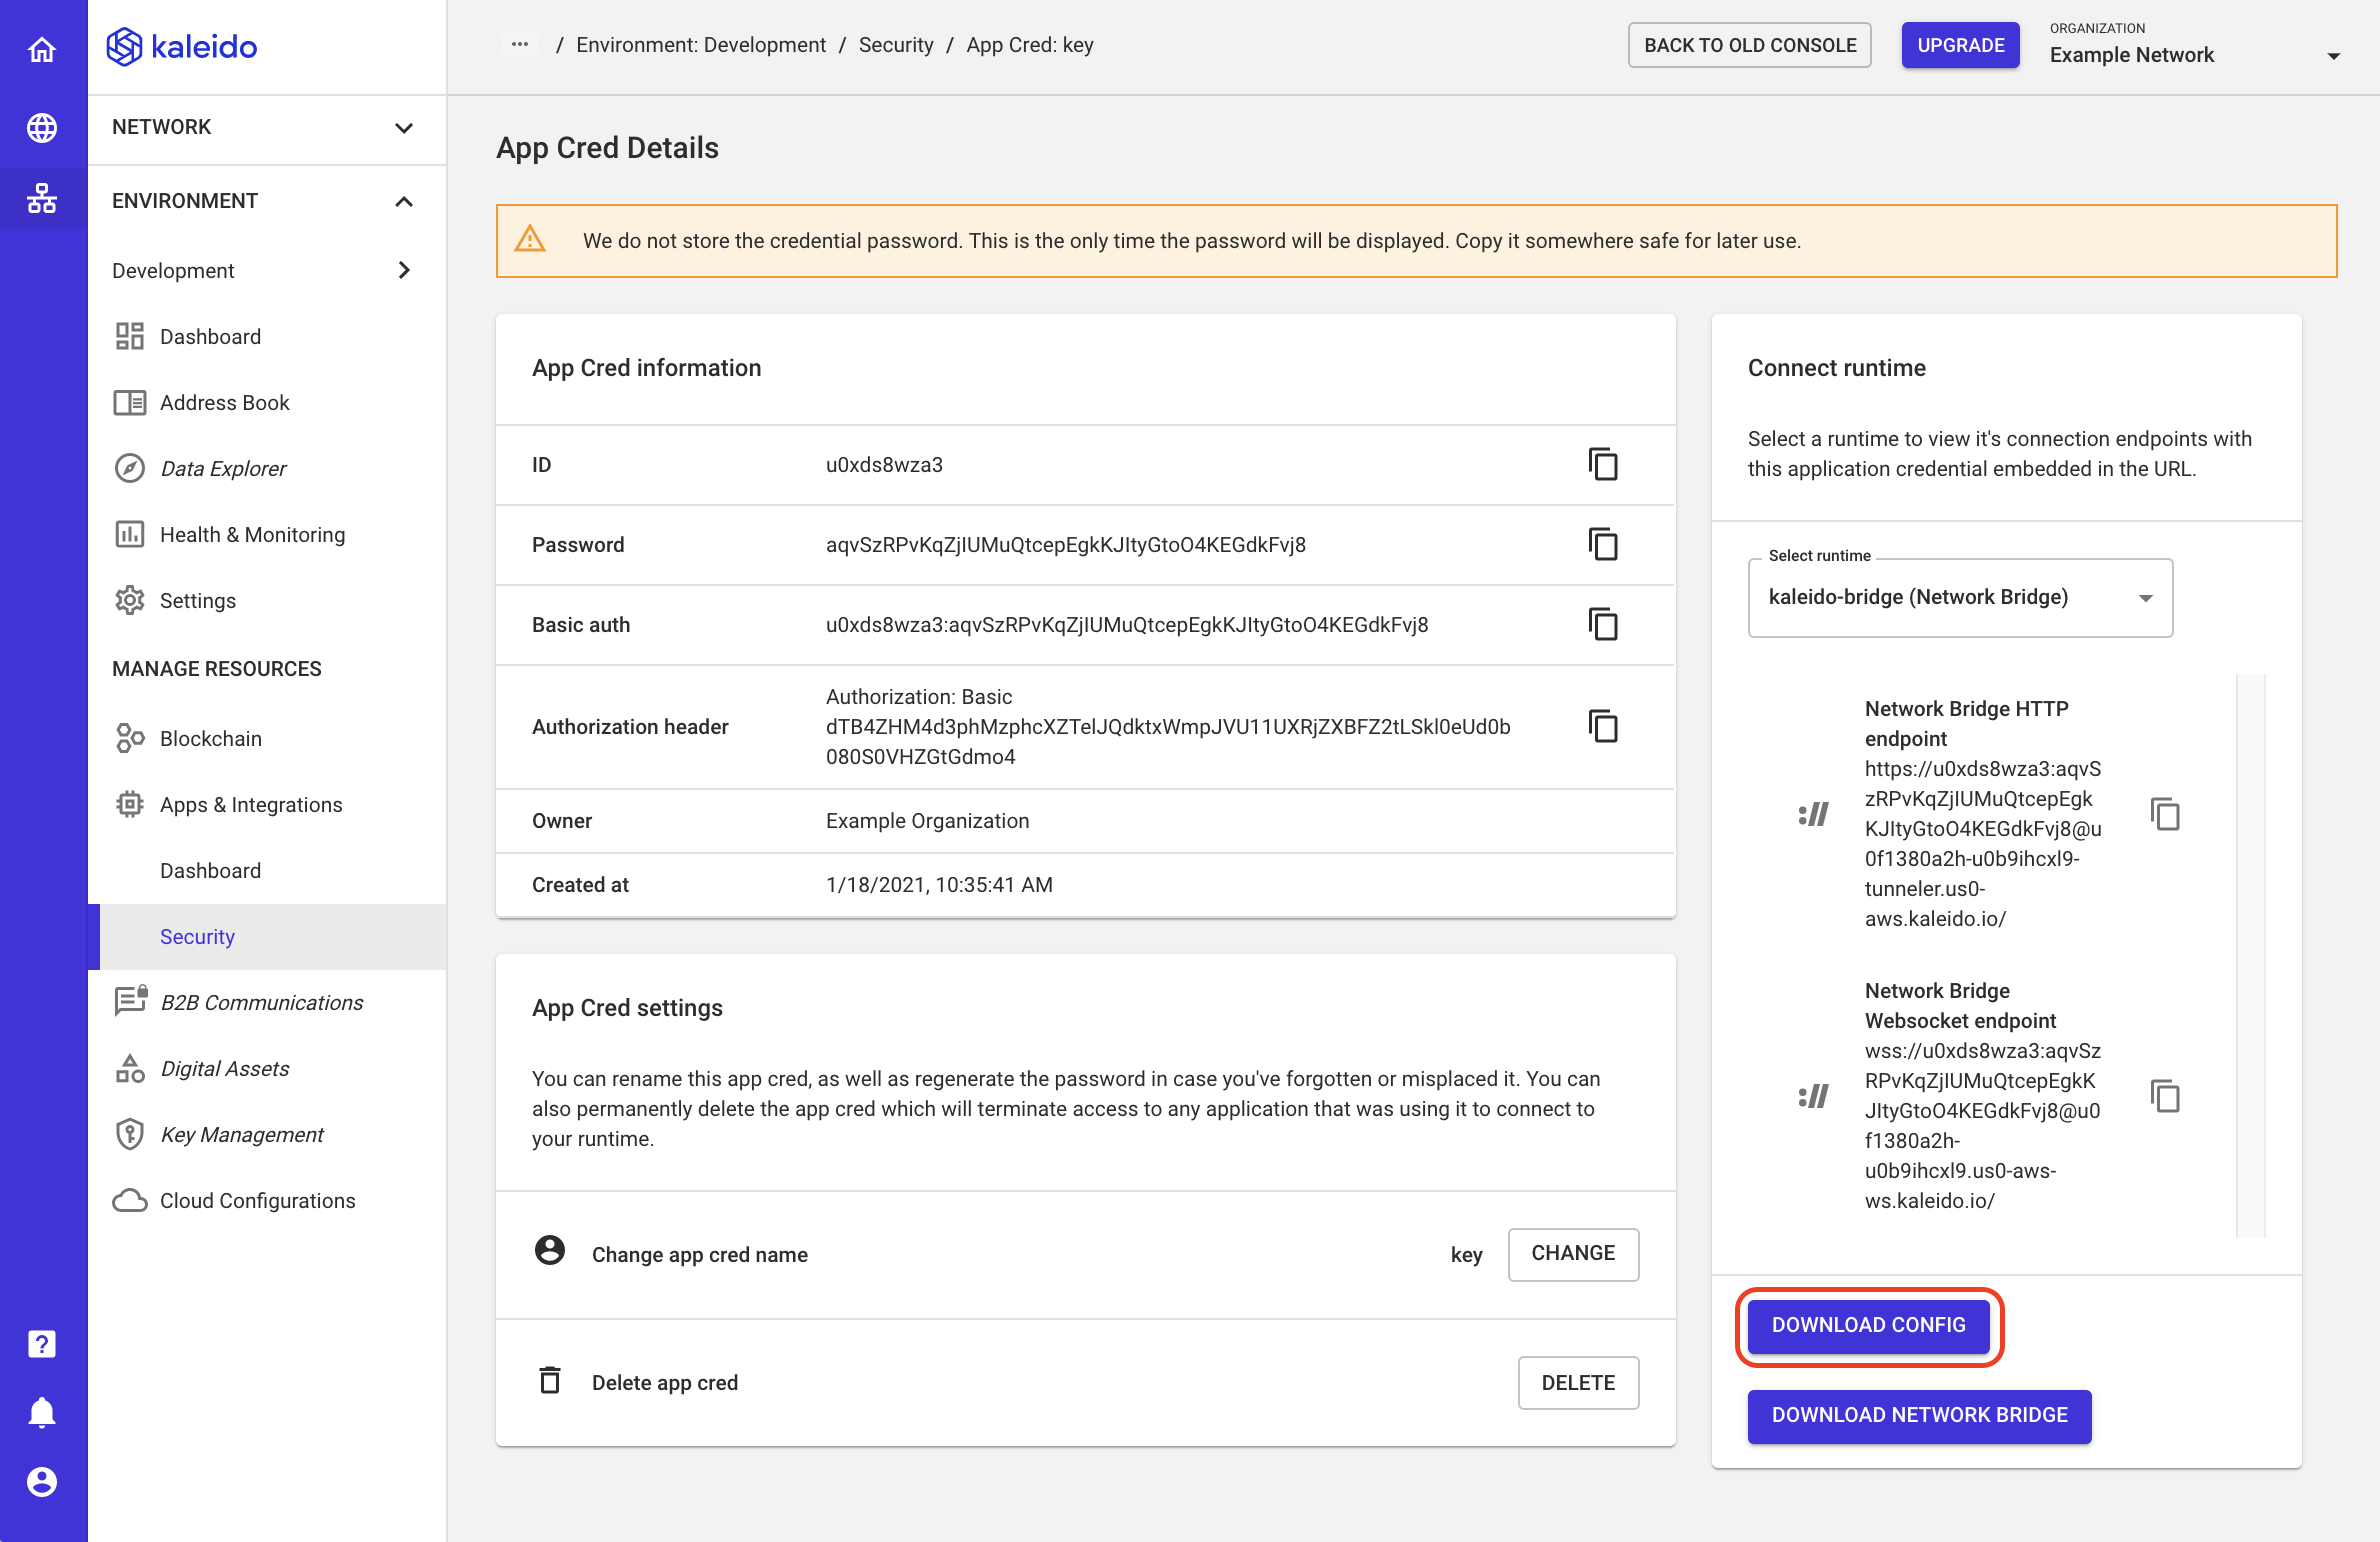
With the bridge config file in hand, the final task is to download a local bridge client to send RPC requests. The local client will, in turn, proxy calls back to the Kaleido-hosted bridge and ultimately to the node that we target from our application.
- From the same screen, click the DOWNLOAD NETWORK BRIDGE button.
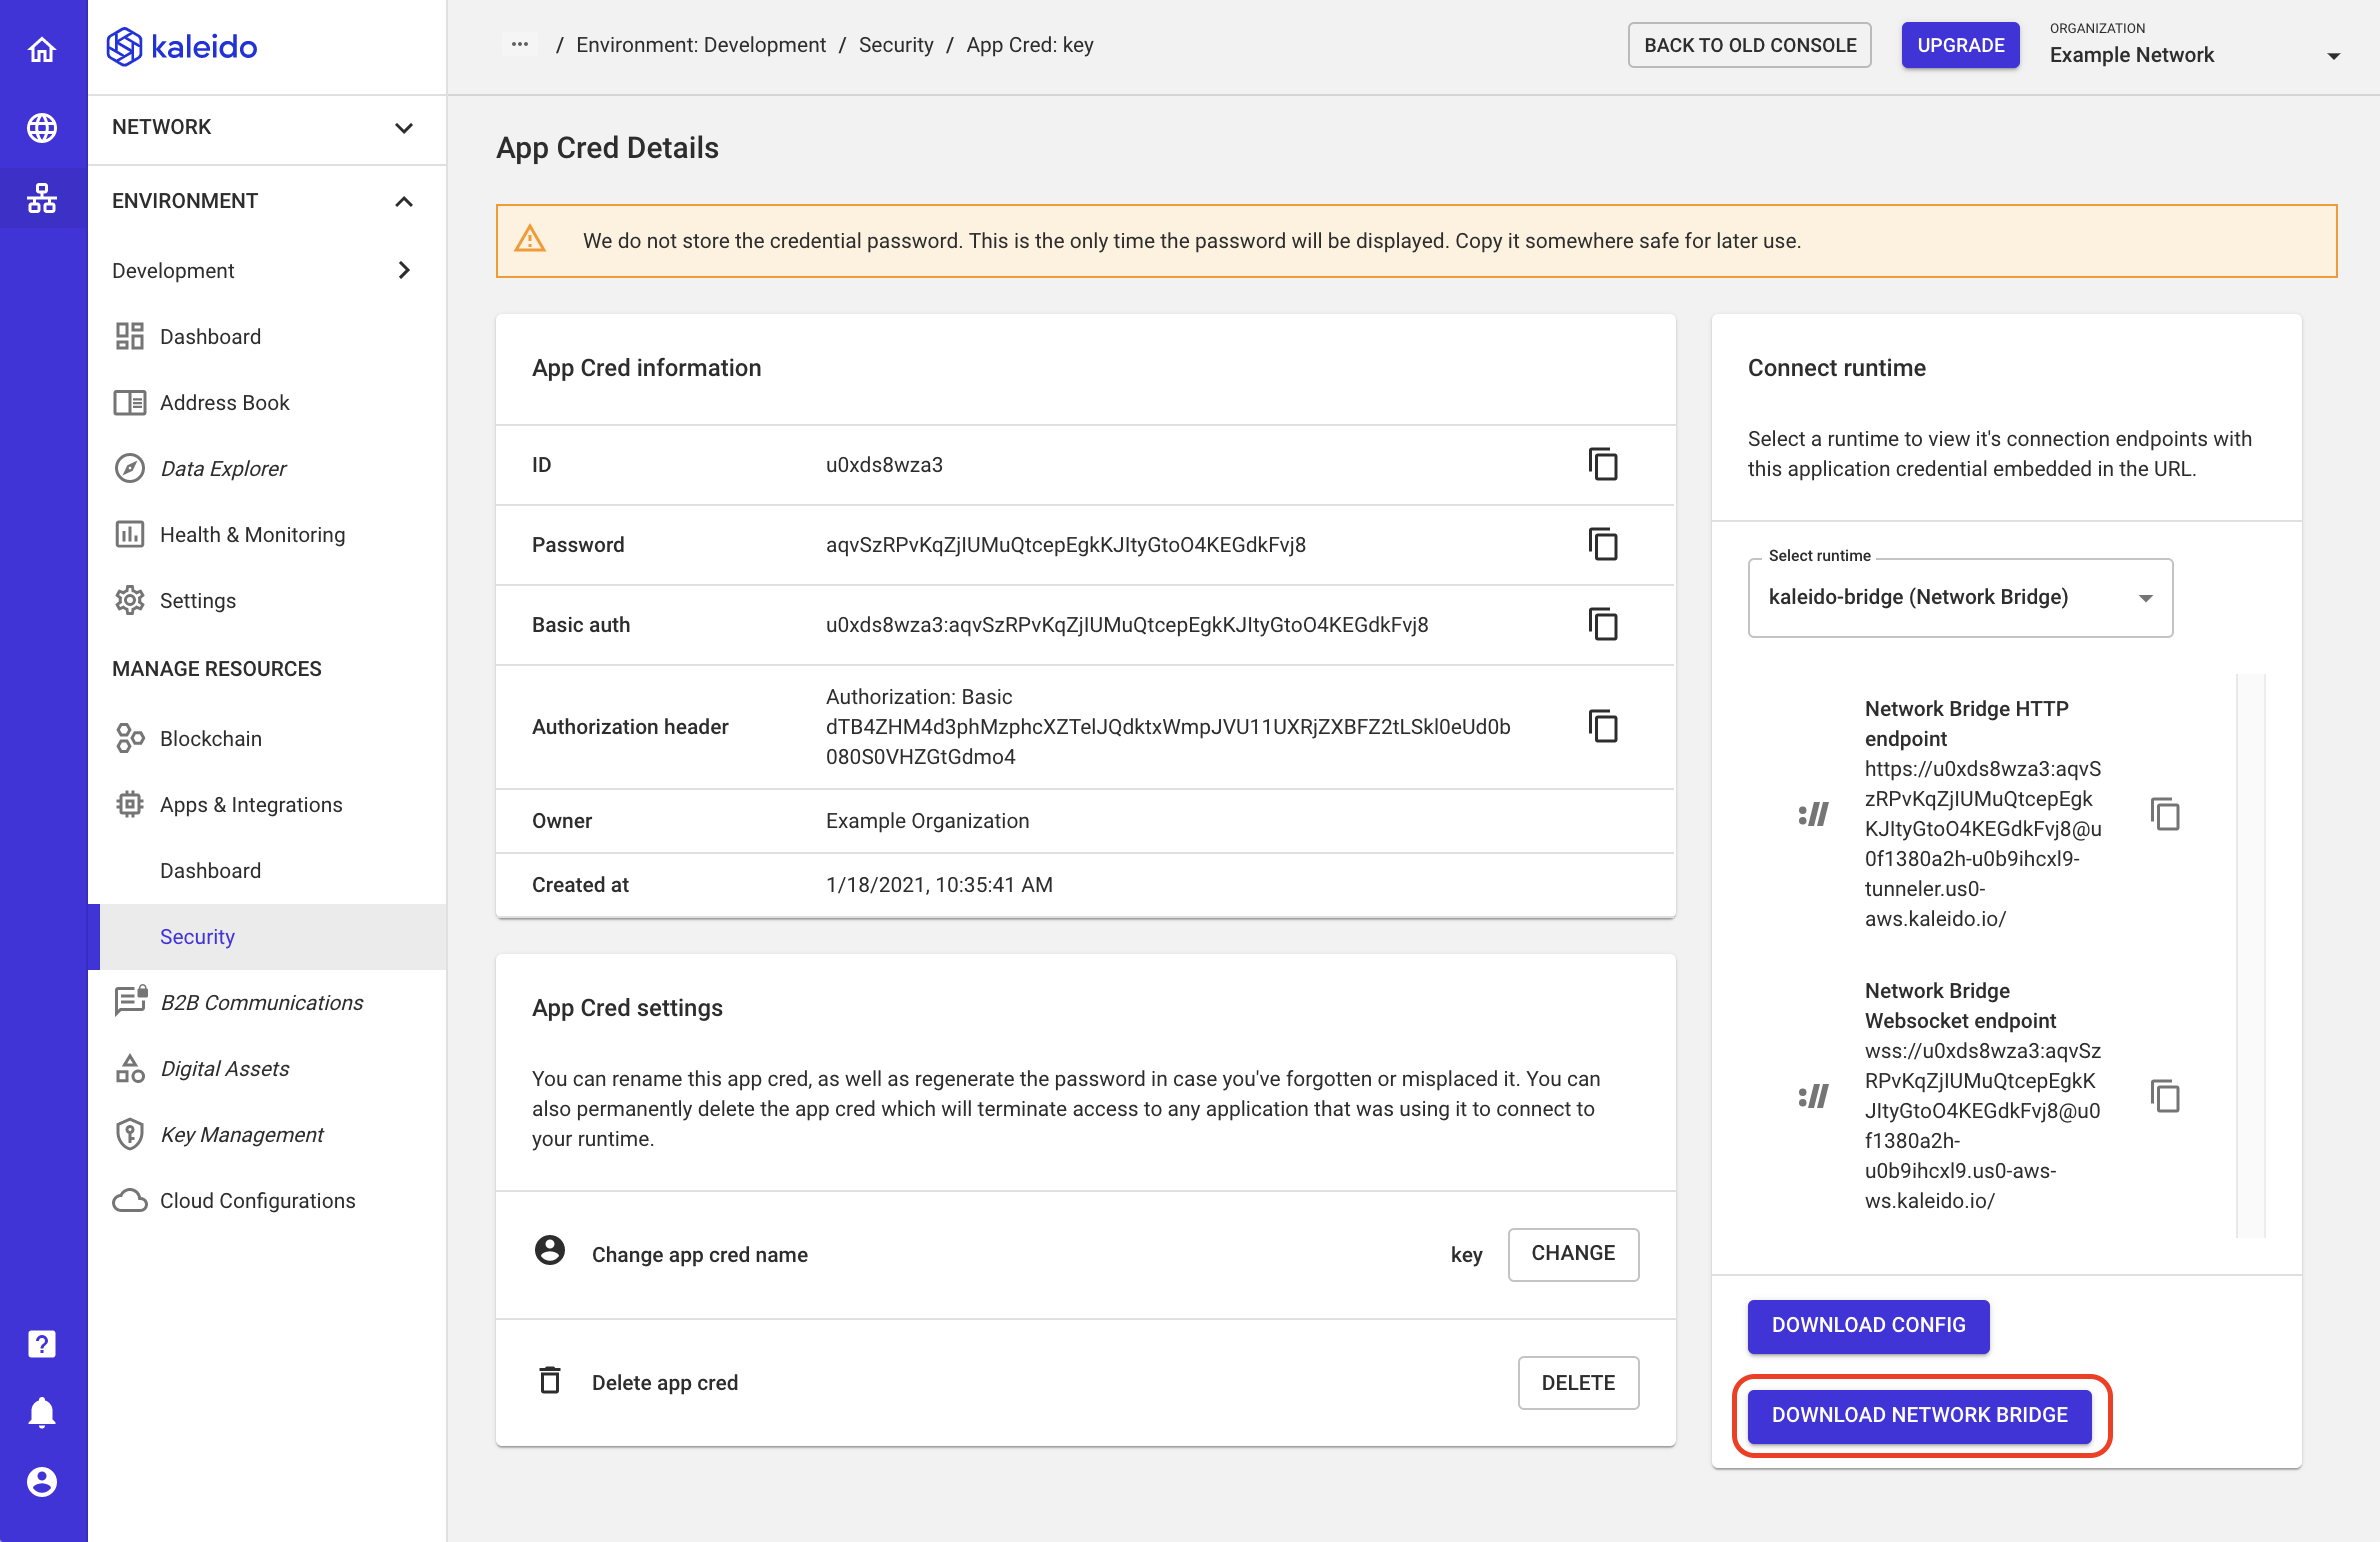
- This will open a Kaleido Downloads page, where you can download the appropriate
kldbridgebinary for your OS. - Unzip the downloaded package, and you're all set with components, services, and configurations.
Run the Bridge
Open a terminal and navigate to your kldbridge executable. For example, if you're running on macOS, the executable will be available in the kldbridge-2.0.1-macos-x64 folder.
The bridge requires a single environment variable - TUNNELER_CONFIG - that points to the path of the previously downloaded JSON configuration file. Add this to your bash profile or directly within the same terminal window where you're running the bridge. For example:
Now you're ready to run the local bridge. On macOS, the call would look as such:
You're looking for a successful connection back to the Kaleido-hosted bridge service. If the connection succeeds, you should see a similar output in the terminal:
2021-01-18T15:50:23.989Z [INFO ]: Kaleido PrivateStack Network Bridge. Version: 2.0.1-50cc233
2021-01-18T15:50:23.990Z [INFO ]: © 2019, 2020 Kaleido Inc. All rights reserved.
2021-01-18T15:50:23.991Z [INFO ]: Loading configuration config.json
2021-01-18T15:50:24.010Z [INFO ]: Listening on TCP 0.0.0.0:40020.
2021-01-18T15:50:24.010Z [INFO ]: Listening on TCP 0.0.0.0:40030.
2021-01-18T15:50:24.011Z [INFO ]: Listening on TCP 0.0.0.0:40031.
2021-01-18T15:50:24.011Z [INFO ]: Listening on TCP 0.0.0.0:40050.
2021-01-18T15:50:24.011Z [INFO ]: Listening on TCP 0.0.0.0:40051.
2021-01-18T15:50:24.013Z [INFO ]: Watching configuration file for changes
2021-01-18T15:50:24.013Z [INFO ]: No port specified. This node will not accept tunnel connections.
2021-01-18T15:50:24.262Z [INFO ]: Successfully connected to node "u0f1380a2h-u0b9ihcxl9-server".
Run the CorDapp
Let's finish up by using the RPC client we built way back in the Prerequisites section to drive our lender/borrower business logic. You'll want to open a second terminal window for this so that the bridge and RPC client can run in parallel. The scenario here is very basic:
- An IOU transaction is signed and issued from node 1. A default value of 100 is coded into the Kaleido RPC client; this can be modified using the
-vflag, but for now, let's just leave the value as is. - Using the RPC client, we will specify node 2 as the borrower; node 2 signs the transaction and forwards it to the notary.
- The notary signs the transaction and returns it to each node, where the state is stored in each node's private vault. This flow contains no UTXO-based inputs and simply deals with the output state that is arbitrarily defined when we issue the IOU transaction.
The build output for the RPC client is located in rpc-client/build/install/rpc-client/bin. You can see the available flags by using the -h flag.
The Kaleido Corda Samples README contains additional information on the client flags. For our purposes, we only need to specify the endpoint that we are sending the transaction through on our locally running kaleido bridge, and then the user + password that we defined on our first node (the lender).
-u: The localhost port that can tunnel to the lending node. We are interested inlocalhost:40031. These ports are defined in the bridge configuration JSON file.-n: The username (with an embedded role) that was created on our lending node.-p: The corresponding password for the user. This was either manually ascribed or autogenerated by Kaleido.
Call the issue method and then pass the appropriate arguments to the above three flags.
Once you've kicked off the flow, the Kaleido RPC client will prompt you for the borrowing node's ID. Hop back into your Kaleido console and ascertain the Node ID for your second node. This is a ten character string, for example, u0e3ifghvx. Match that string to the available targets, and then enter the appropriate integer that corresponds to the node.
[main] INFO net.corda.client.rpc.internal.RPCClient - Startup took 5491 msec
[main] INFO io.kaleido.samples.IOUClient - To issue new IoU, a borrower is needed. You can specify a unique search string with -borrower-id (using the borrower node Id would be a good idea), or select from the discovered list of parties below.
[main] INFO io.kaleido.samples.IOUClient - Found 3 parties in the network matching the borrower id
[main] INFO io.kaleido.samples.IOUClient - Pick from the following parties:
[main] INFO io.kaleido.samples.IOUClient -  0: CN=Node of u0q030vacn for u0g7zoroy6, O=Kaleido, L=Raleigh, C=US
[main] INFO io.kaleido.samples.IOUClient -  1: CN=Node of u0e3ifghvx for u0g7zoroy6, O=Kaleido, L=Raleigh, C=US
[main] INFO io.kaleido.samples.IOUClient -  2: CN=Node of u0mxiu3x4x for u0g7zoroy6, O=Kaleido, L=Raleigh, C=US
In the above scenario, we would enter 1 in the terminal and then hit ENTER to finish the flow. The remaining portion of the flow takes about 20 seconds for all the hops to complete. After which, you're able to see the transaction ID and available state information.
[pool-4-thread-1] INFO io.kaleido.samples.IOUClient - Signed tx: SignedTransaction(id=01A6E4BE80EBD16076D12306F04DF3B1873160DD59258E5168C1872F1DC9CD5D)
[pool-4-thread-1] INFO io.kaleido.samples.IOUClient - IOUState(value=100, lender=CN=Node of u0q030vacn for u0g7zoroy6, O=Kaleido, L=Raleigh, C=US, borrower=CN=Node of u0e3ifghvx for u0g7zoroy6, O=Kaleido, L=Raleigh, C=US, linearId=eccc670a-6ec7-47ab-a6be-6206d5473f52)
[pool-4-thread-1] INFO io.kaleido.KaleidoClient - IoU issuing transaction #1 (worker #1) successfully finalized

========Printing the results======
    Total successes: 1
    Total failures: 0
    Elapsed time: 23 seconds
    TPS: 0
Refer to the Kaleido Corda Samples README for additional details on queries and accessing stored state information.
