Issue Your First Polygon Transaction
Now that you have an Polygon environment with some active nodes, it's time to deploy a basic smart contract and issue some transactions.
Create an App project
We'll start by leveraging Kaleido's Smart Contract Management component. This feature provides the collective business network with a transparent and auditable source code management utility. It delivers decisive mappings of your on-chain transactions and state changes directly back to your business logic. Additionally, it simplifies Ethereum transaction submission and application development by providing clean RESTful interfaces for interaction with your smart contract methods. No custom programming or blockchain expertise is necessary, and otherwise esoteric features of the protocol such as nonce management and type mapping are removed from the equation. Simply upload some solidity code, and Kaleido will provide an interactive Swagger interface along with downloadable API specifications for click button simple interaction and swift application development.
- Navigate to your business network dashboard and click on the Apps icon in the left navigation pane.
- Select the CREATE APP button within the Apps frame.
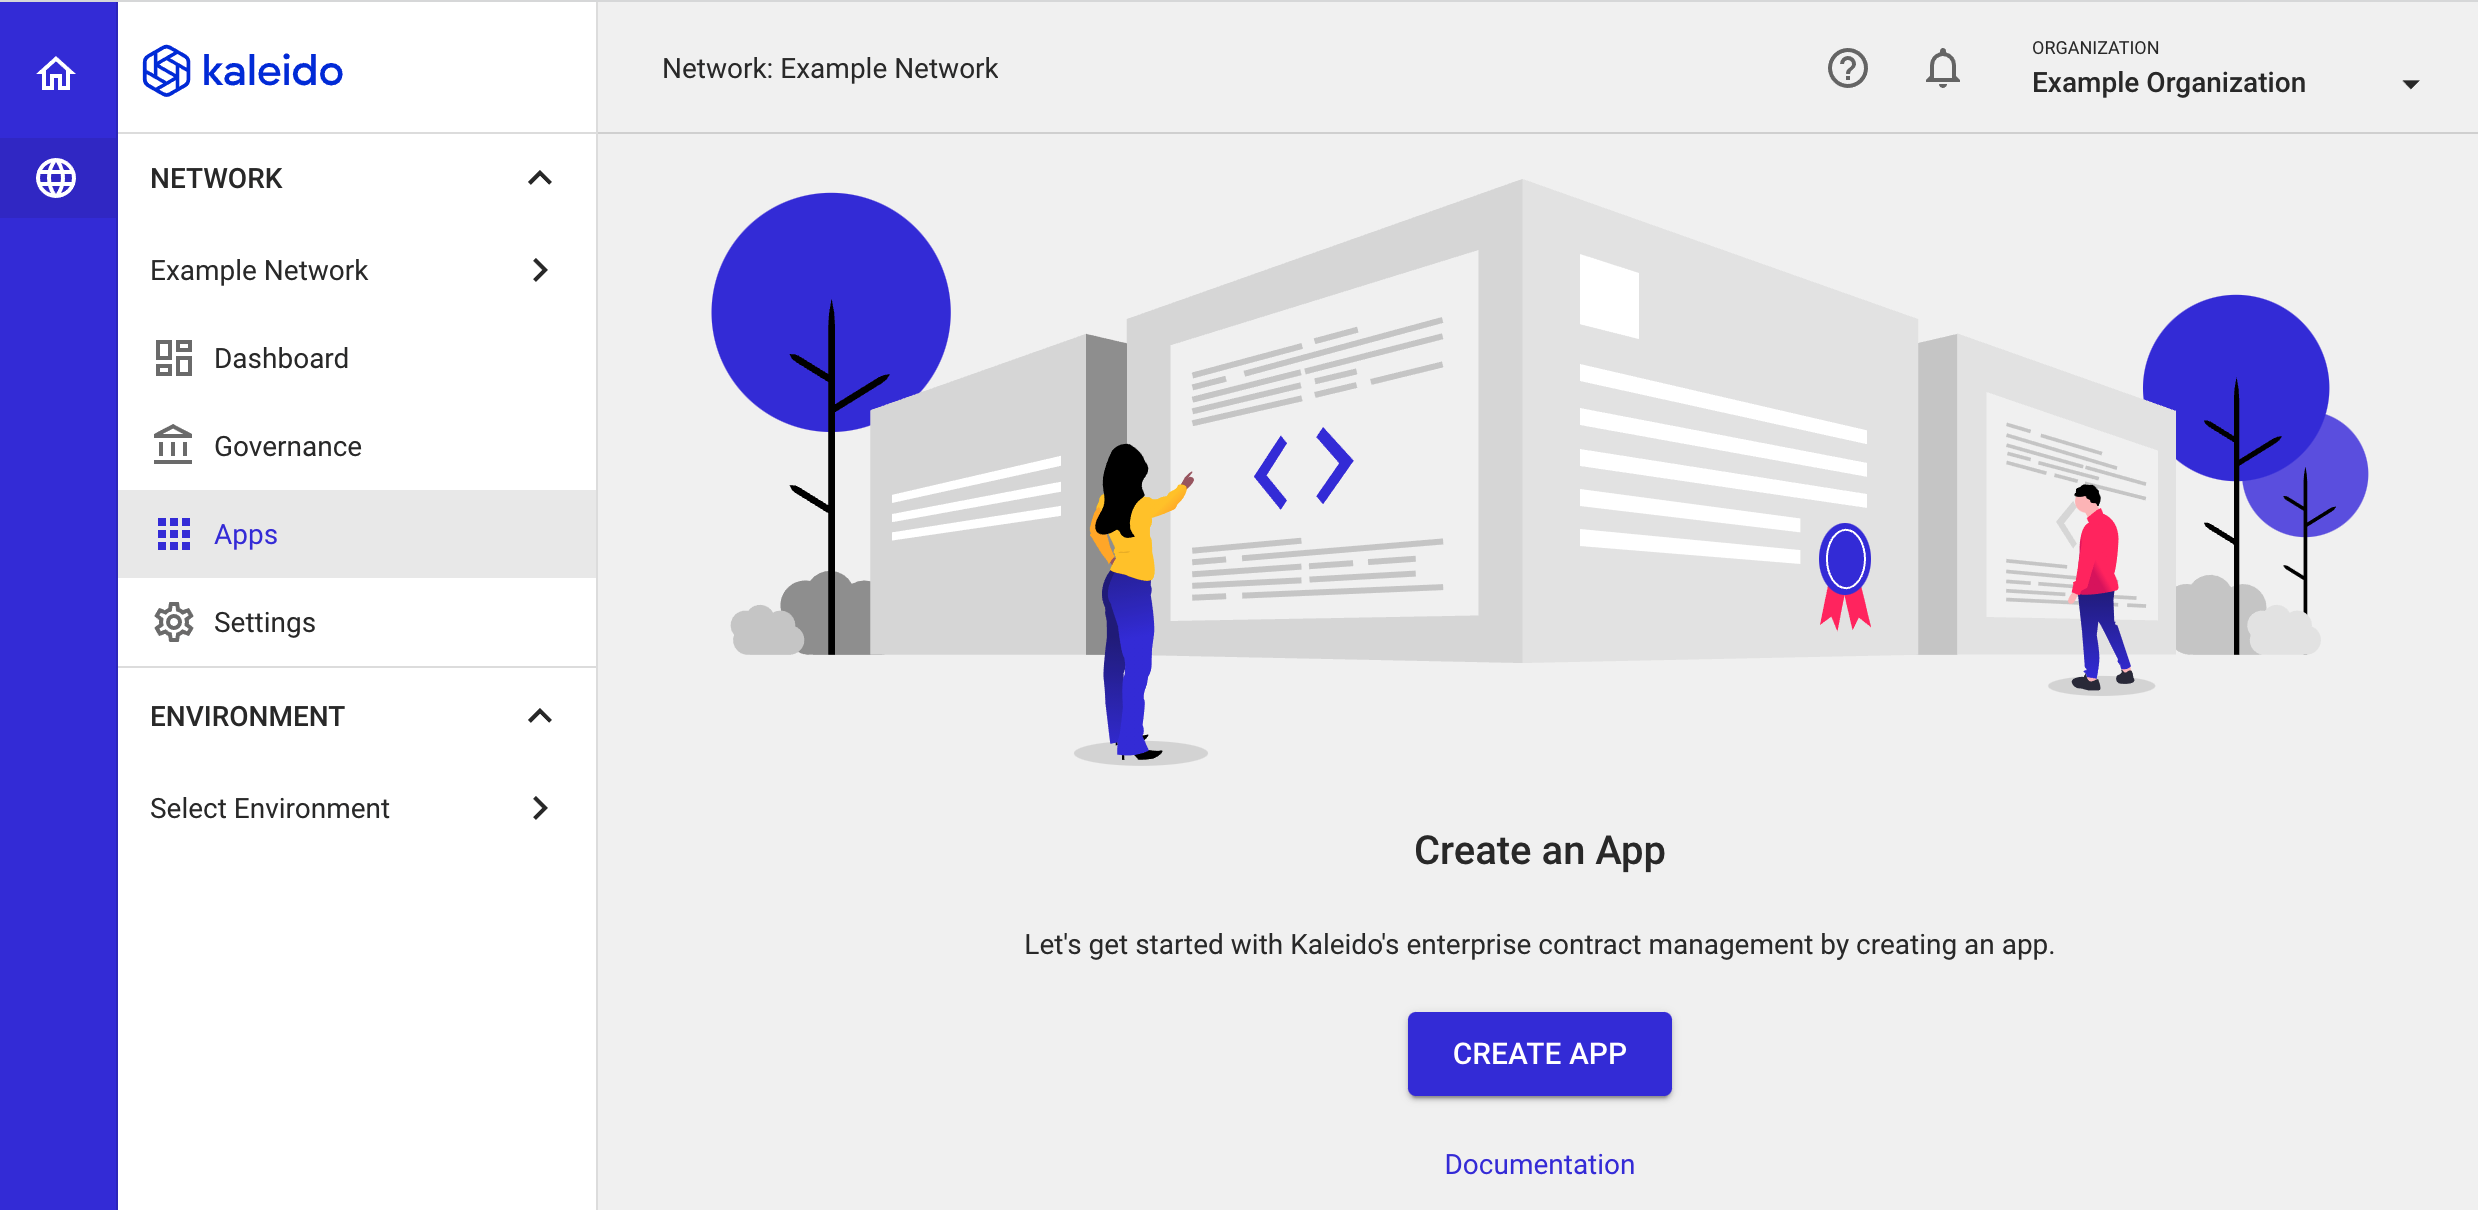
- Select the Ethereum tile and click NEXT
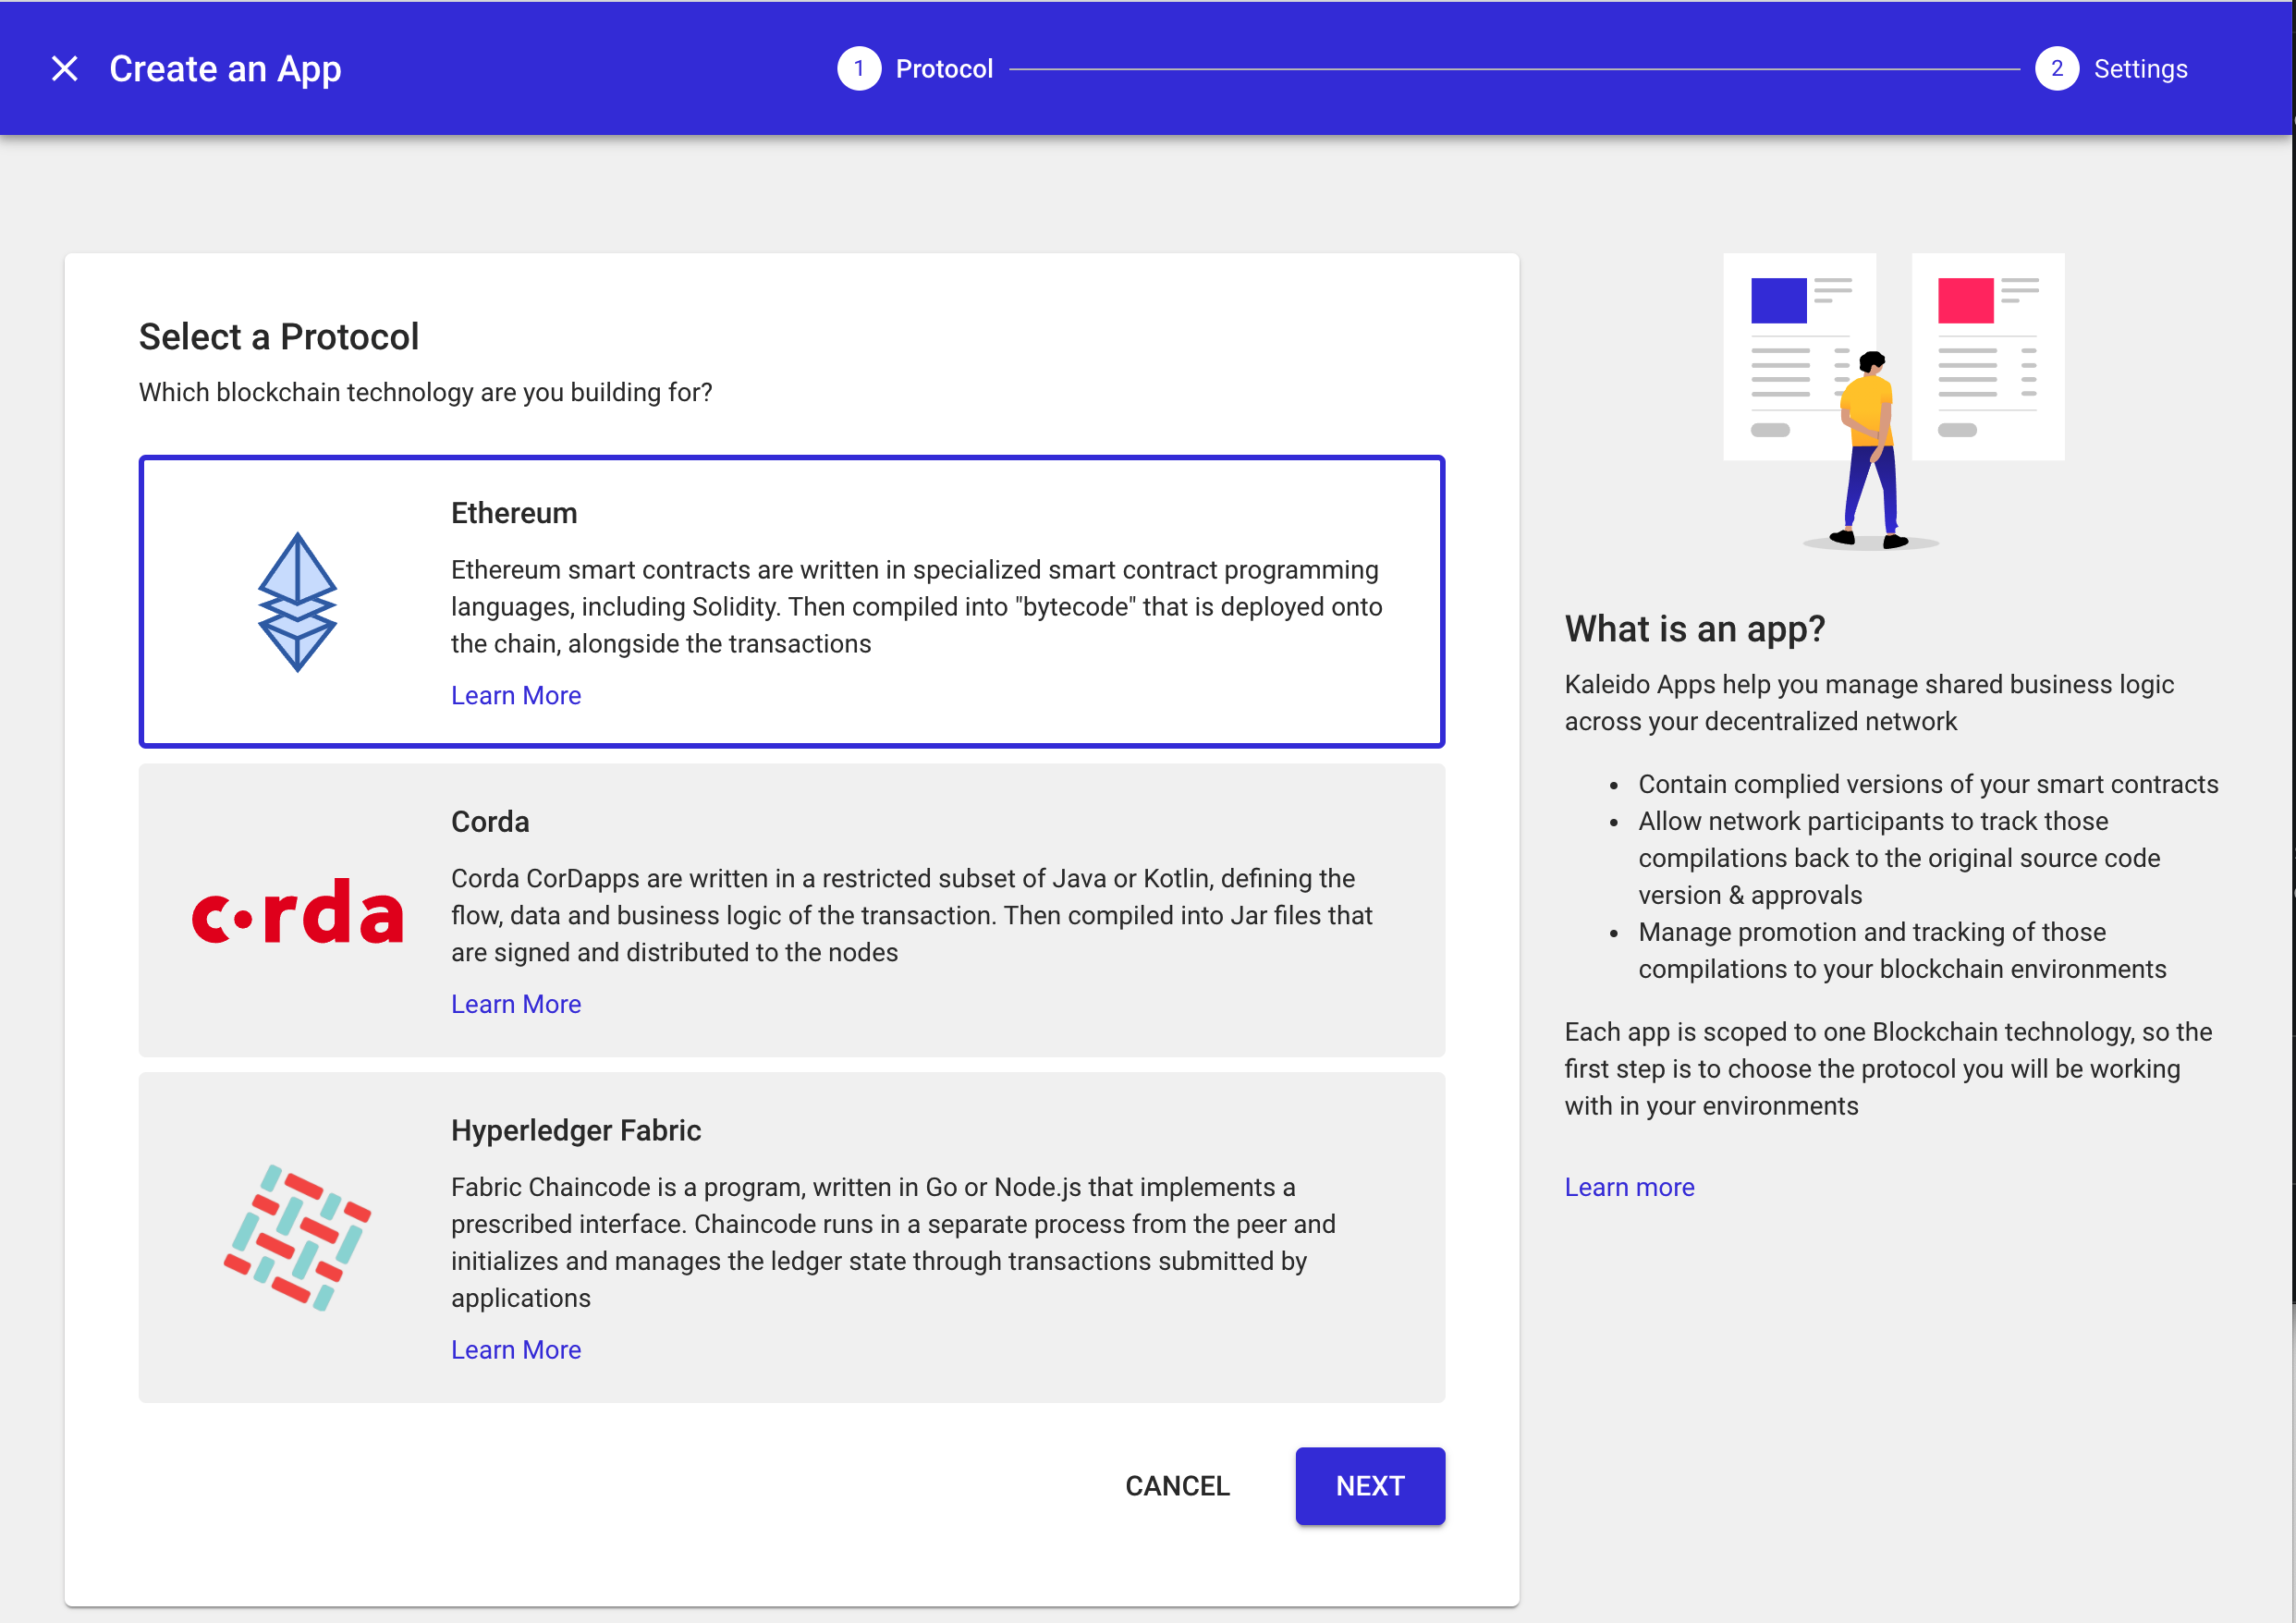
- Provide a name for your App project. We'll use
Simple Storagefor this example. - Click on the Managed Compilation from Github option. Kaleido also allows you to supply bytecode and an accompanying binary interface directly. However, we want to avoid compilation procedures and unnecessary complexity, so we'll just import some basic solidity code from Github and let Kaleido do all of the heavy lifting.
- Click FINISH to create the project namespace.
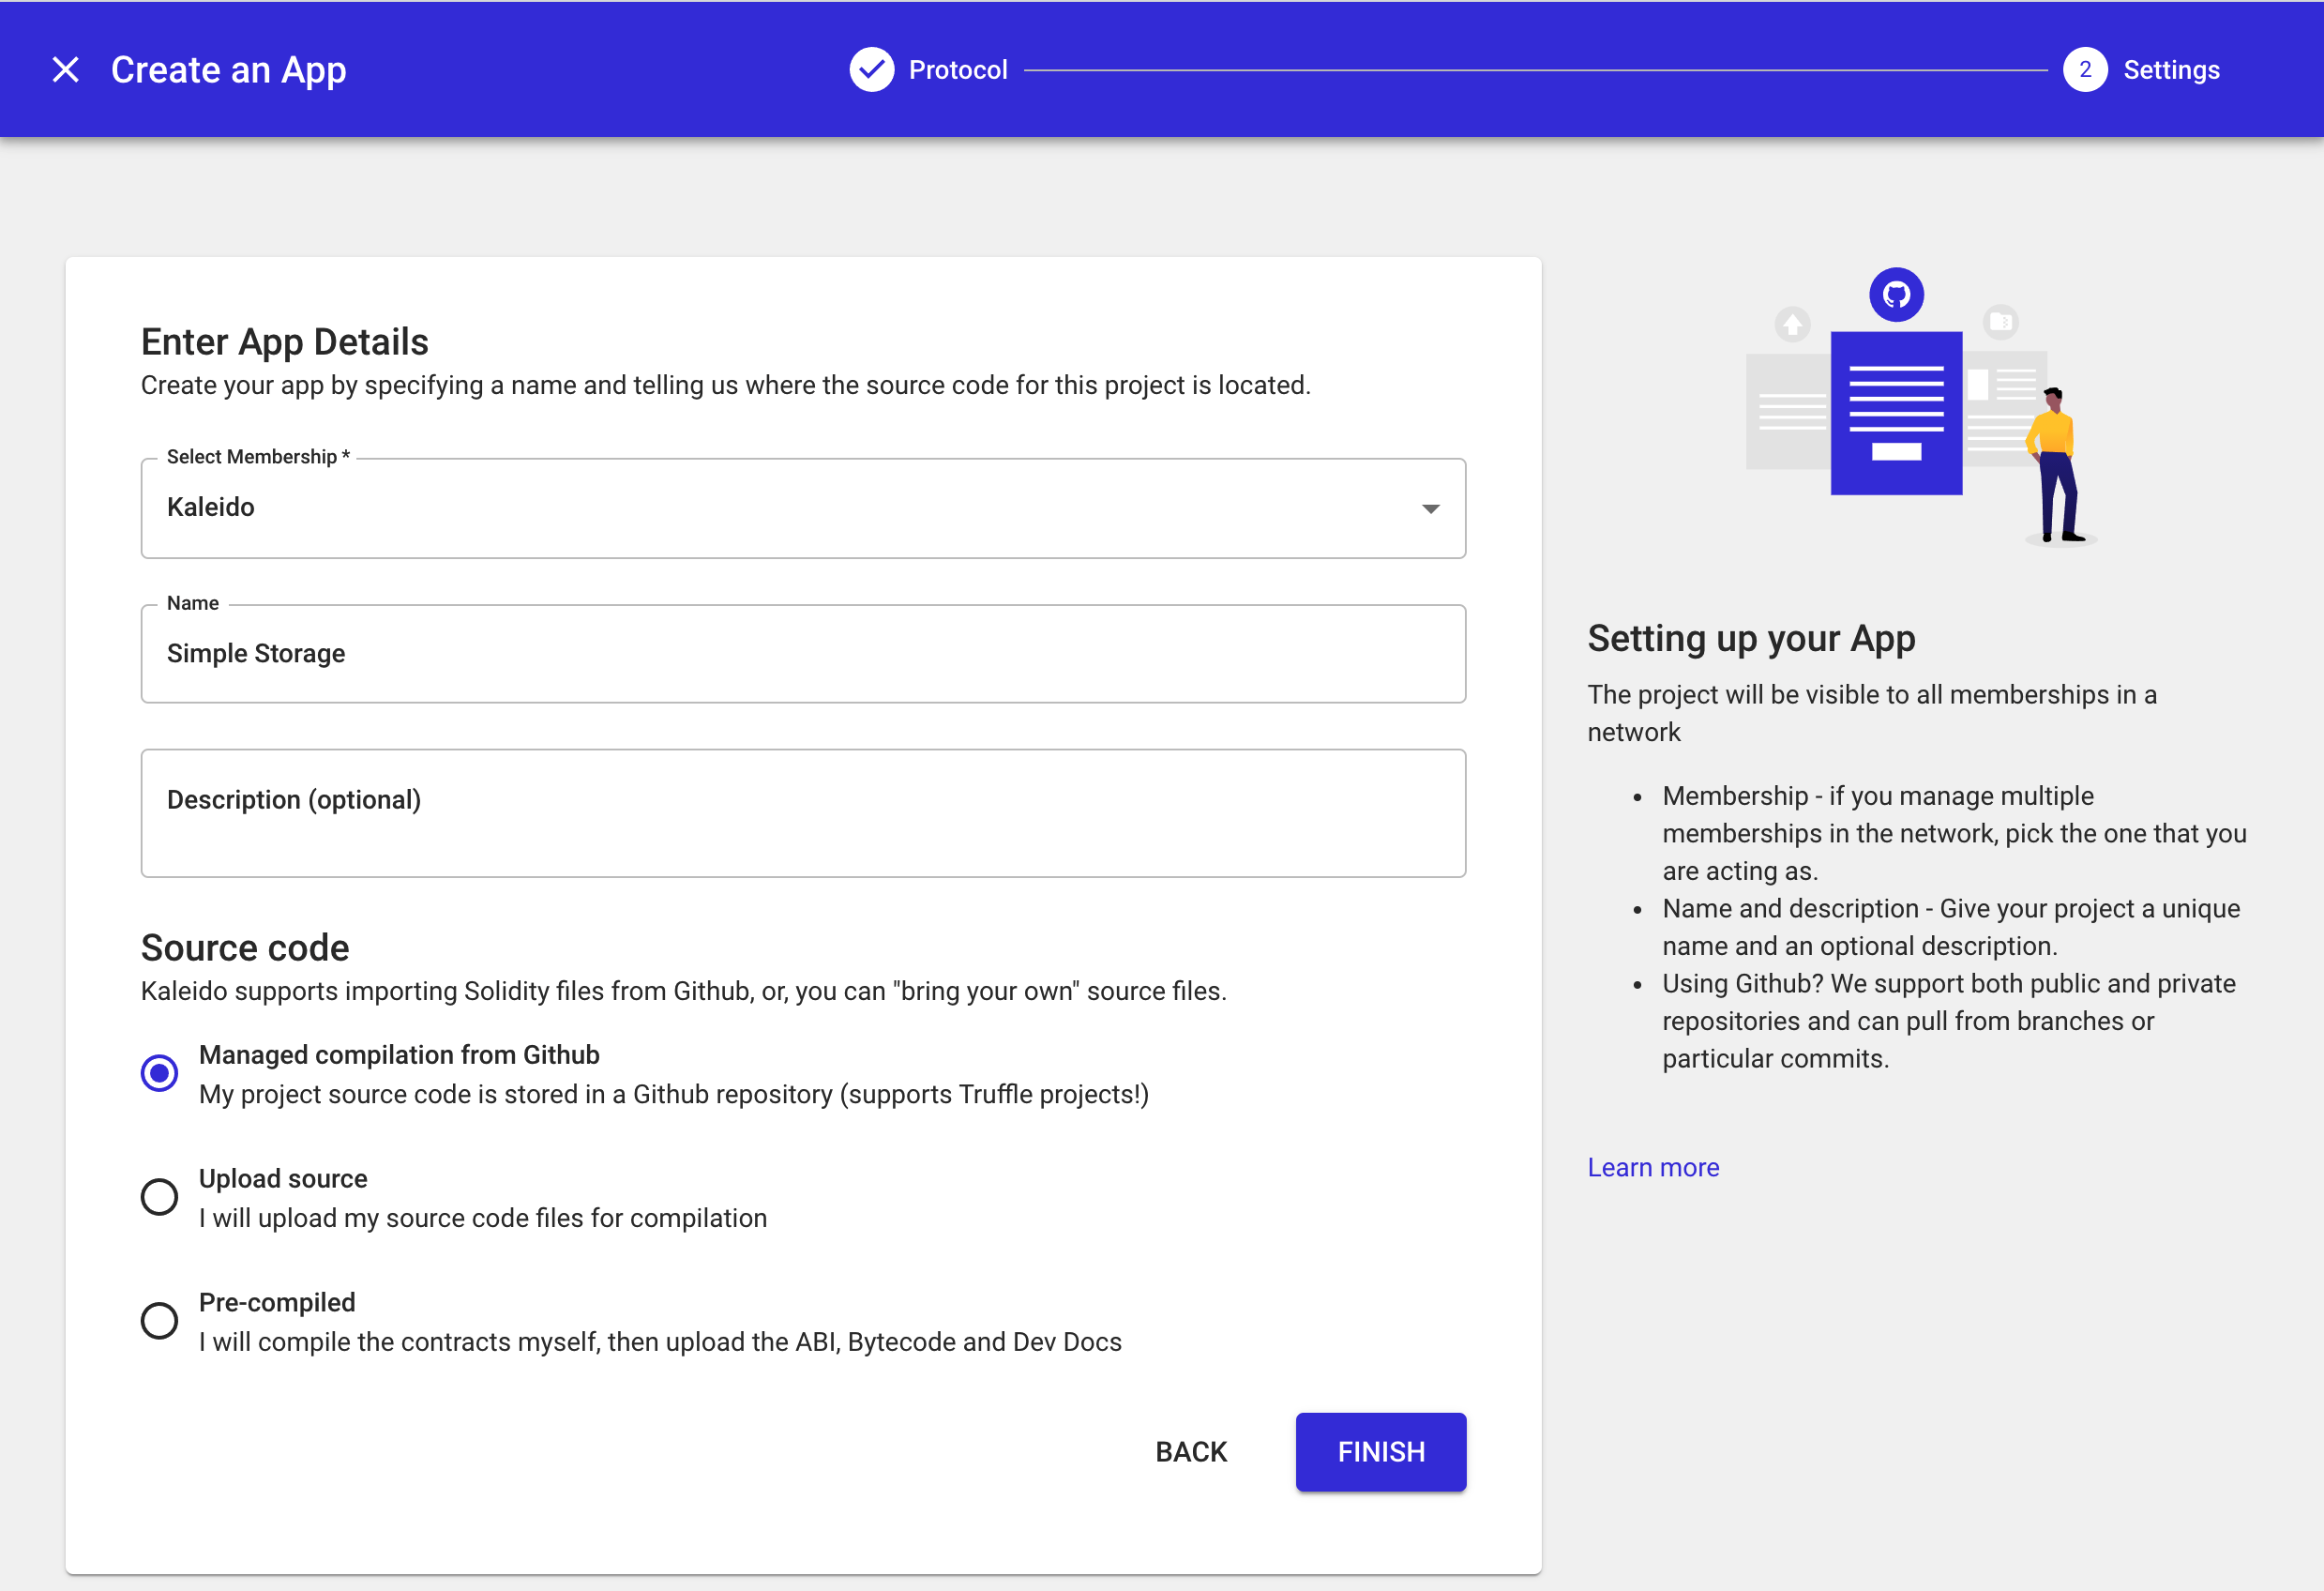
- What is generated is an empty App project namespace with an "import from Github" configuration. We now need to populate it with some source code. Click the CREATE NEW VERSION button in the upper right portion of your screen.
Create a new Version
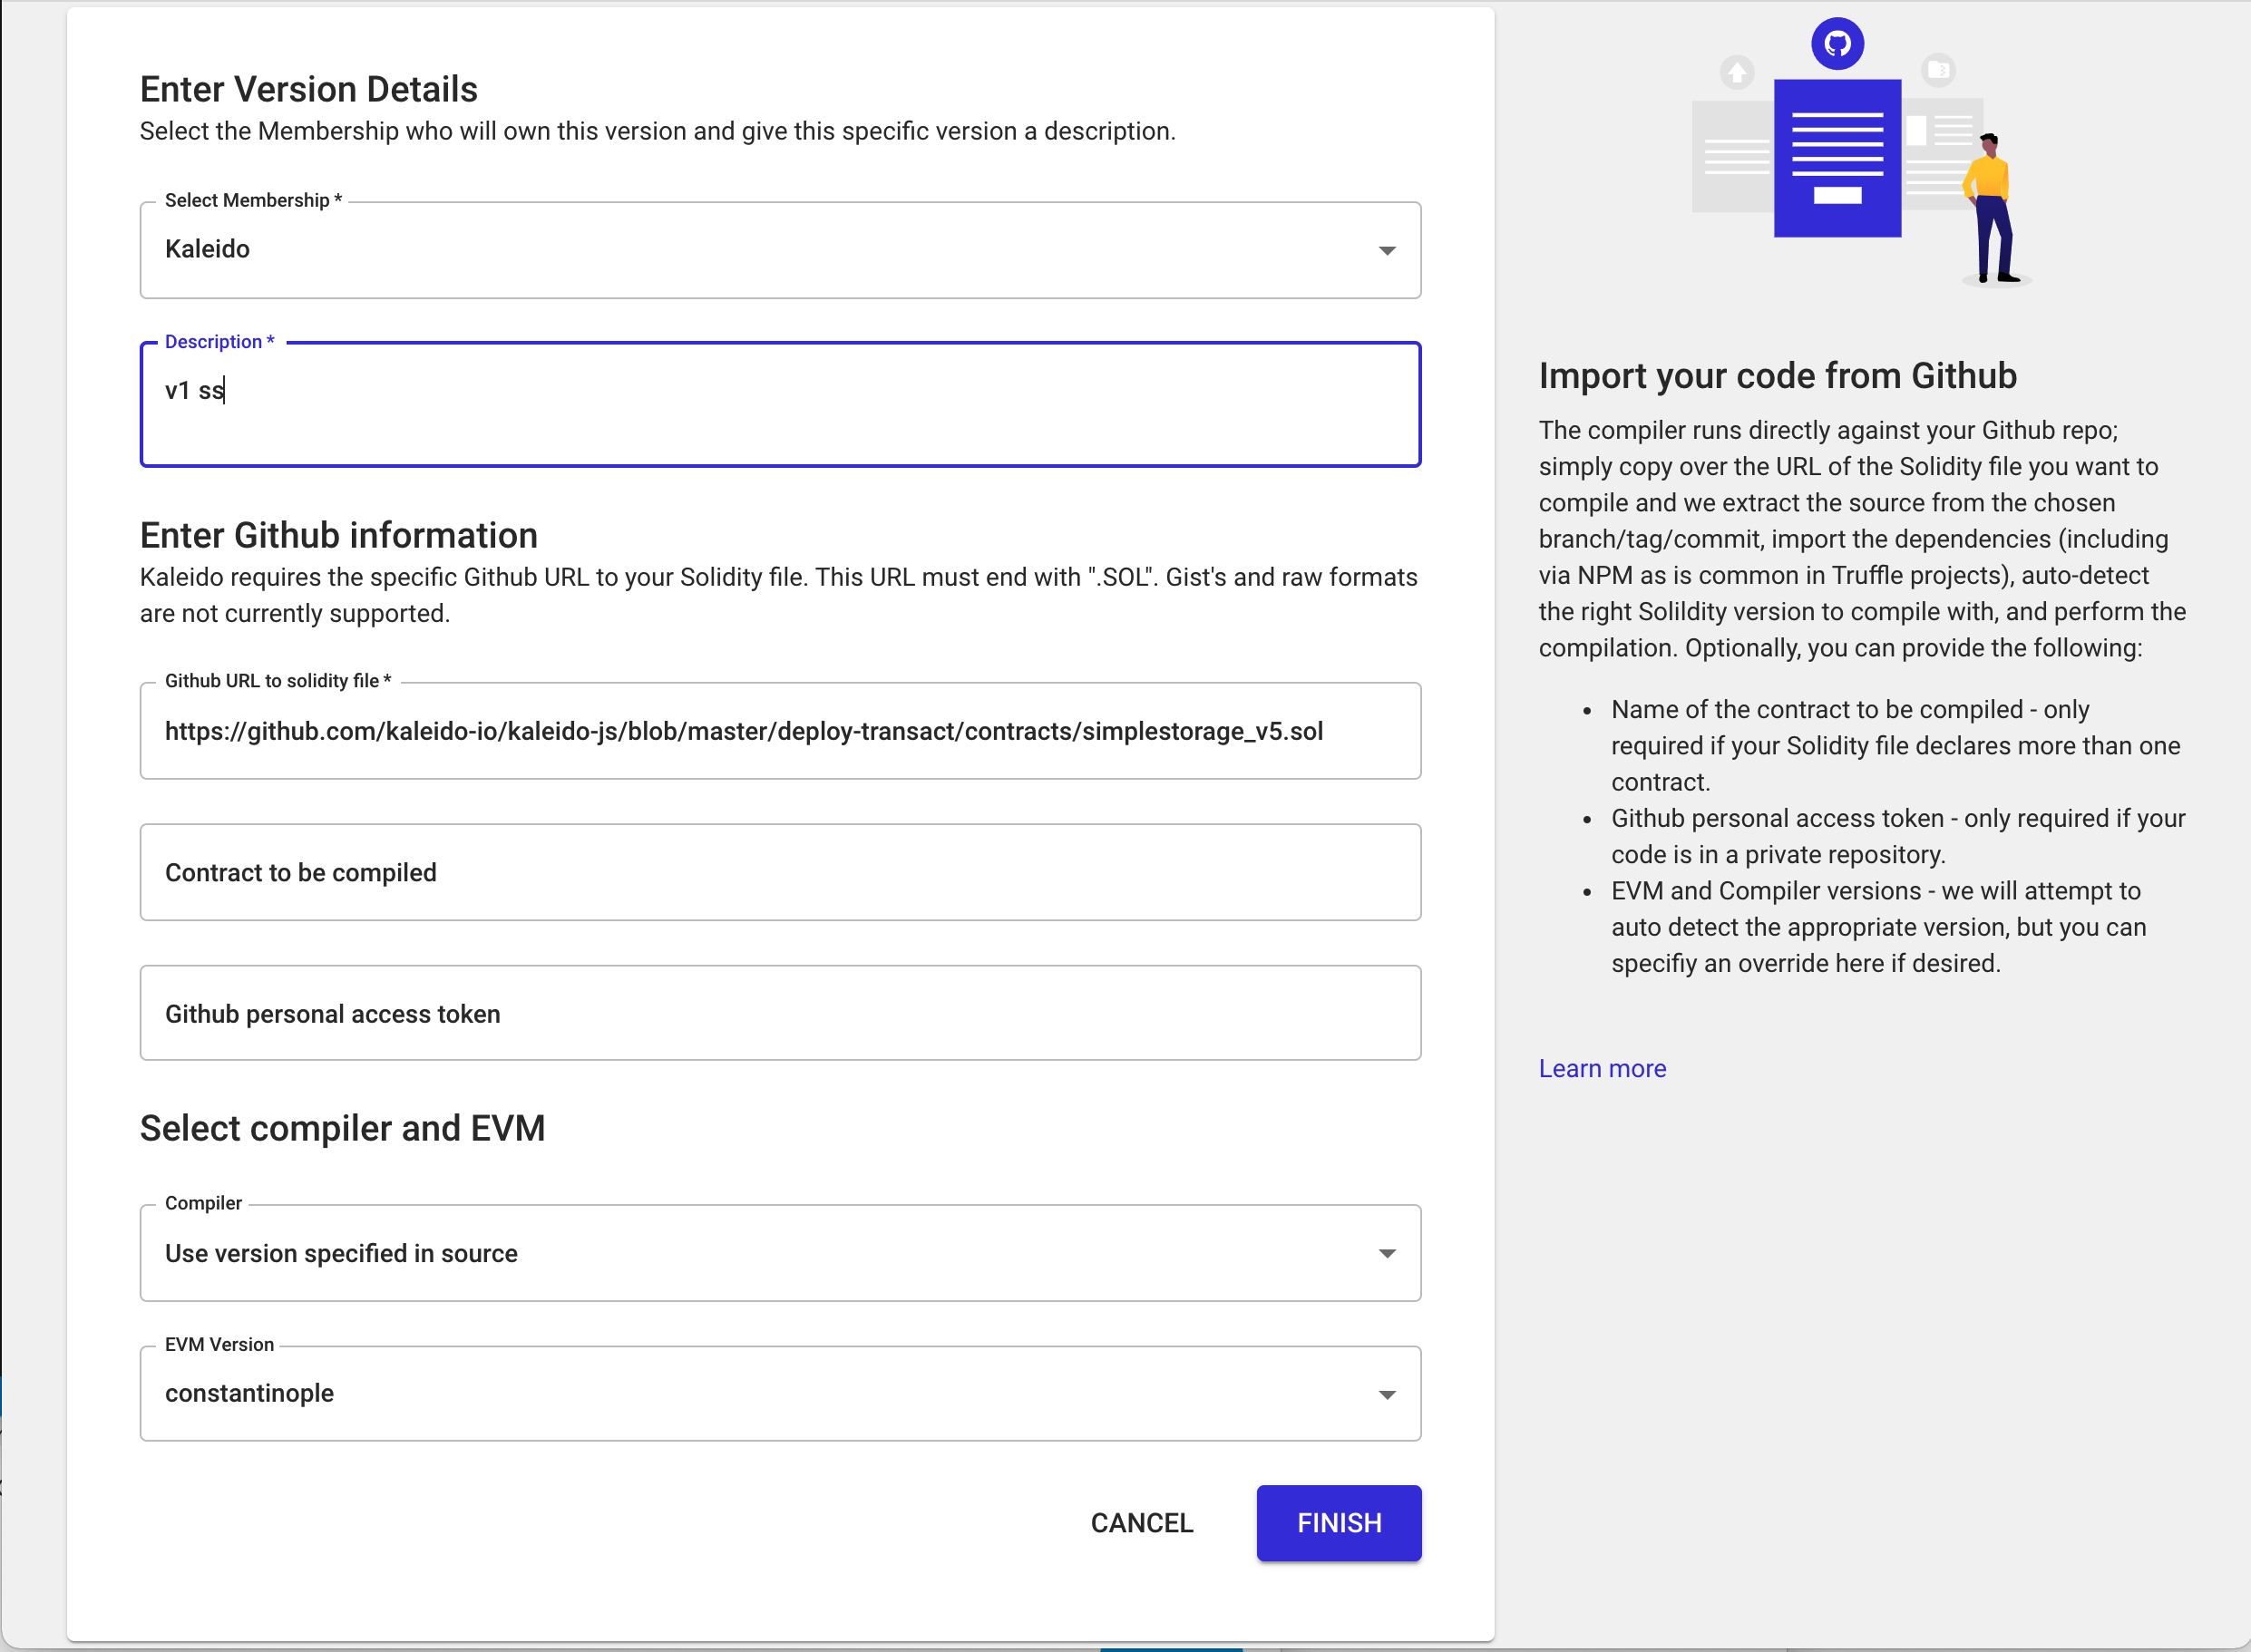
Now we need to populate the required fields to generate our first compilation. We're going to use Kaleido's publicly available SimpleStorage smart contract for this example. It's a simple piece of source code, with a single uint global variable - storedData - and two methods - set and get. We only need to supply arguments for the version of our compilation and the URL to the source code. Feel free to copy and paste the two strings below.
- Description/Version:
v1 ss - Github URL to solidty:
https://github.com/kaleido-io/kaleido-js/blob/master/deploy-transact/contracts/simplestorage_v5.sol
There is only a single smart contract within this solidity file, so we can forgo the Contract to be compiled field. And this is a public Github repository, so we don't need an access token. Let Kaleido autodetect the compiler in the source and leave the EVM engine as Constantinople.
- Click FINISH to generate the compilation of SimpleStorage.
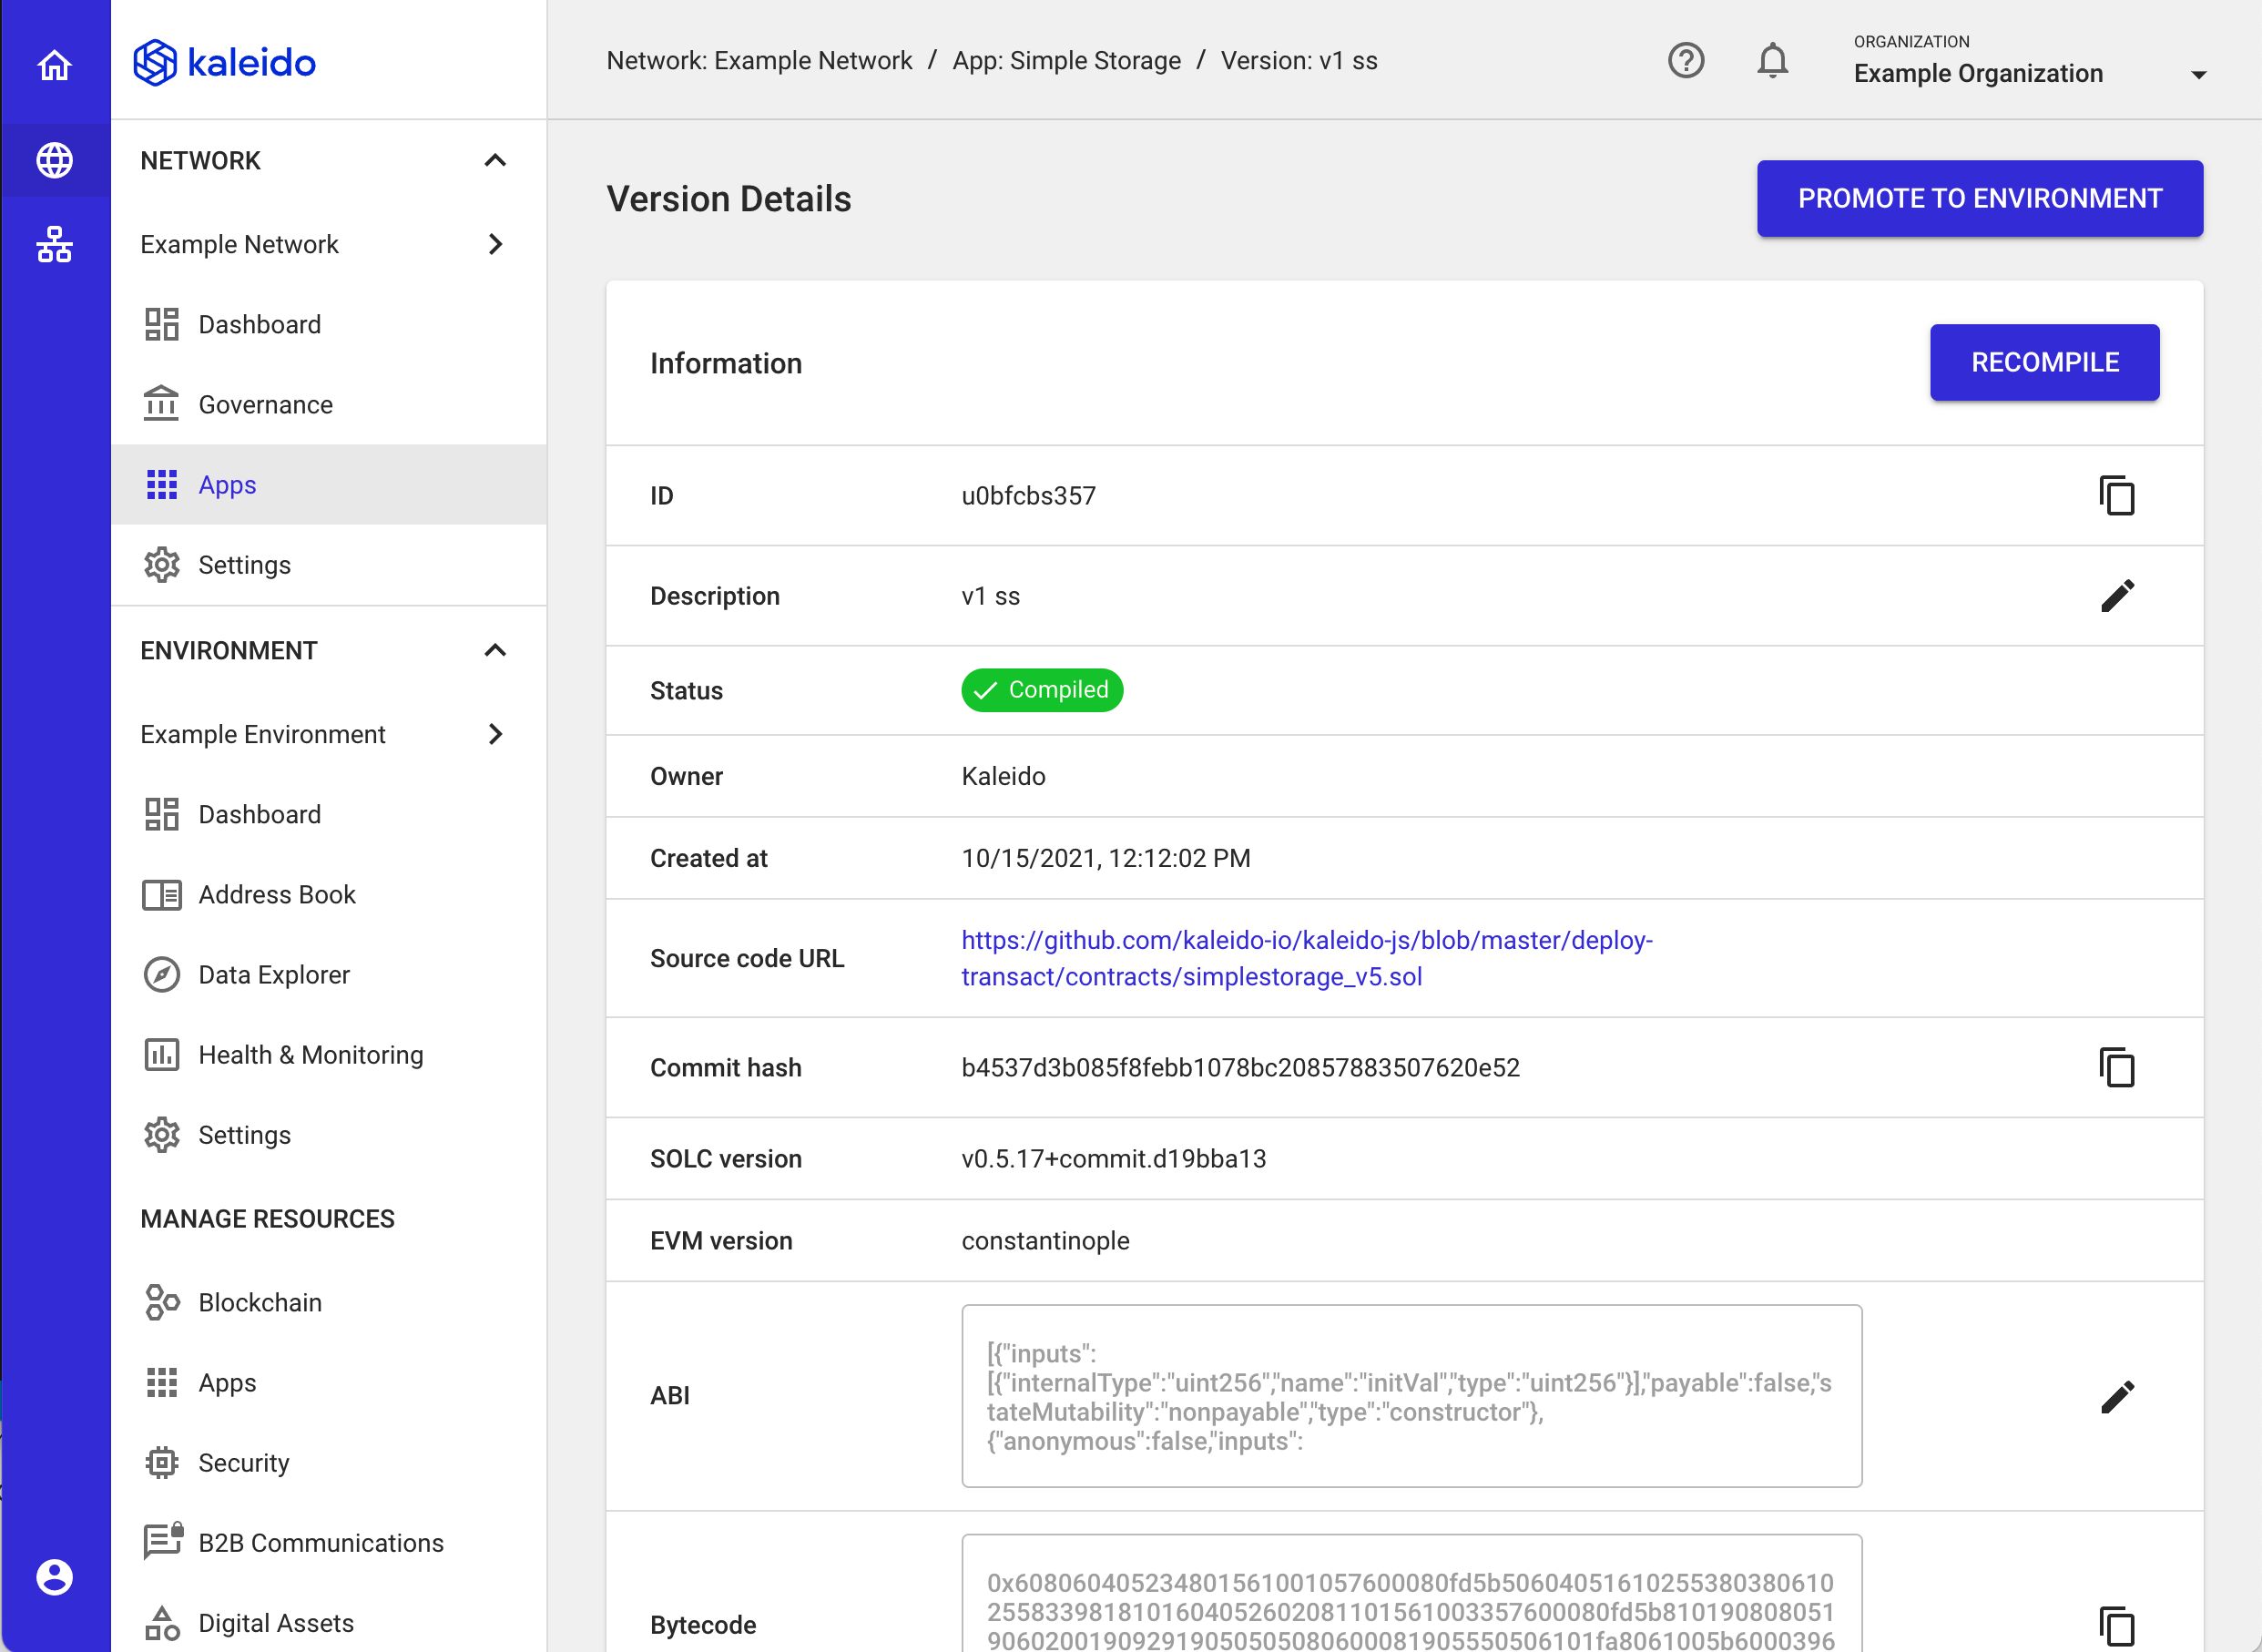
The process should take roughly 5-10 seconds to complete. After which, you're left with a screen displaying the compilation details: the bytecode, the binary interface, the embedded developer docs, the URL of our source, and even the git commit hash! Every on-chain contract that leverages this compilation will be mapped directly back to this source of truth.
Promote the Compilation to an Environment
Now is the fun part. We will take this compilation and turn it into a set of Open APIs for easy deployment and even easier reads and writes against our Polygon blockchain.
- In the top right portion of your screen, click the up arrow to promote this compilation to your existing environment.
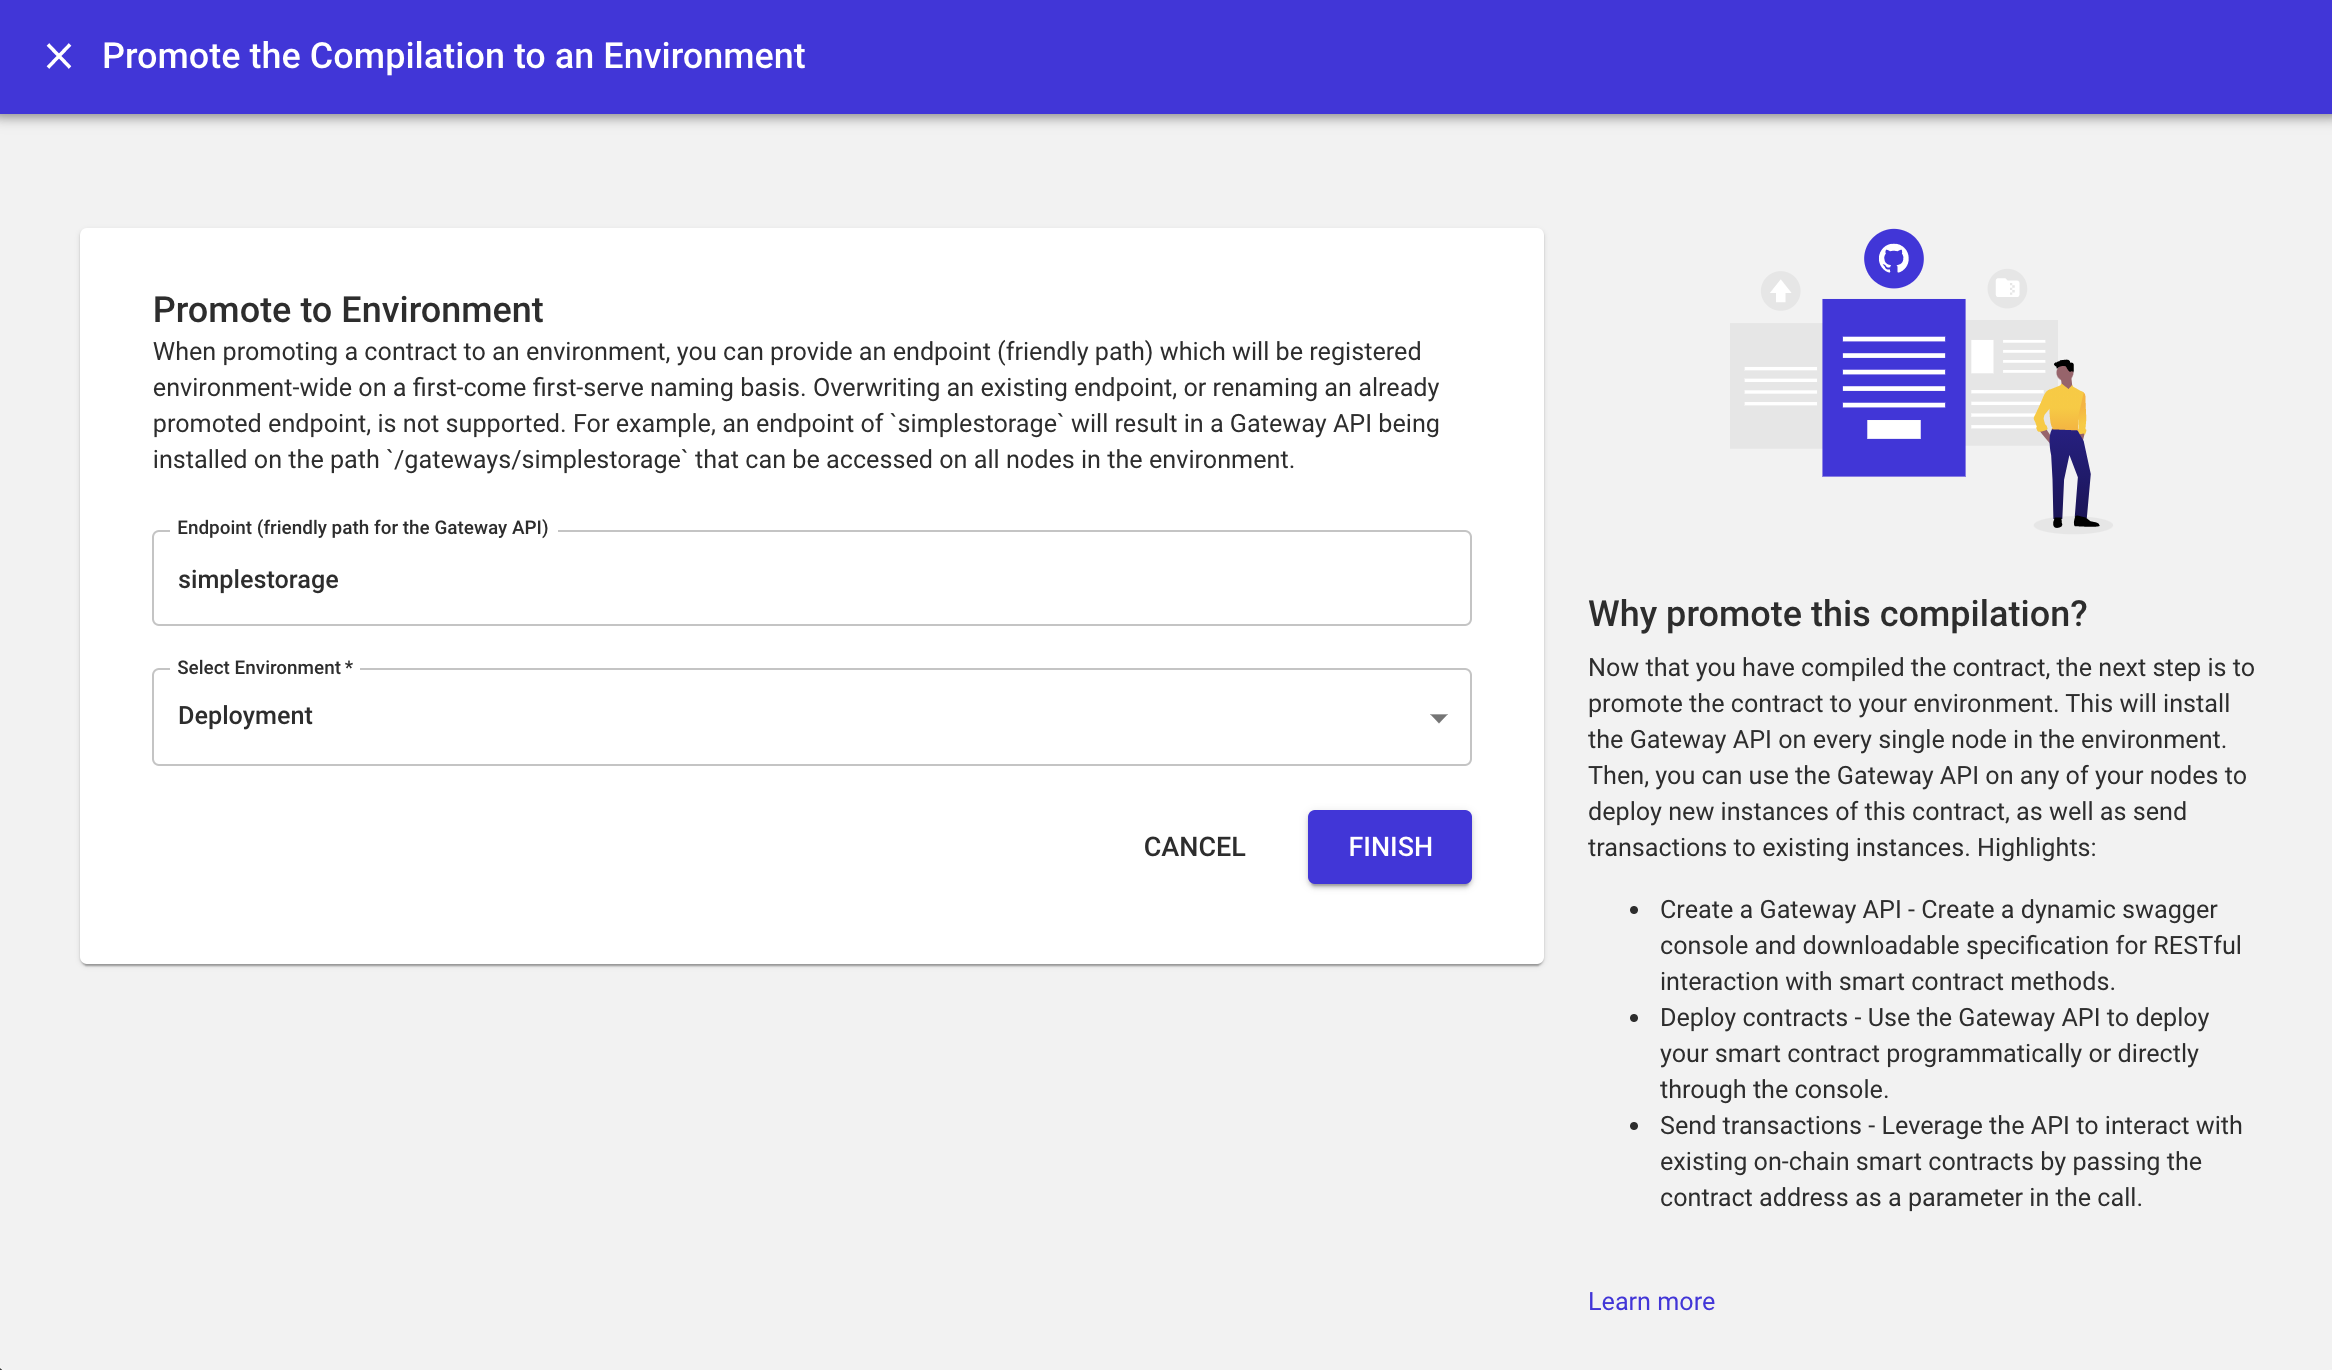
- Promoting a compilation results in the generation of Open APIs for the smart contract methods. We refer to this as an API Gateway in Kaleido. Think of a compilation as having a one-to-one mapping with a Gateway API.
- Provide a name for the Gateway API, for example,
simplestorage. - Click FINISH to generate and promote the API to your environment.
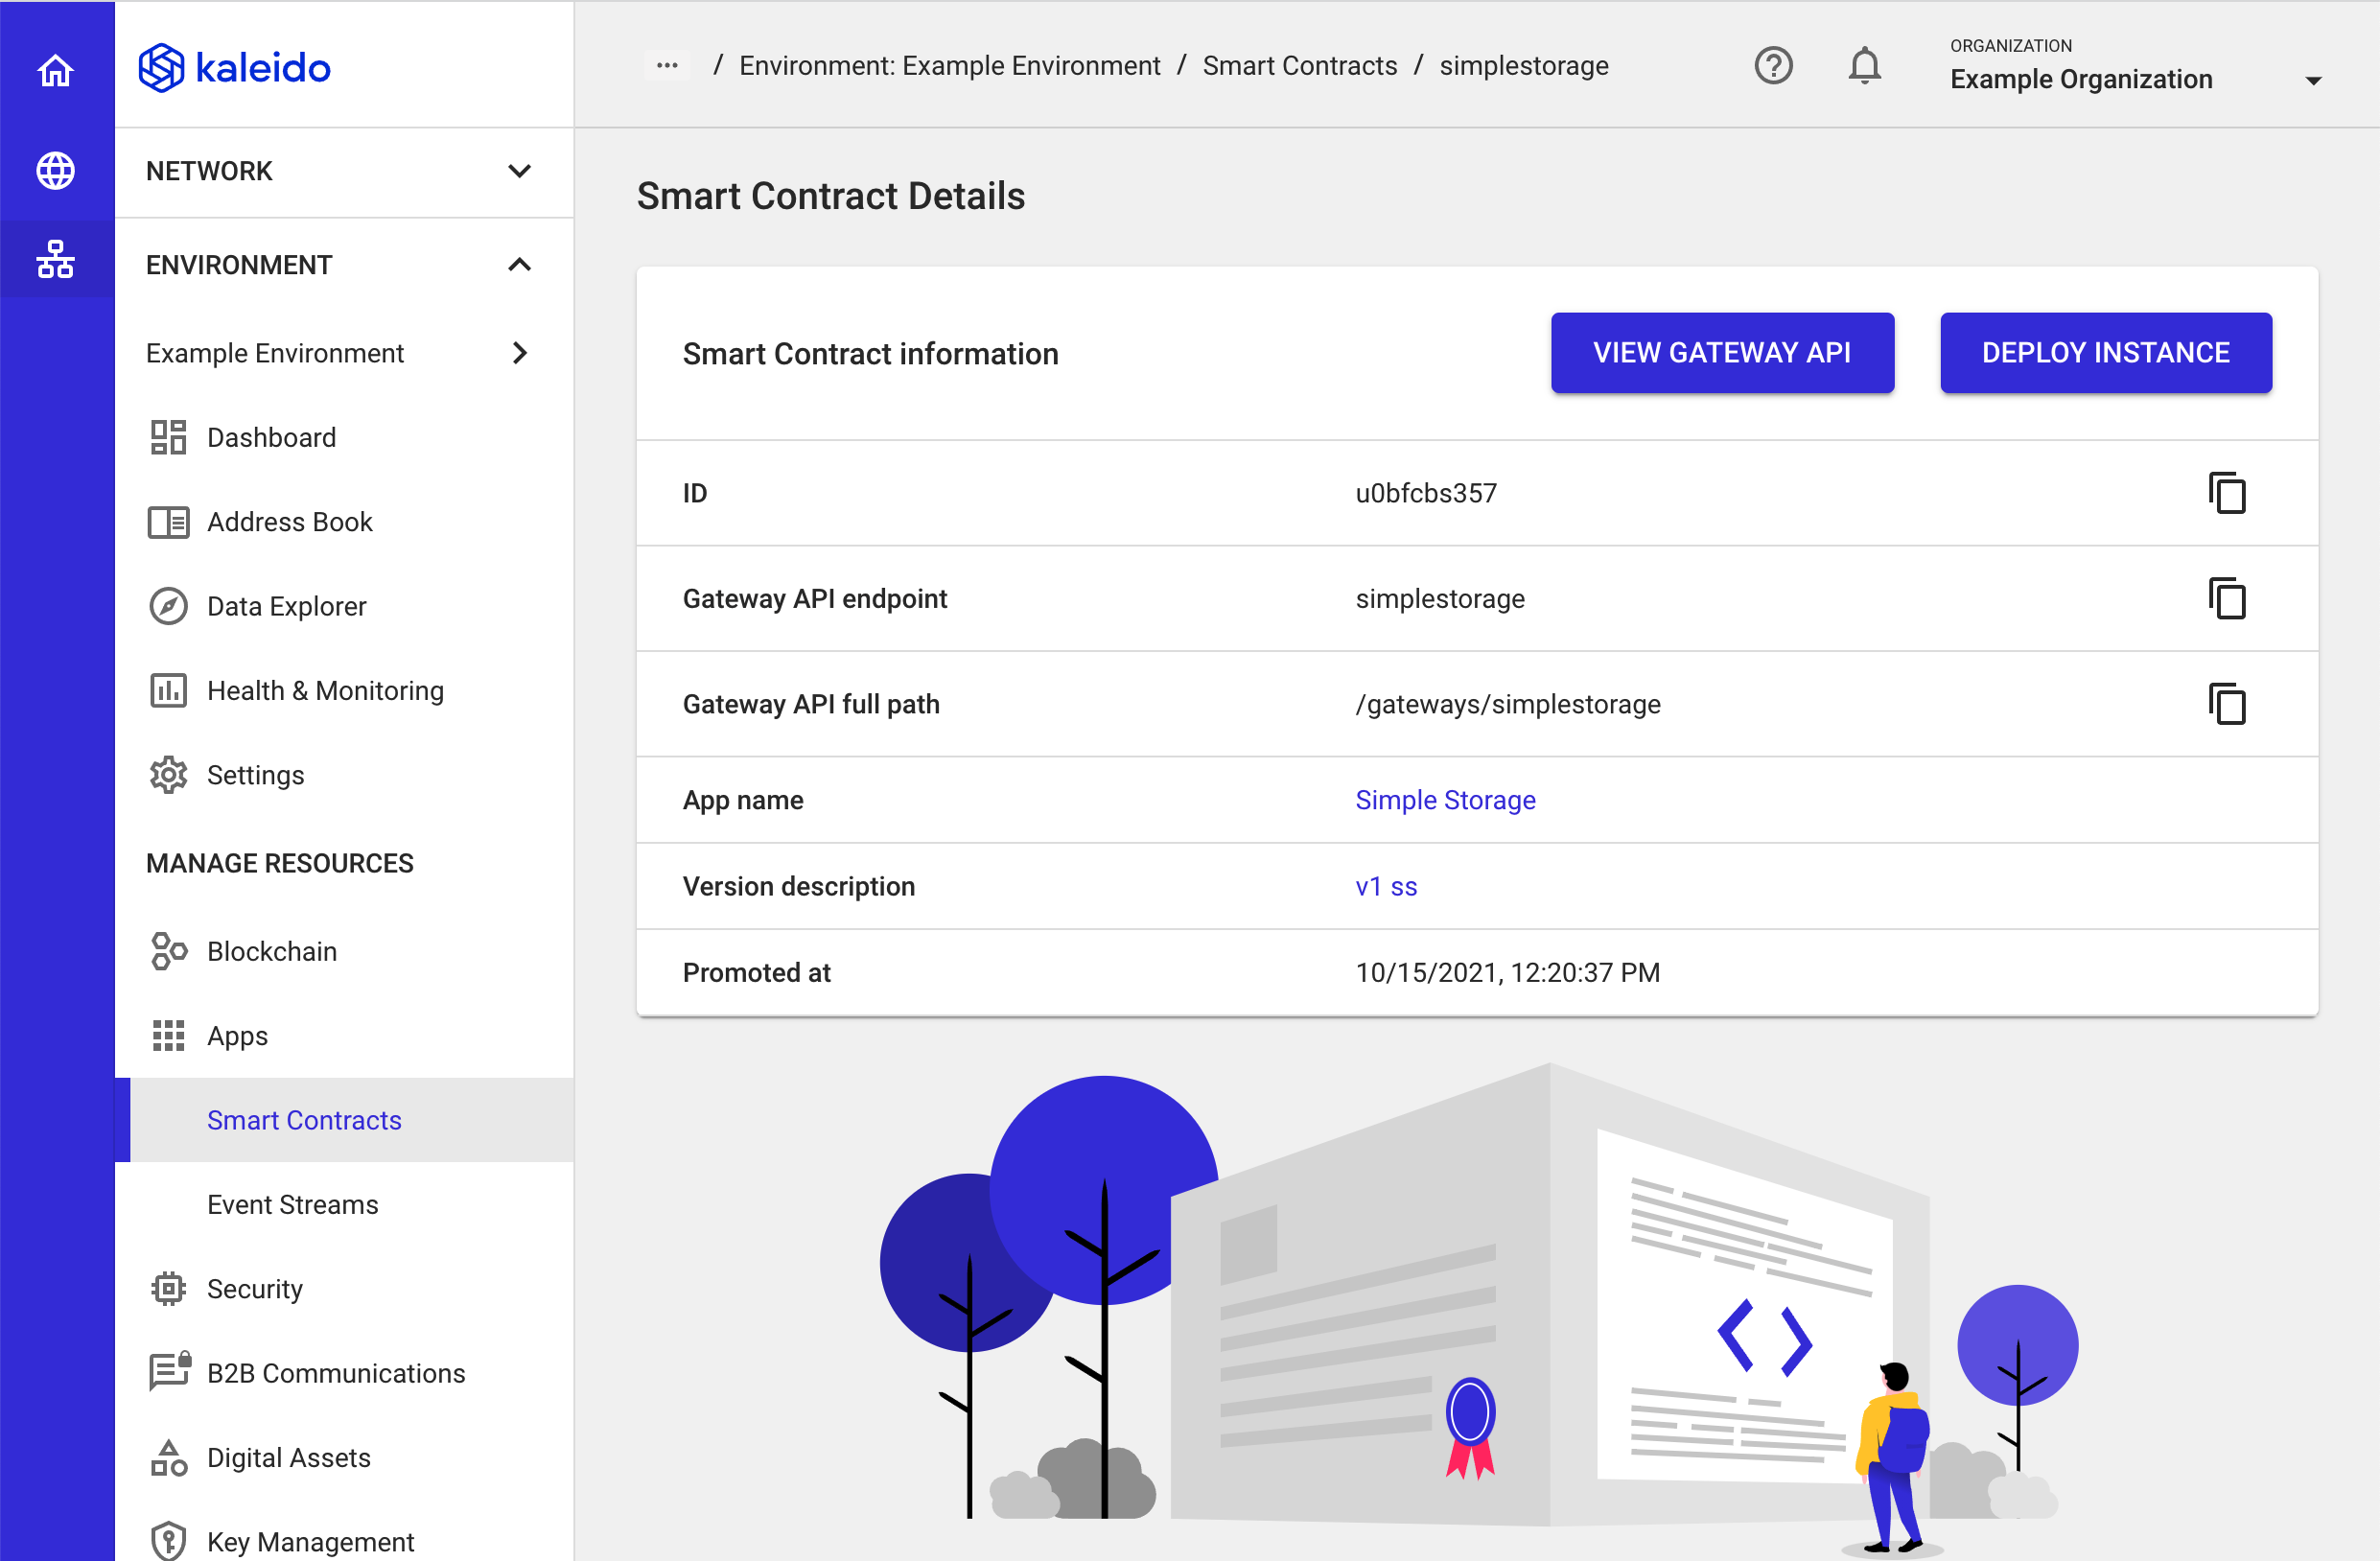
- Now, you're brought into the Gateway APIs view within your environment. And specifically within the
simplestorageGateway API. - Our next task is to turn these APIs into an actual on-chain smart contract deployment. As of now, all we've done is generate a compilation and a subsequent Gateway API for the compilation.
- Click the Deploy Instance button to turn your Gateway API into a proper smart contract instantiation.
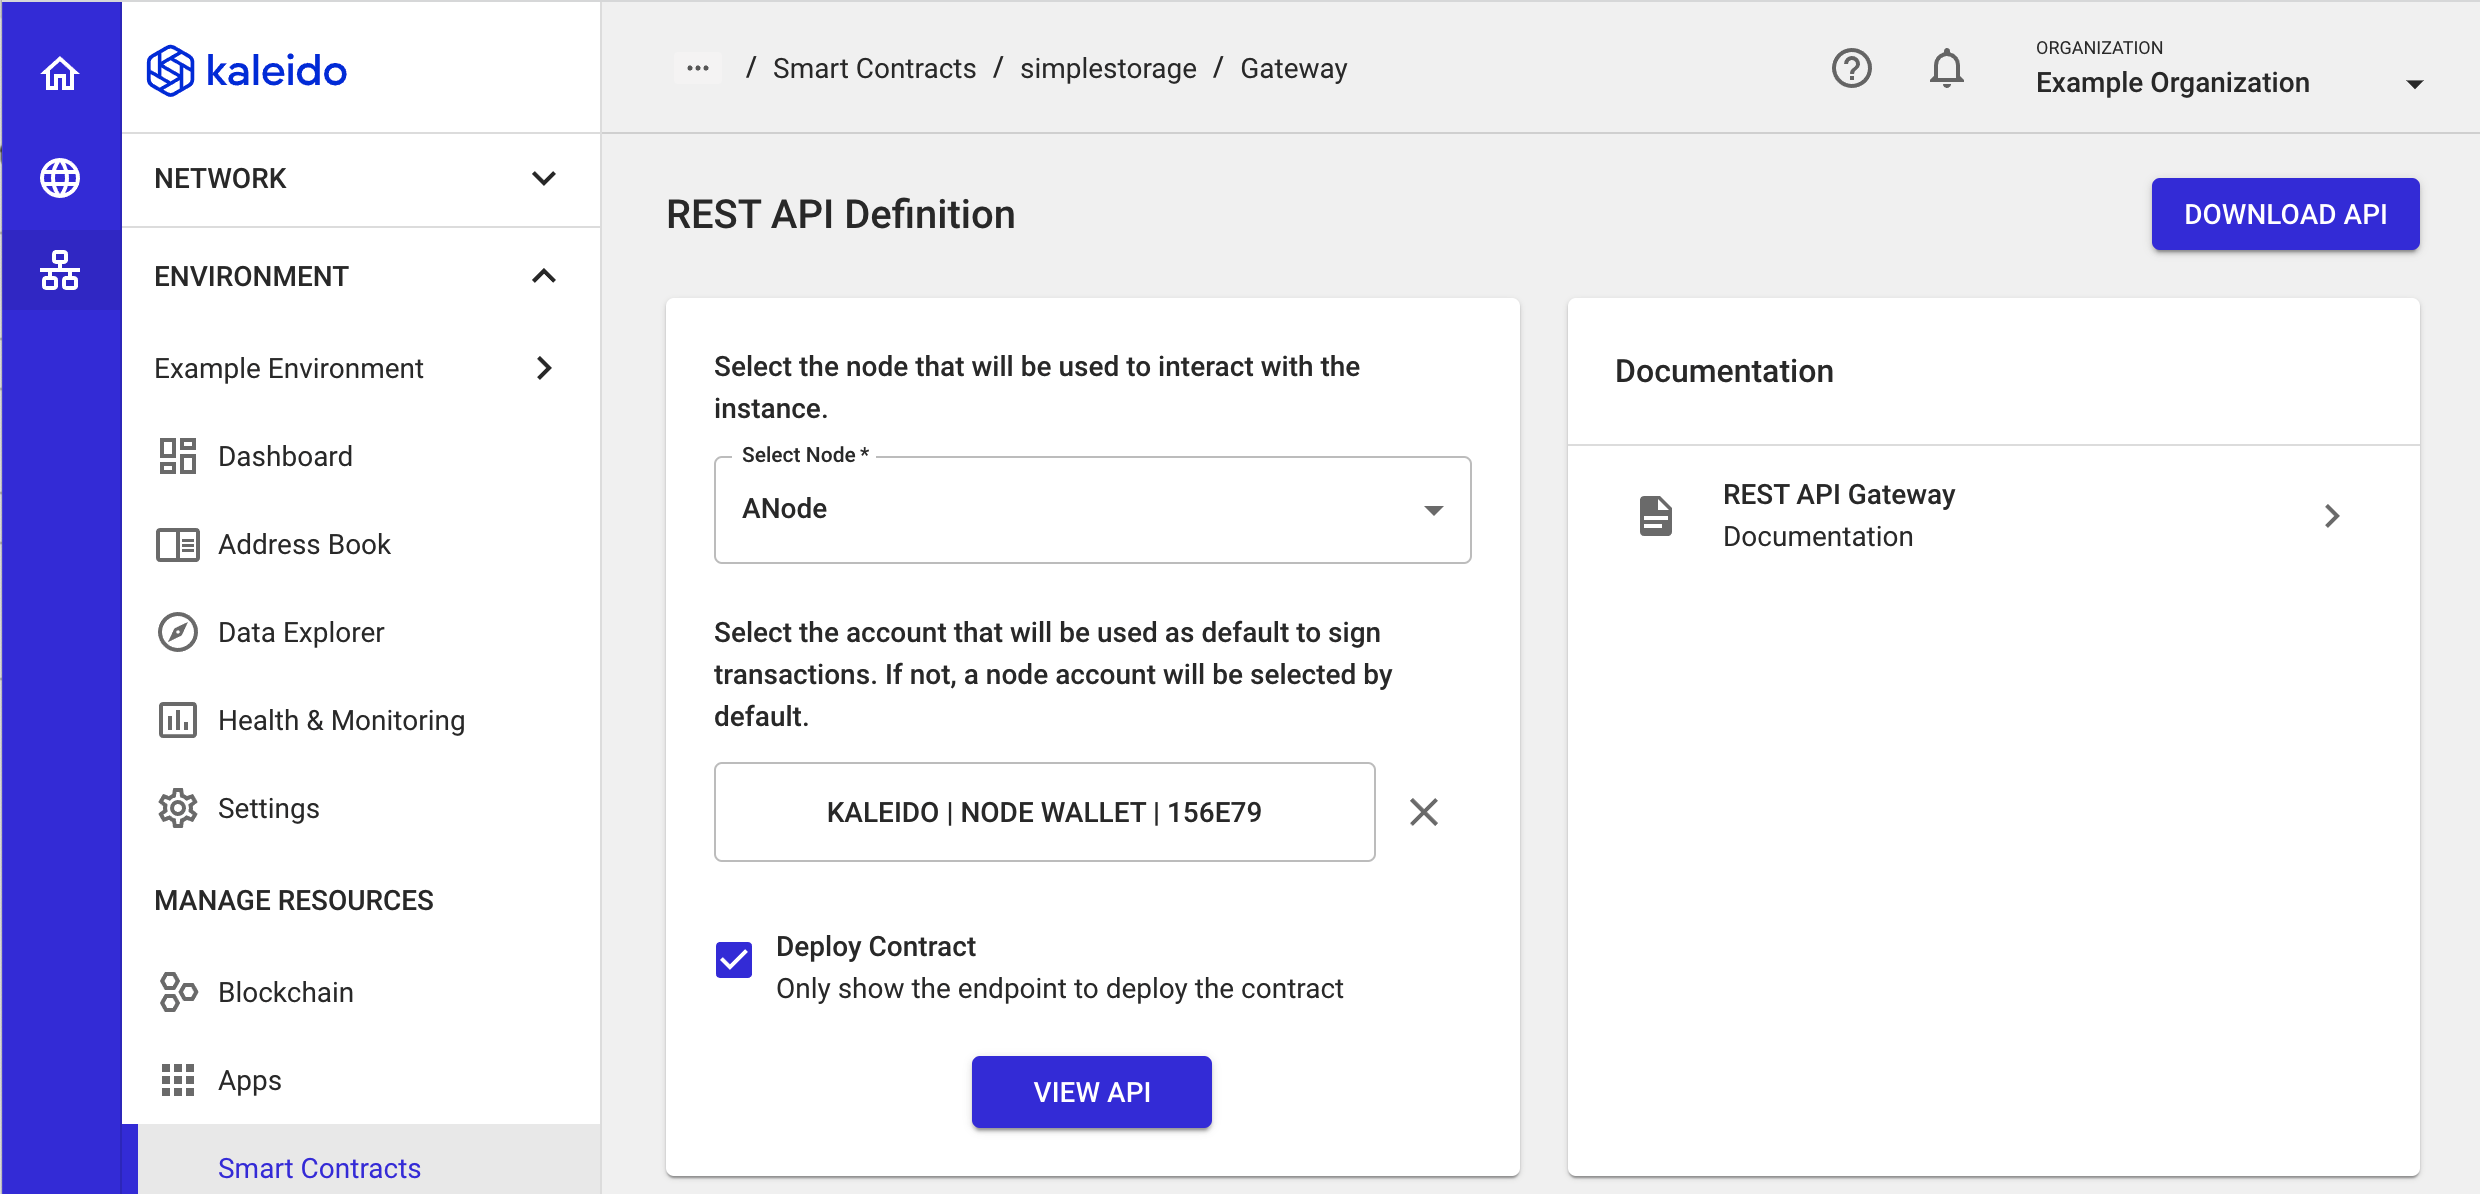
- This will open a new modal where you will first be tasked with selecting the node that will receive the deployment transaction. Select one of your nodes from the dropdown menu.
- Next, choose an account to sign the transaction. By default, Kaleido will detect and enumerate the node's first Polygon account (generated upon node creation) as the signing address for the transaction. If you have additional accounts in your Kaleido node wallet or in another Kaleido managed wallet service, you can use the signing account dropdown to select the relevant address.
- Next, click the View API button
- You'll now see an interactive dropdown with a Swagger interface.
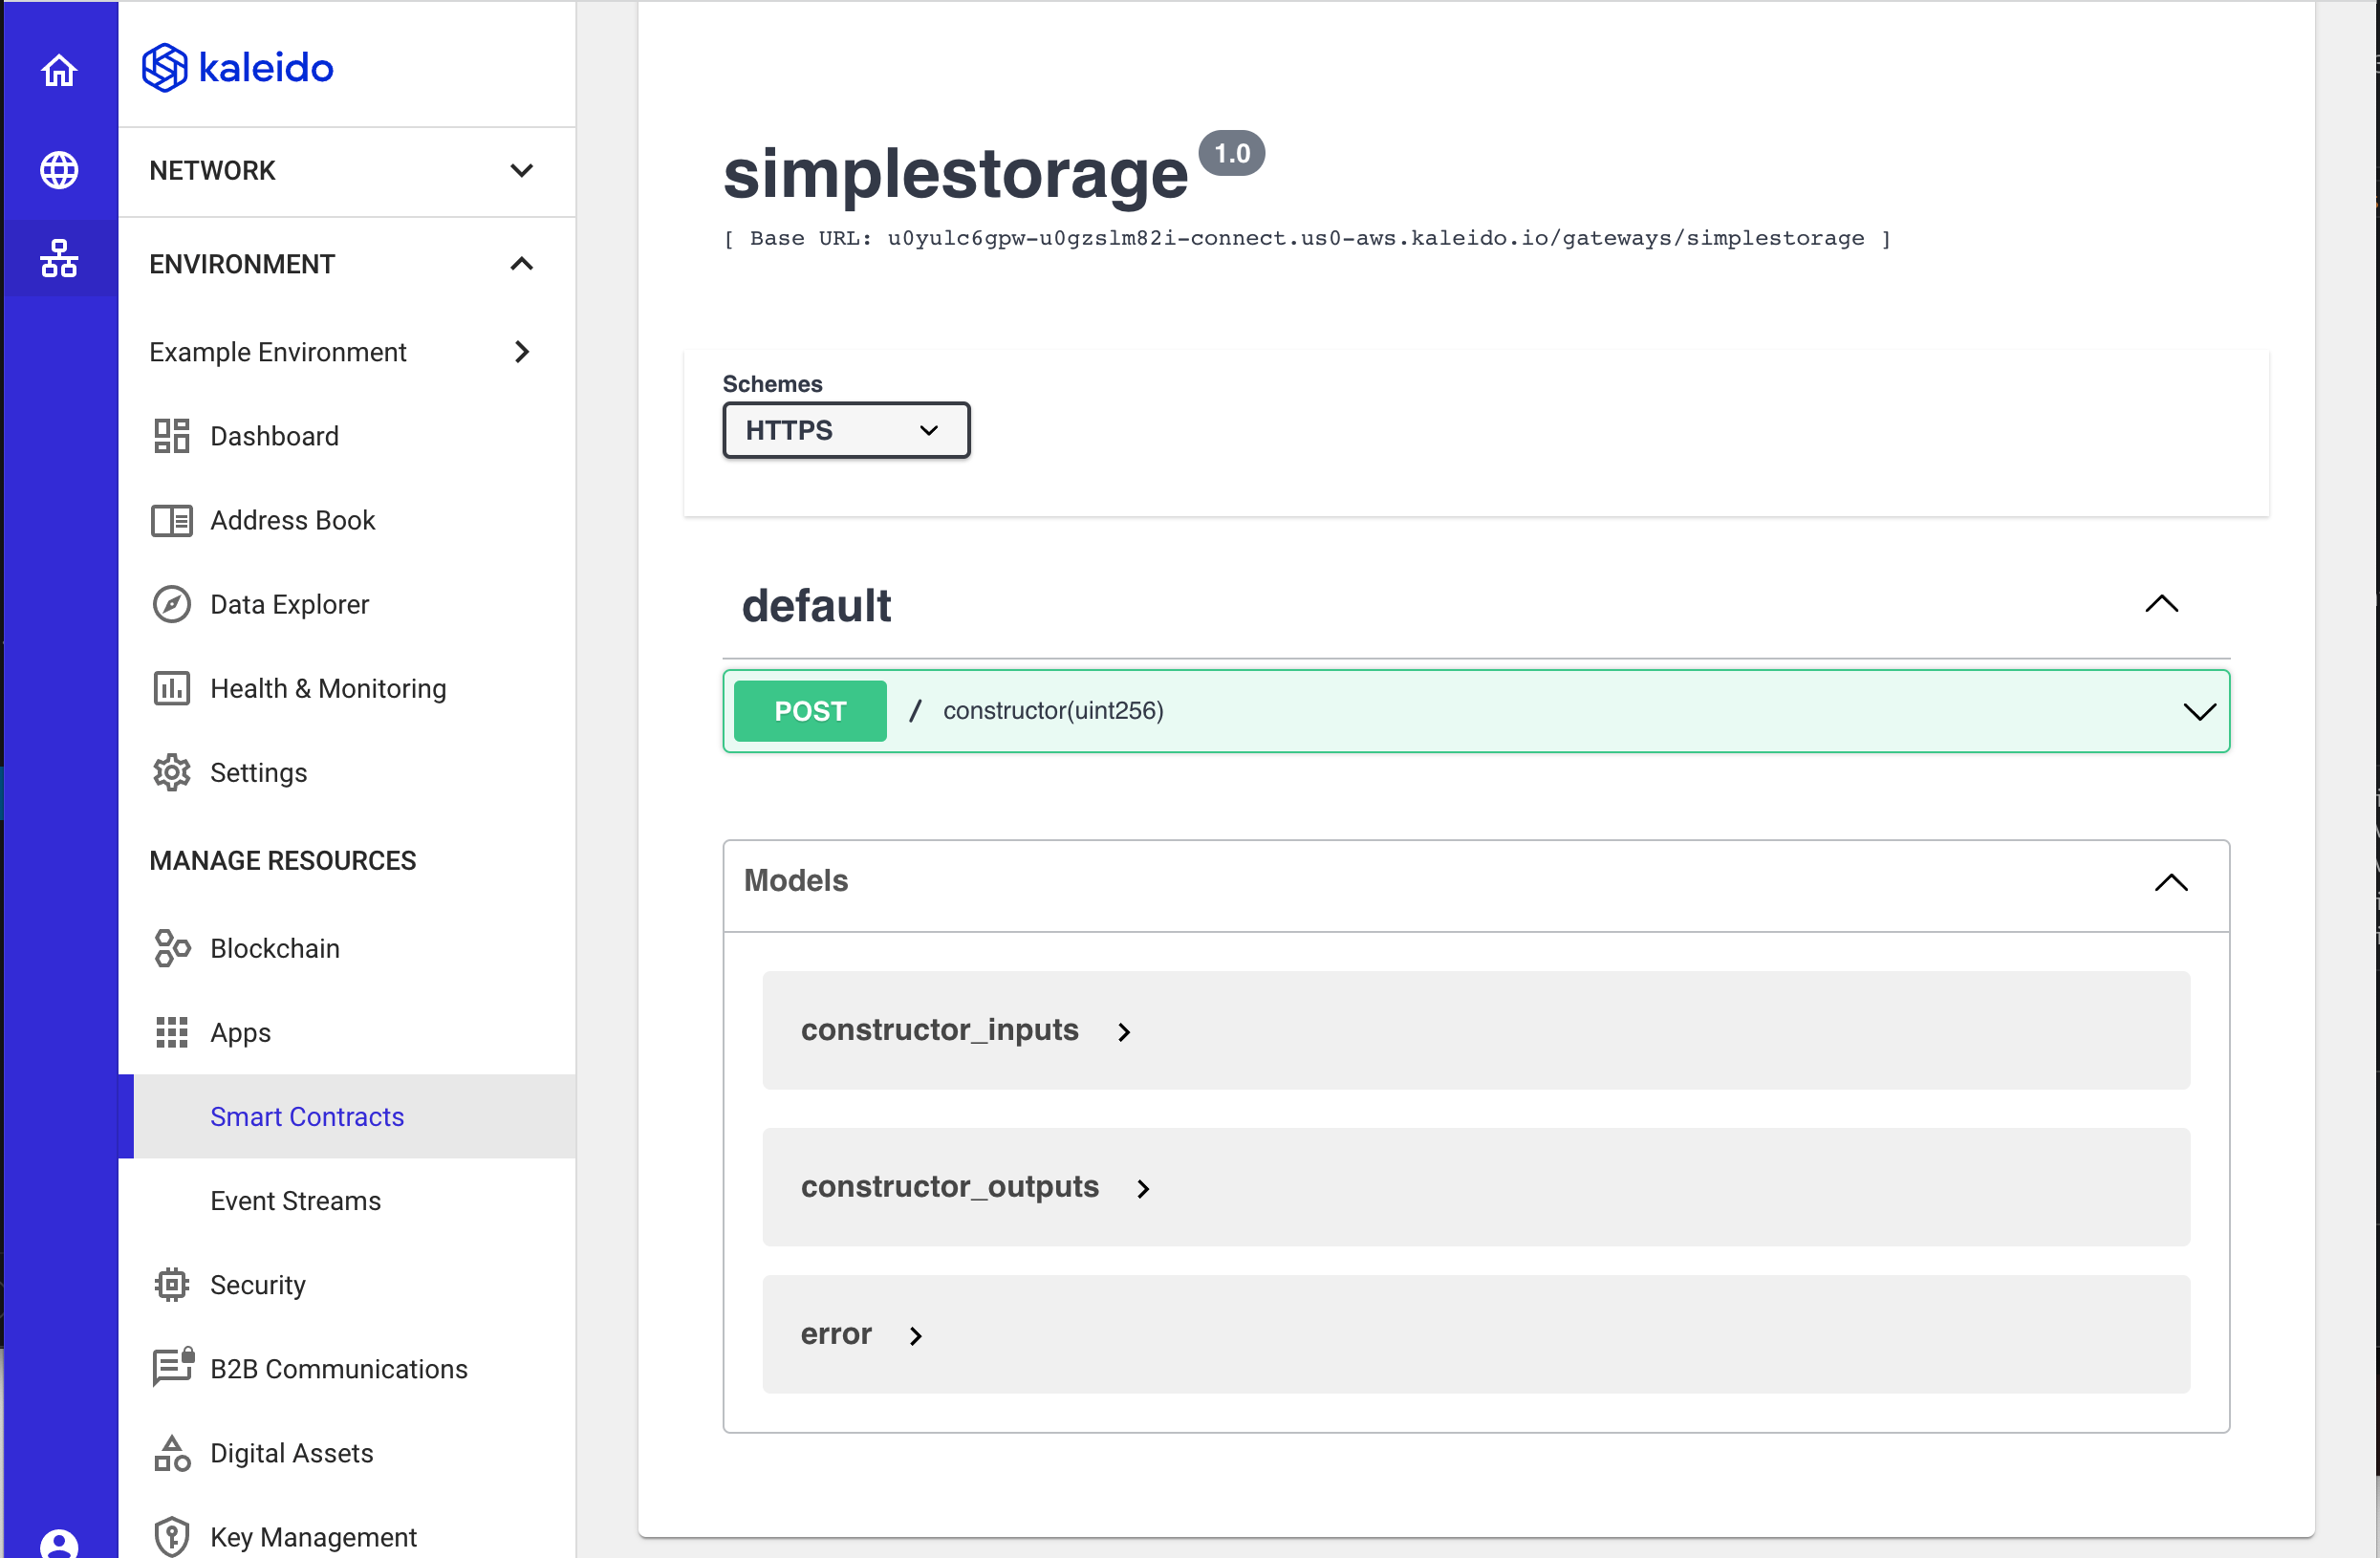
- This Swagger interface will only contain a single REST method, a root
POSTmethod that allows you to instantiate the Gateway API and turn it into an on-chain smart contract instance. - Expand the root
POSTmethod to see the available Kaleido submission parameters. - This transaction paradigm leverages the Kaleido REST API Gateway for simplified interaction with your Ethereum blockchain, and it also exposes several parameters for further customization of your smart contracts and transaction submission approaches. The REST API Gateway's nuances are out of scope for this quick start, but we'll take a look at a handful of essential parameters.
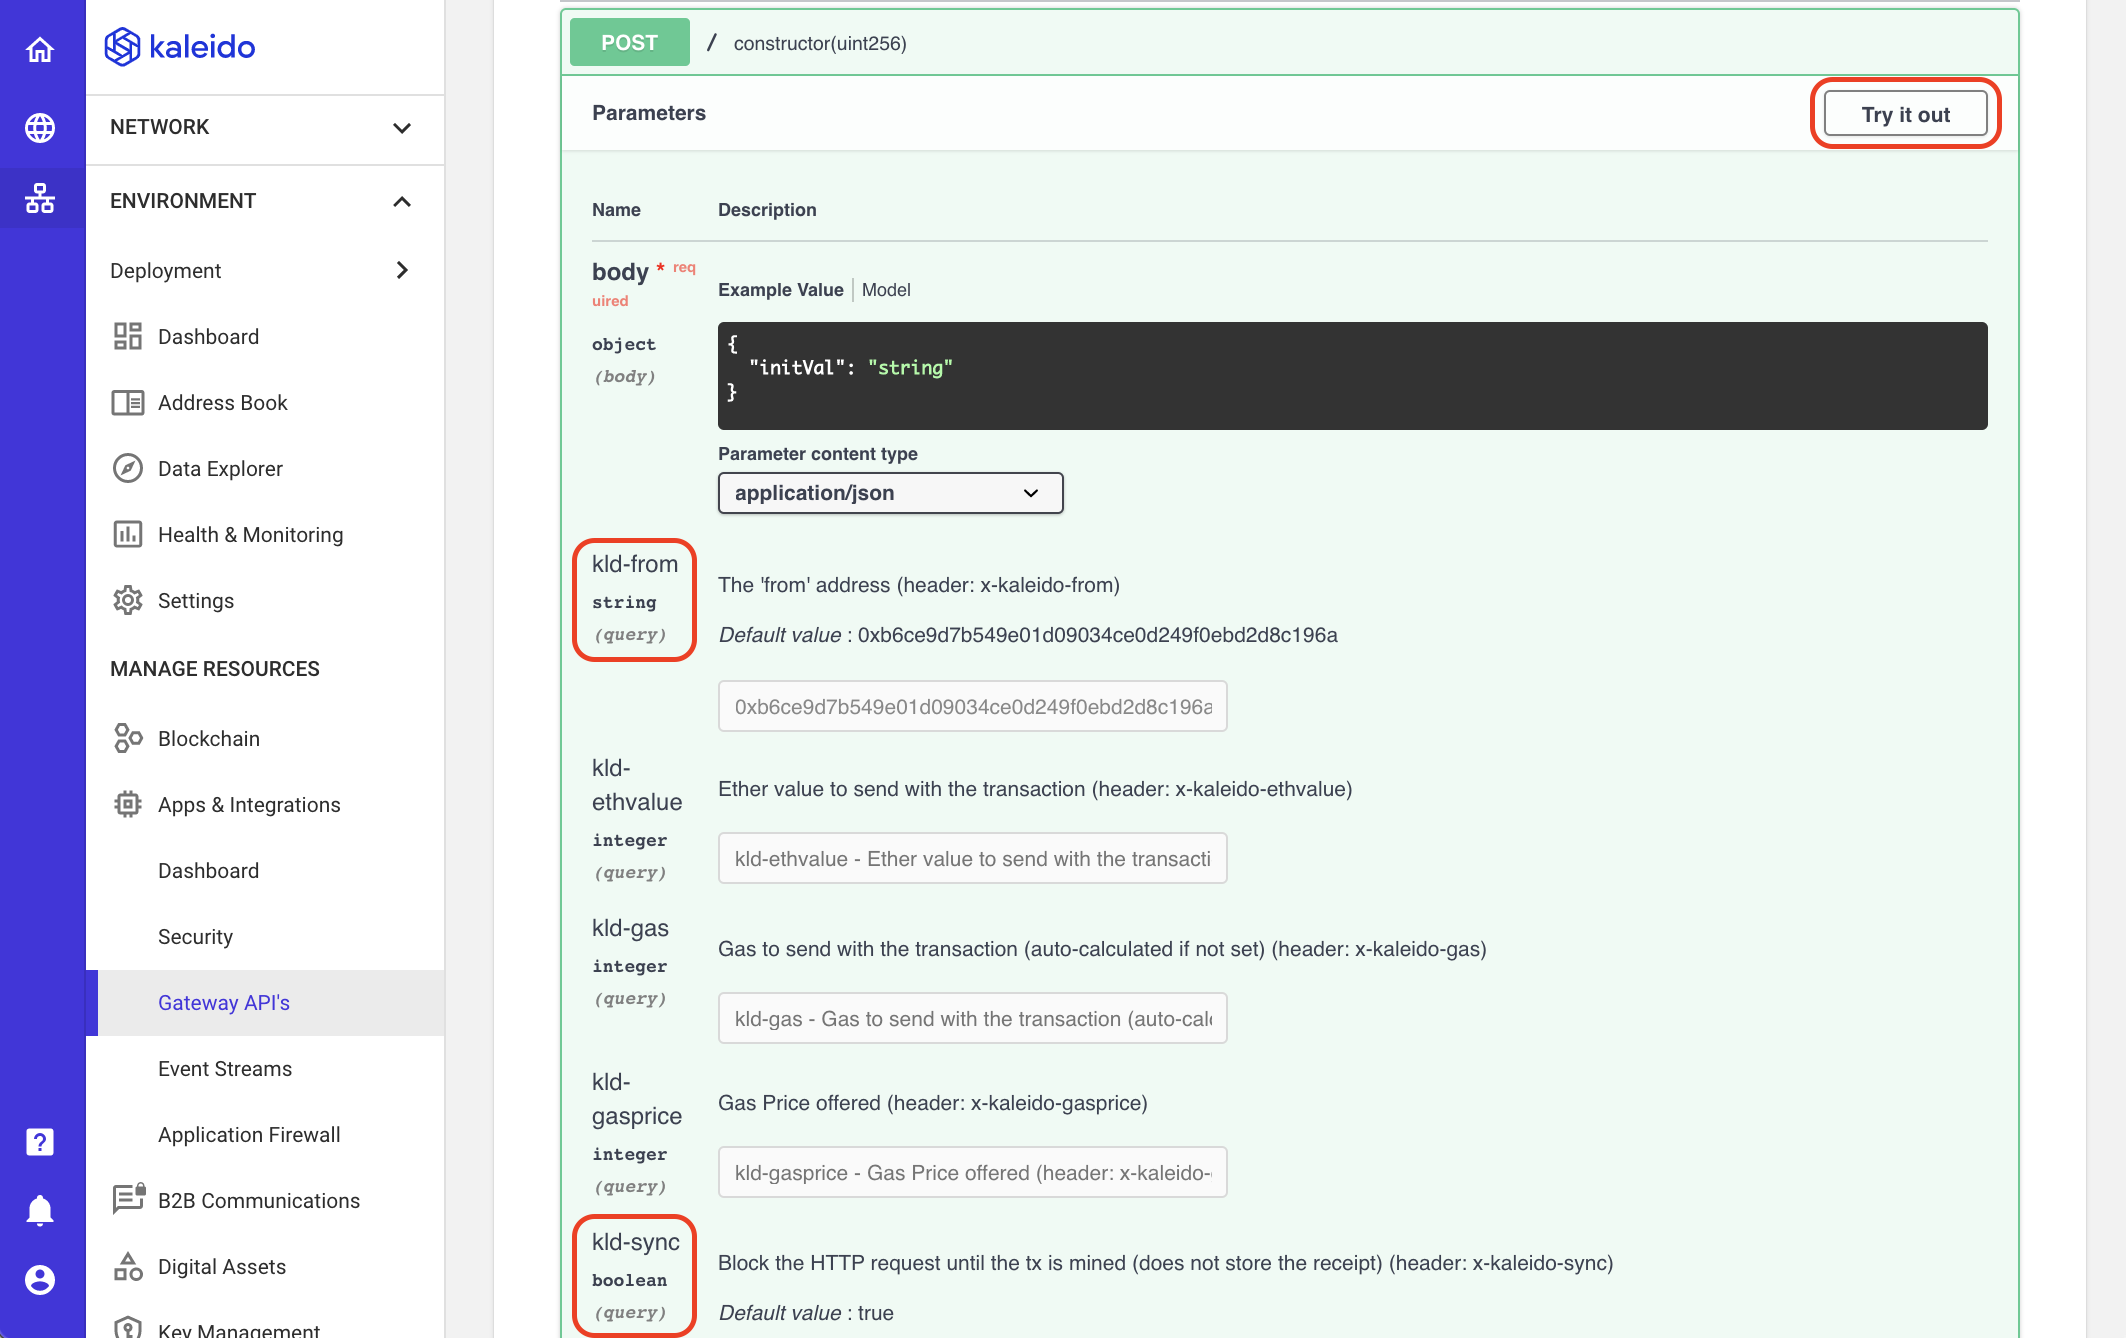
kld-from- The Ethereum address that is going to sign the transaction. By default, you receive the existing Ethereum account on the node through which you're viewing this API instance. Any key held in a Kaleido managed wallet (e.g., HD Wallet) or integrated utility (e.g., Cloud HSM) can be passed to this field.kld-sync- Synchronous (true) or asynchronous (false) transaction submission. Synchronous requests will wait until the transaction is mined before returning a transaction receipt. Asynchronous requests simply wait for an acknowledgment from the Kafka Requests Topic and return almost immediately.kld-register- Allows for arbitrary names to be applied to smart contract instances instead of hexadecimal address representation. Human-friendly naming techniques can be leveraged for easy identification across the business network. Also useful for easy delineation amongst multiple instances deployed against the same Gateway API.
The Body Data is the input payload for the transaction. In our case, we need to initialize our smart contract with a value because the constructor requires an argument to be passed.
- Click TRY IT OUT to open the Swagger Interface for interaction.
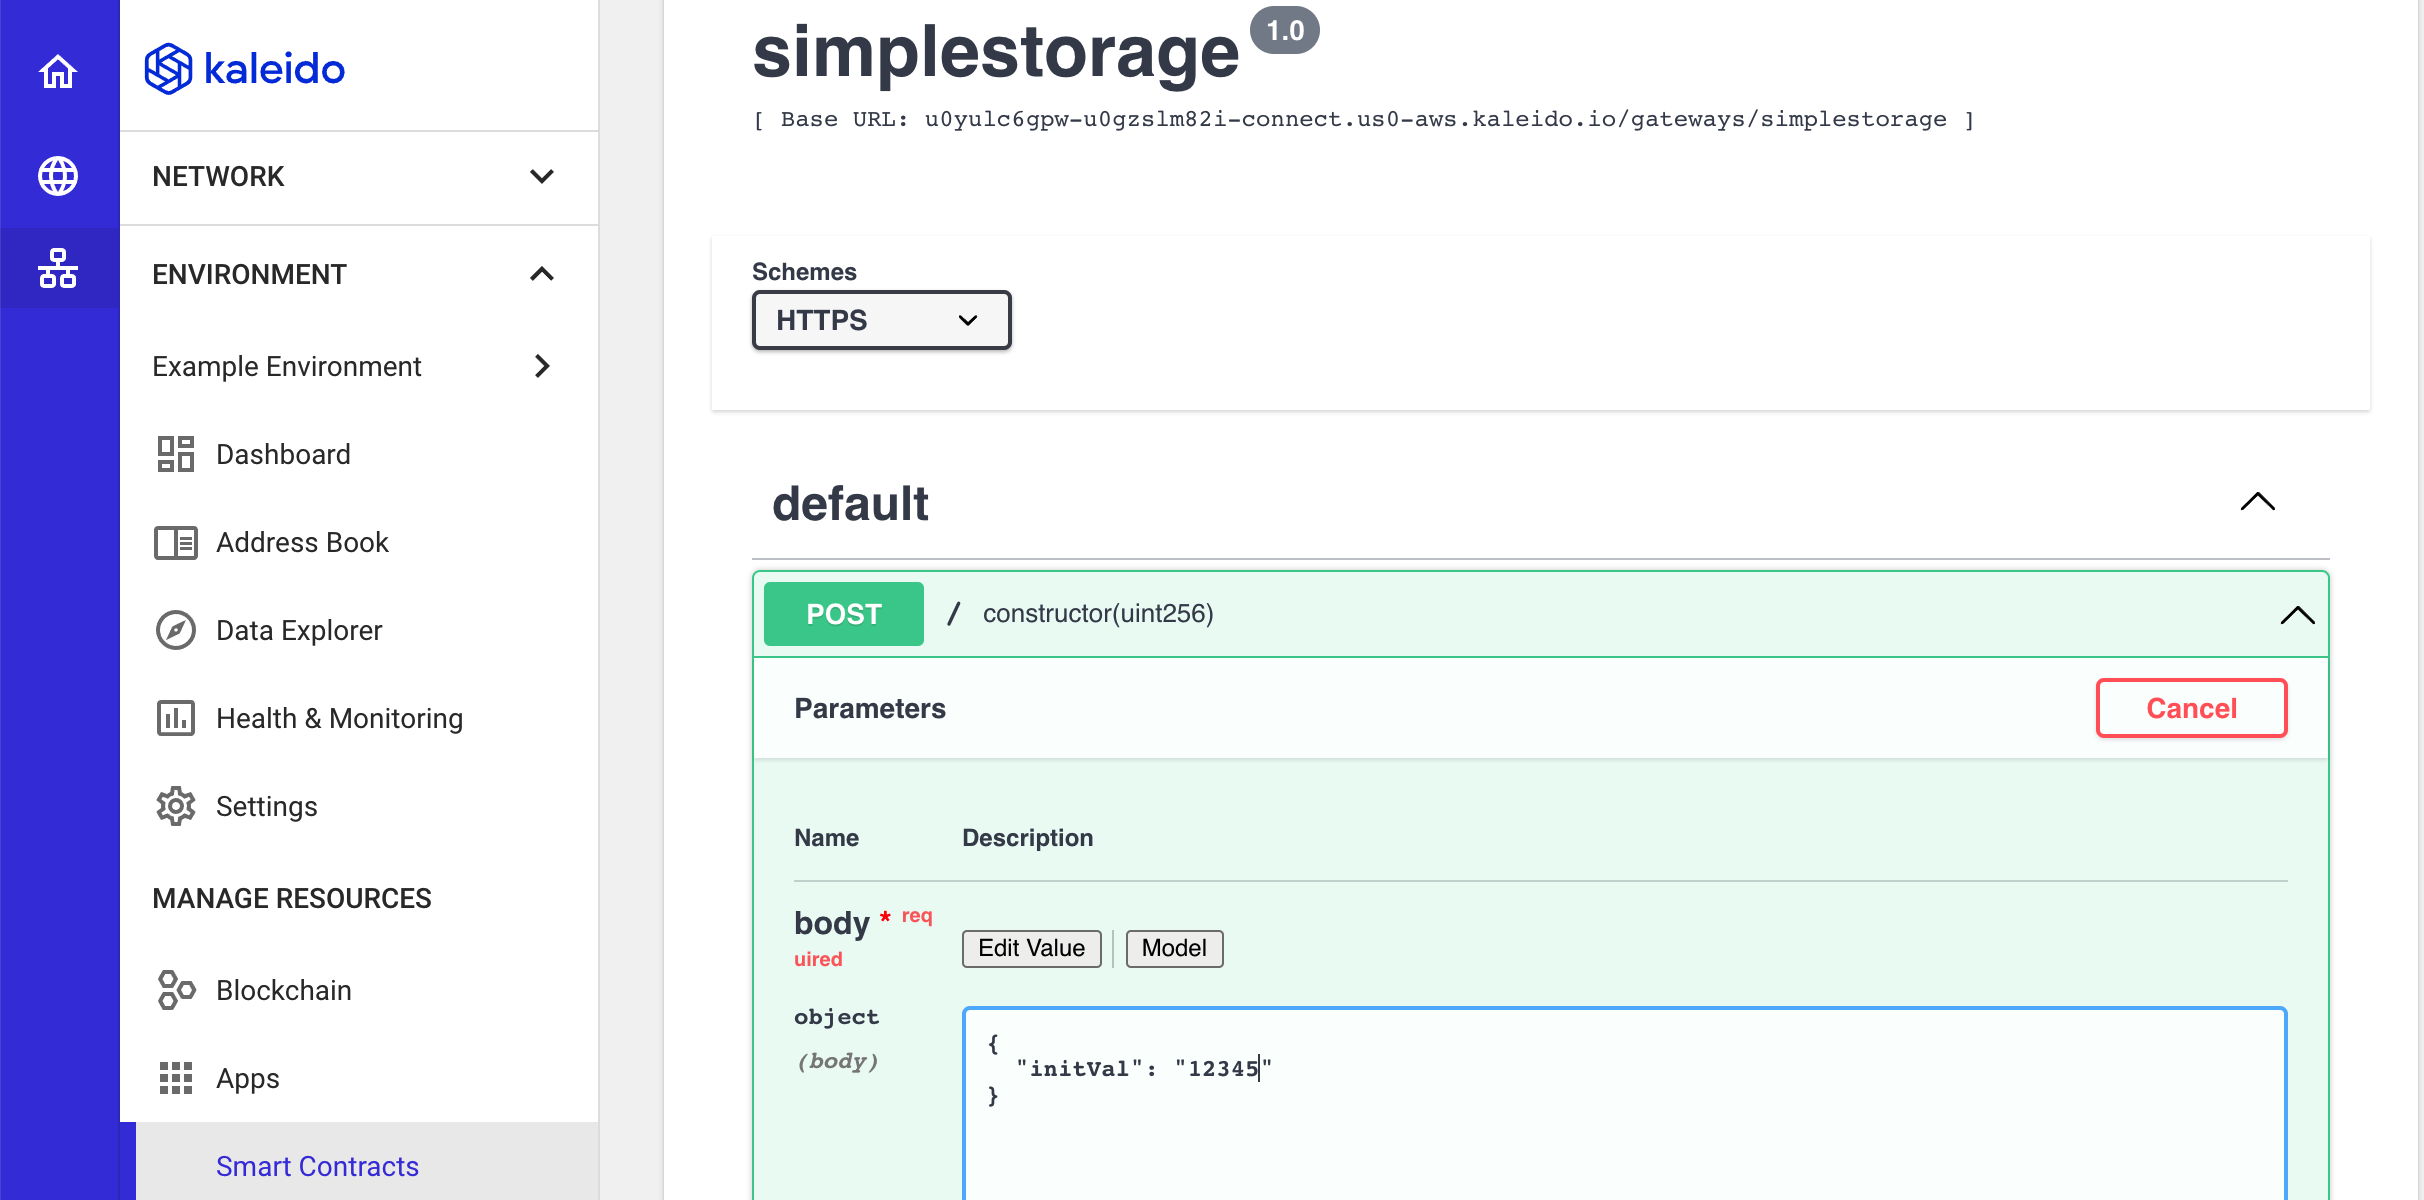
- In the
kld-registerquery parameter add a human-friendly name for your smart contract. For example,ss123 - Overwrite the placeholder syntax in the JSON body, and supply an unsigned integer. For example,
12345 - Scroll to the bottom of the Swagger and click Execute to invoke the root
POSTmethod and deploy the smart contract.
- Look for a 200 status code and a response payload containing the details of your deployment (timestamp, blockhash, transaction hash, gas, etc.)
- Now, close this Swagger Interface to return to the Gateway APIs view within your environment (you can use the breadcrumbs at the top of screen or the lefthand navigation). If the deployment was successful, you will see your smart contract listed beneath the Contract Instances row.
- If you utilized the
kld-registerparameter, then your contract will inherit the ascribed name. If you withheld this field, your contract will have a standard hexadecimal address provided as an extension to the API Gateway's name.
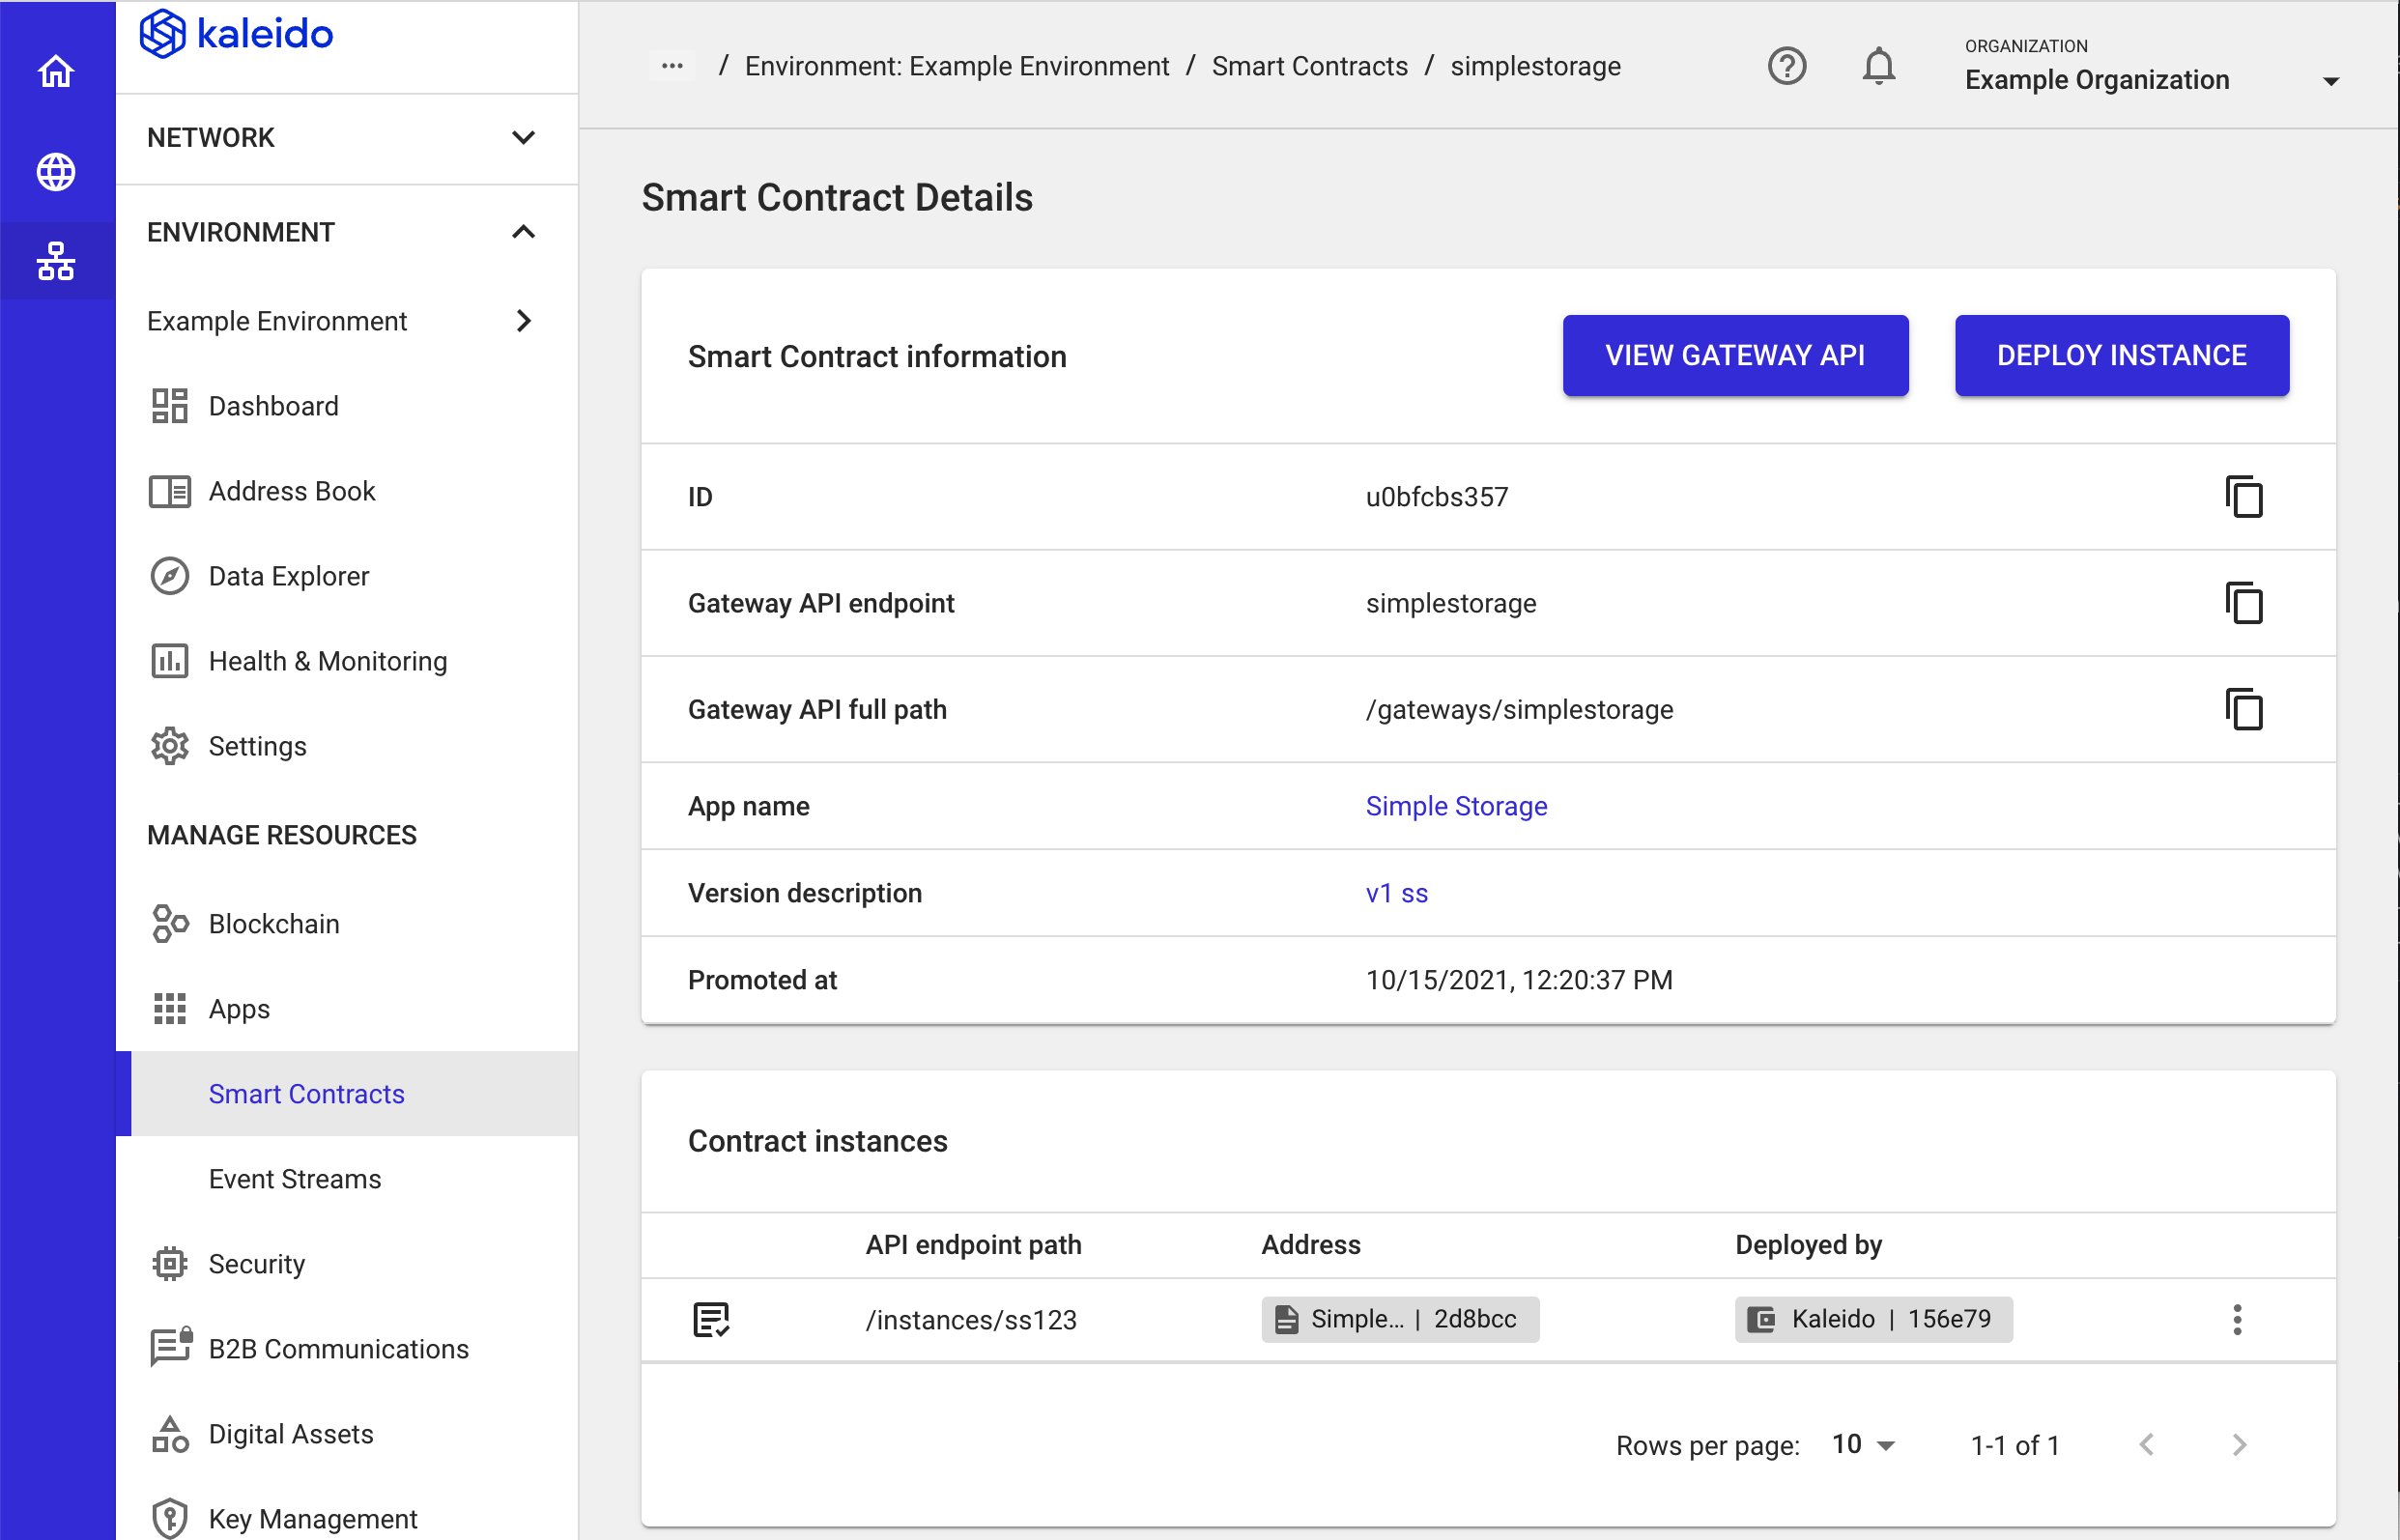
- Use the ellipsis dropdown next to your instance to interact with the smart contract (e.g.
get&set) or view the contract details to see additional information and transaction-specific data. - For an interactive walkthrough that performs the same steps, take a look at the Smart Contract Management and REST API Gateway product videos.
