Self-managed Cryptography
Use these instructions to construct your own externally-signed destination certificate. By electing for this approach you are also responsible for:
-
Uploading the certificate to the On-Chain Registry.
-
This MUST be done via the console if your membership is underpinned with a Kaleido self-signed identity certificate, because Kaleido is managing the certificate's private key.
-
This MUST be done via the Kaleido CLI if your membership is underpinned with an externally-signed identity certificate, because Kaleido does not have the certificate's private key.
-
signing emitted messages with your destination certificate's corresponding private key
- verifying signatures for consumed messages
- decrypting consumed messages with your user-controlled private key (the uploaded destination certificate is what your counterparts will use to encrypt messaging payloads).
Generating the Certificate
- When configuring your destination within the app2app service, provide a name for the destination and click on the Advanced Settings option.

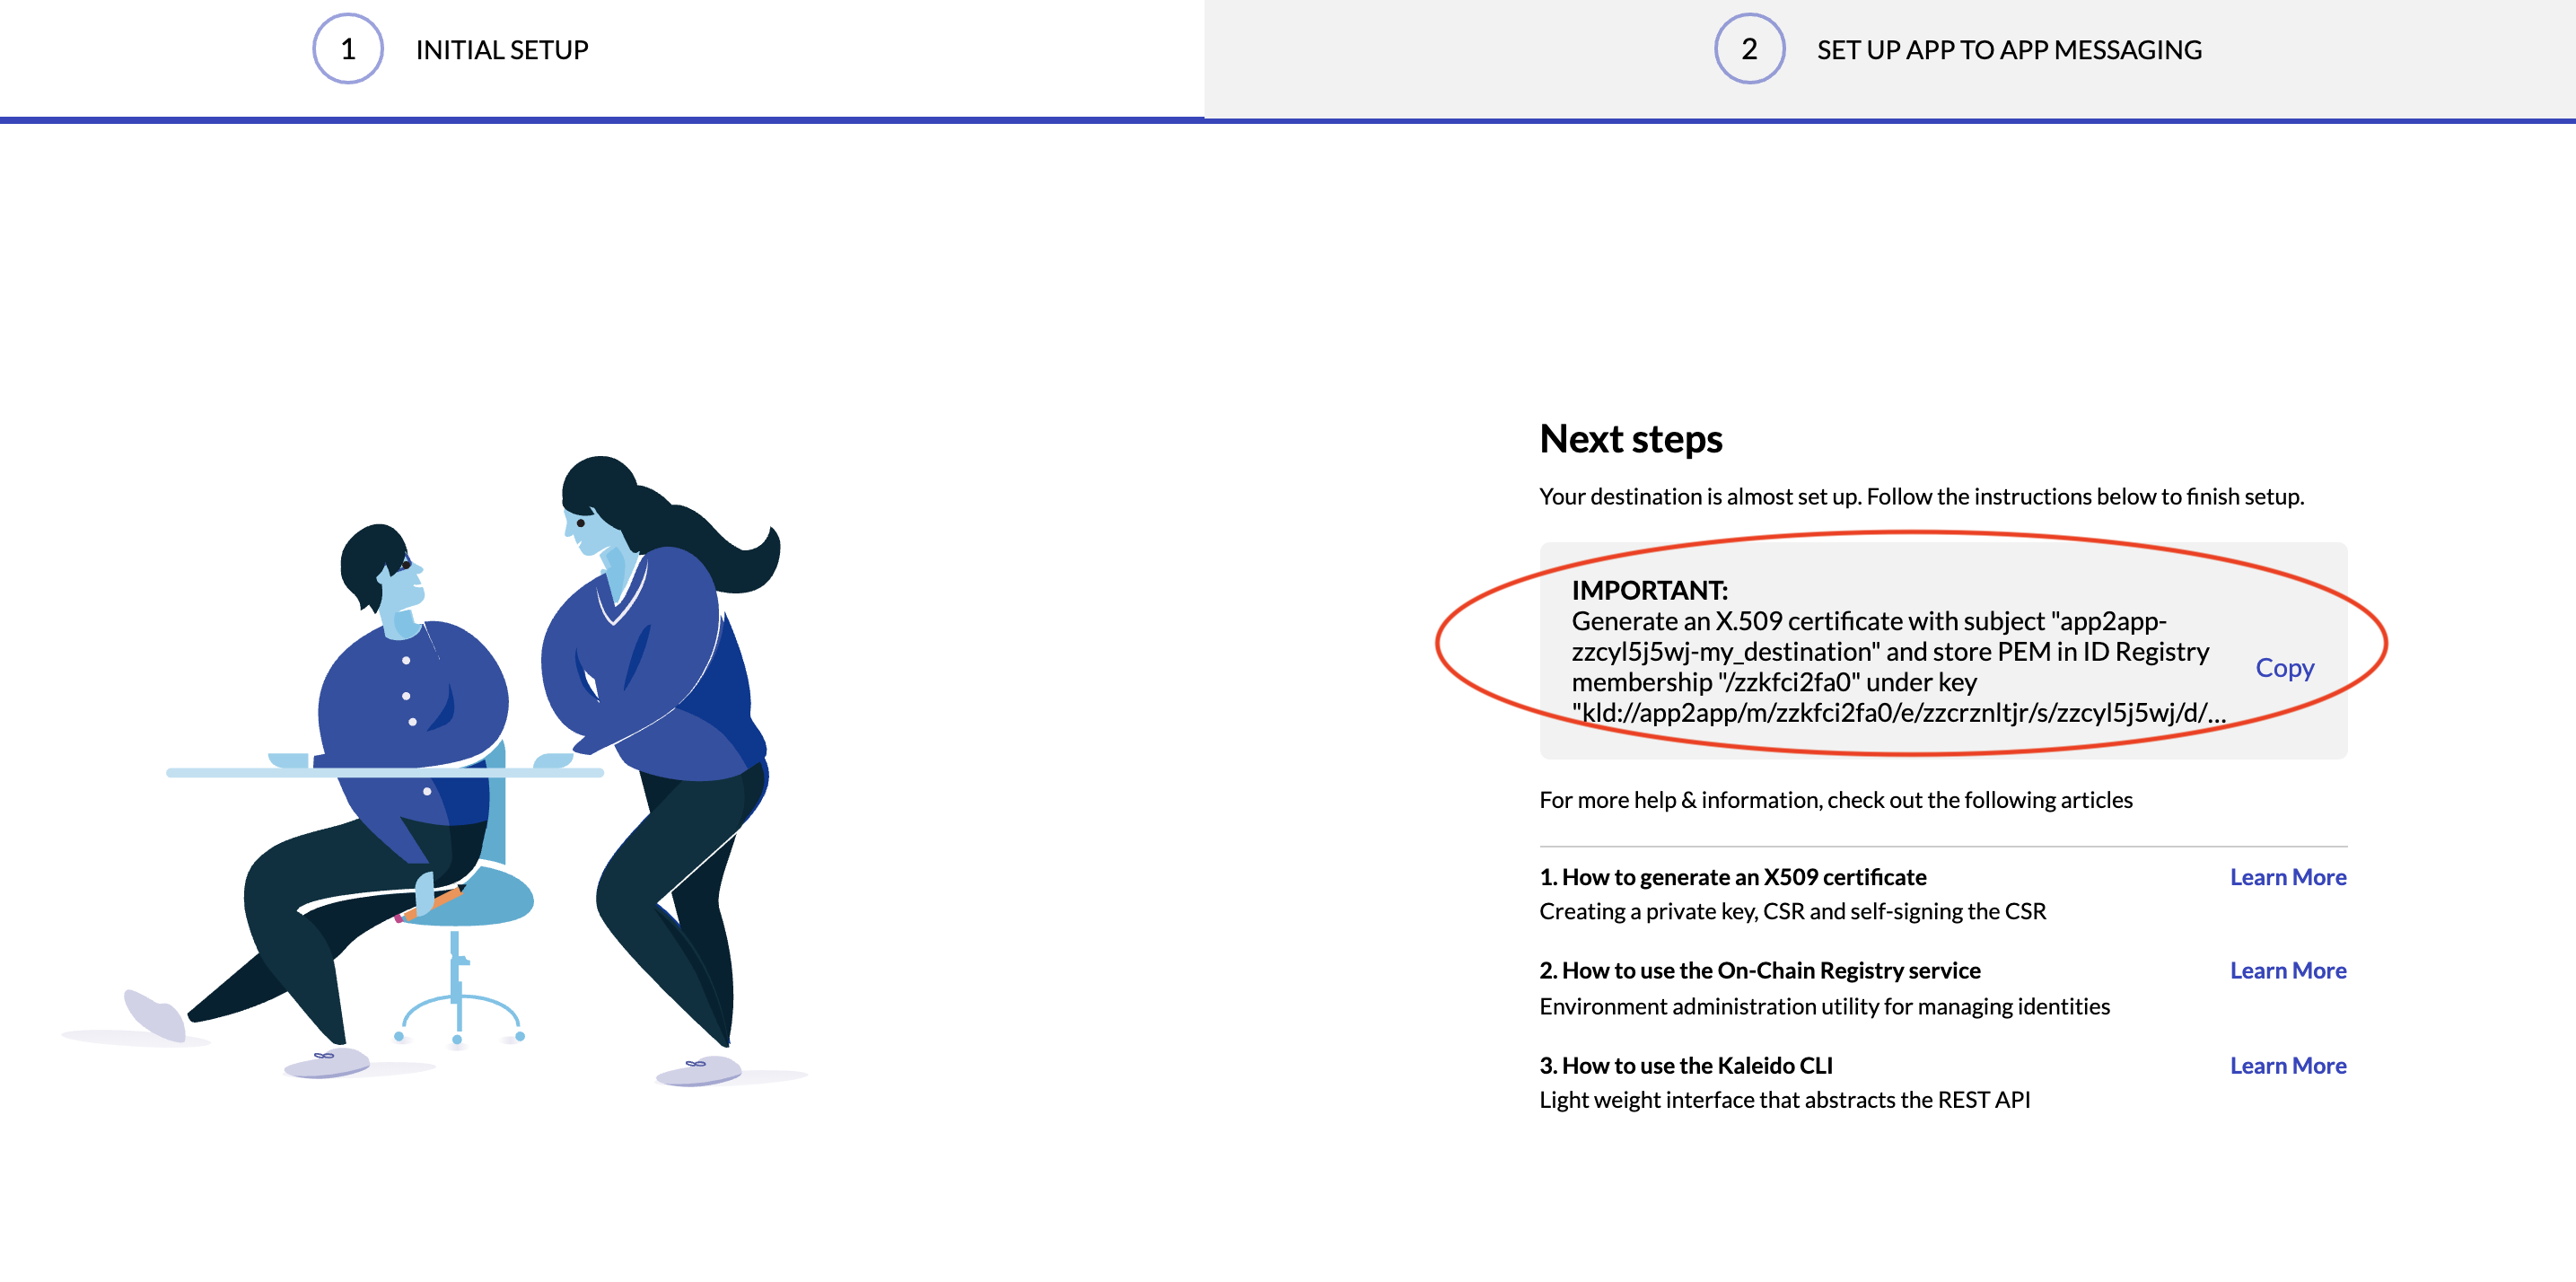
- This will create your destination URI and a custom string to be injected into the certificate's Common Name (CN) field. For example:

- Copy down both the CN string and the destination URI. The URI is necessary for scenarios where the destination cert needs to be programmatically uploaded via the Kaleido CLI.
- Now you can proceed to construct the certificate using the following syntax:
openssl req -x509 -newkey rsa:2048 -sha256 -days 365 -nodes -keyout key.pem -out cert.pem -subj /CN=KALEIDO_PROVIDED_COMMON_NAME_FOR_DESTINATION
- This will create a 2048 bit RSA private key that is then used to self-sign the destination certificate.
- Using the above screenshot as a reference, the actual call would be:
openssl req -x509 -newkey rsa:2048 -sha256 -days 365 -nodes -keyout key.pem -out cert.pem -subj /CN=app2app-zzcyl5j5wj-my_destination
- You can parse the pem-encoded cert with the following command:
Uploading the Destination Certificate to On-Chain Registry via Kaleido Console
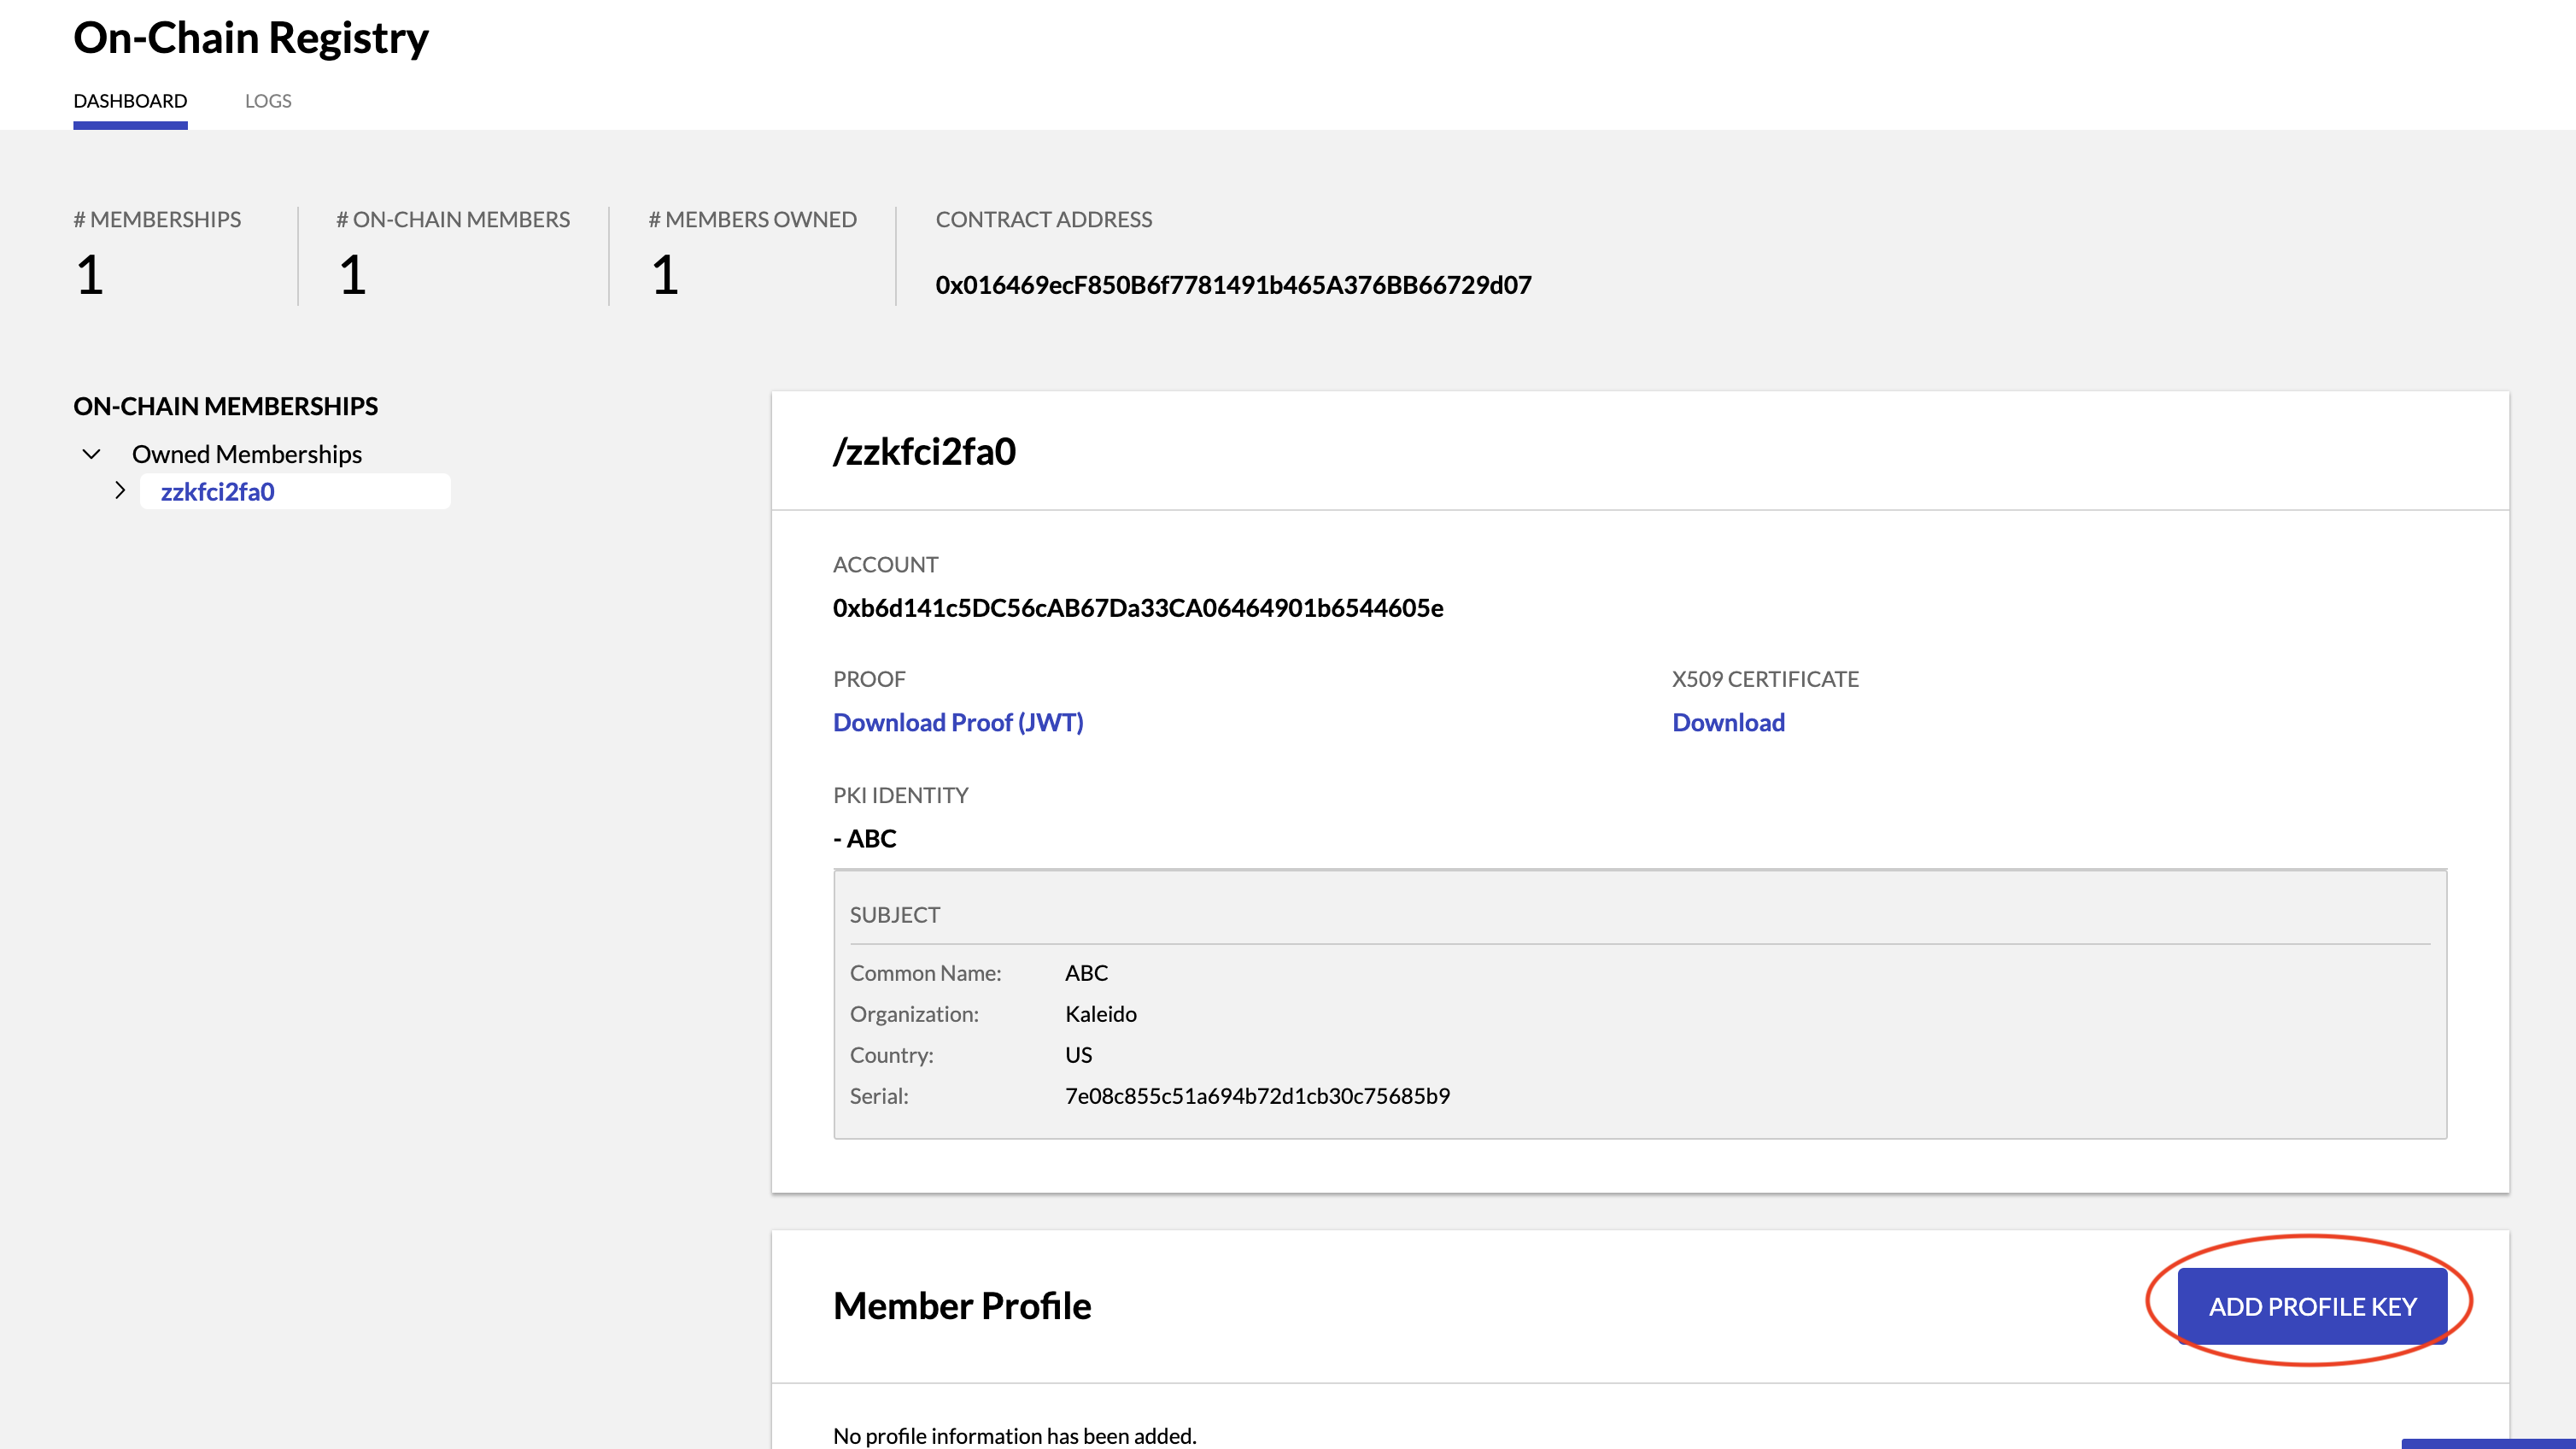
Navigate to your On-Chain Registry service.
- In the Member Profile Section click ADD PROFILE KEY

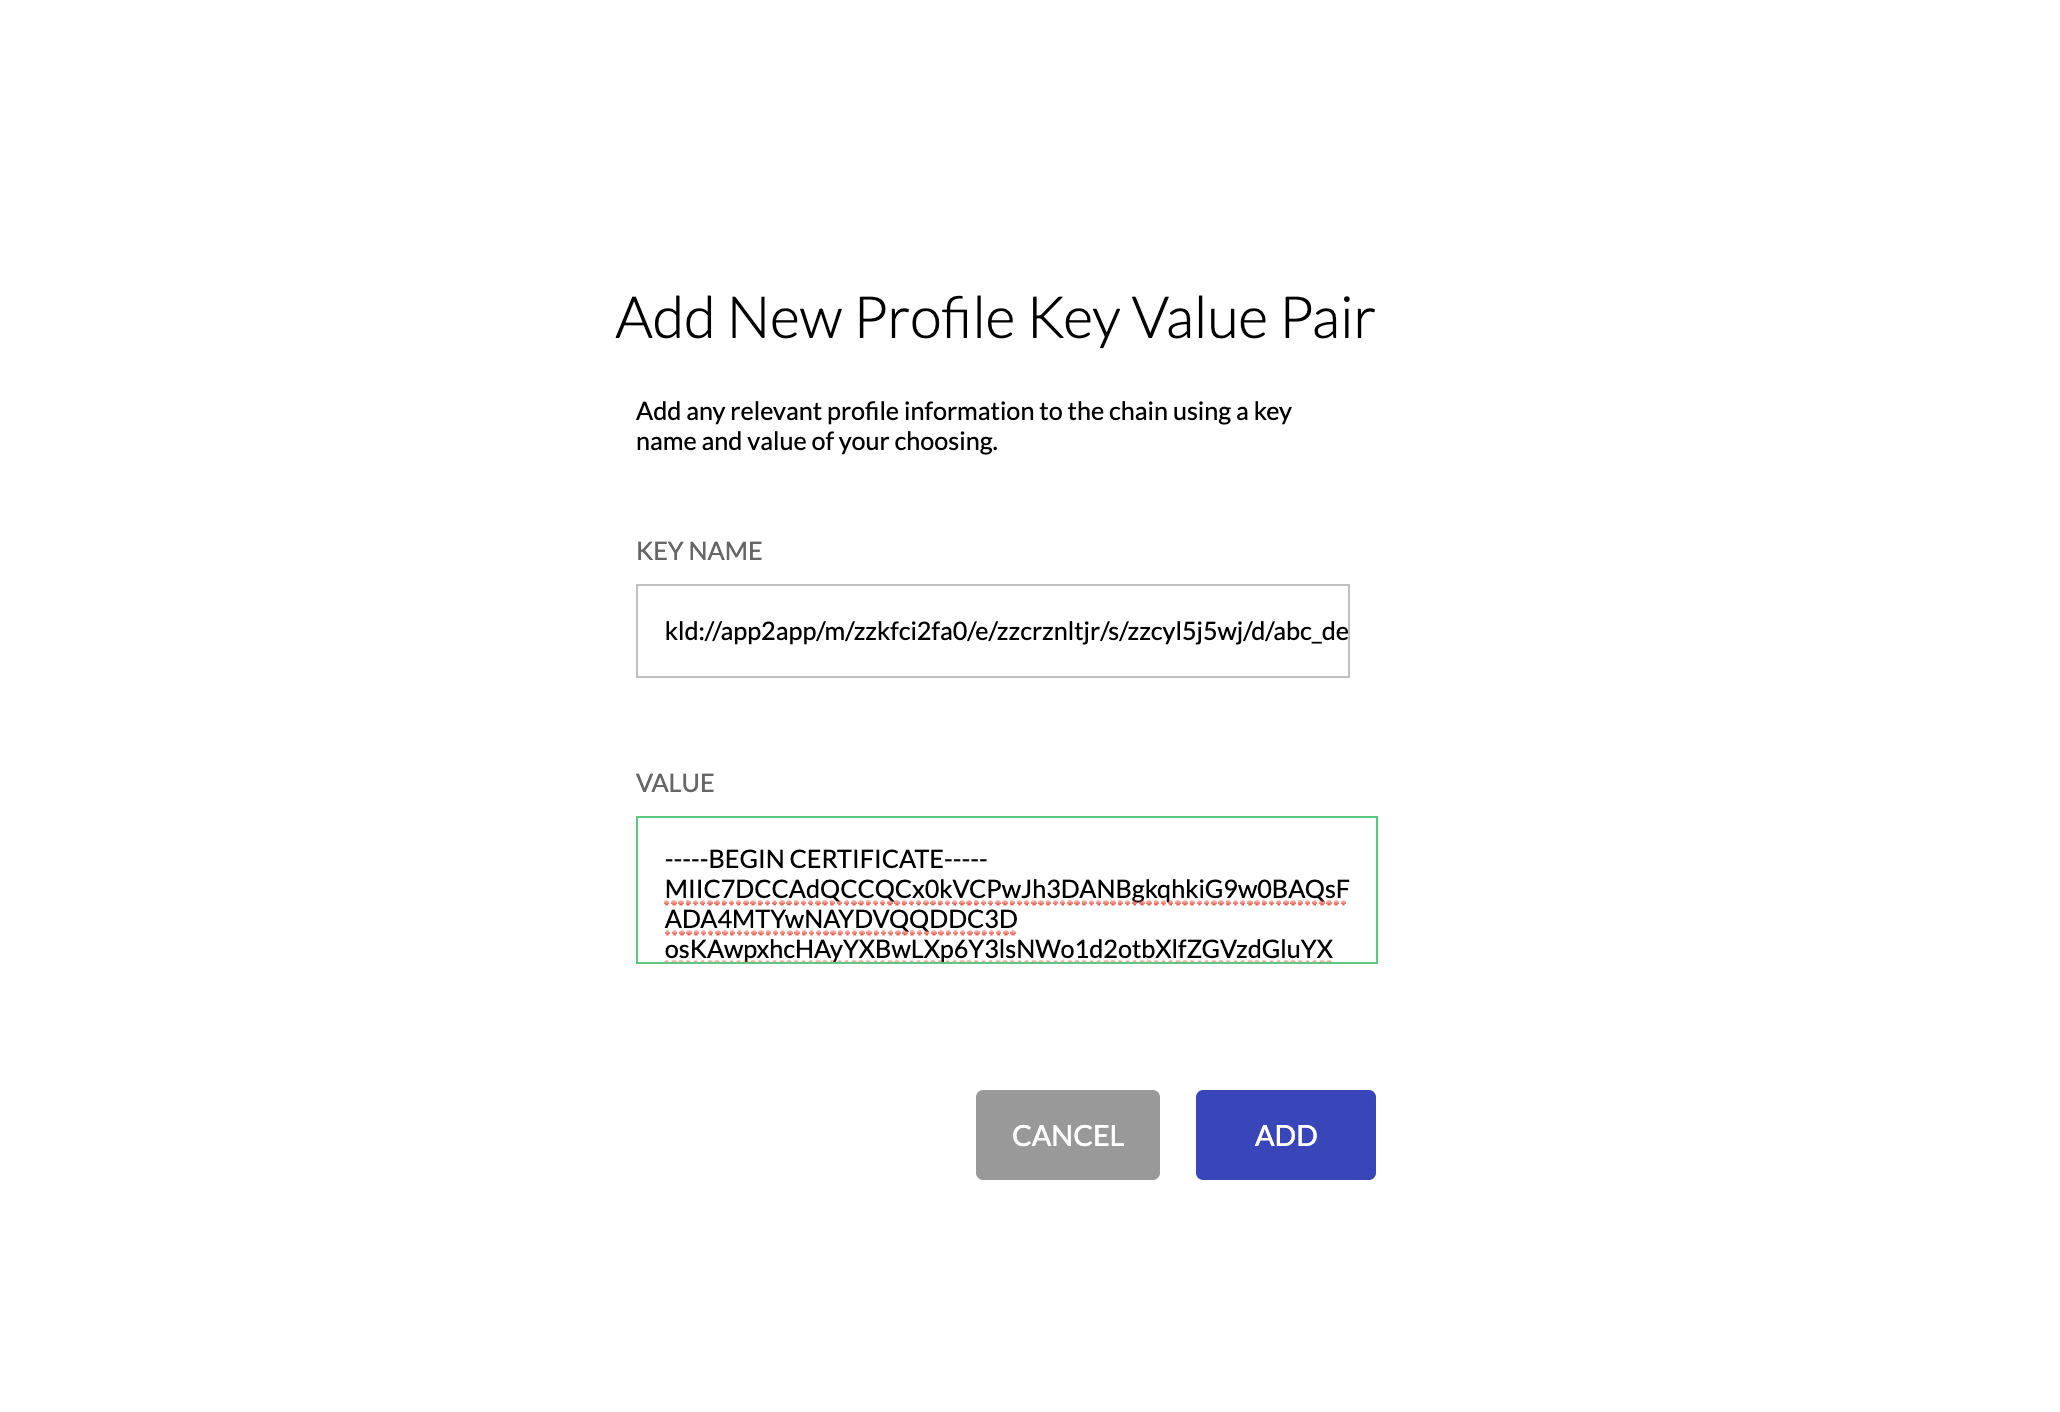
- Add the Destination URI into the Key field and the raw pem-encoded cert as the key. For example:

- Click ADD to inject the Destination/Certificate key value pair into the Profiles smart contract.
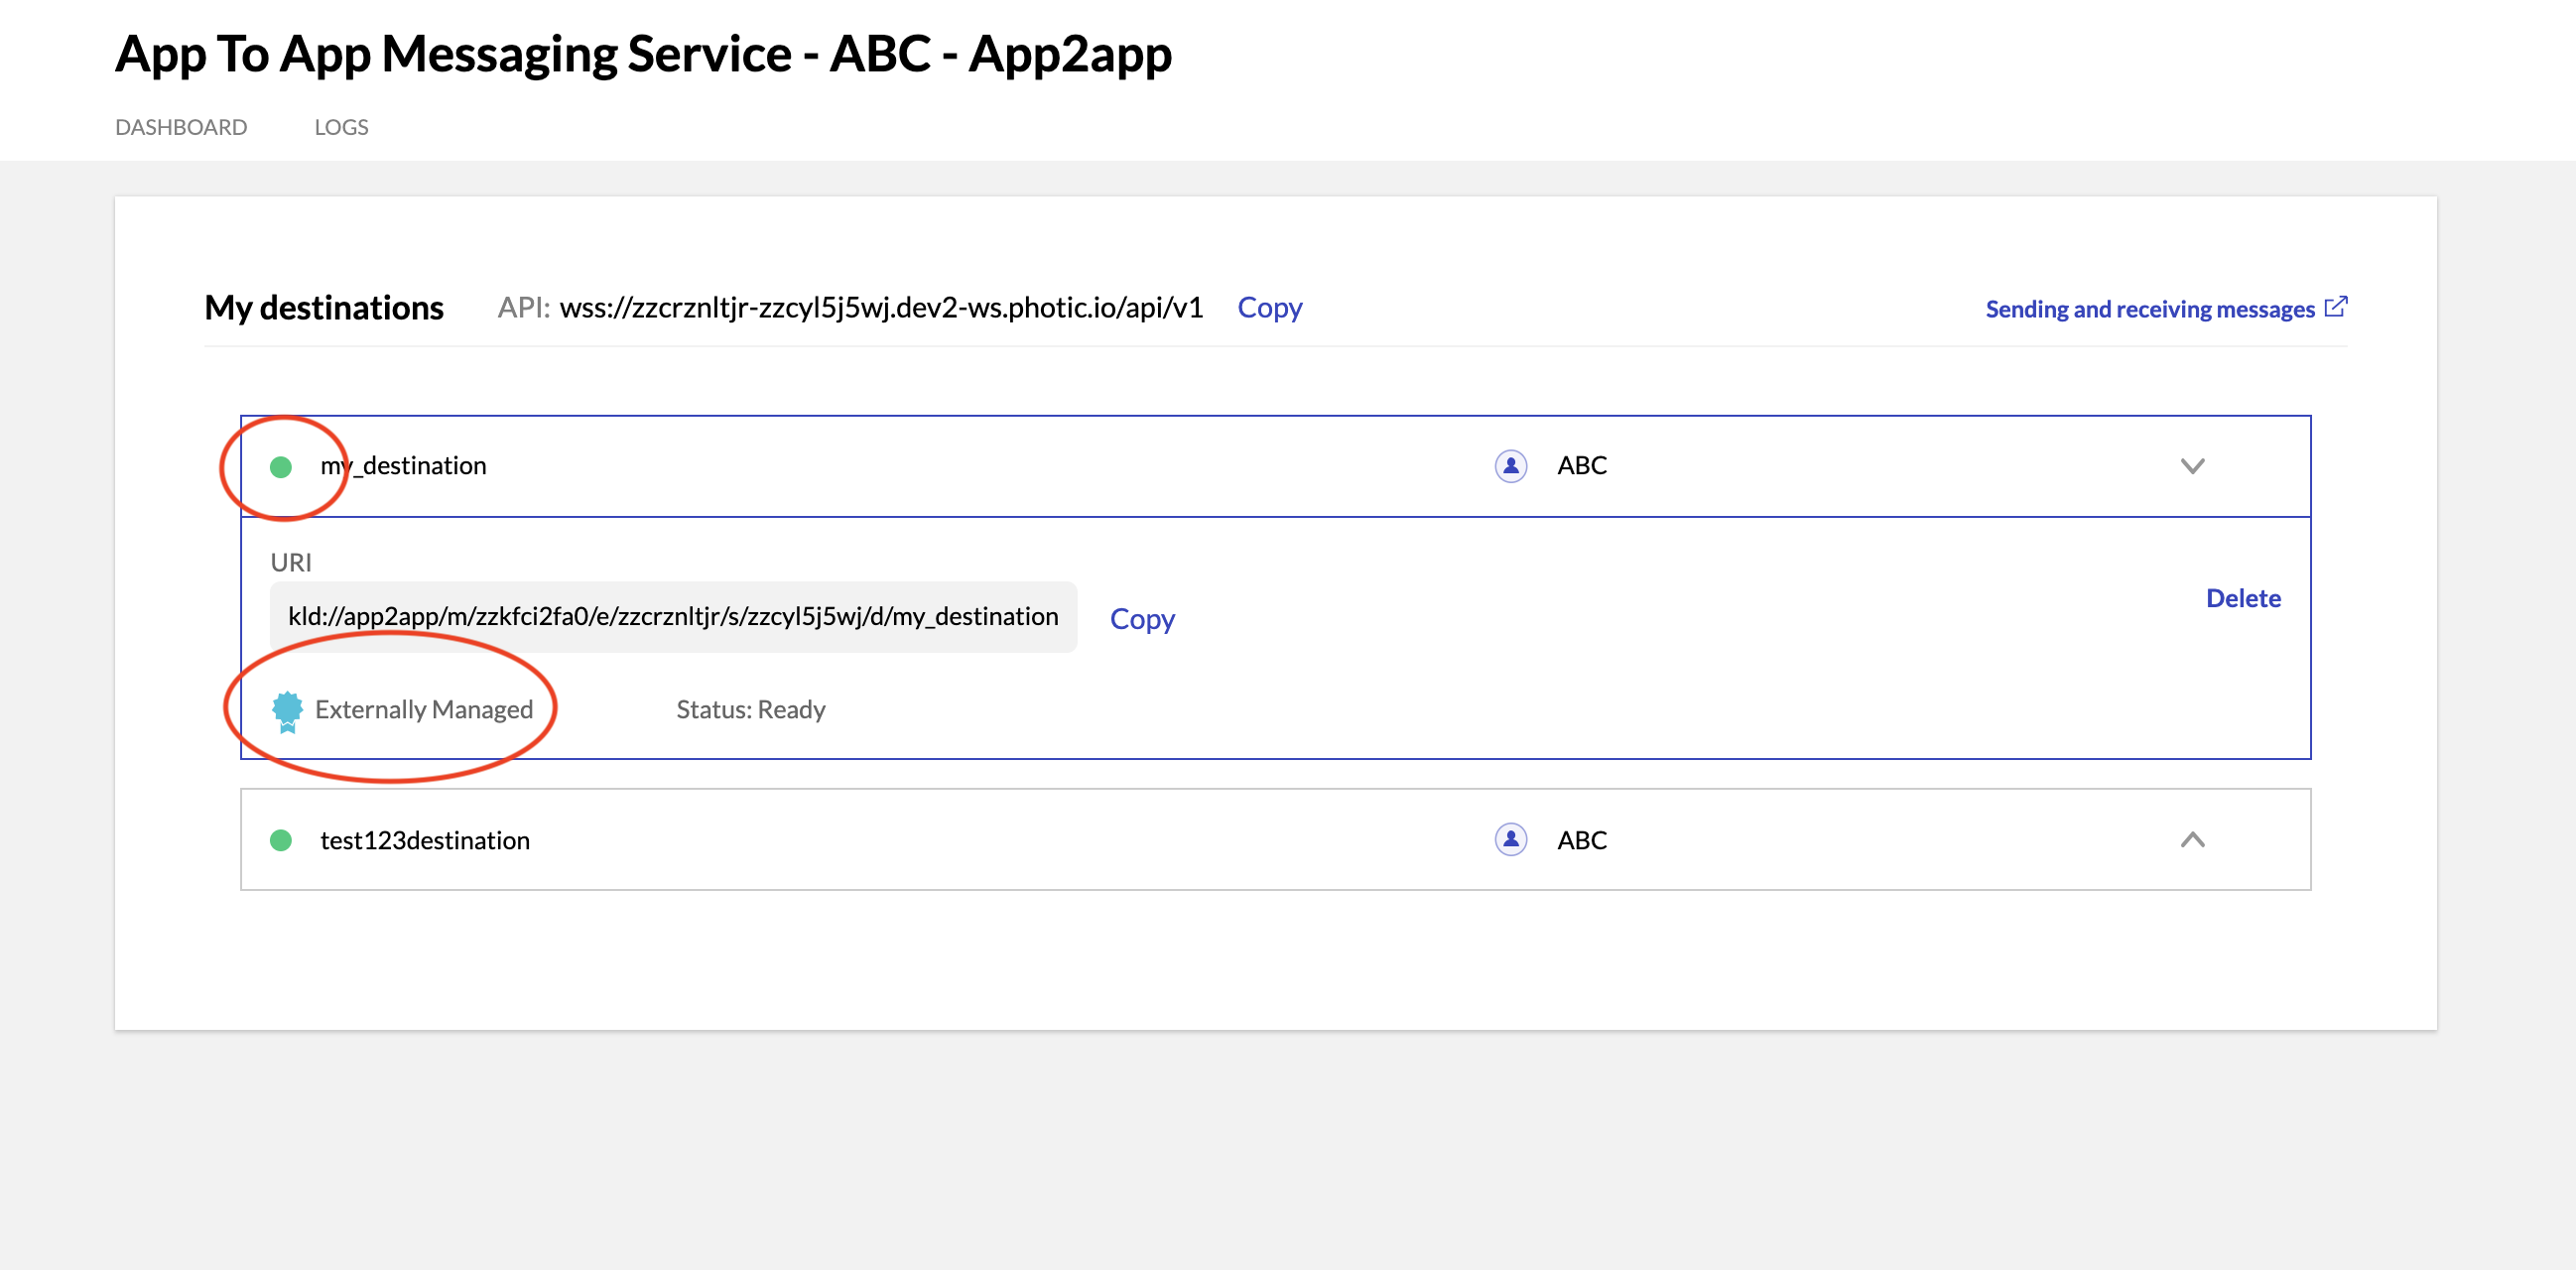
- Now go back to your Messaging Service and confirm that the destination certificate was properly uploaded. You should see your destination with a green dot next to it. For example:

Uploading the Destination Certificate to On-Chain Registry via Kaleido CLI
If your membership identity in the On-Chain Registry is underpinned with an externally-signed x509 identity certificate, you will have to use the Kaleido CLI to upload your externally-generated destination certificate. This is mandatory because you need to demonstrate ownership of the identity cert's private key. Kaleido does not have this key. Refer to the Registry Interaction via CLI for instructions on programmatically uploading a destination cert.
