Ether Pool
By default, each Kaleido environment is configured with one billion ether in the chain’s genesis block. The pool offers a convenient alternative to developing your own ERC20 token and can be used in myriad ways. For example, it can be used to enforce optional gas costs for executing smart contract methods and/or to represent a fungible and transactional asset. The ether pool is an environmentally-shared utility service, with the balance defaulting to the system monitor's sole Ethereum account, and is accessible by any organization operating a node within the environment.
NOTE: Kaleido also offers support for environment creation with pre-funded accounts. See the Advanced Blockchain Configuration documentation and/or the
/environmentsAPI Documentation for more details on pre-funded accounts.
The governance of the pool is left entirely to the discretion of the consortium. For example, the pool can be used intermittently on a need-by-need basis or drained immediately and then disseminated in accordance with some agreed upon protocol. Kaleido enforces no restrictions on its usage within the permissioned Ethereum orchestration.
Fund an Account
The ether can be accessed directly via the Kaleido user interface or through an administrative /fundaccount API call. This documentation will focus on interaction via the Kaleido console. Please refer to the /environments API Documentation for details on the programmatic approach.
Accessing via the Console
- Navigate to an environmental dashboard within your business network
- Under the "Manage Resources" section of the lefthand navigation, expand the "Digital Assets" tab
- Click "Dashboard"
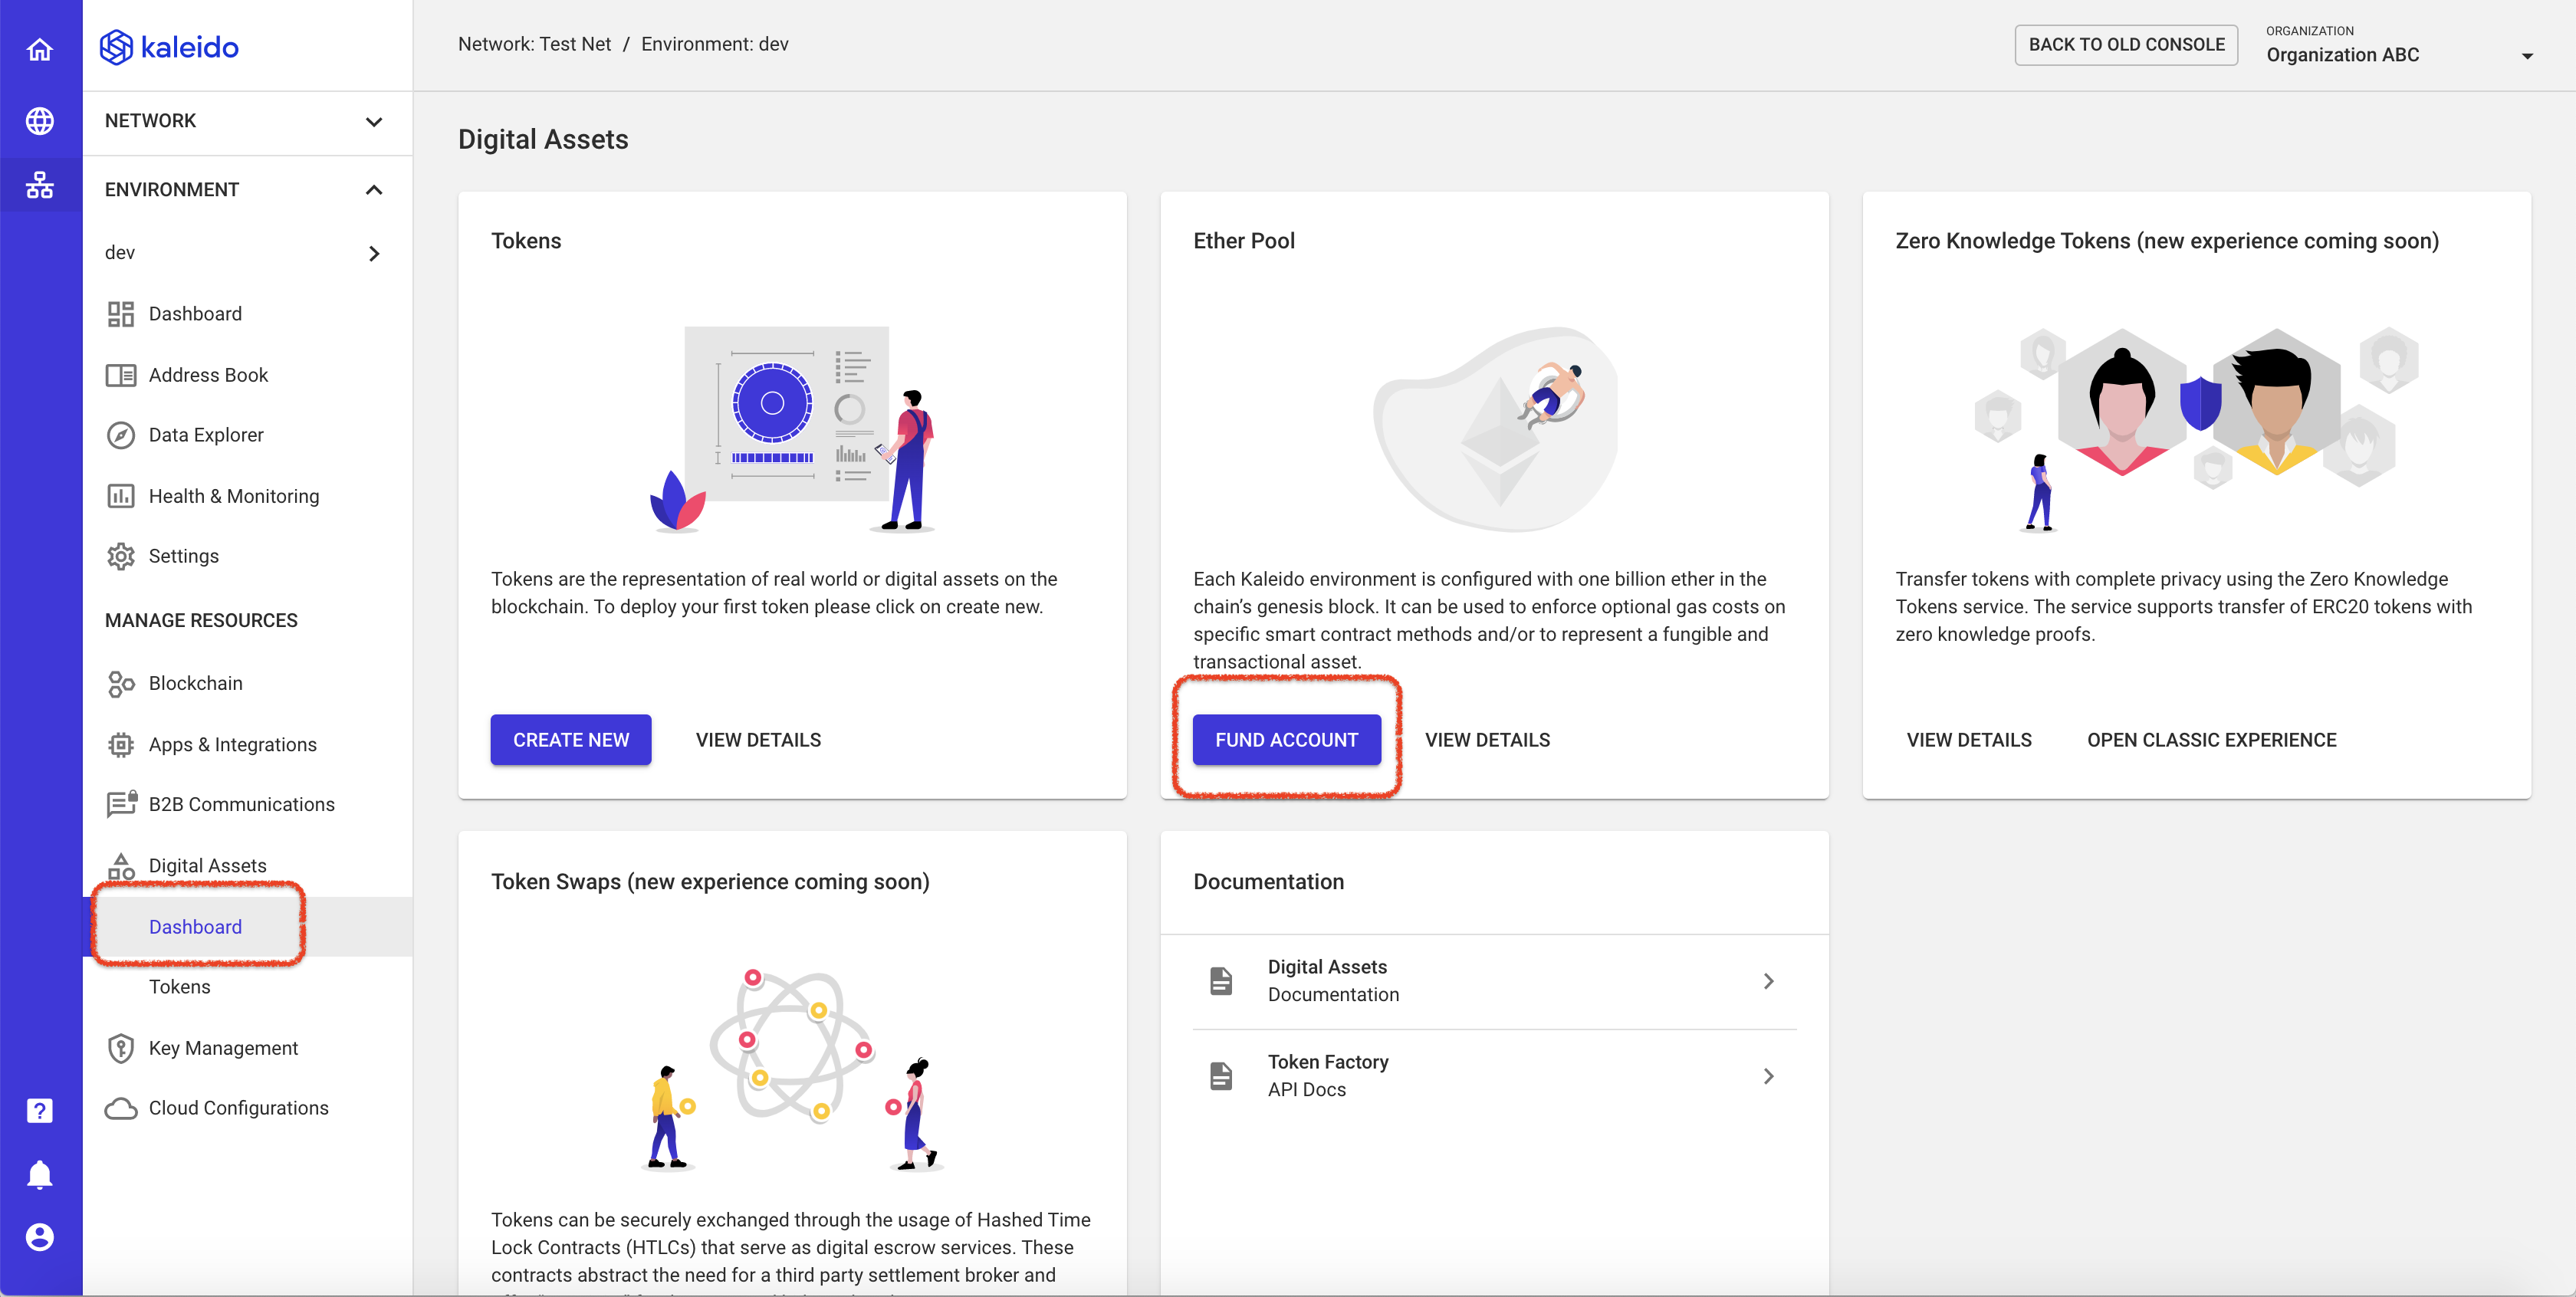
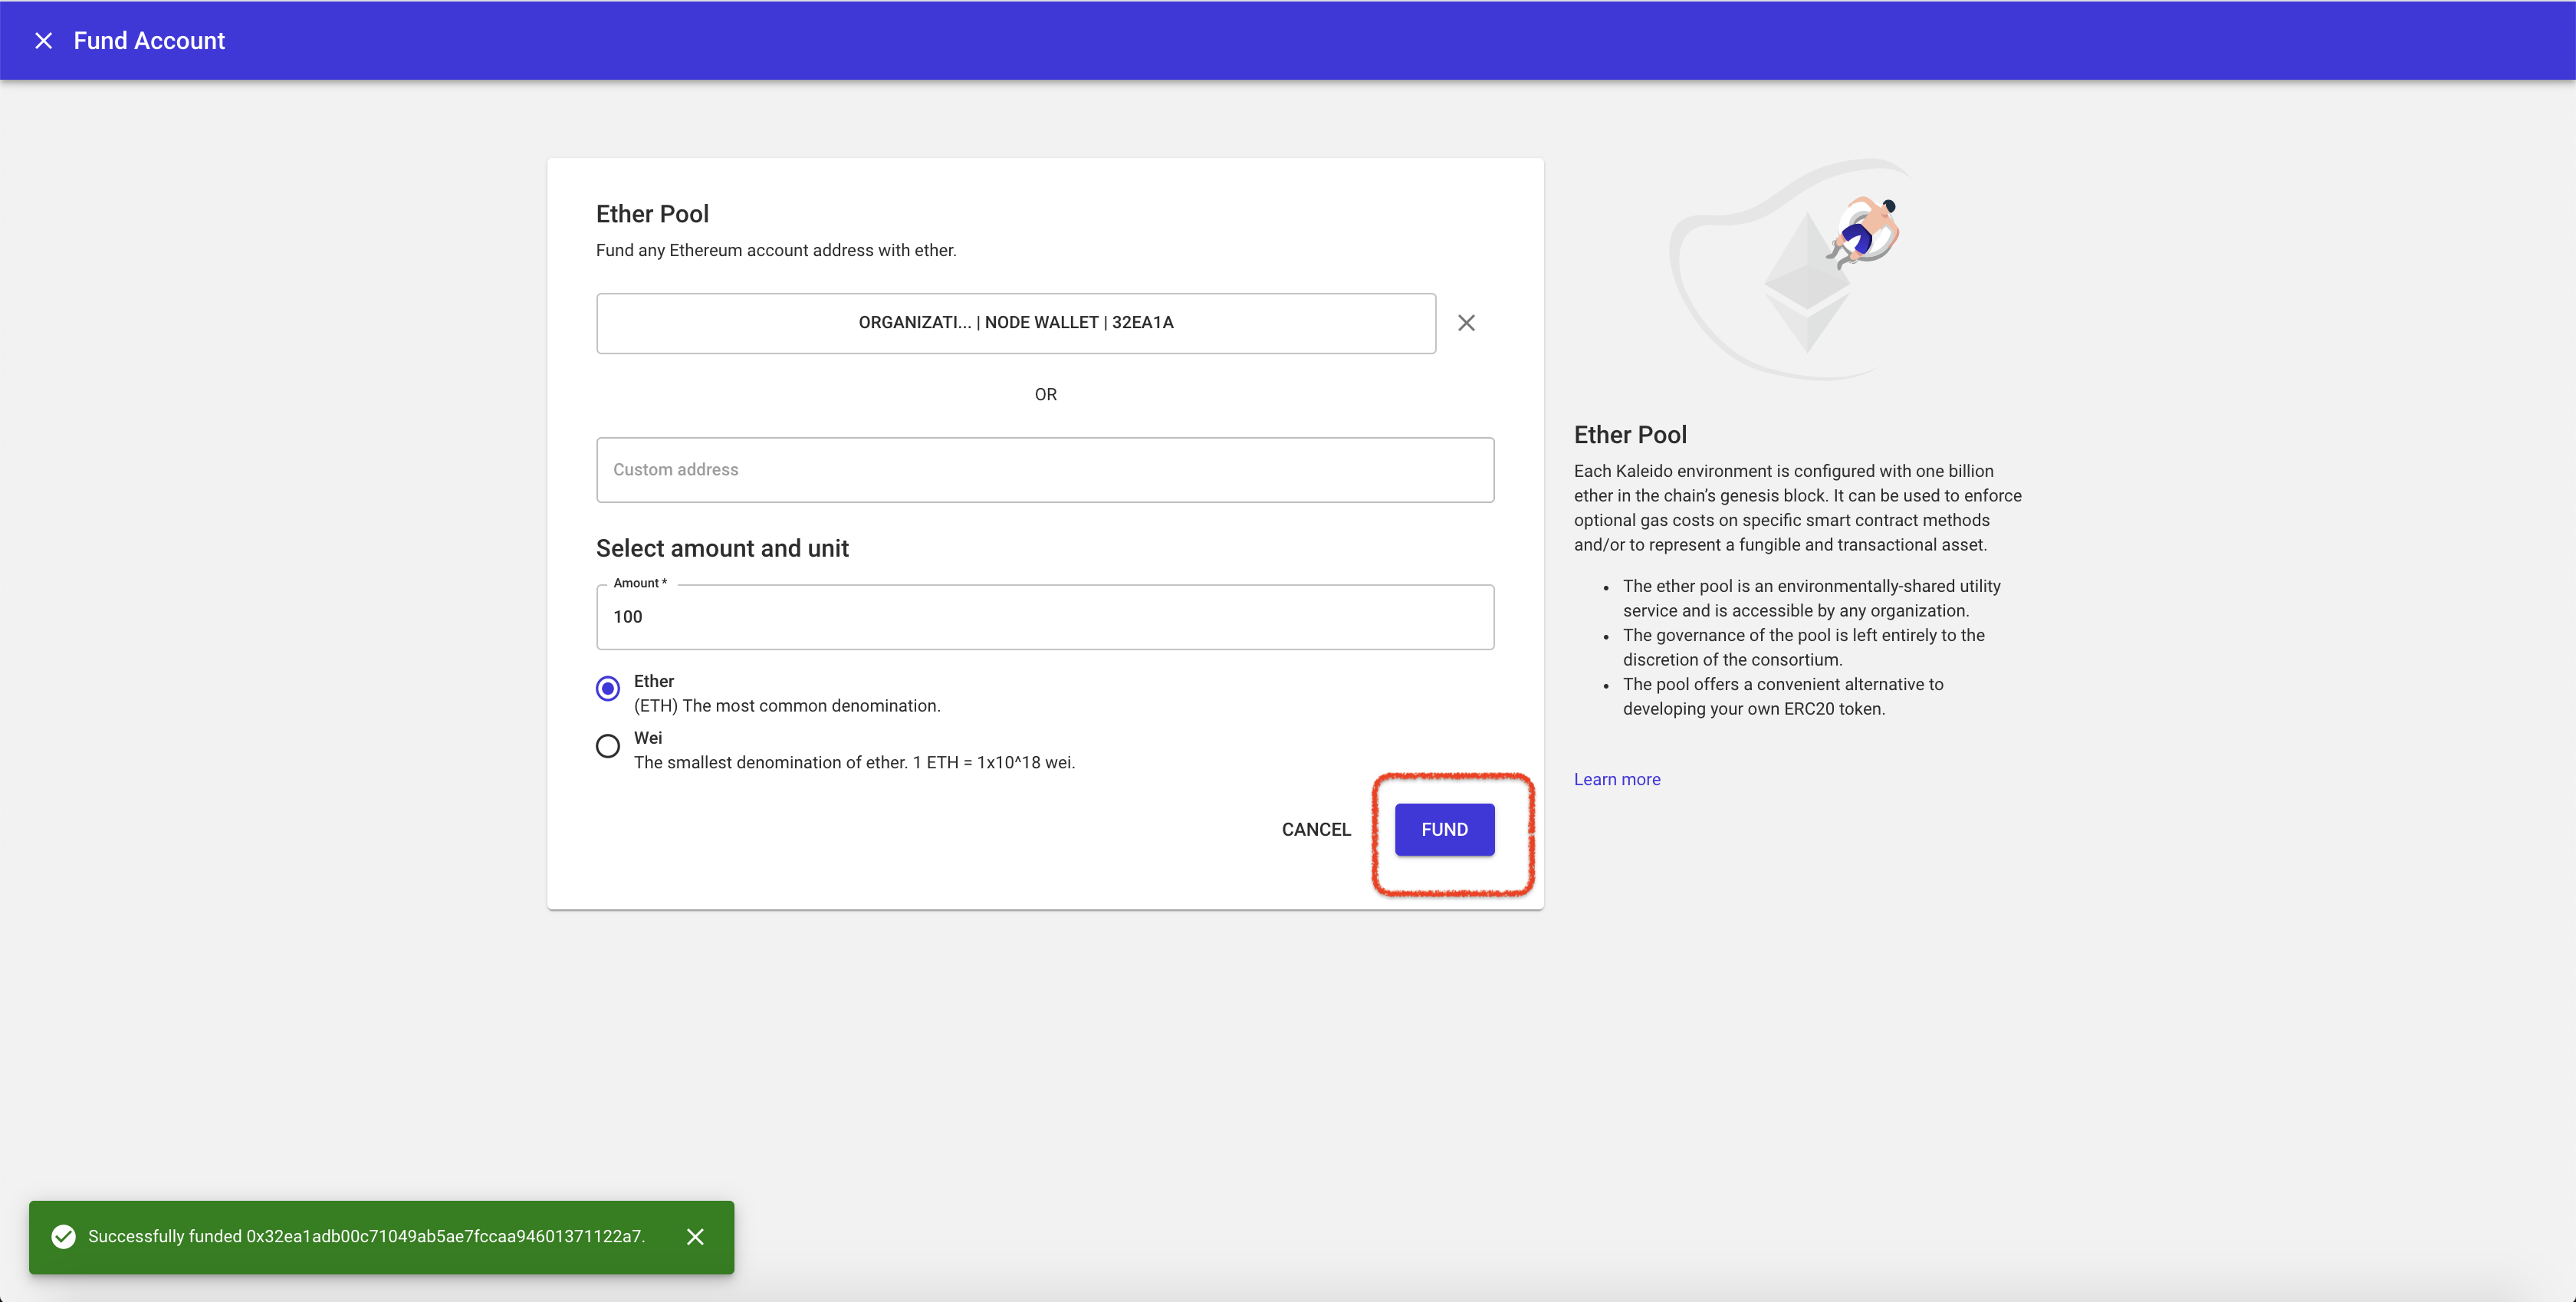
- Click the "Fund Account" button beneath the Ether Pool modal
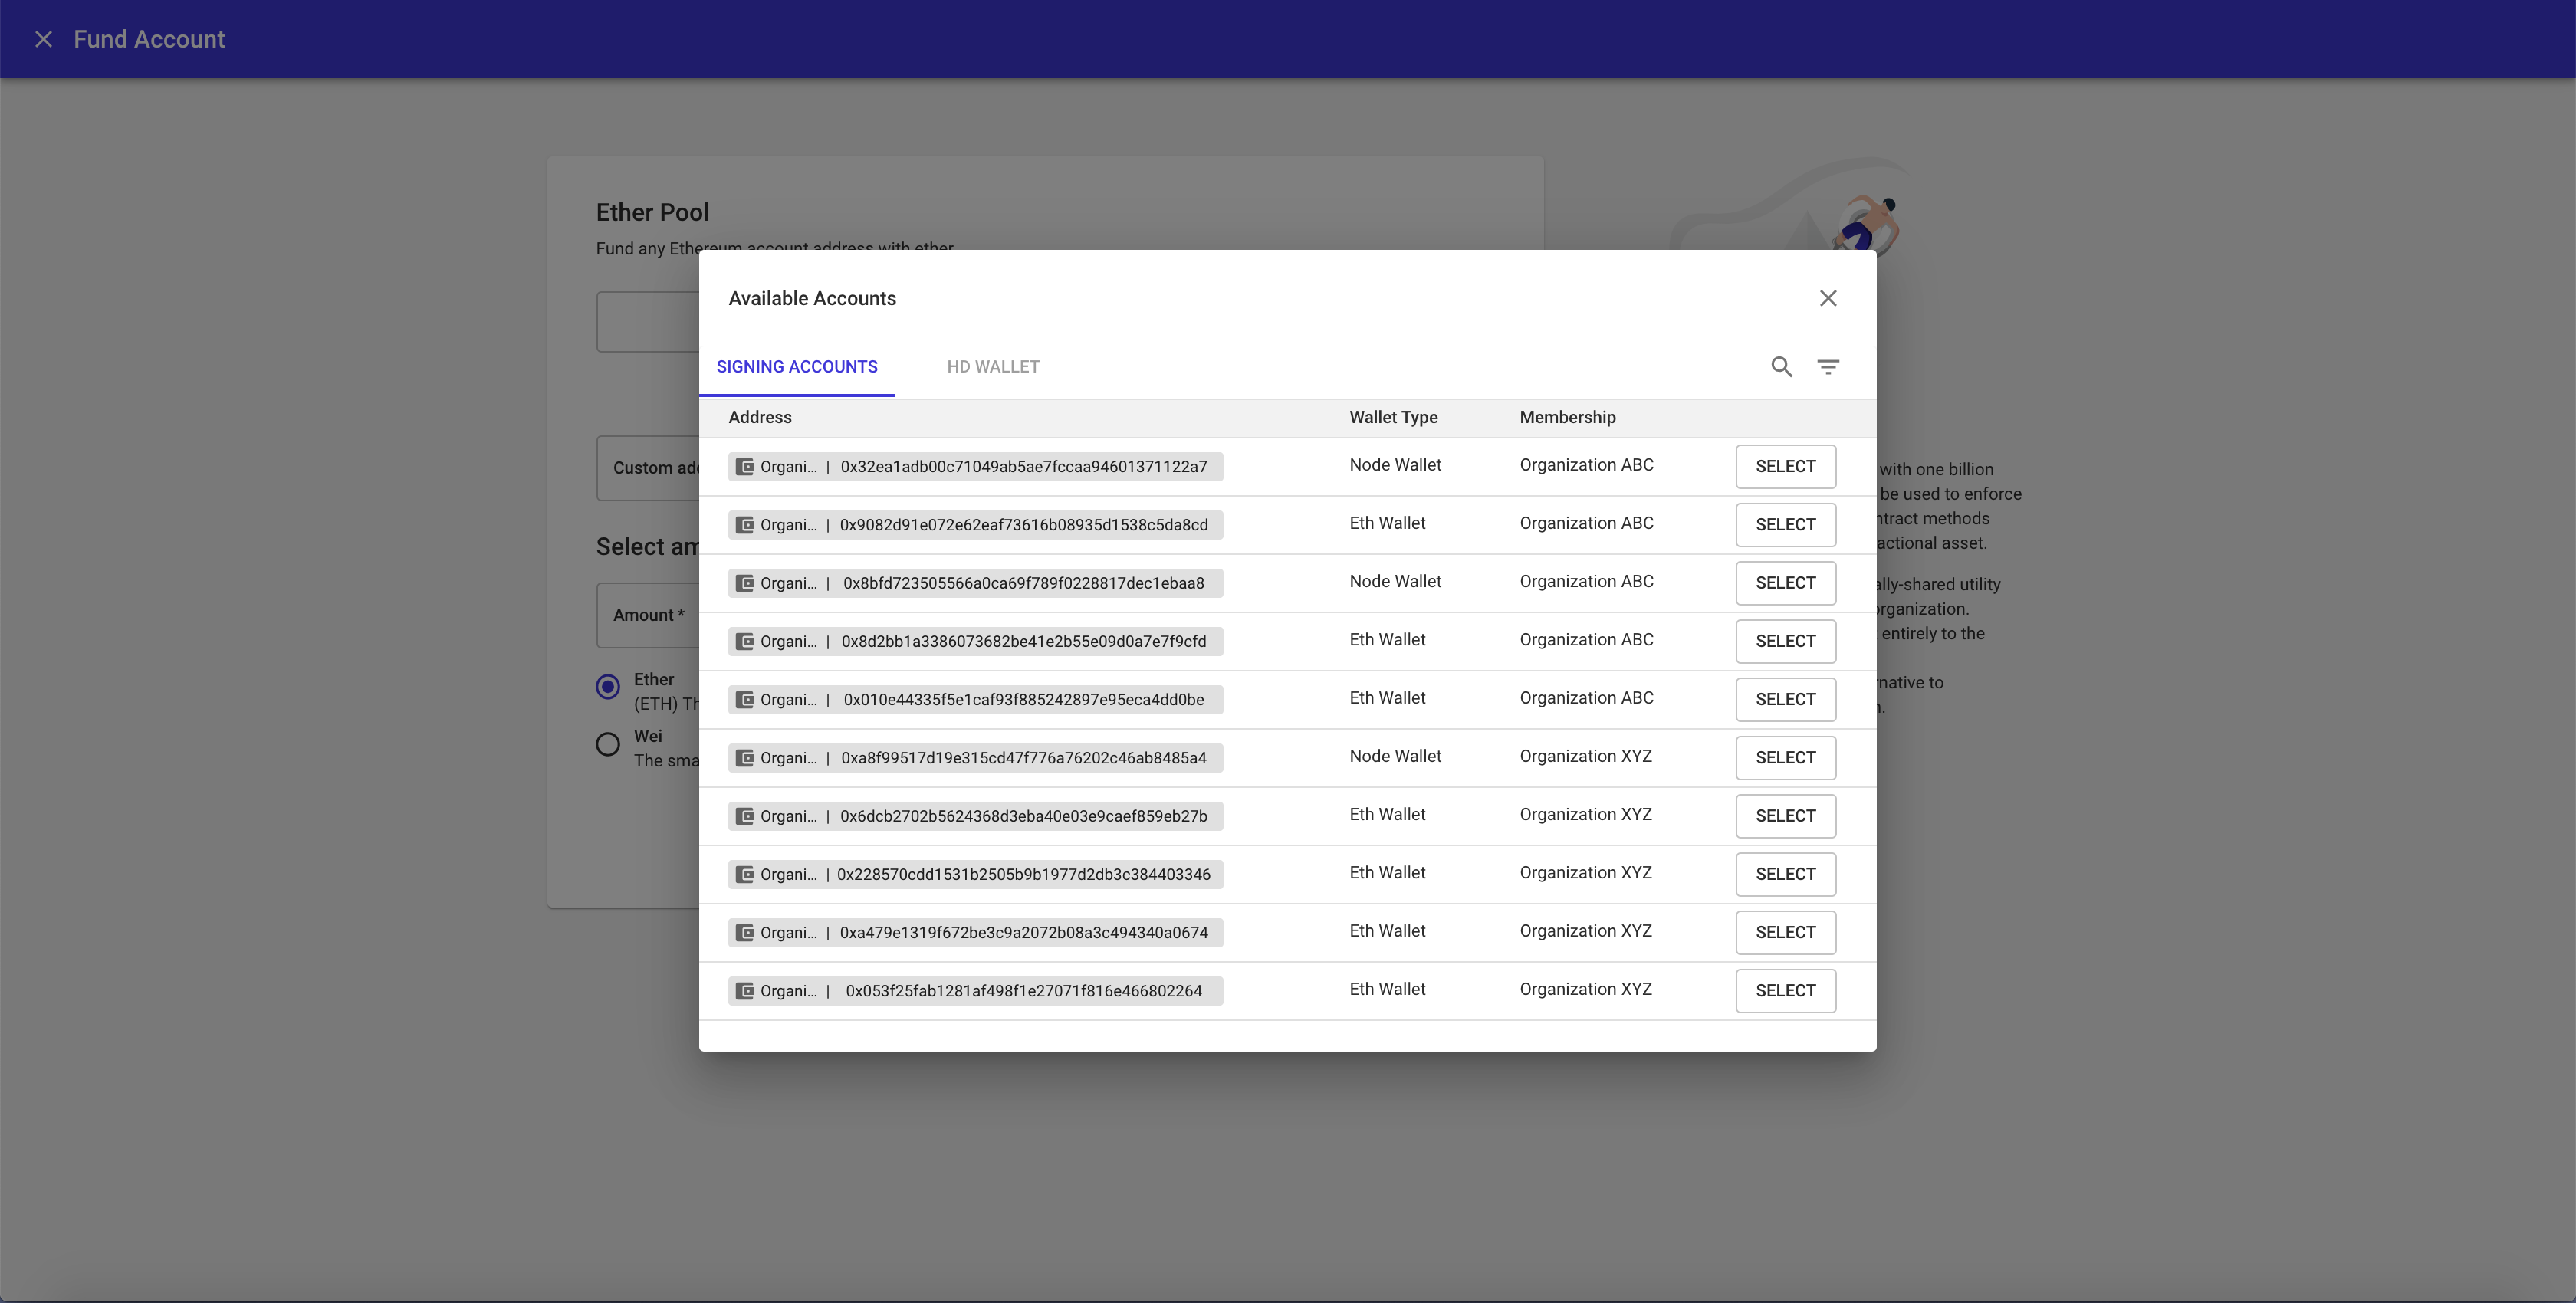
- Use the "Select Account" dropdown window to select an indexed account OR input the custom address of an externally-managed account.
NOTE: When using the "Select Account" dropdown, Kaleido will make available ALL indexed accounts for selection. Included are all known accounts within the Kaleido environment, such as node accounts, managed wallets and cloud HSMs.
Selecting an Indexed Account
- Identify the indexed account for ether funding and click the "Select" button next to the account
Inputting a Custom Address
- Paste the hexadecimal string for the externally-managed account you wish to fund
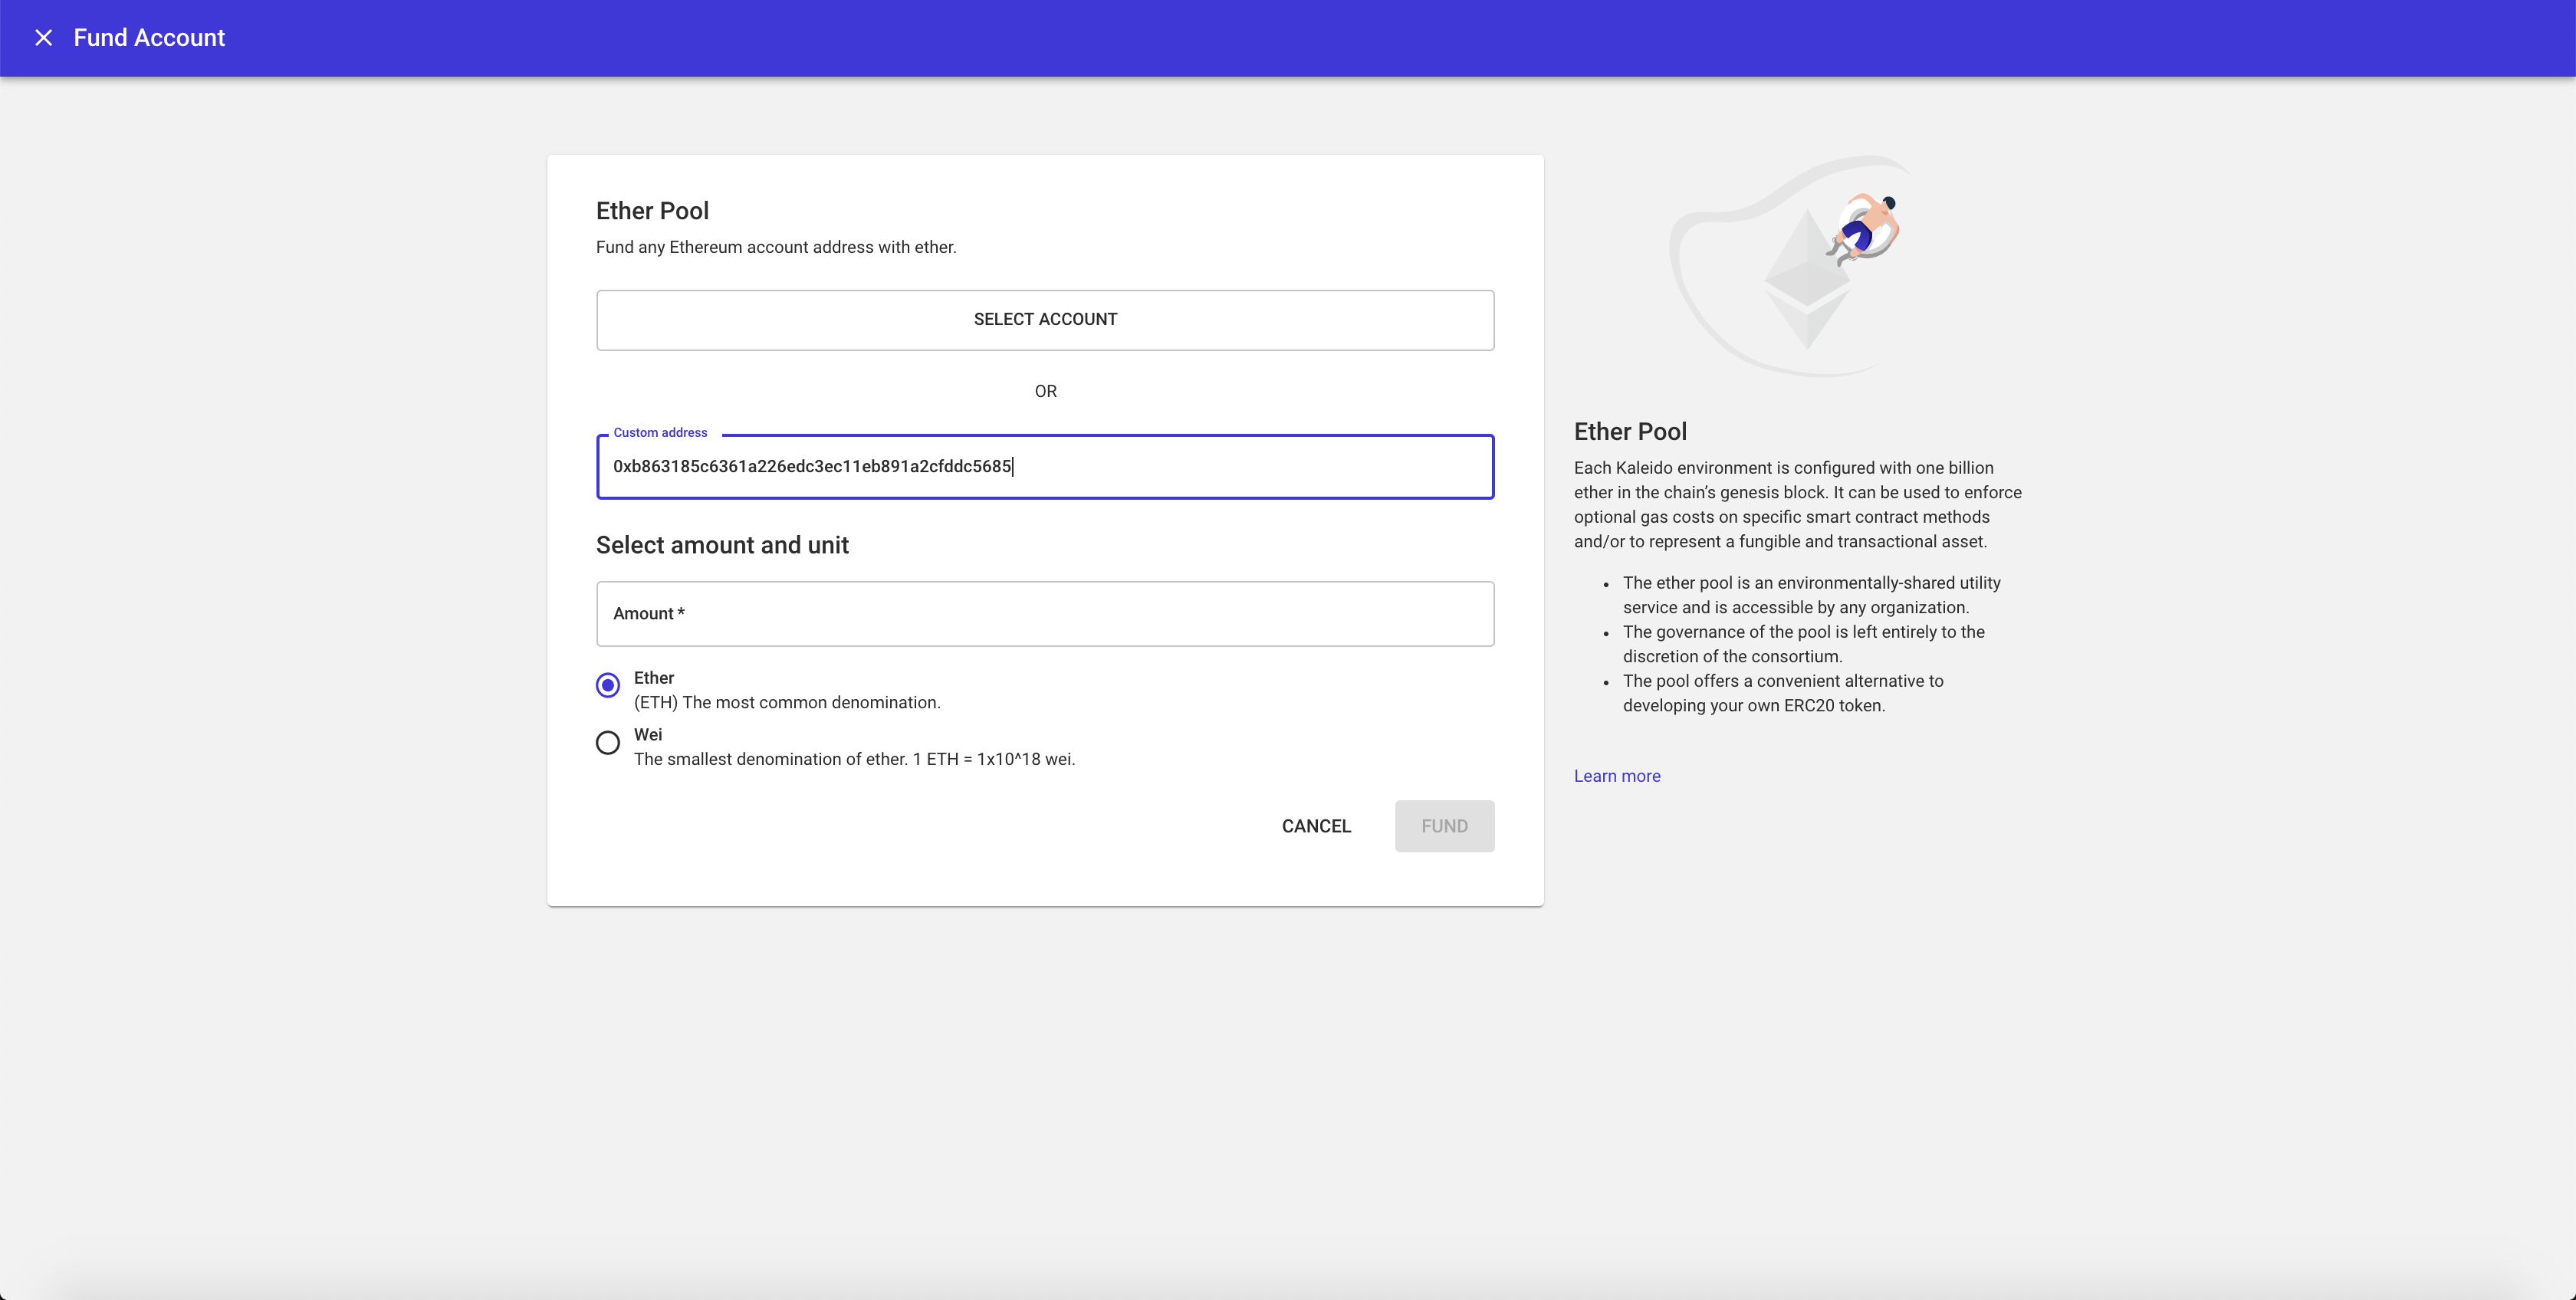
Specifying an Amount
- Input a positive integer in the "Amount" field
- Specify the denomination type: Ether or Wei
- Click "FUND"
- You will see a notification bar in the bottom lefthand corner of the screen upon a successful transaction
Checking an Indexed Account Balance
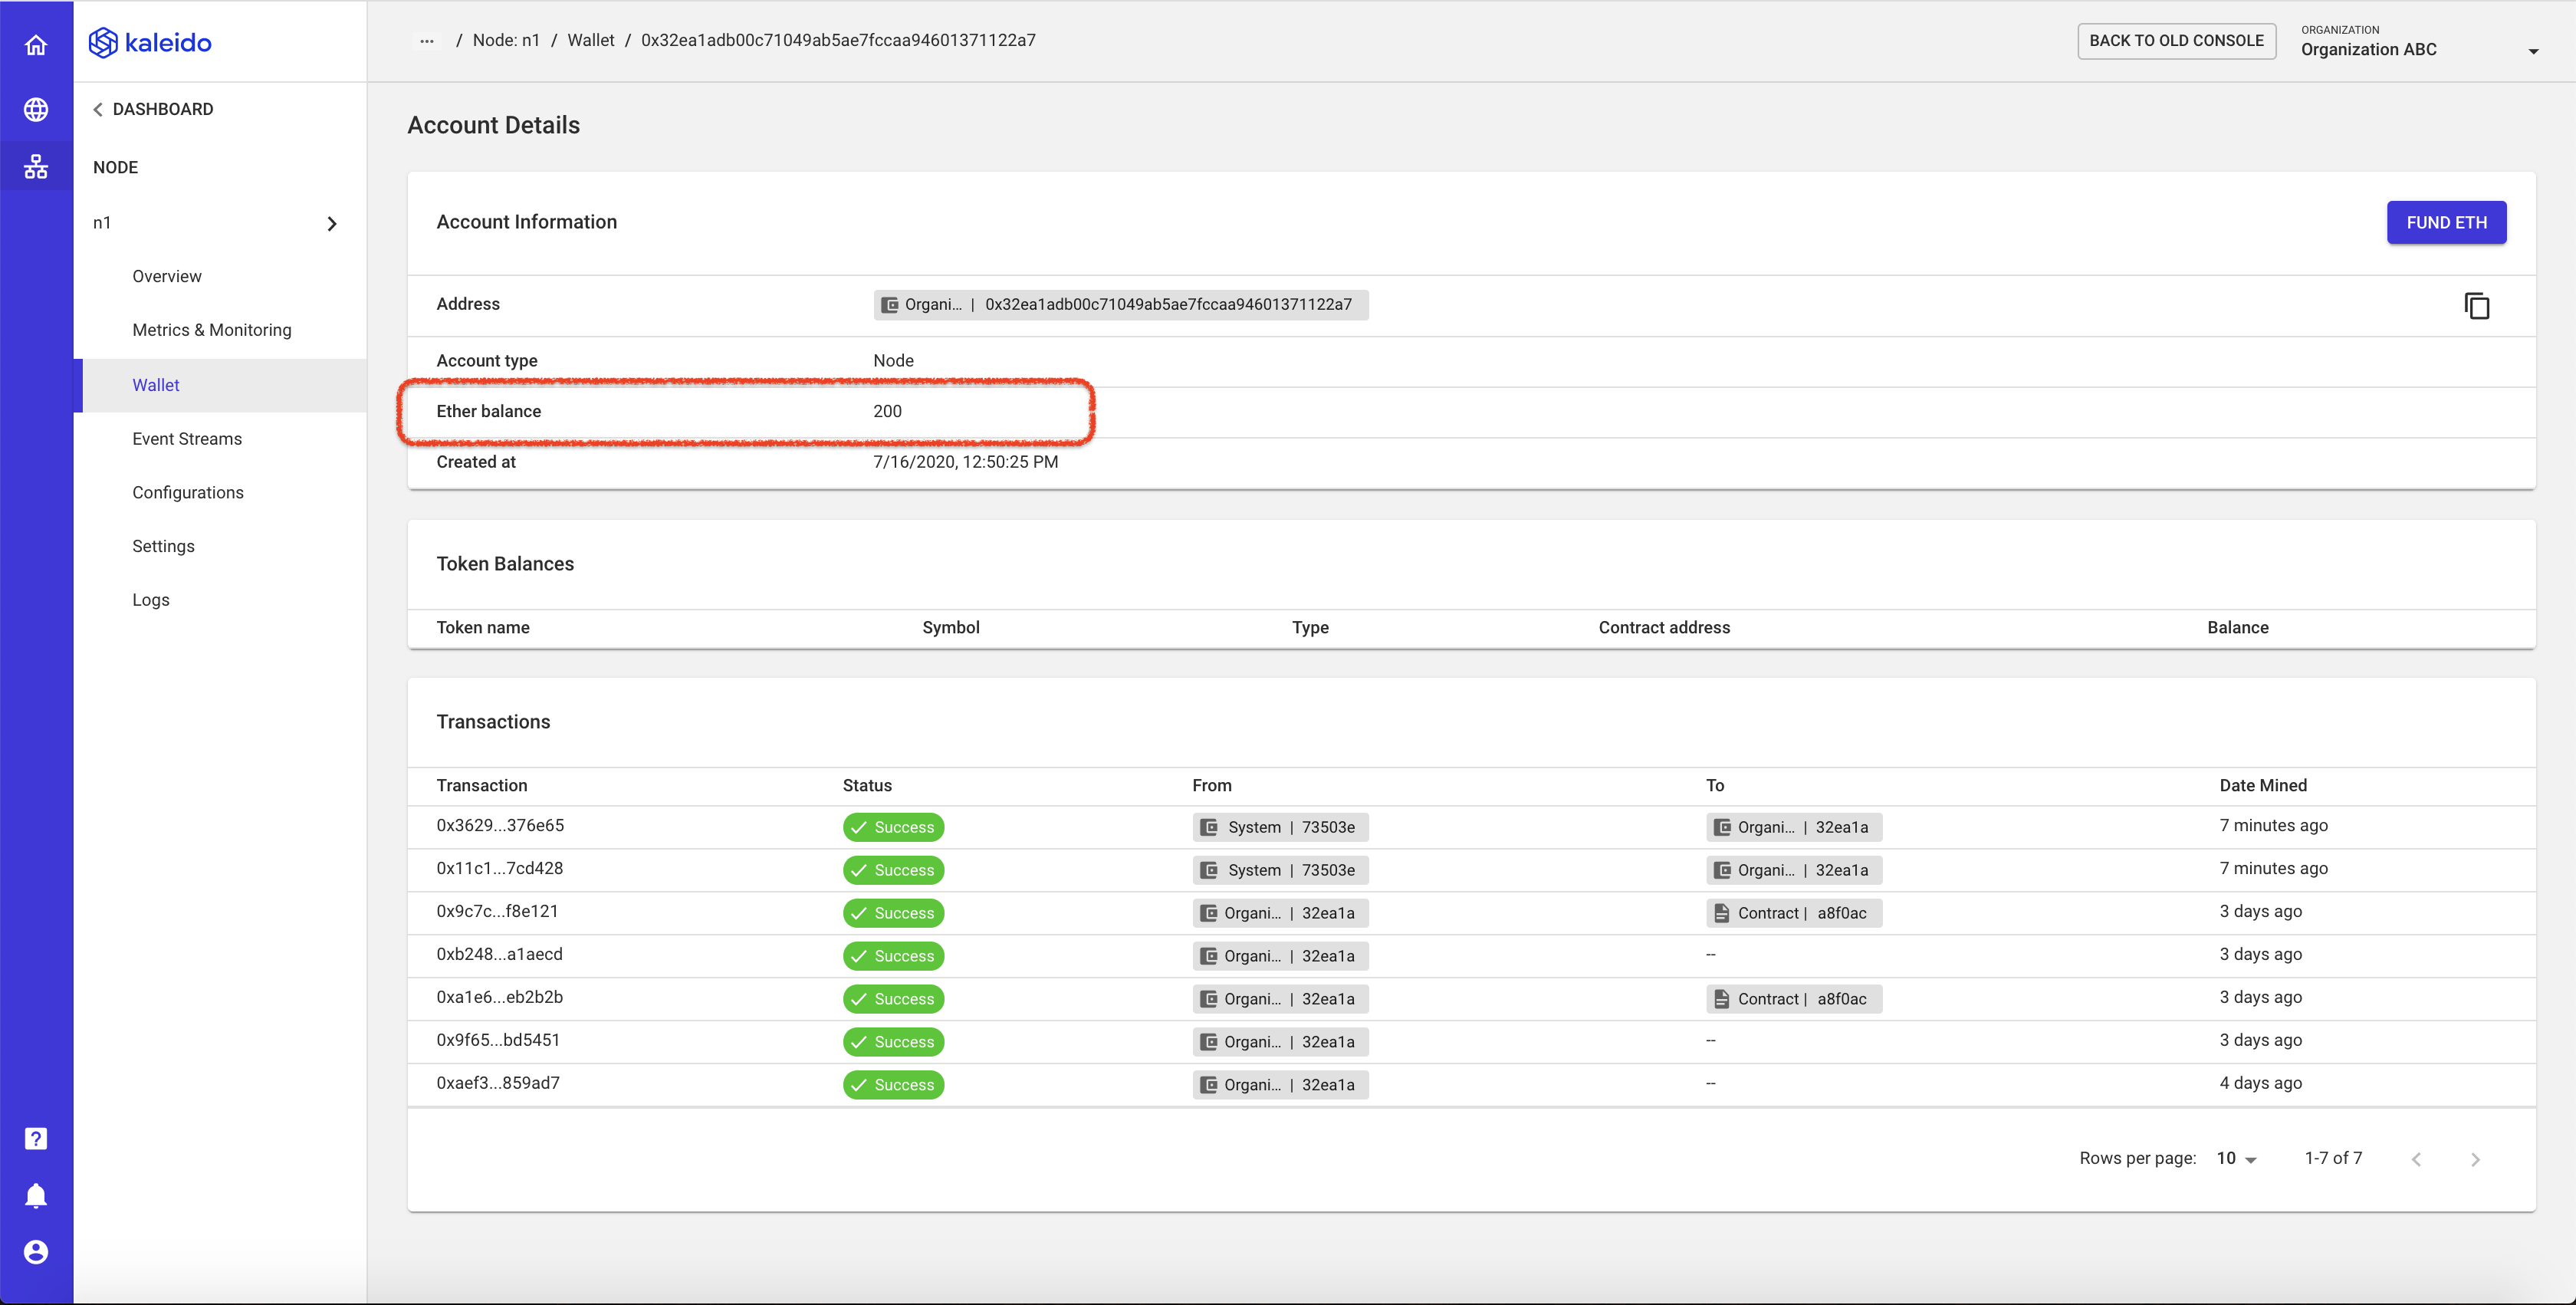
- Expand the "Key Management" tab in the lefthand navigation of your environment
- Click the appropriate wallet type: Node, Managed or Cloud HSM
- Navigate to the dashboard of the account in question.
- The balance will display in the "Ether Balance" row
Checking the Balance of an Externally-Managed Account
- Use the
eth.getBalanceAPI from within the JavaScript console or via a Web3 client library and specify the externally-managed account. For example:
Welcome to the Geth JavaScript console!

instance: Geth/v1.8.27-stable-c149c5ca/linux-amd64/go1.11.13
coinbase: 0x32ea1adb00c71049ab5ae7fccaa94601371122a7
at block: 72656 (Mon, 20 Jul 2020 17:44:24 EDT)
 datadir: /qdata/ethereum
 modules: admin:1.0 clique:1.0 debug:1.0 eth:1.0 miner:1.0 net:1.0 personal:1.0 rpc:1.0 txpool:1.0 web3:1.0

> eth.getBalance("0xb863185c6361a226edc3ec11eb891a2cfddc5685")
100000000000000000000
Checking the Ether Pool Balance
- Expand the "Address Book" tab from within your environment
- Click "Signing Accounts"
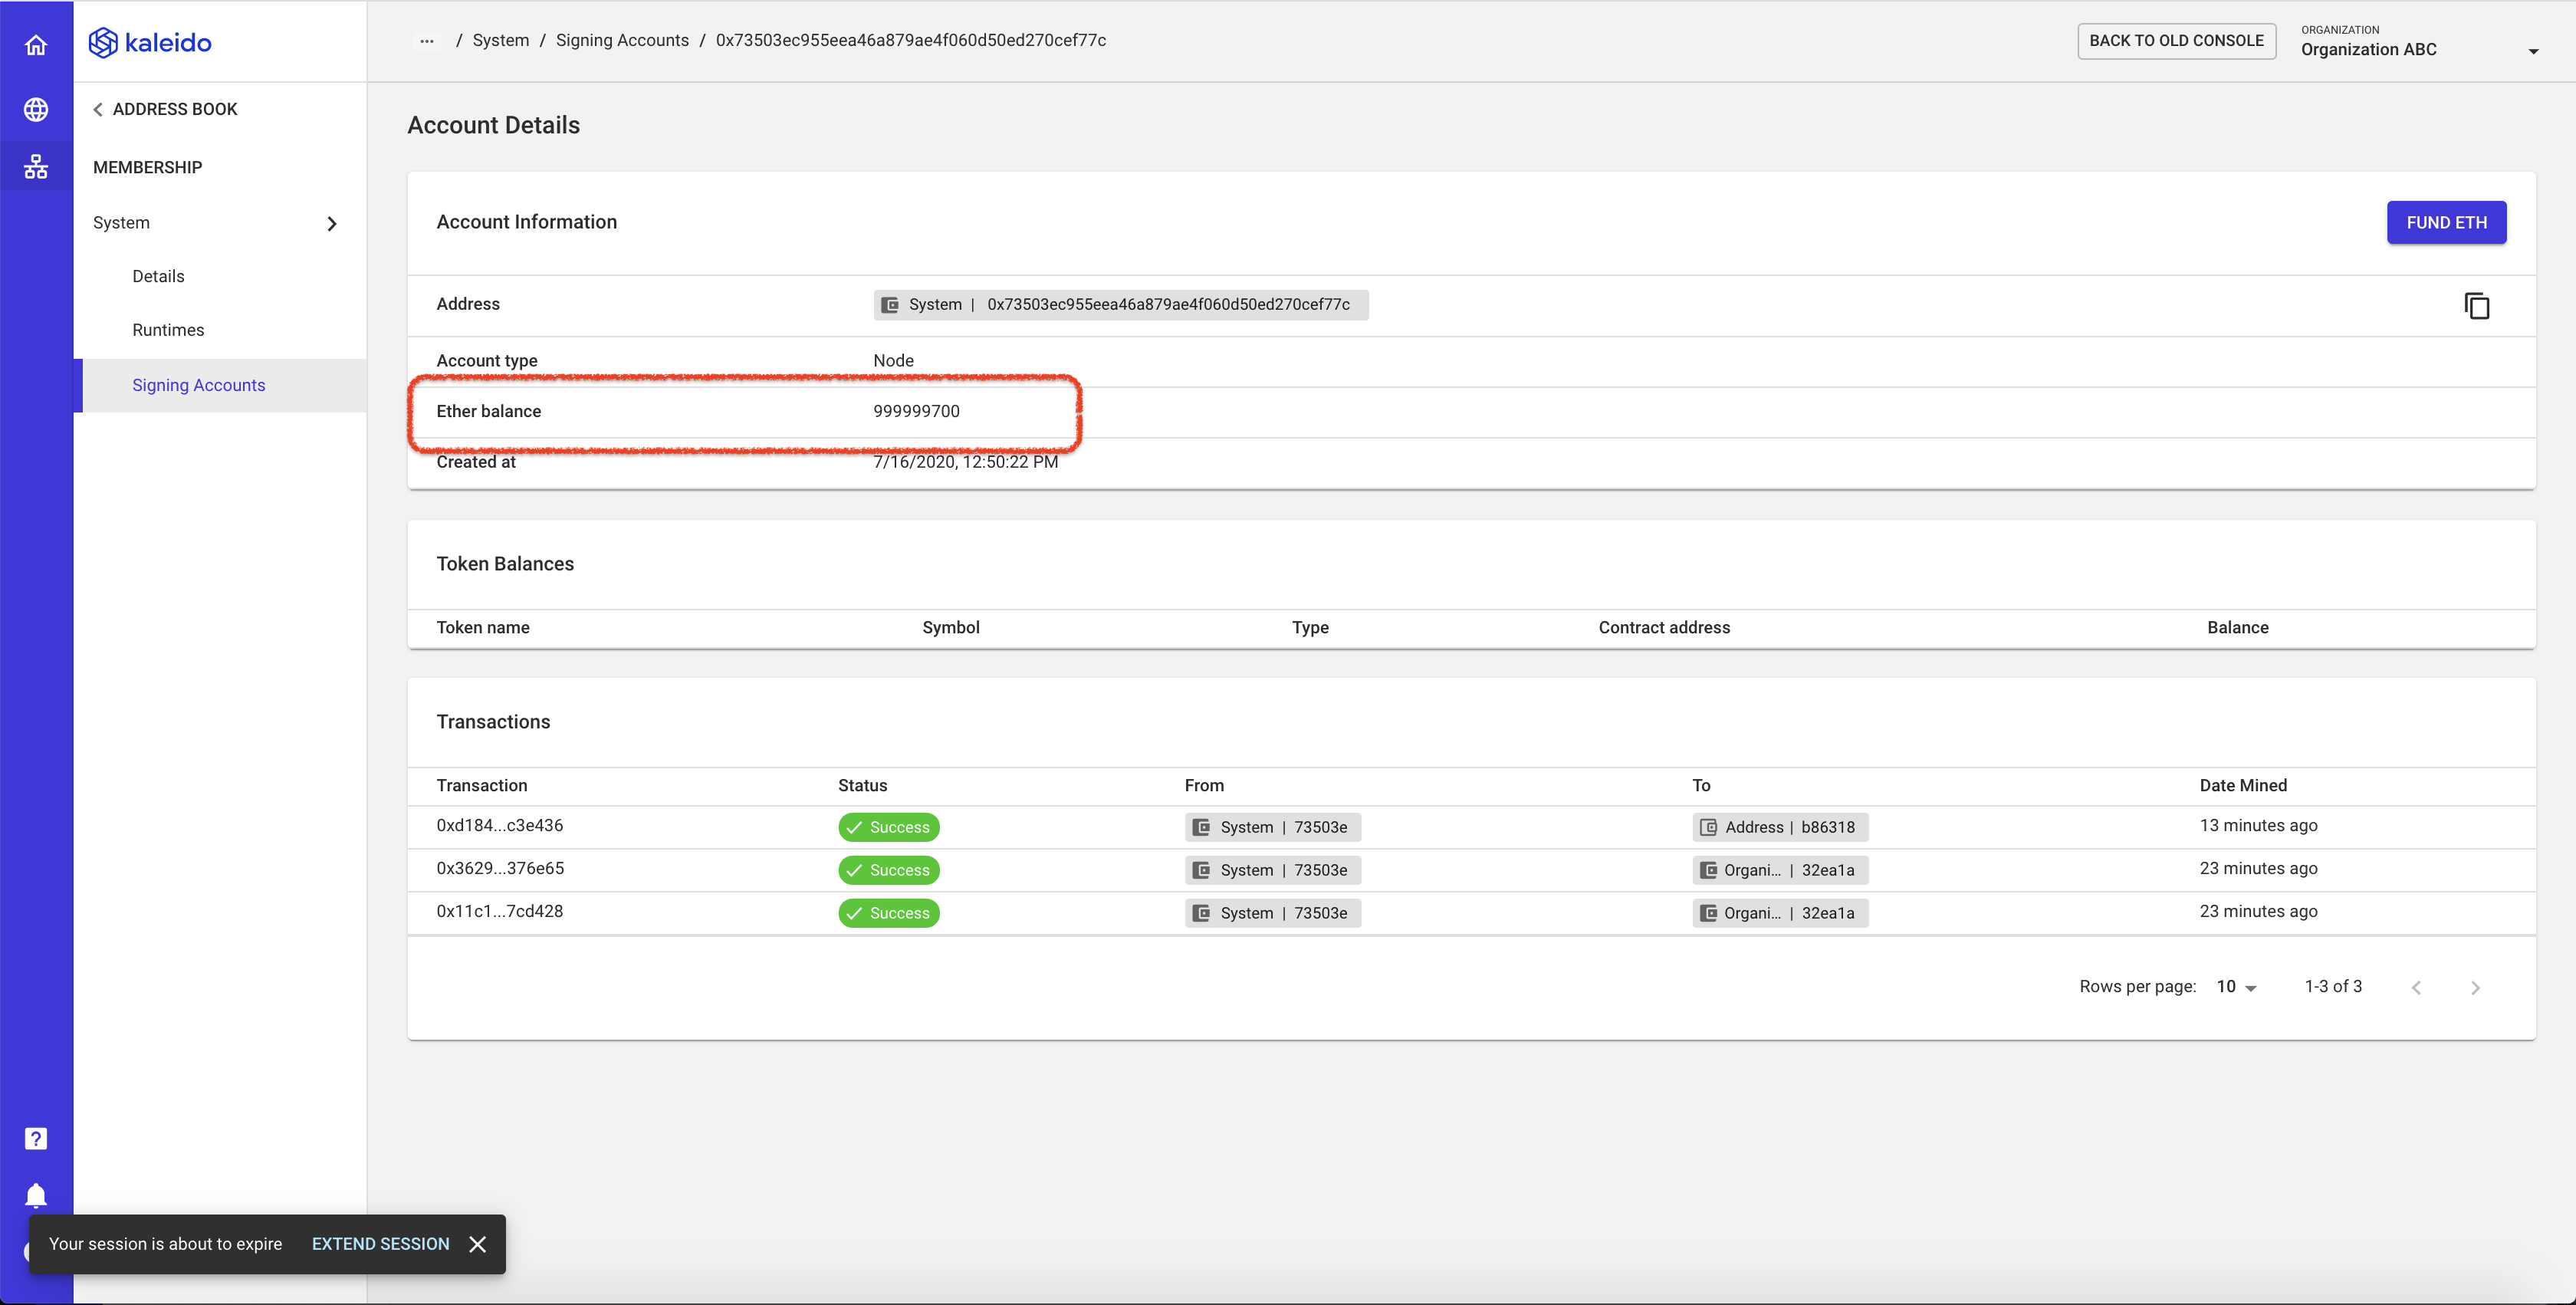
- Click on the Account widget for the sole System Monitor address
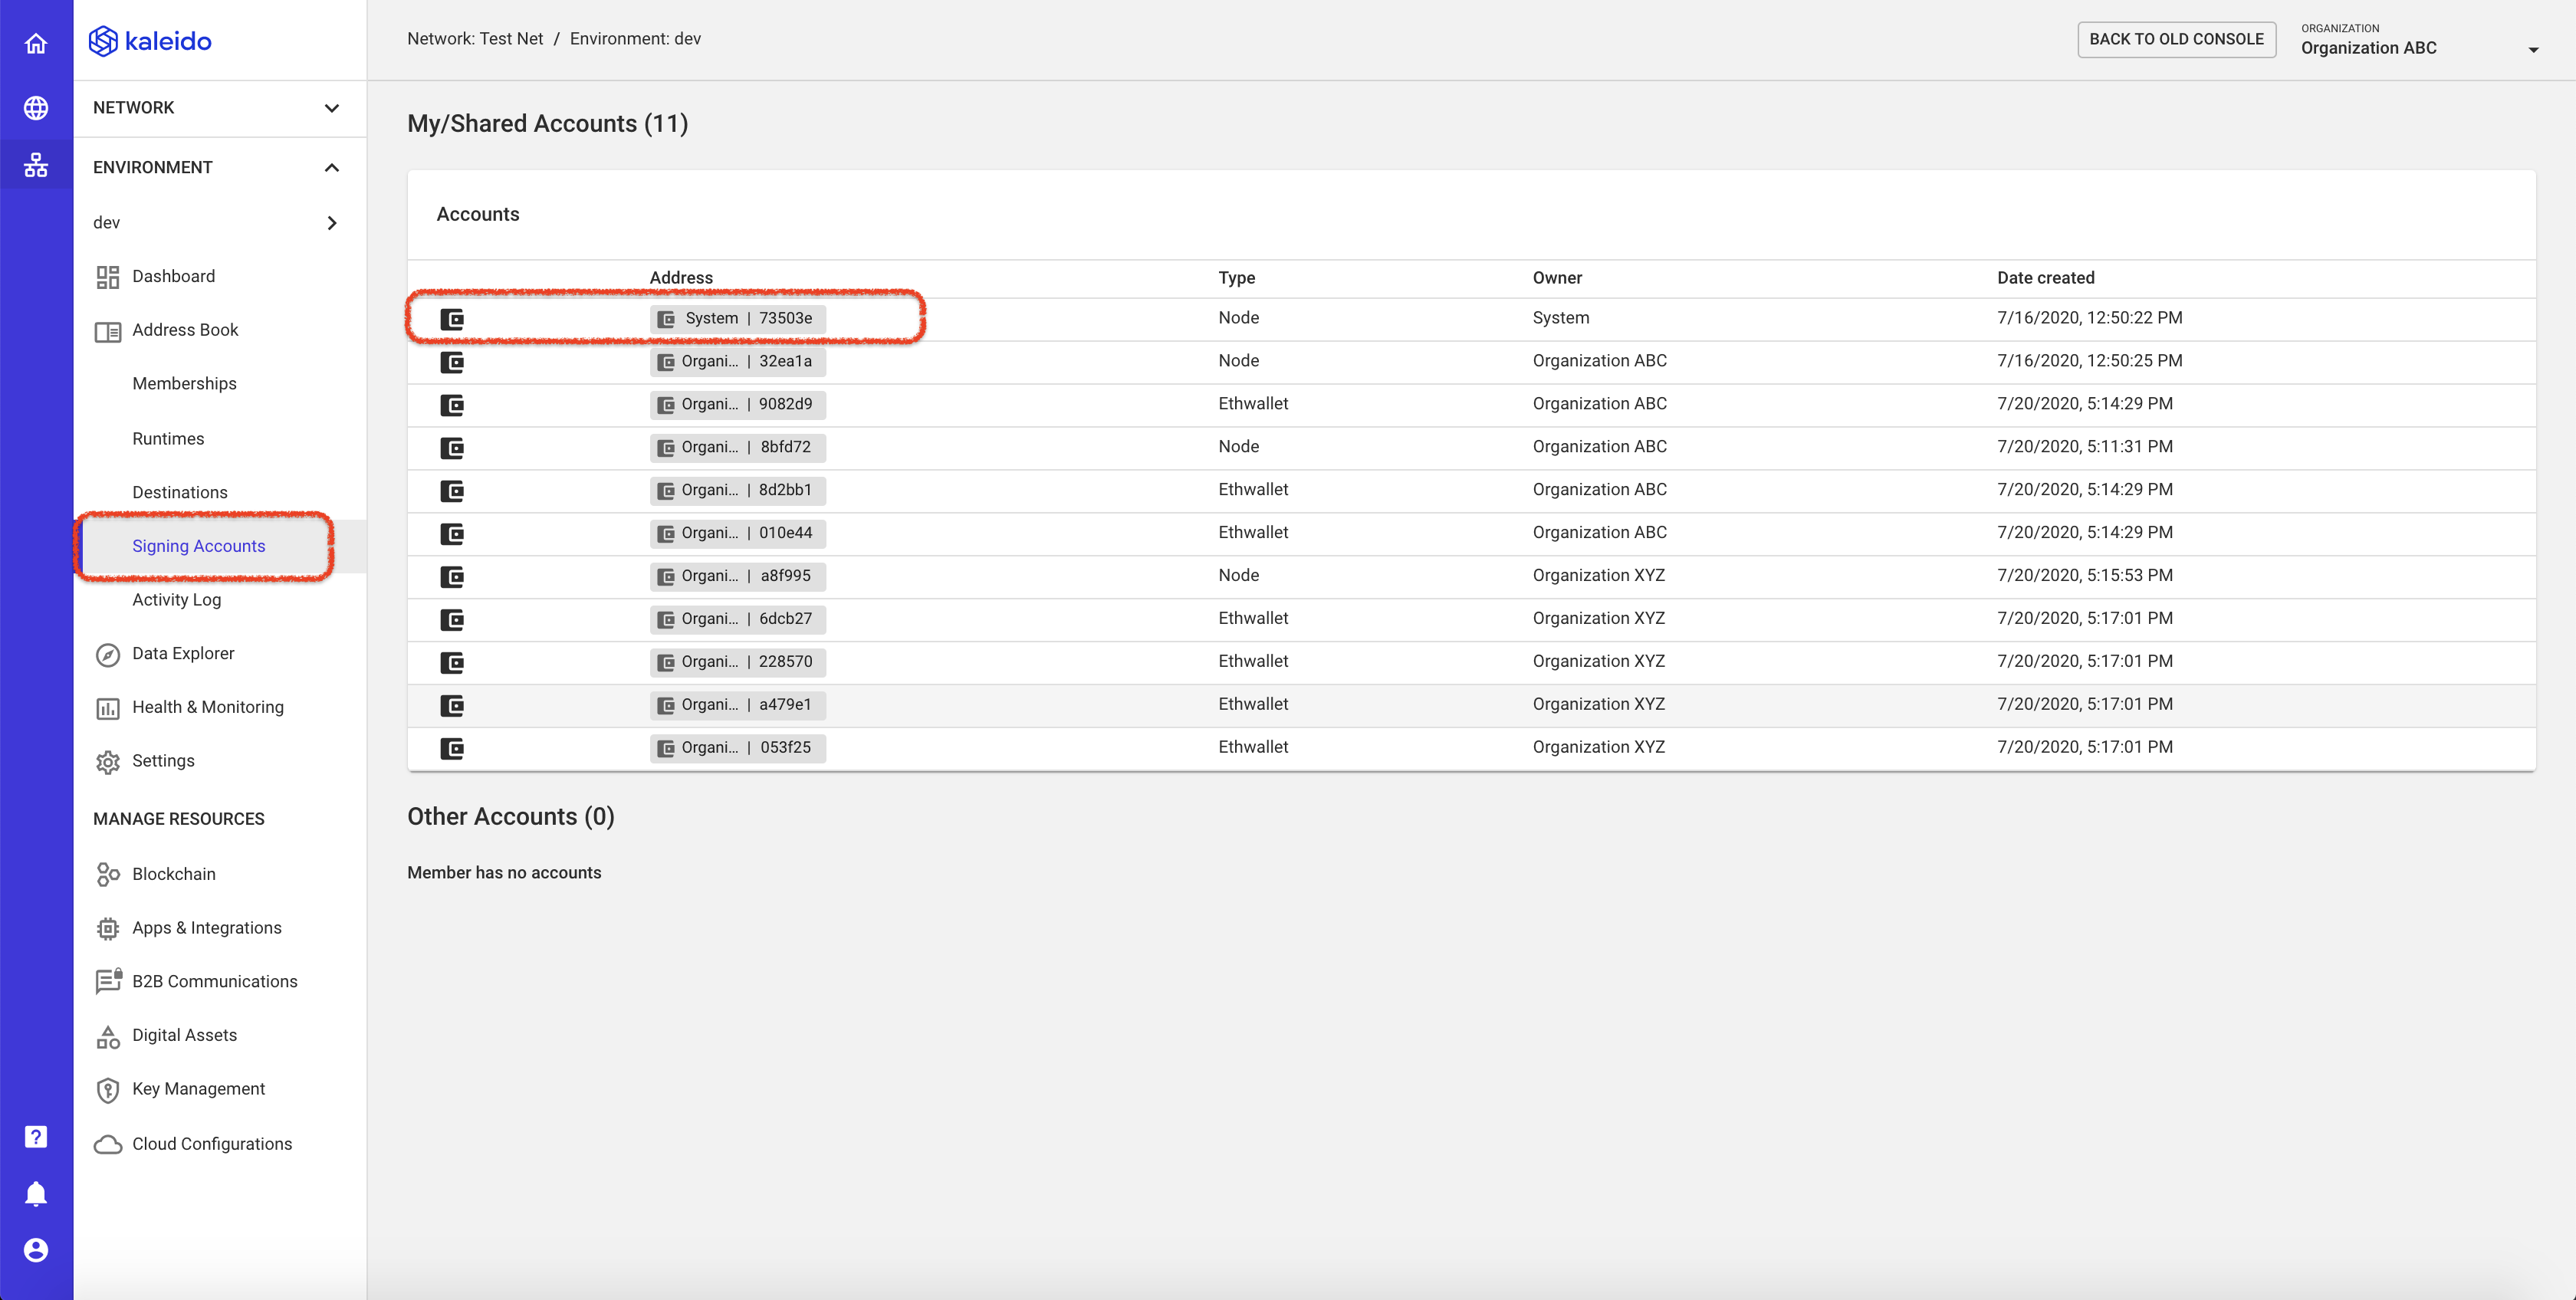
- As with all indexed accounts, the remaining balance will display in the "Ether Balance" row
