Usage - Webhooks
Make use of event streams within your environment's Apps and Integrations portal to consume event payloads emitted from your deployed smart contracts and send them to a target of your choice. In order to leverage the Kaleido Event Streams Service, your smart contract requires an event interface which is used to specify contract parameters for indexing. The indexed arguments of an event will be stored on-chain in the transaction’s log when a function with the applied event is invoked, and the event payload can then be consumed by a client side app or streaming service that is subscribed to the event signature. Kaleido simplifies events by allowing you to specify your own custom event destination URL along with additional headers and security parameters.
Events provide particular value in a decentralized blockchain orchestration where your existing business processes benefit from real time notification of pertinent on-chain state changes. For example, a counterparty in your blockchain environment makes new private data or digital assets available for purchase. Event streams are applicable to all industry verticals and can be implemented in myriad use cases such as capital markets, supply chain, trade finance and beyond. And their value extends far beyond the reliable, guaranteed delivery provided by Kaleido; organizations can seamlessly integrate with their existing IT infrastructure to build bespoke off-chain databases for rich query functionality, and easily automate downstream business processes.
Create an Event Stream
NOTE: Events are delivered as message streams via Kaleido's REST API middleware tier. As such, for any contract to emit events via the Kaleido Event Streams service, there must be an accompanying Gateway API available for subscription.
The following example configuration will extend on the Ethereum Quick Start tutorial and make use of the basic SimpleStorage smart contract. The contract comes embedded with a basic event - DataStored - that emits when the set method is invoked. This is the event that we will subscribe to in the forthcoming steps.
Note that you can still subscribe to events for contracts that were previously deployed with a web3 library. You simply need to create an accompanying API Gateway for the instantiated smart contract. Refer to the Smart Contract Management docs for more details on generating an API Gateway.
- From within your environmental dashboard, expand the Apps and Integrations section
- Make use of the "Gateway APIs" tab if you need to generate a new Gateway; if you already have a Gateway API, skip to the next bullet
- Click on the "Event Streams" tab
- Click the "Create Event Stream" button in the middle of the screen
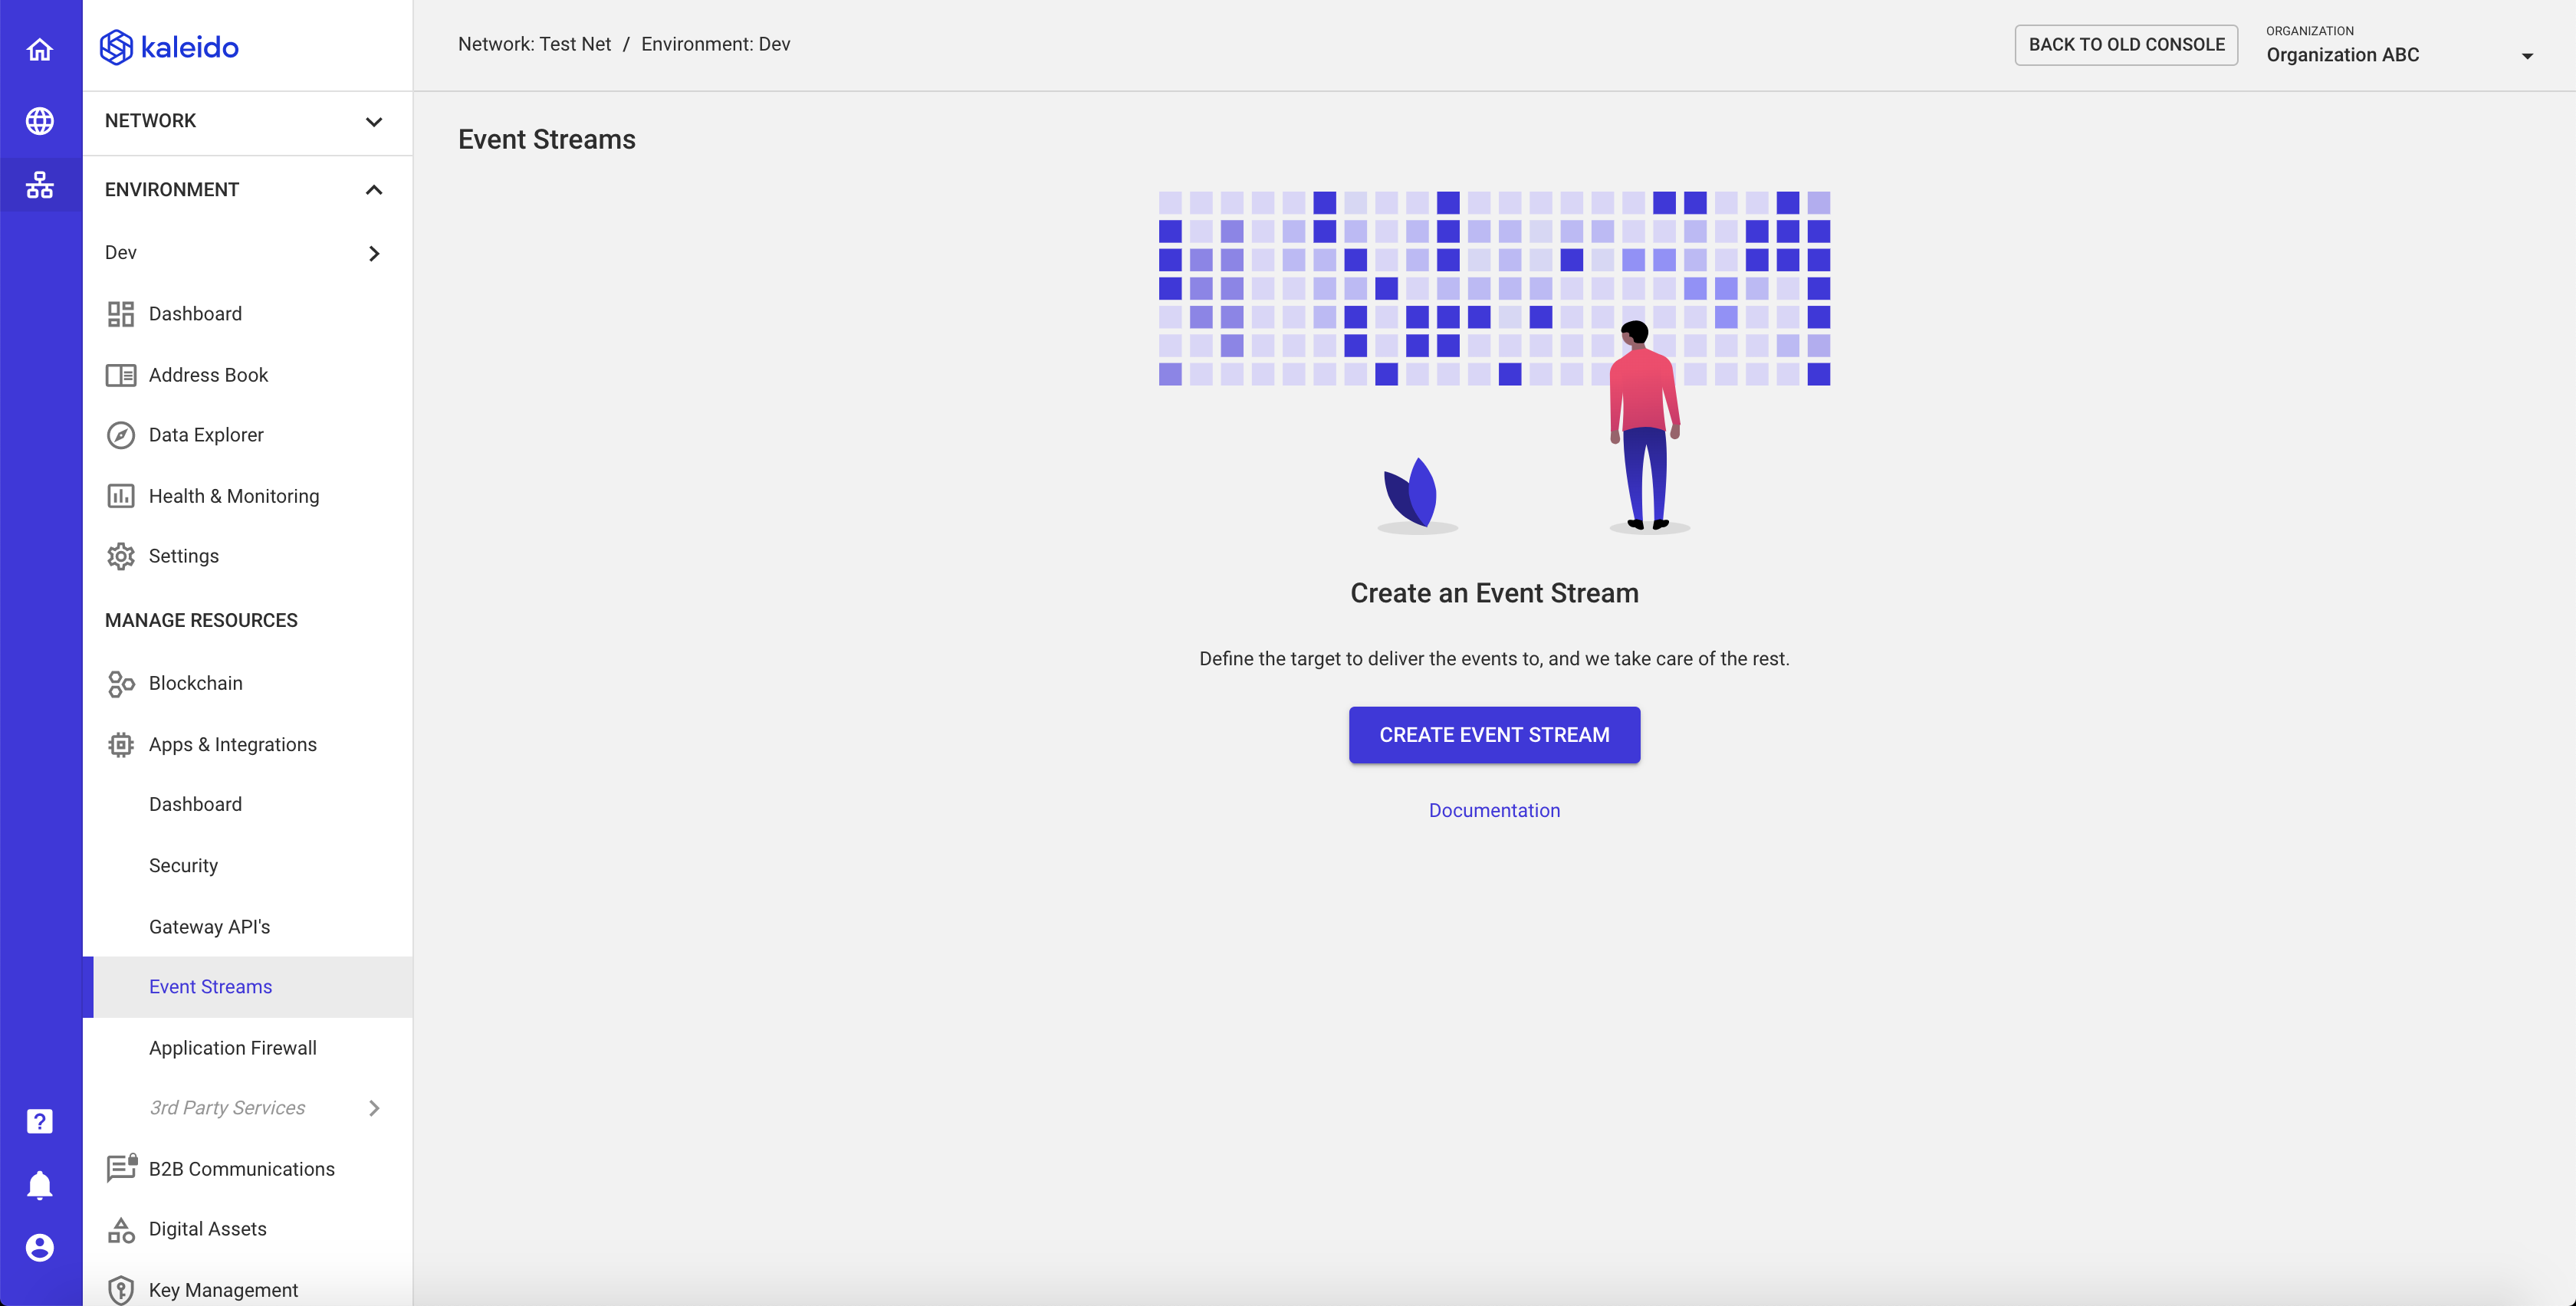
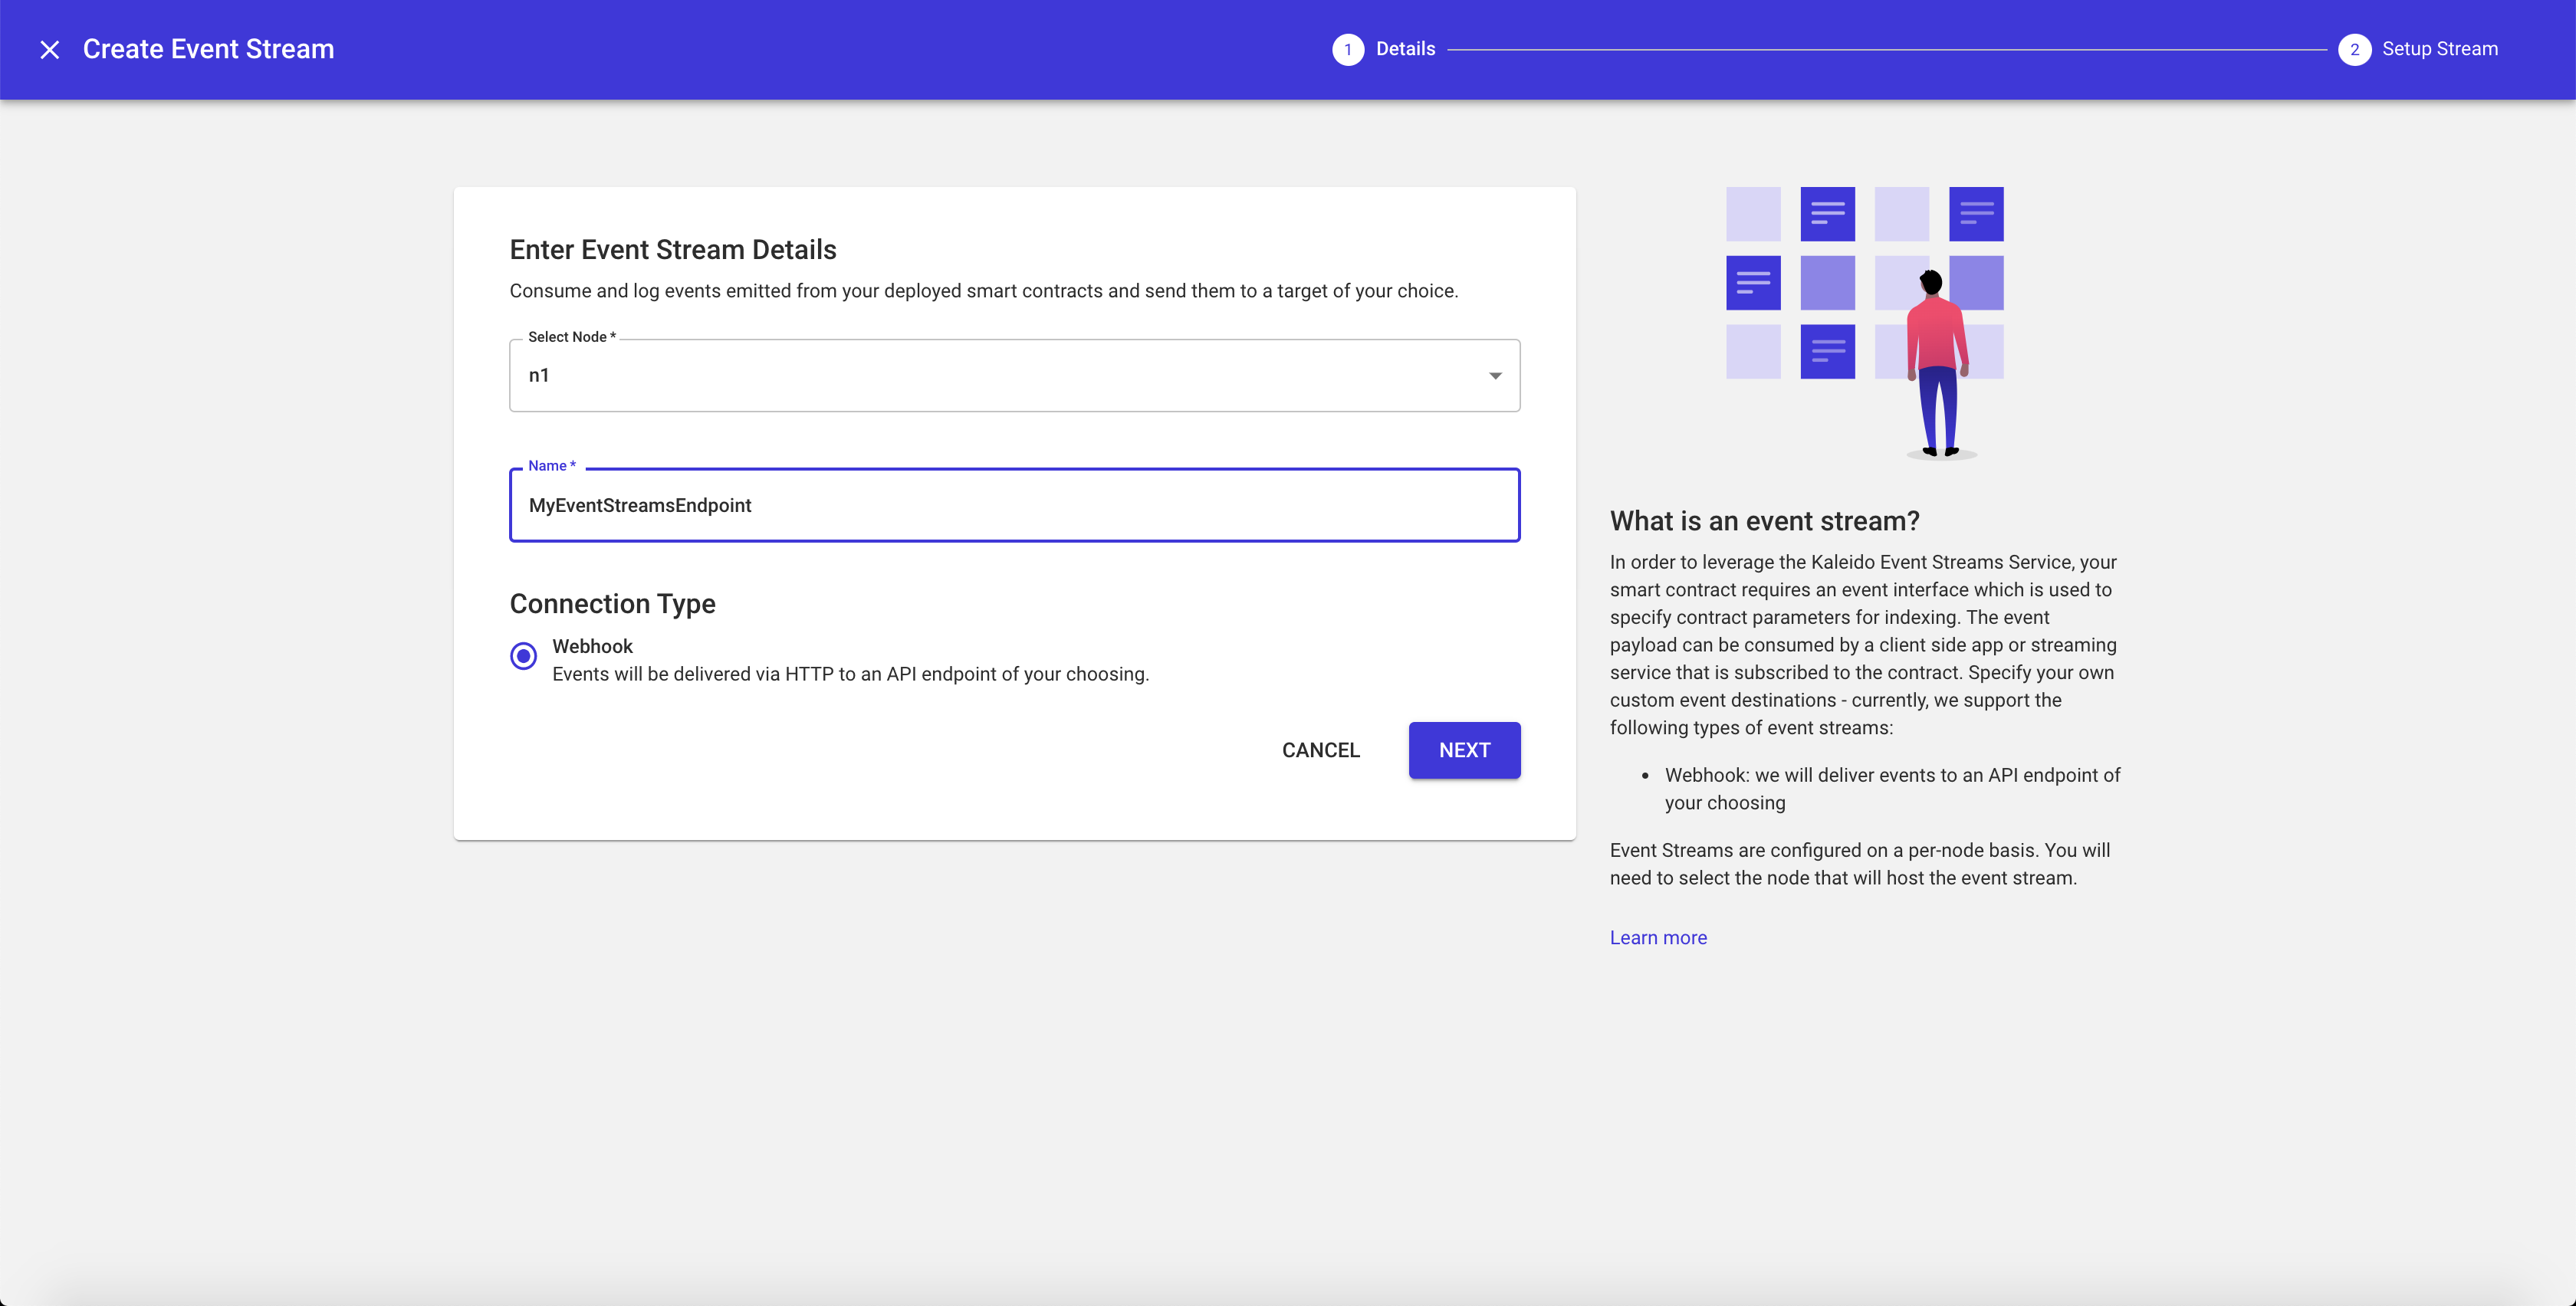
- Select a node to emit the event(s)
- Input an arbitrary name for your Event Stream (e.g.
MyEventStreamsEndpoint) - Leave the "Connection Type" as Webhook
- Click NEXT
- Finalize your event stream configuration by providing the URL endpoint where you want the payloads to be delivered. For quick testing purposes, you can utilize a free subdomain service like Request Catcher to view events directly in your web browser. For actual application development, consider utilizing a server-less function such as AWS Lambda or Azure Functions. See the bottom of this document for an example snippet of AWS Lambda function code written in Node.js.
- Optionally configure the available batch size, timeout and blocked retry parameters.
- Optionally add headers for security or event customization. If your endpoint is protected with a security token, use the
x-api-keyparameter as the Header Name and pass the API Key or bearer token as the value. - Click FINISH to finalize the event stream configuration.
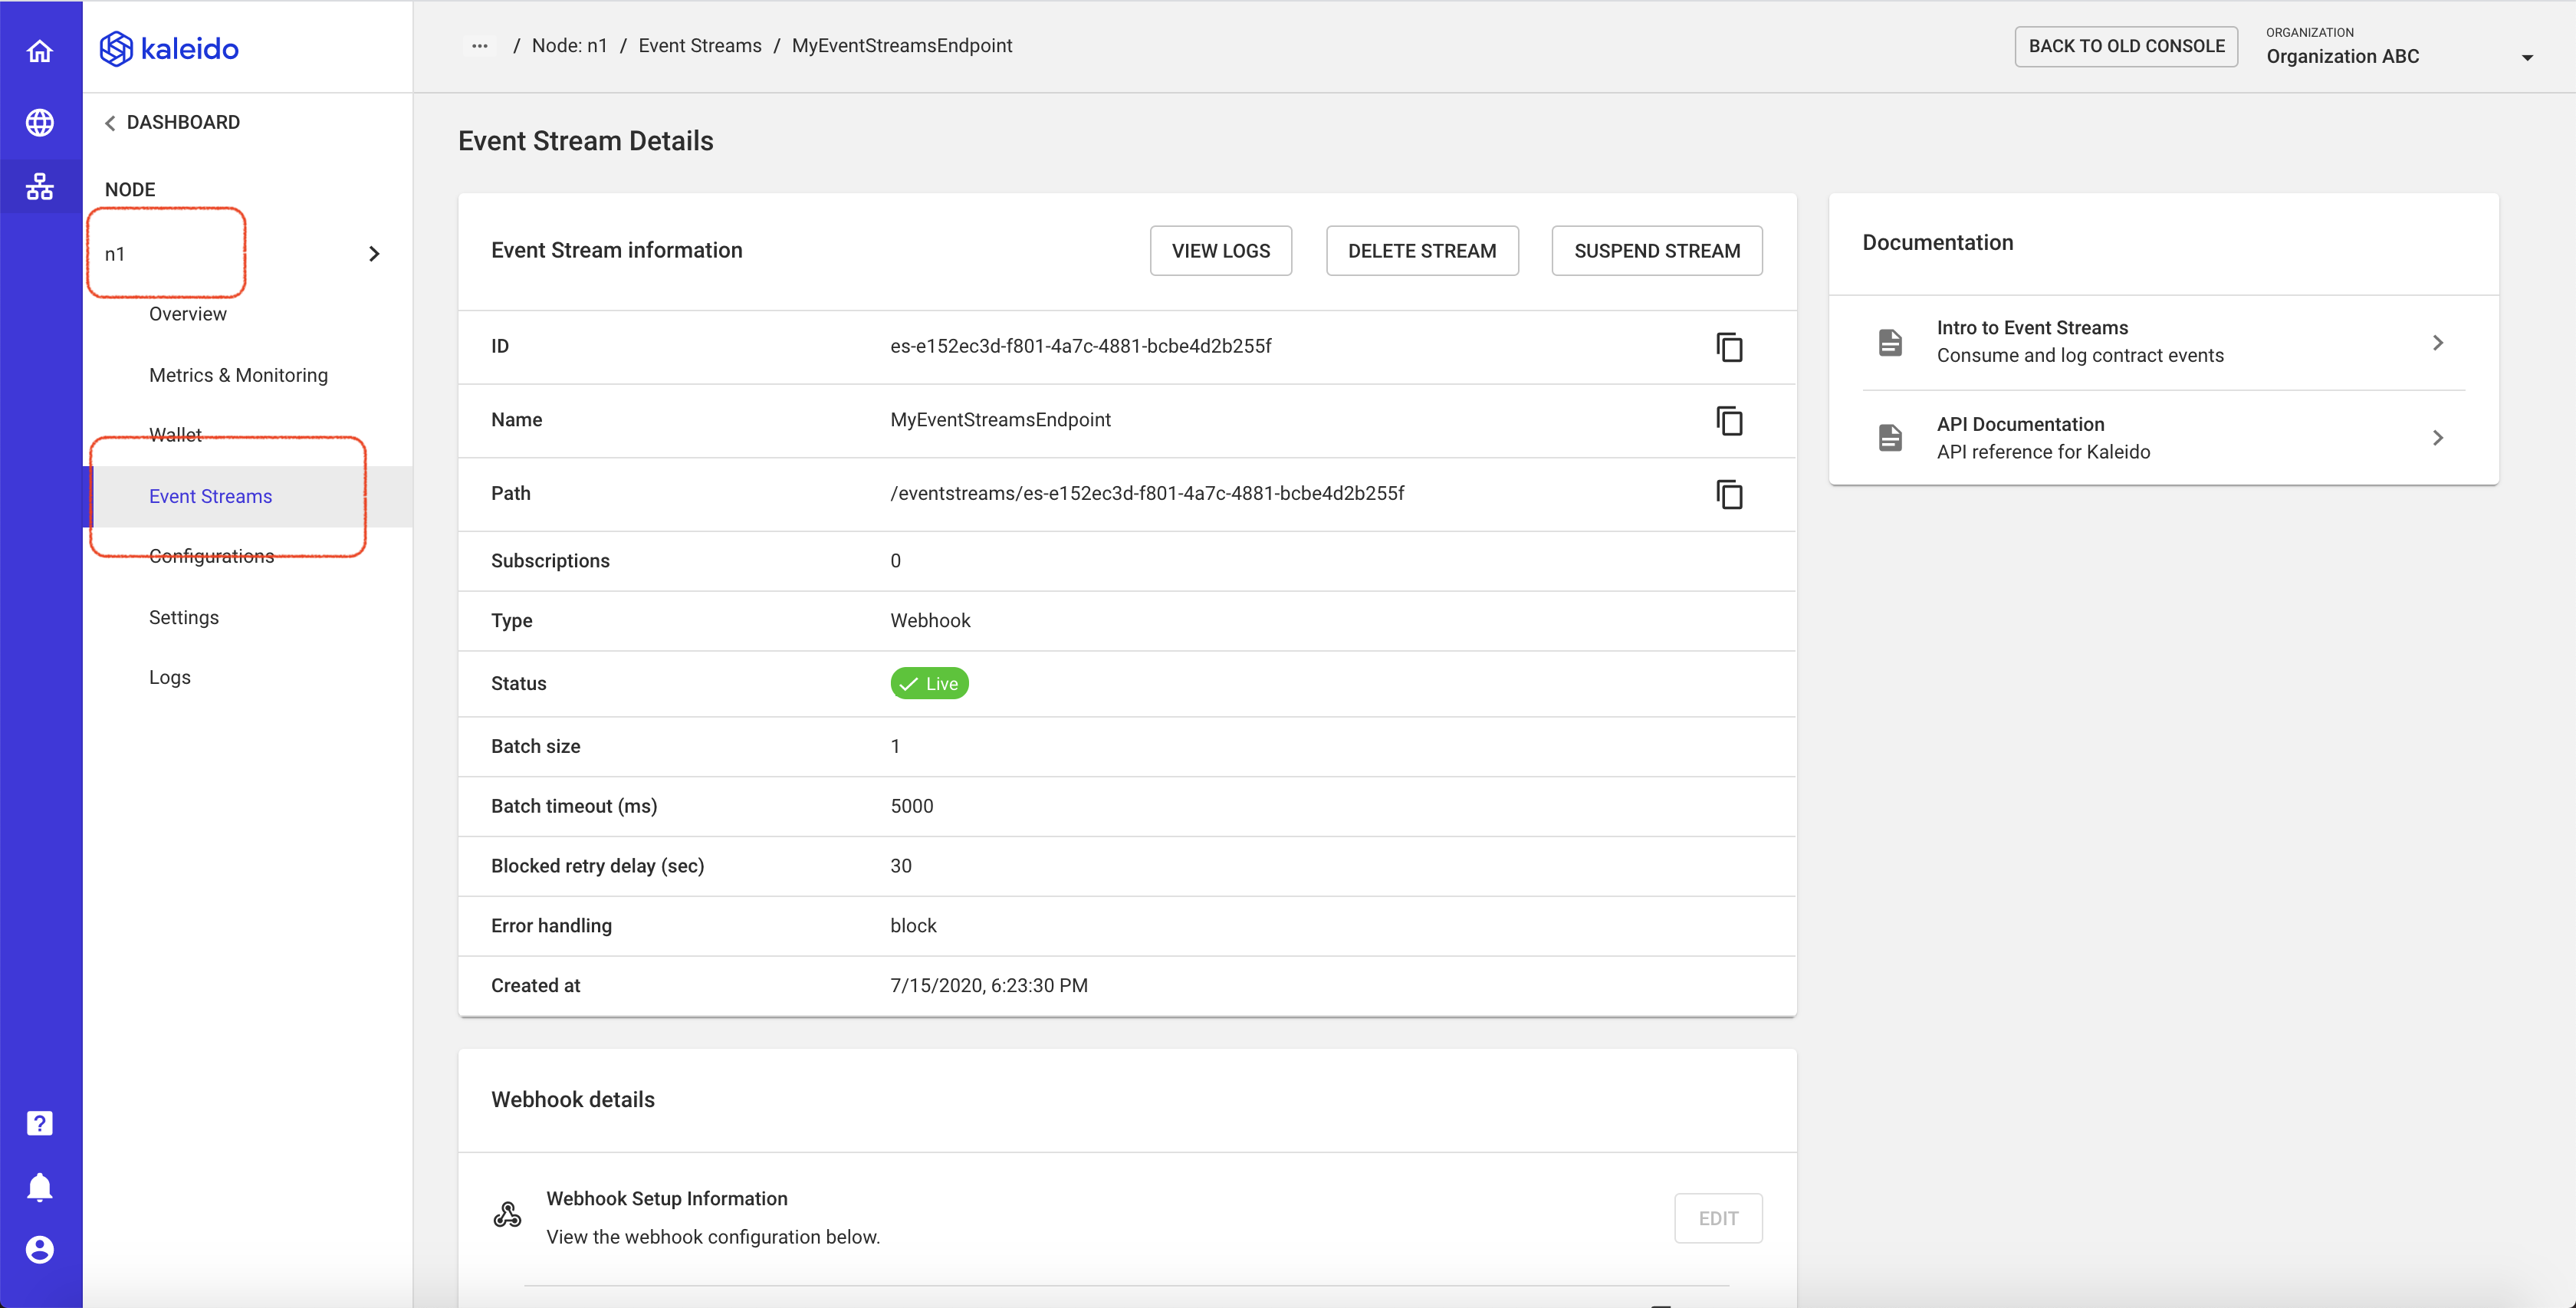
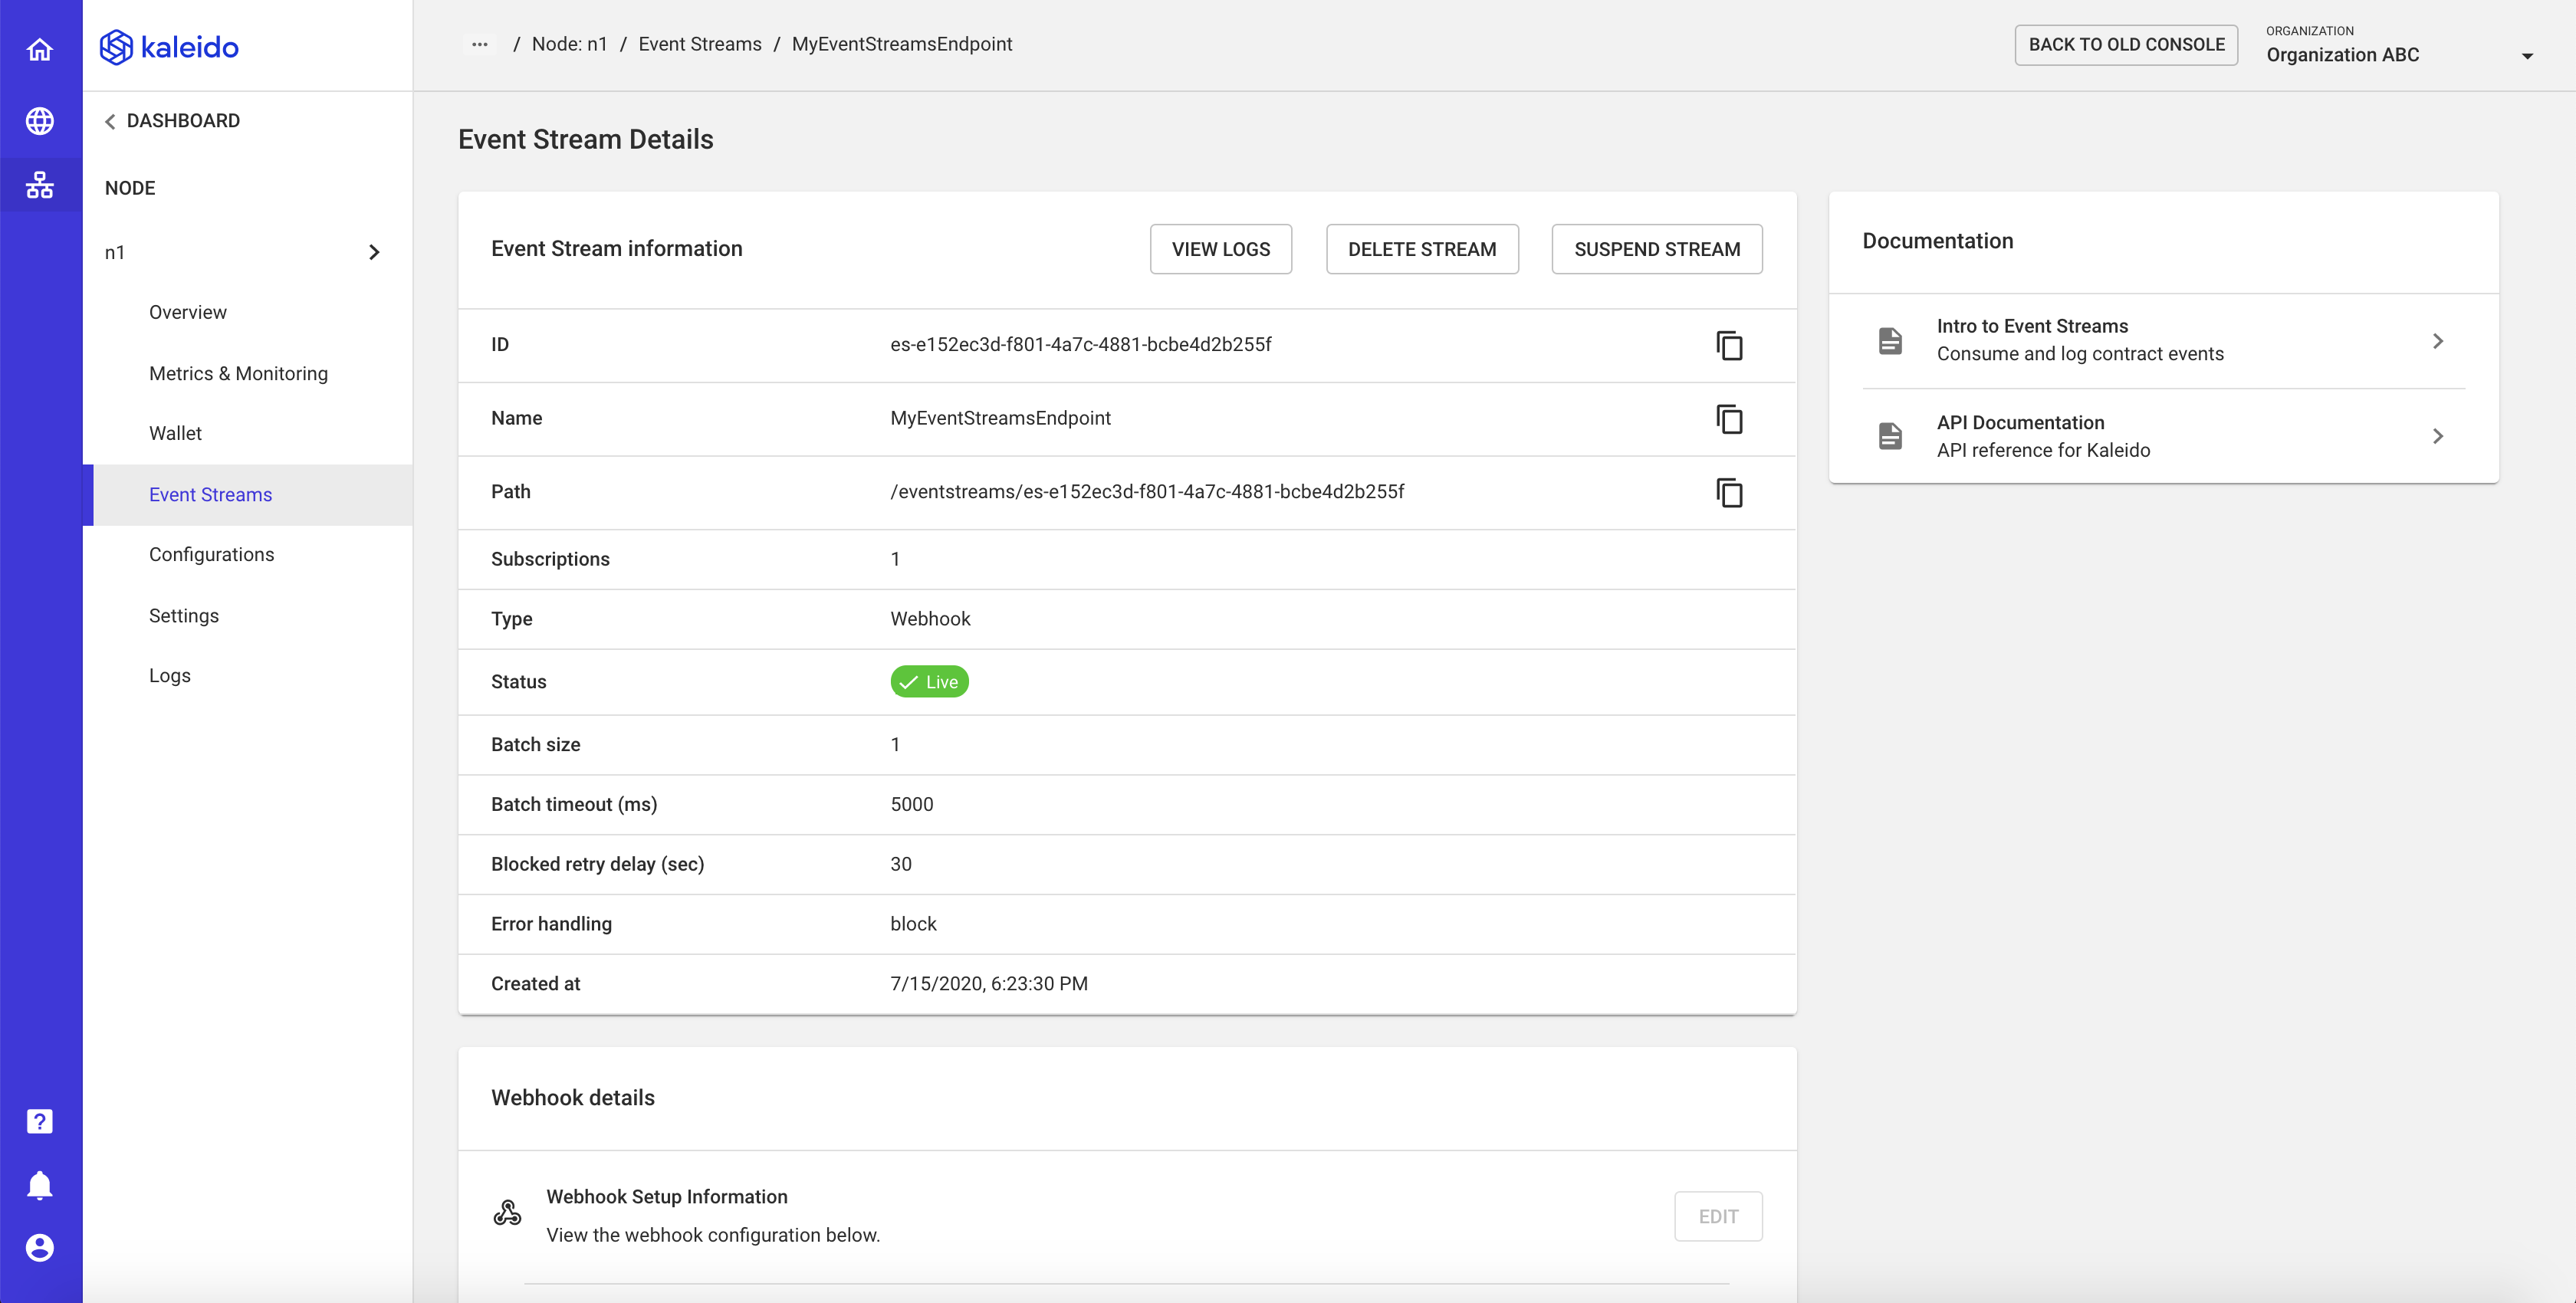
- The event stream will be persisted as a configuration within the node that it is attached to. It is viewable by accessing the node and clicking the "Event Streams" tab in the lefthand navigation.
Subscribe to an Event
- Access your event stream instance and scroll down to the bottom of the page to the "Subscriptions" section
- Click on + ADD SUBSCRIPTION
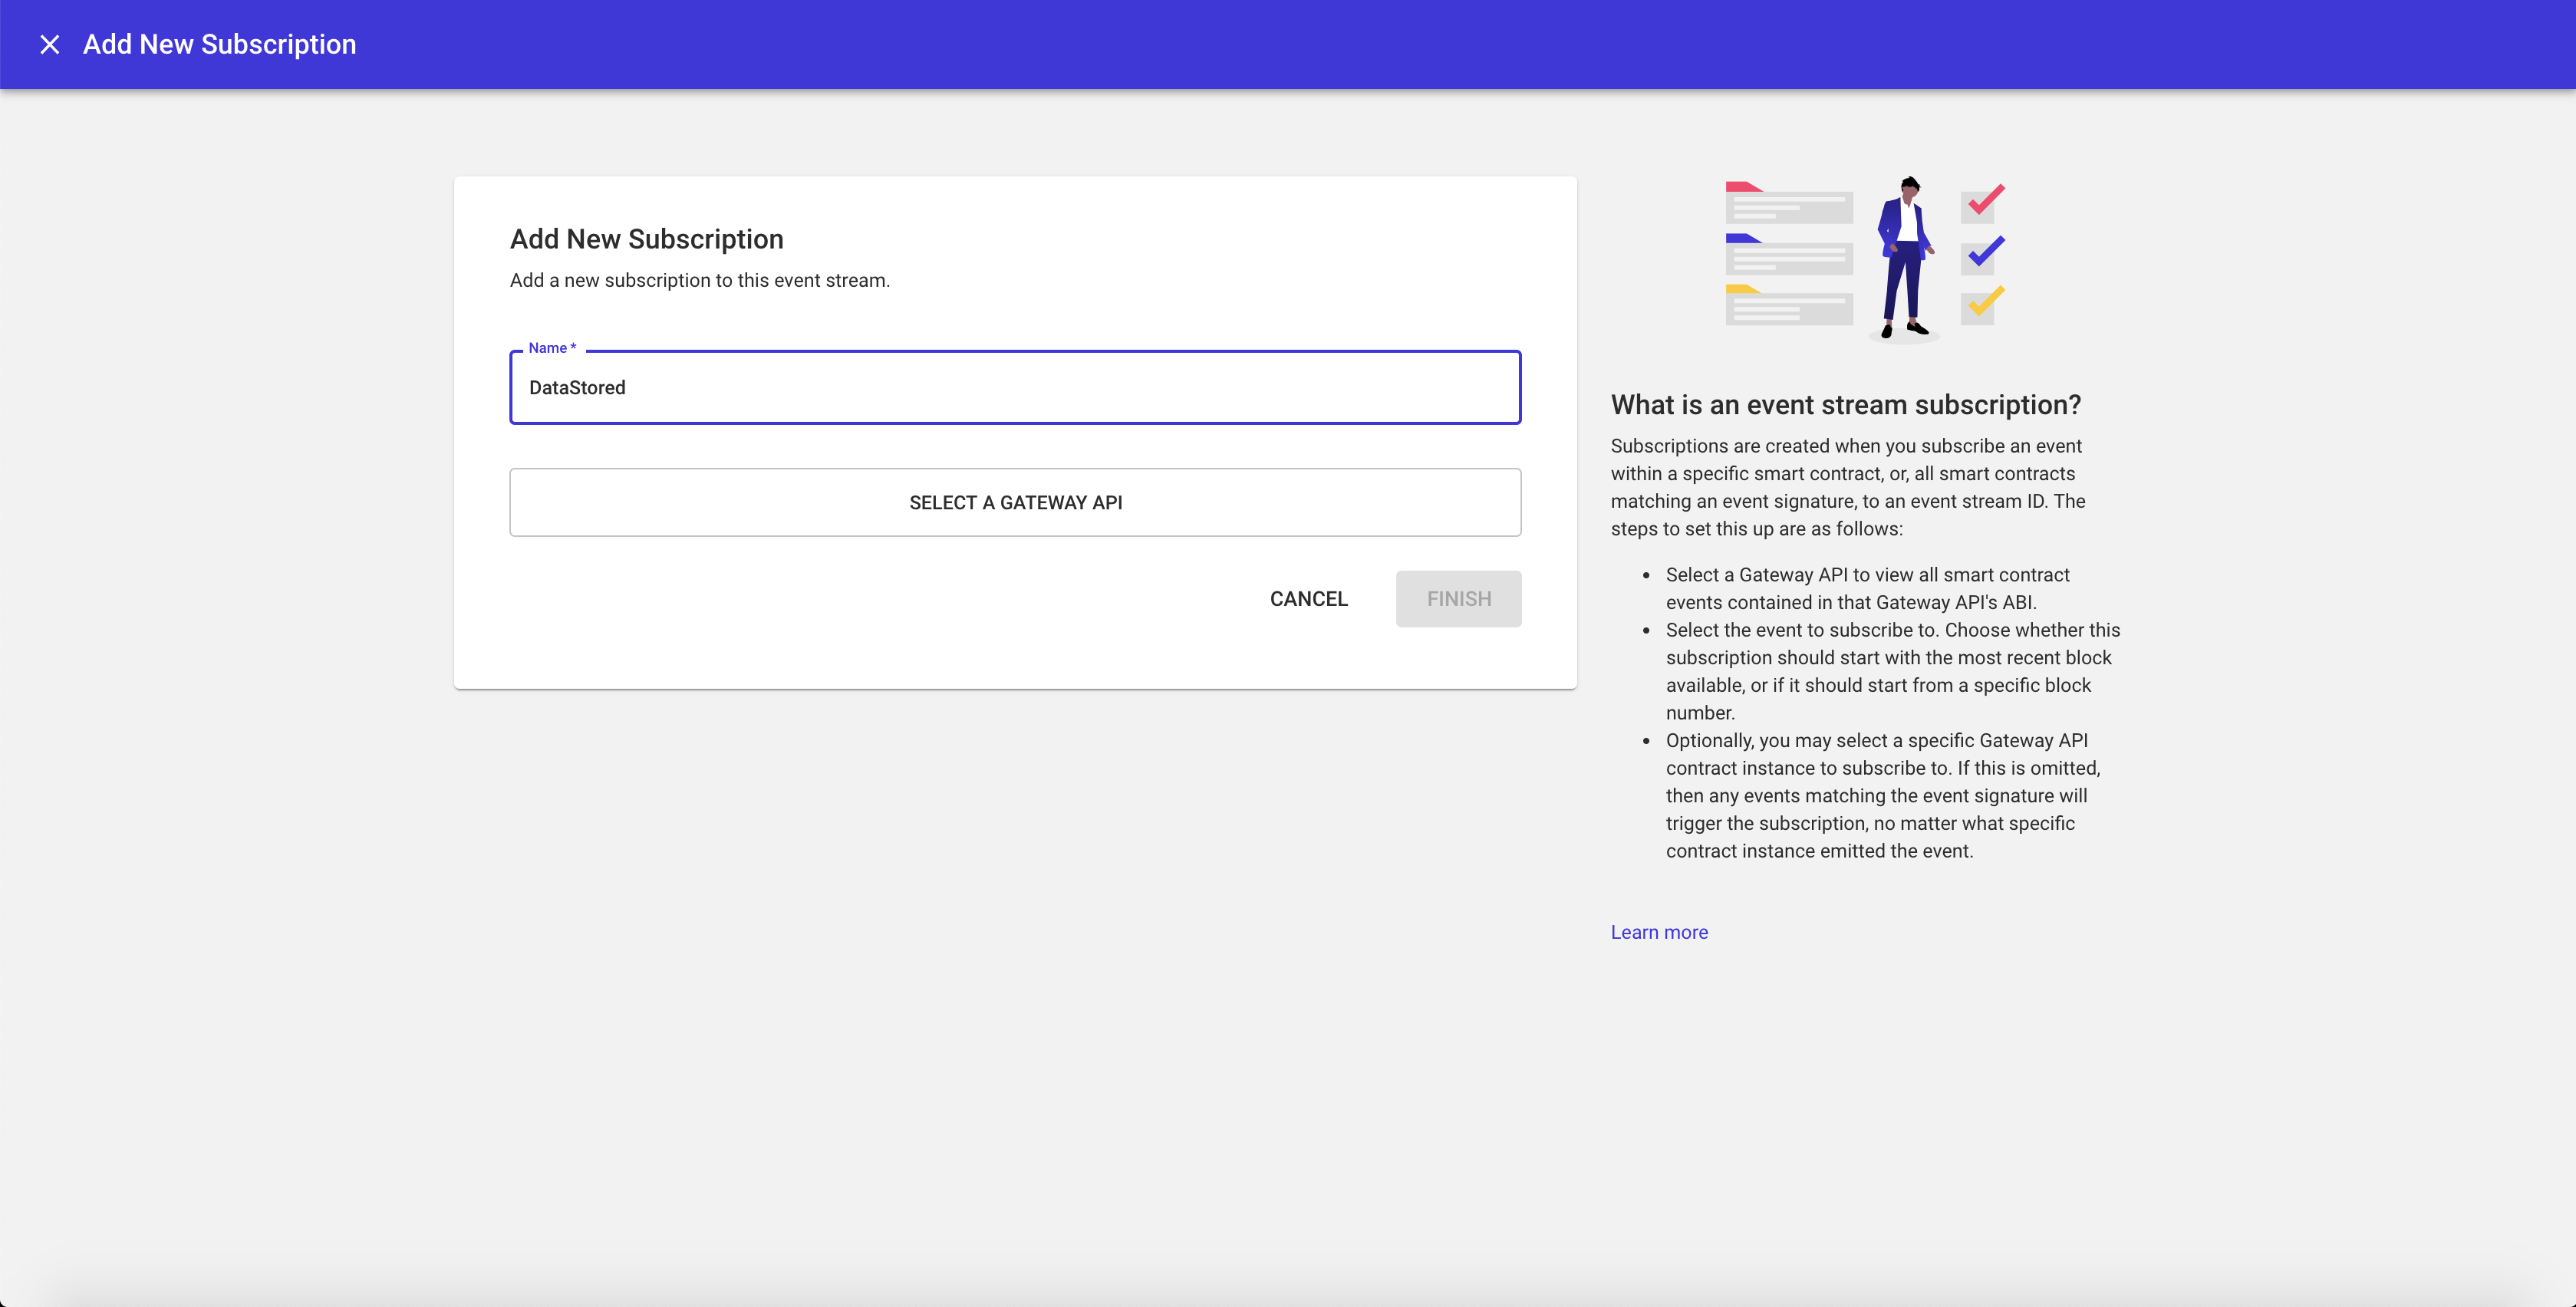
- Provide a name for the subscription (e.g.
DataStored) - Select the Gateway API containing the event you wish to subscribe to. If you do not have any Gateway APIs, you will be prompted to create one at this step
- Next, select the event you want to subscribe to (e.g.
DataStored). Kaleido will surface all available events within the Gateway API. - Use the "From Block" section to configure which block you wish to receive events from. If you want all historical events, select block 0.
- Optionally select a specific contract instance within your Gateway API to receive events from. If a specific instance is not selected, Kaleido will deliver all events matching the signature to your endpoint.
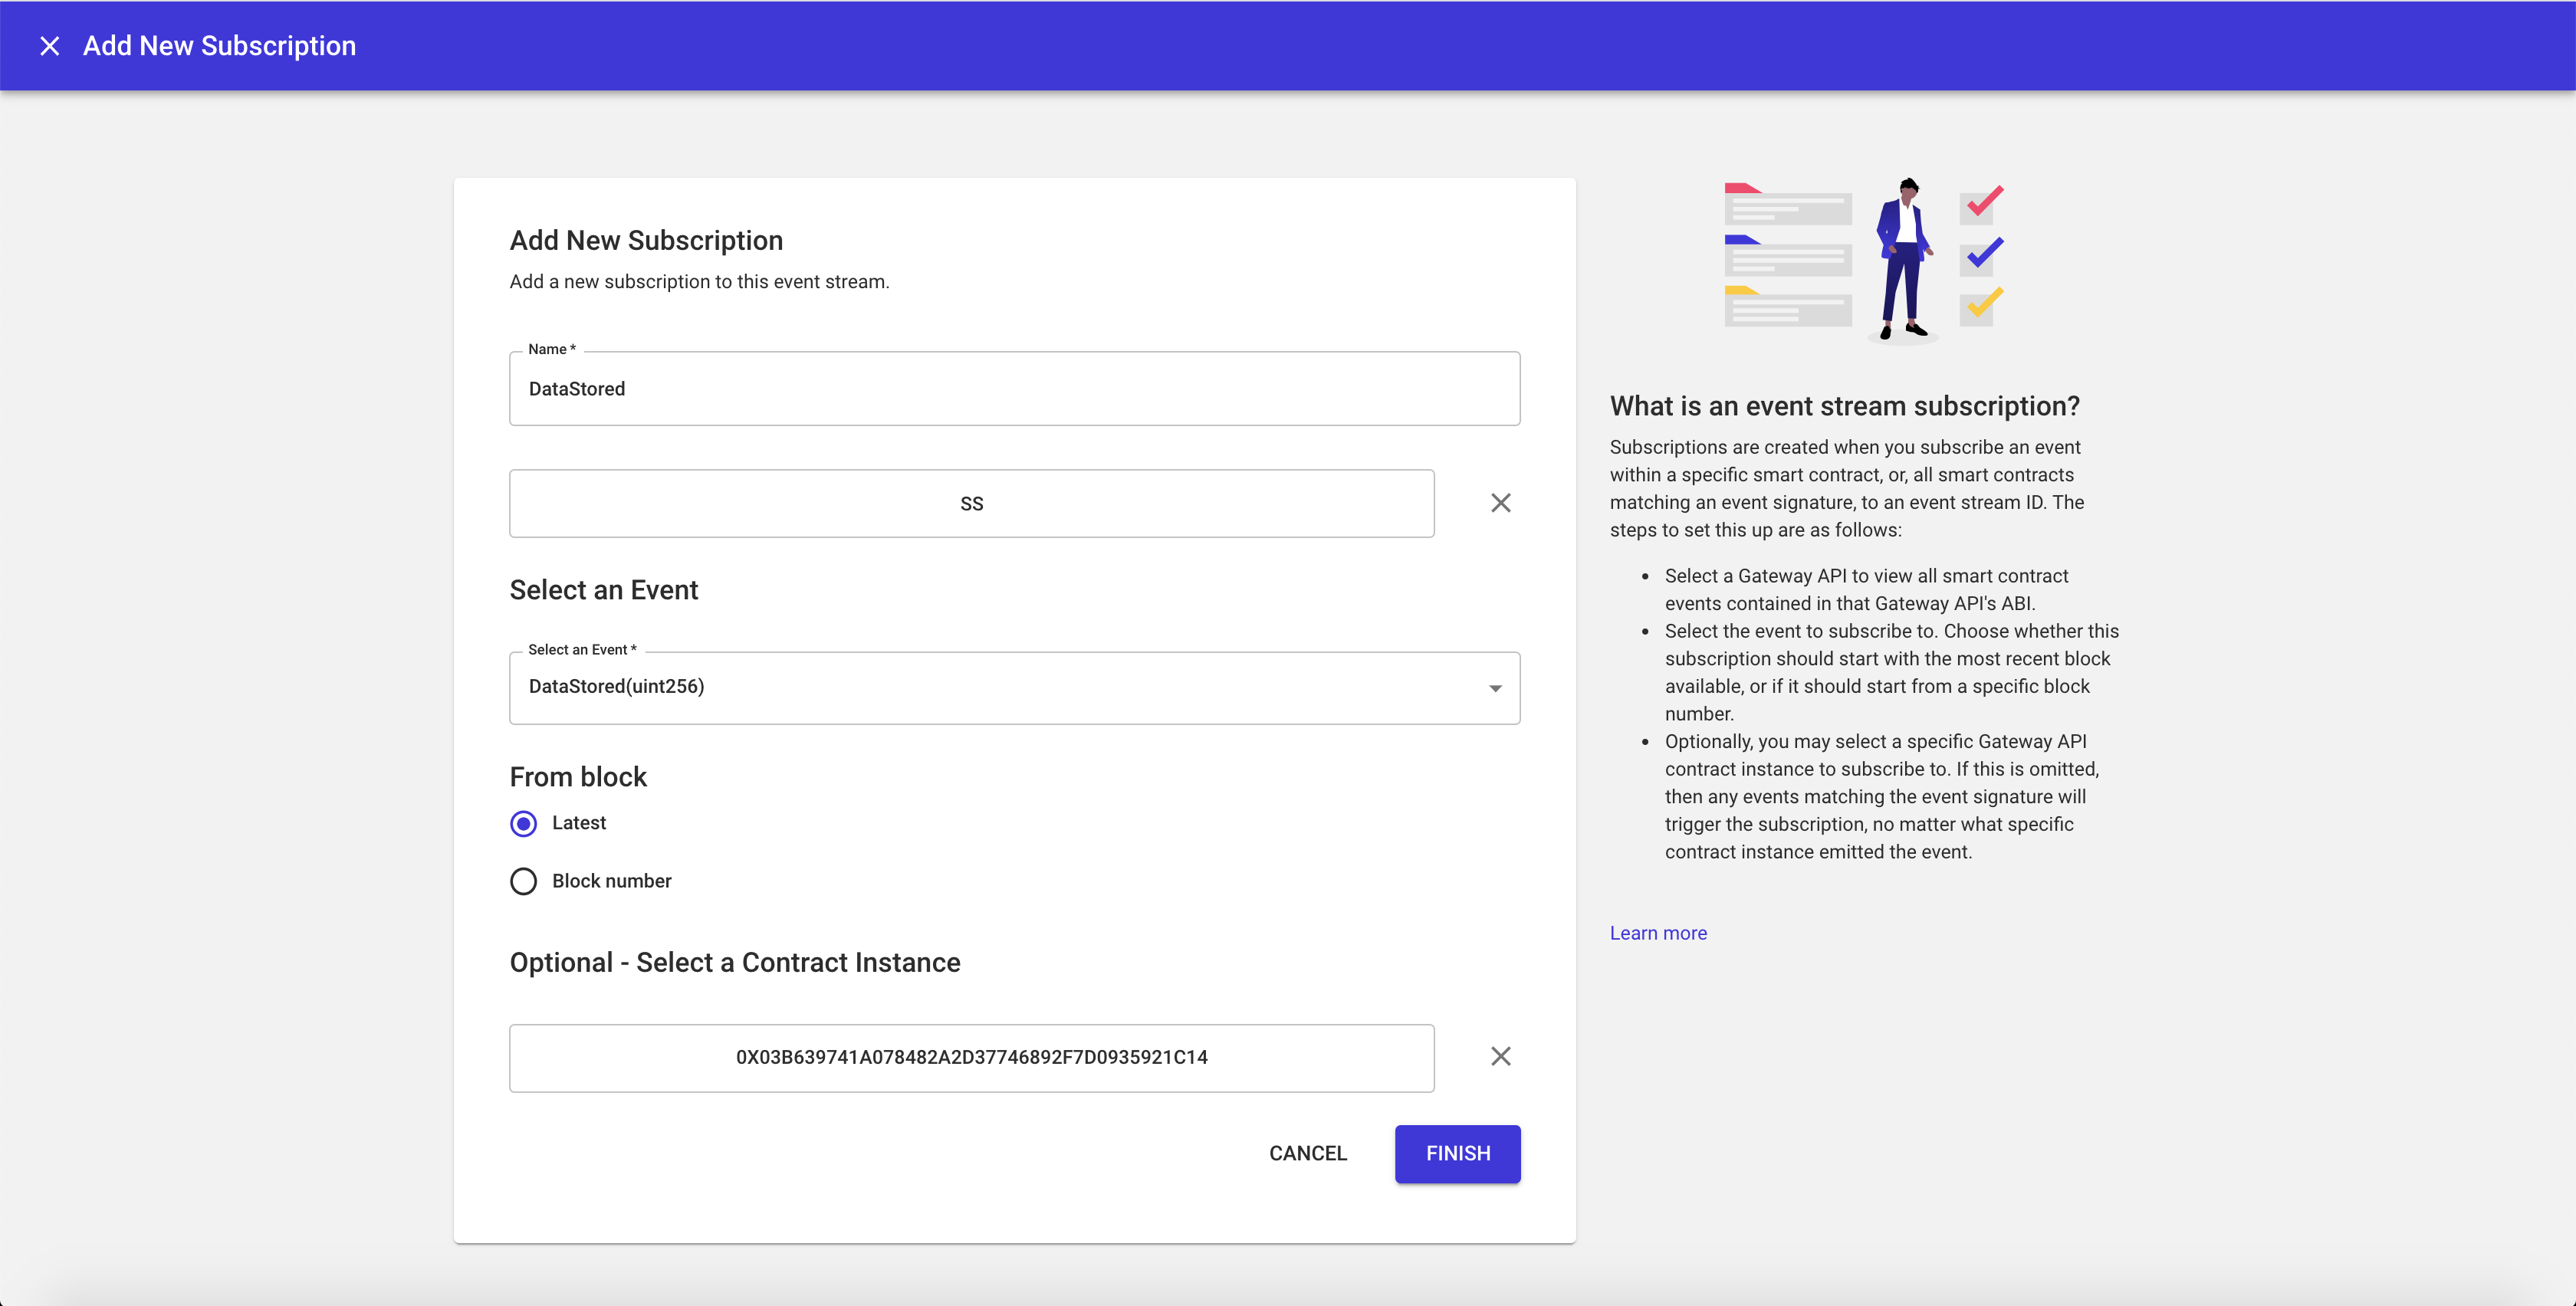
NOTE: You can use a single event stream instance to encapsulate multiple subscriptions. The available header parameters, as well as the event signature, smart contract address and msg.sender fields can be used to parse and index the received event payloads.
Managing Streams and Subscriptions
Streams
- Access the node containing the event stream you want to manage
- Click the "Event Streams" tab in the lefthand navigation
- You have four administrative options for the stream: Delete, Suspend, Resume and View Logs
- "Delete" - remove the attachment and by extension any subscriptions within the stream
- "Suspend" - pause the stream; this will also pause the delivery of events to your endpoint
- "Resume" - resume the stream; this will reactivate the stream and, based on the subscription configuration, deliver any missed events
- "View Logs" - inspect the logs for your event stream
Subscriptions
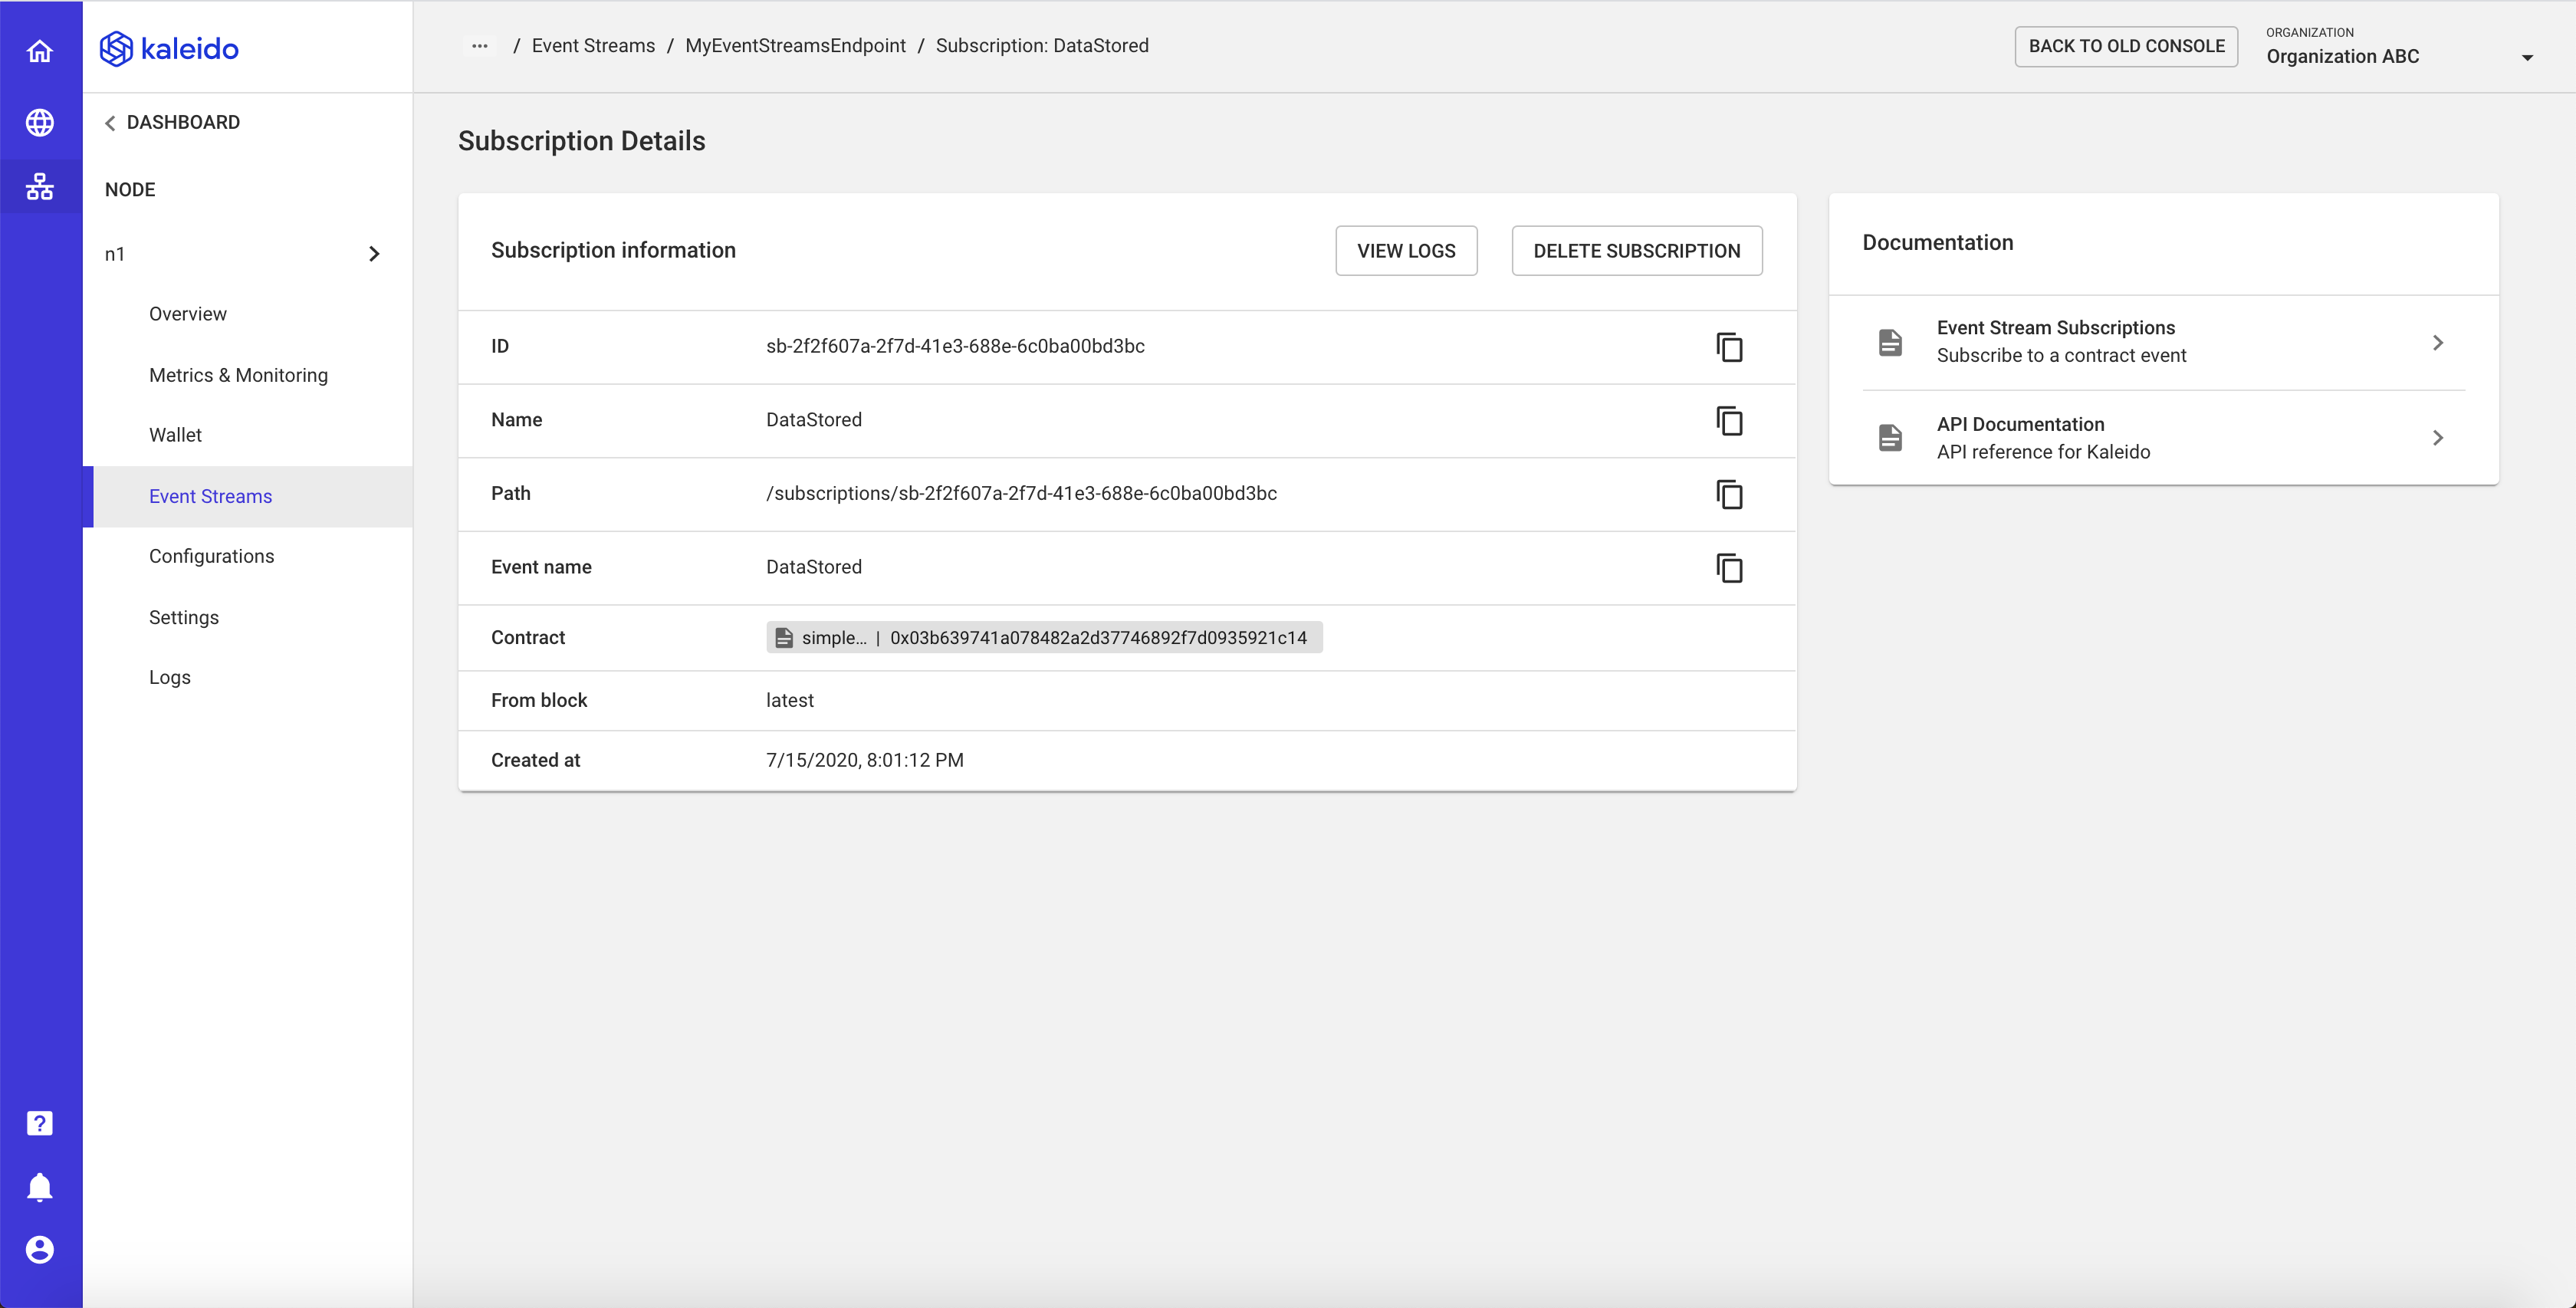
- From within your event stream details panel, scroll to the bottom of the screen and select the subscription you wish to manage
- You have two administrative options for the subscription: Delete and View Logs
- "Delete" - remove the subscription and by extension the events it is configured to emit; this is a permanent action and requires a new subscription to be applied to receive further events
- "View Logs" - inspect the logs for your subscription
Walkthrough with Server-less Functions
Creating an AWS Lambda Function
We will use AWS Lambda to build a function and create a target URL, however alternative cloud compute services such as Azure Functions can be leveraged as well.
- Login to the AWS console and navigate to the Lambda service within the Compute category
- Click the Create a Function button at the top of the screen
- Remain on the Author from Scratch tab and supply a name for your function in the Function Name field. For example,
ethConnectSync - You can alter the runtime language for your function if you wish. For this example, we will leave the default configuration of Node.js 12.x
- Set your permissions by leveraging an existing role within your IAM service or allowing Lambda to create a new role for this function. For this example, we will let Lambda create a new role and API key
- Click Create Function to finish. When complete, you will be redirected to a new page for your newly created function
- Scroll down to the Function Code section to see the code for your function.
- Alter the code and add a
console.logstatement to print out the returned event. For example:
exports.handler = async (event) => {
    console.log(JSON.stringify(event.body, null, "  "));
    const response = {
        statusCode: 200,
    };
    return response;
};
- Click Save in the top right of the screen to persist your new function
Exposing AWS Lambda function via a REST API
- Next, click the + ADD TRIGGER button at the top of your function screen
- Choose the API Gateway; select Create API
- Select the REST API configuration box
- Optionally add a security setting (e.g. API Key). It is recommended to secure your endpoint with some type of security mechanism.
- Optionally employ additional configuration settings.
- Click ADD
Once you have configured your API Gateway, you will have a URL endpoint to send requests to, along with an API key or bearer token if you have enabled security settings. For example:
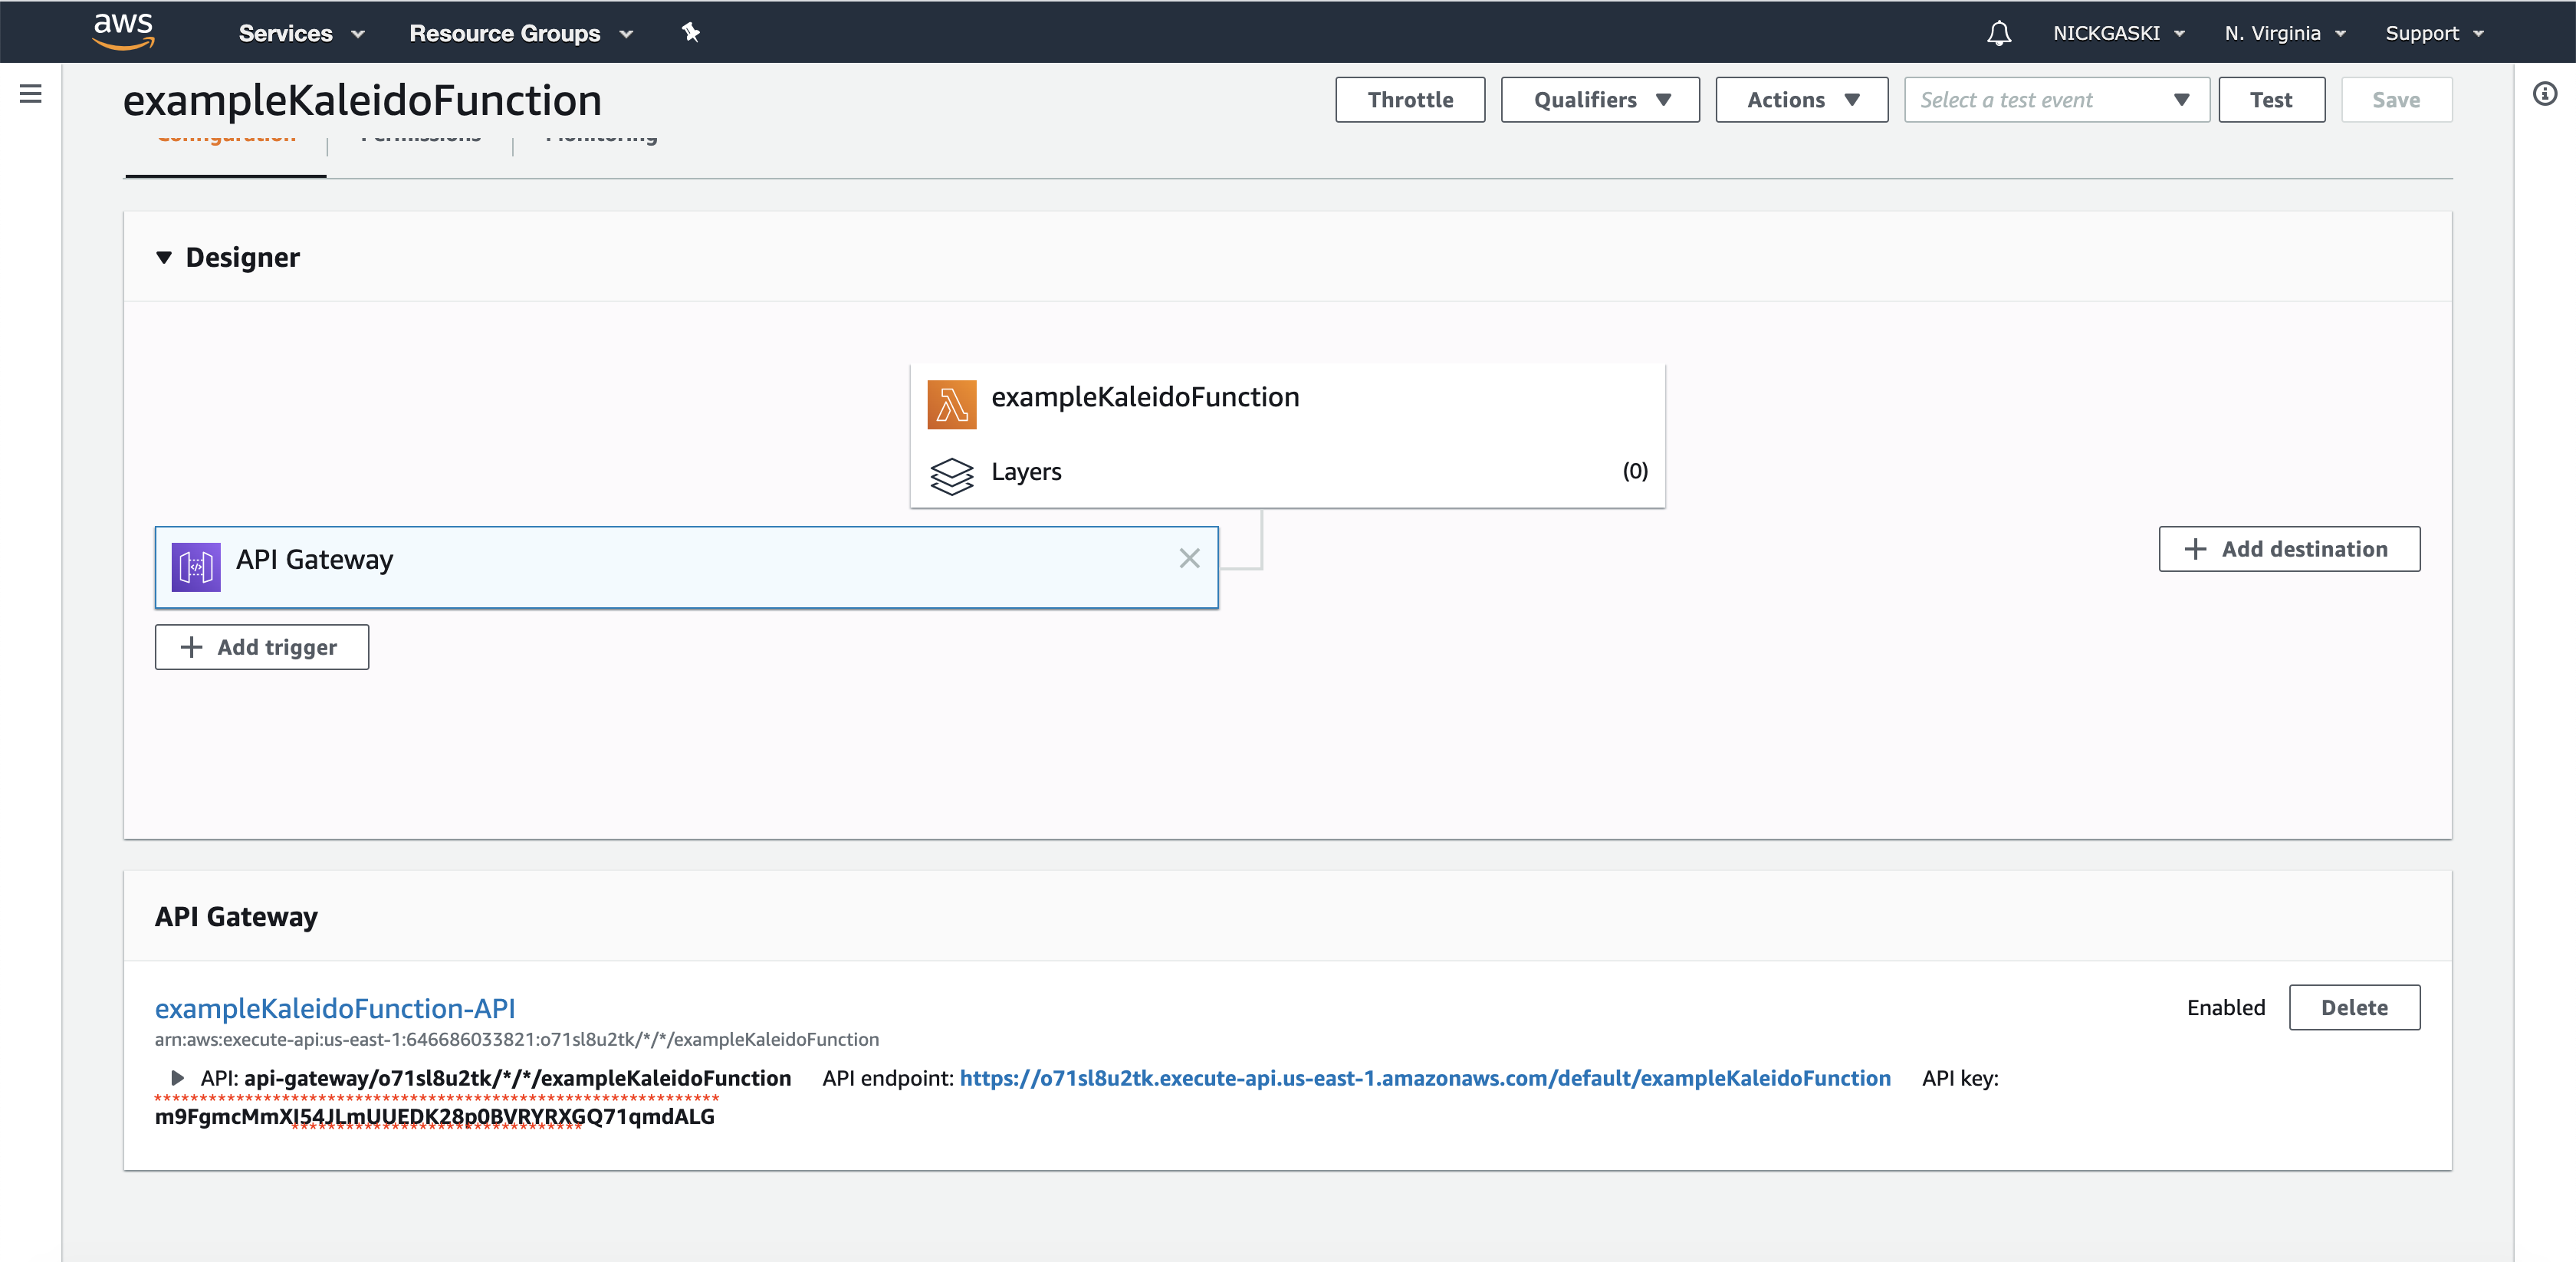
- Use the Gateway API as your Event Steam URL endpoint
- Use the API Key as the header value for
x-api-key
