Usage - WebSockets
In addition to webhooks, Kaleido also supports sending events over WebSockets. This can be useful if your application does not have a publicly accessible HTTP server, or if you want to receive many events over a single long lived connection. This page will walk you through the process of setting up a WebSocket Event Stream and sending/receiving a test event.
Create an Event Stream
NOTE: Events are delivered as message streams via Kaleido's REST API middleware tier. As such, for any contract to emit events via the Kaleido Event Streams service, there must be an accompanying Gateway API available for subscription.
The following example configuration will extend on the Ethereum Quick Start tutorial and make use of the basic SimpleStorage smart contract. The contract comes embedded with a basic event - DataStored - that emits when the set method is invoked. This is the event that we will subscribe to in the forthcoming steps.
Note that you can still subscribe to events for contracts that were previously deployed with a web3 library. You simply need to create an accompanying API Gateway for the instantiated smart contract. Refer to the Smart Contract Management docs for more details on generating an API Gateway.
- From within your environmental dashboard, expand the Apps and Integrations section
- Make use of the "Gateway APIs" tab if you need to generate a new Gateway; if you already have a Gateway API, skip to the next bullet
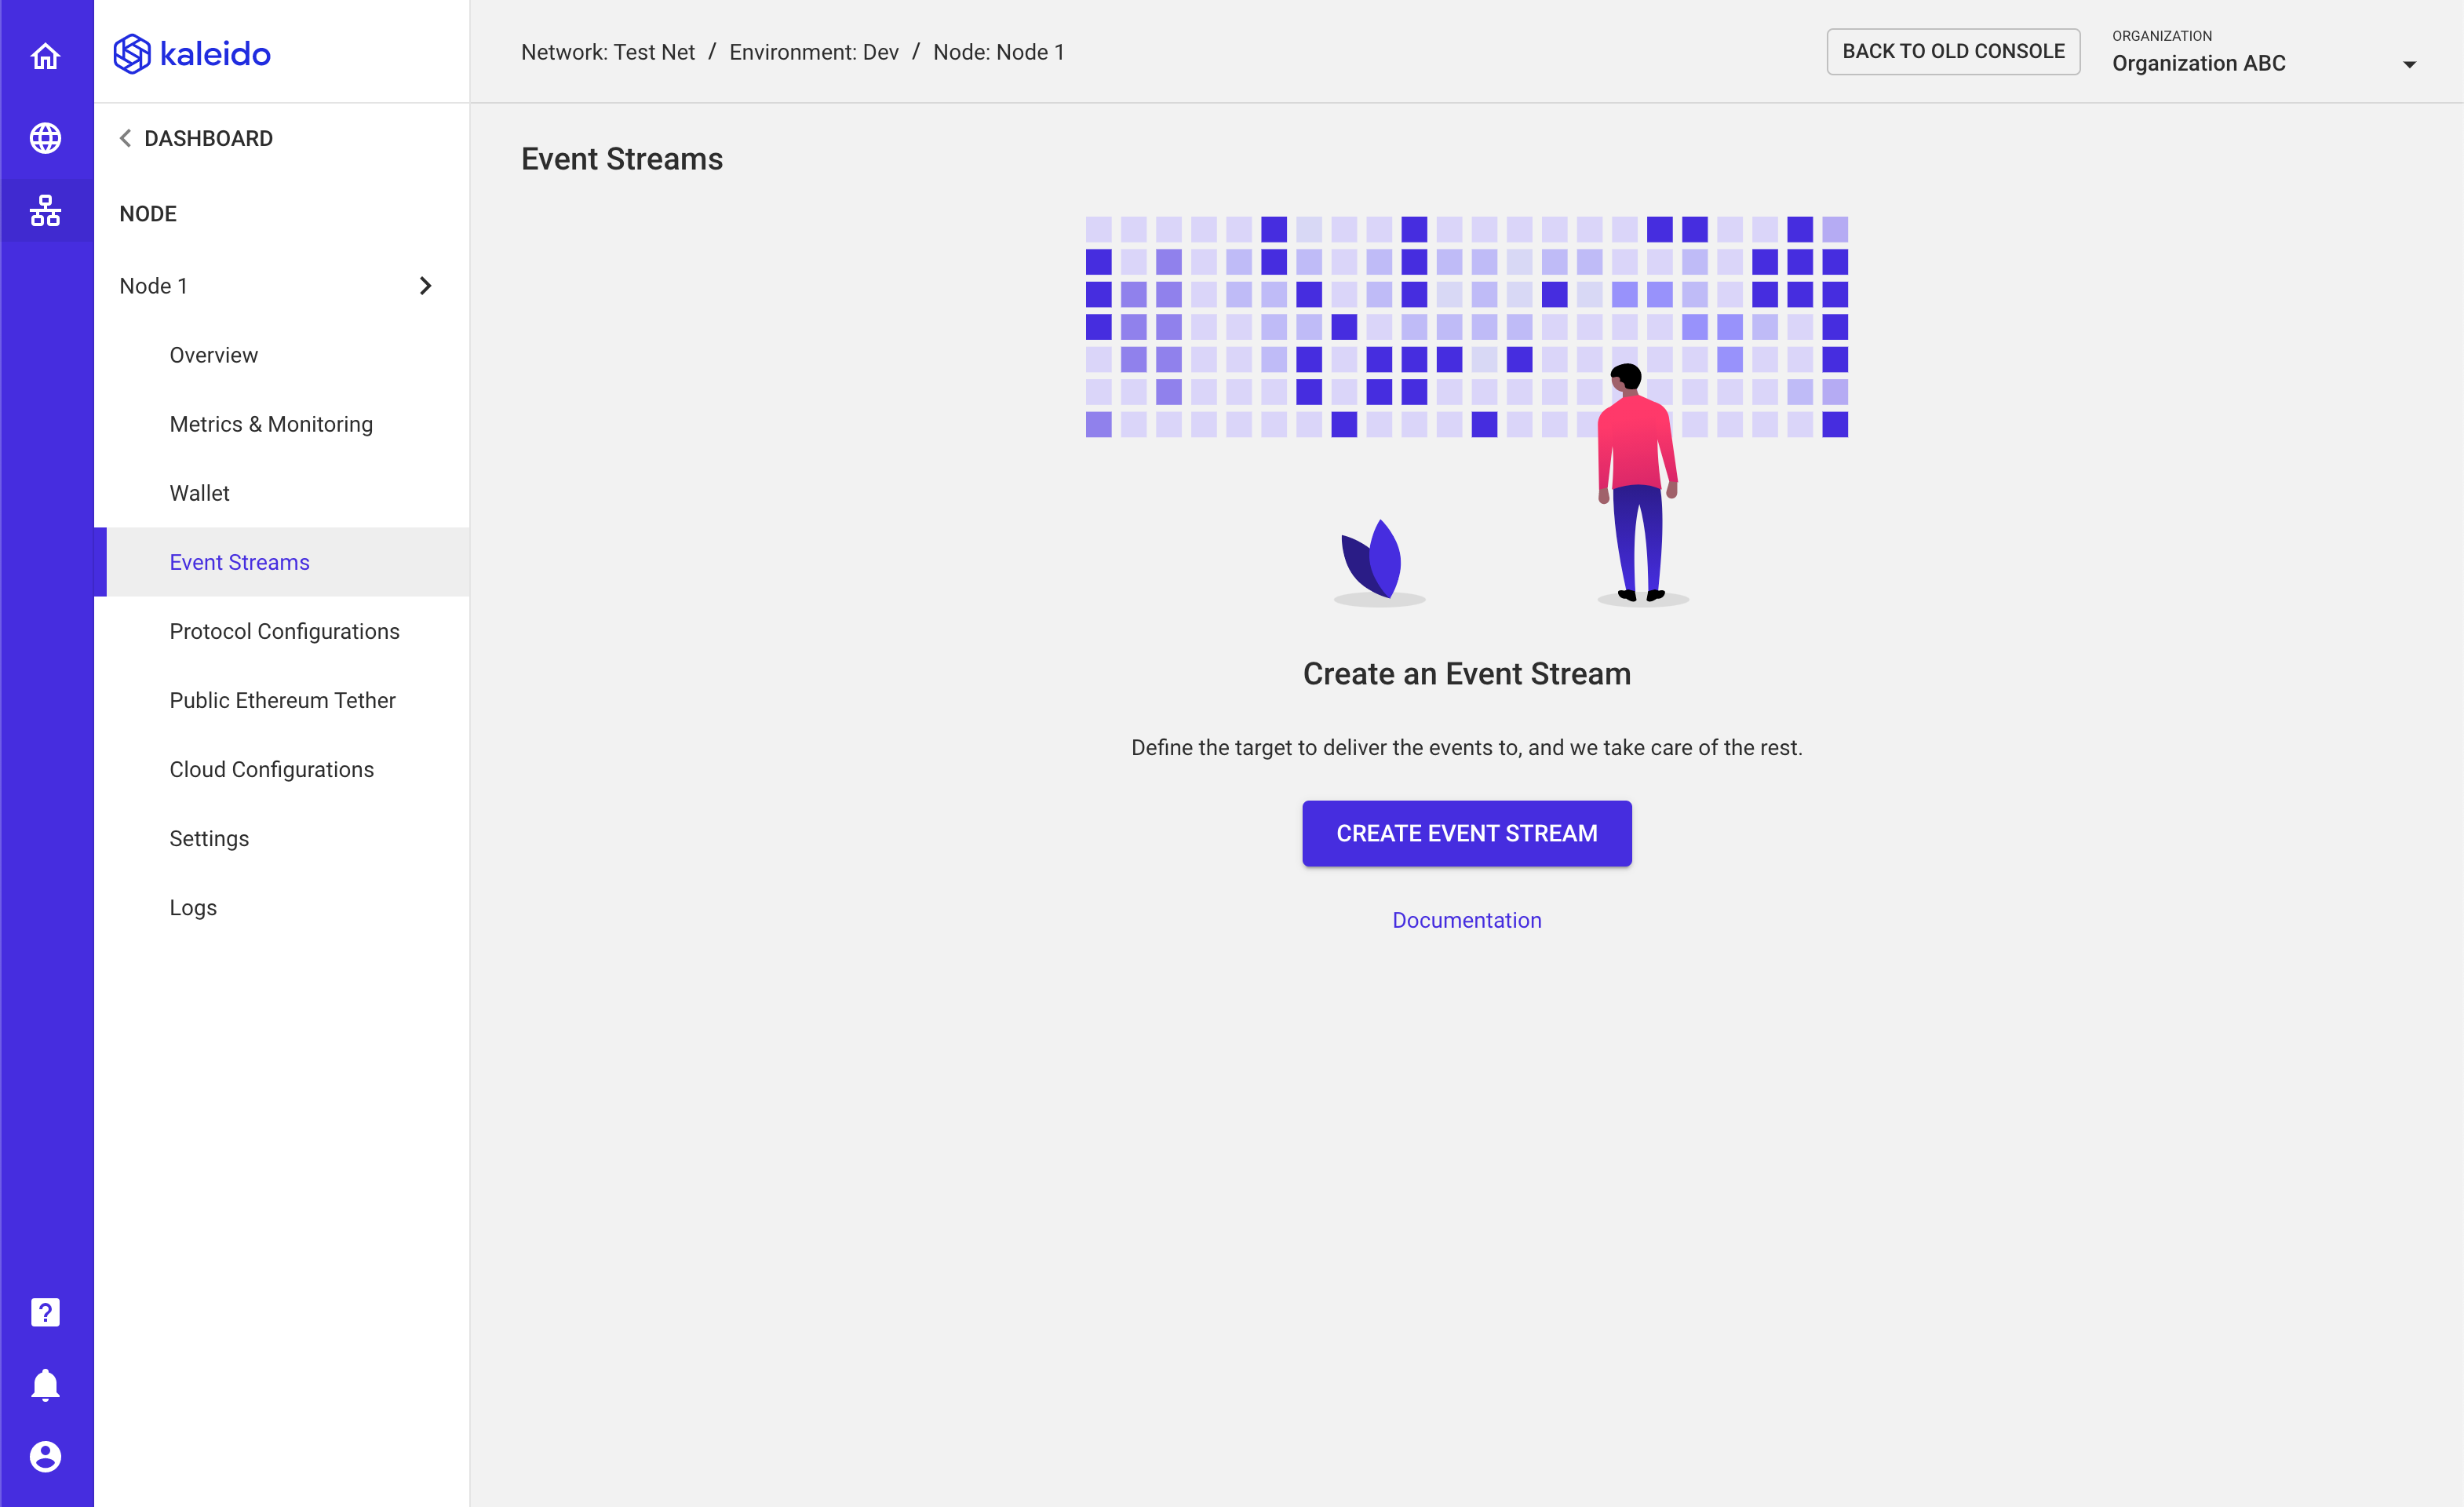
- Click on the "Event Streams" tab
- Click the "Create Event Stream" button in the middle of the screen
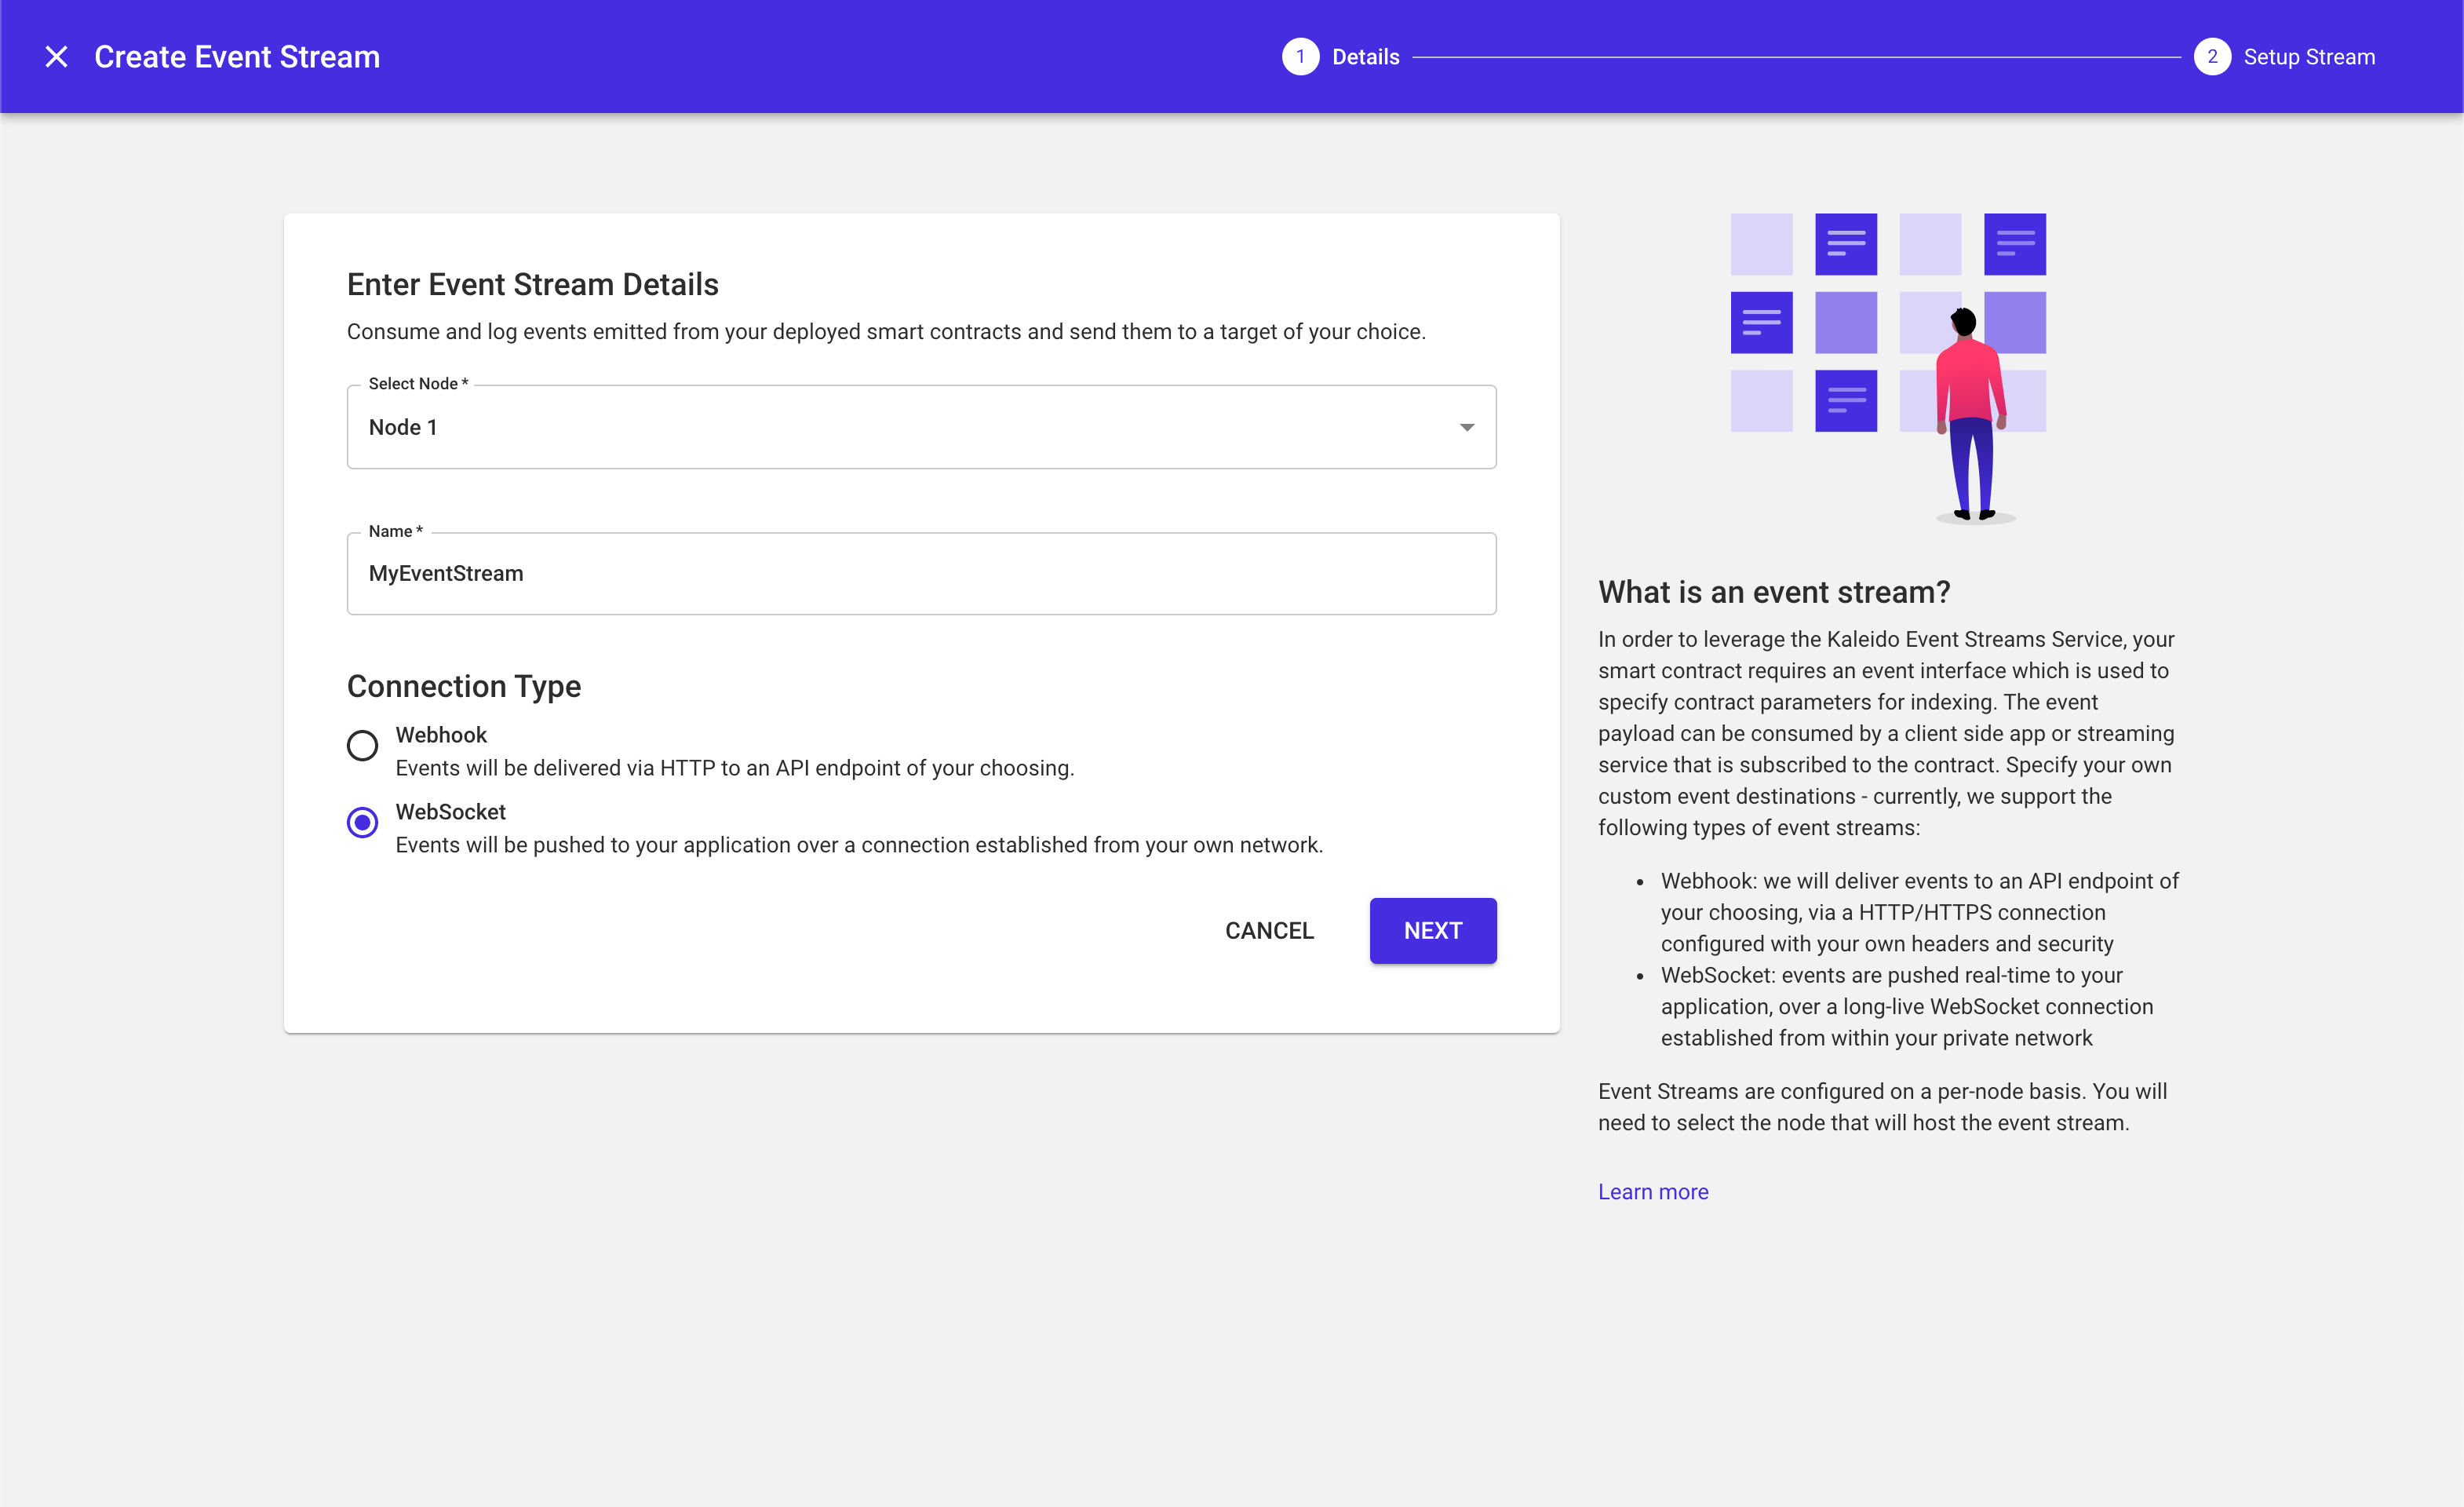
- Select a node to emit the event(s)
- Input an arbitrary name for your Event Stream (e.g.
MyEventStream) - Set the "Connection Type" to "WebSocket"
- Click NEXT
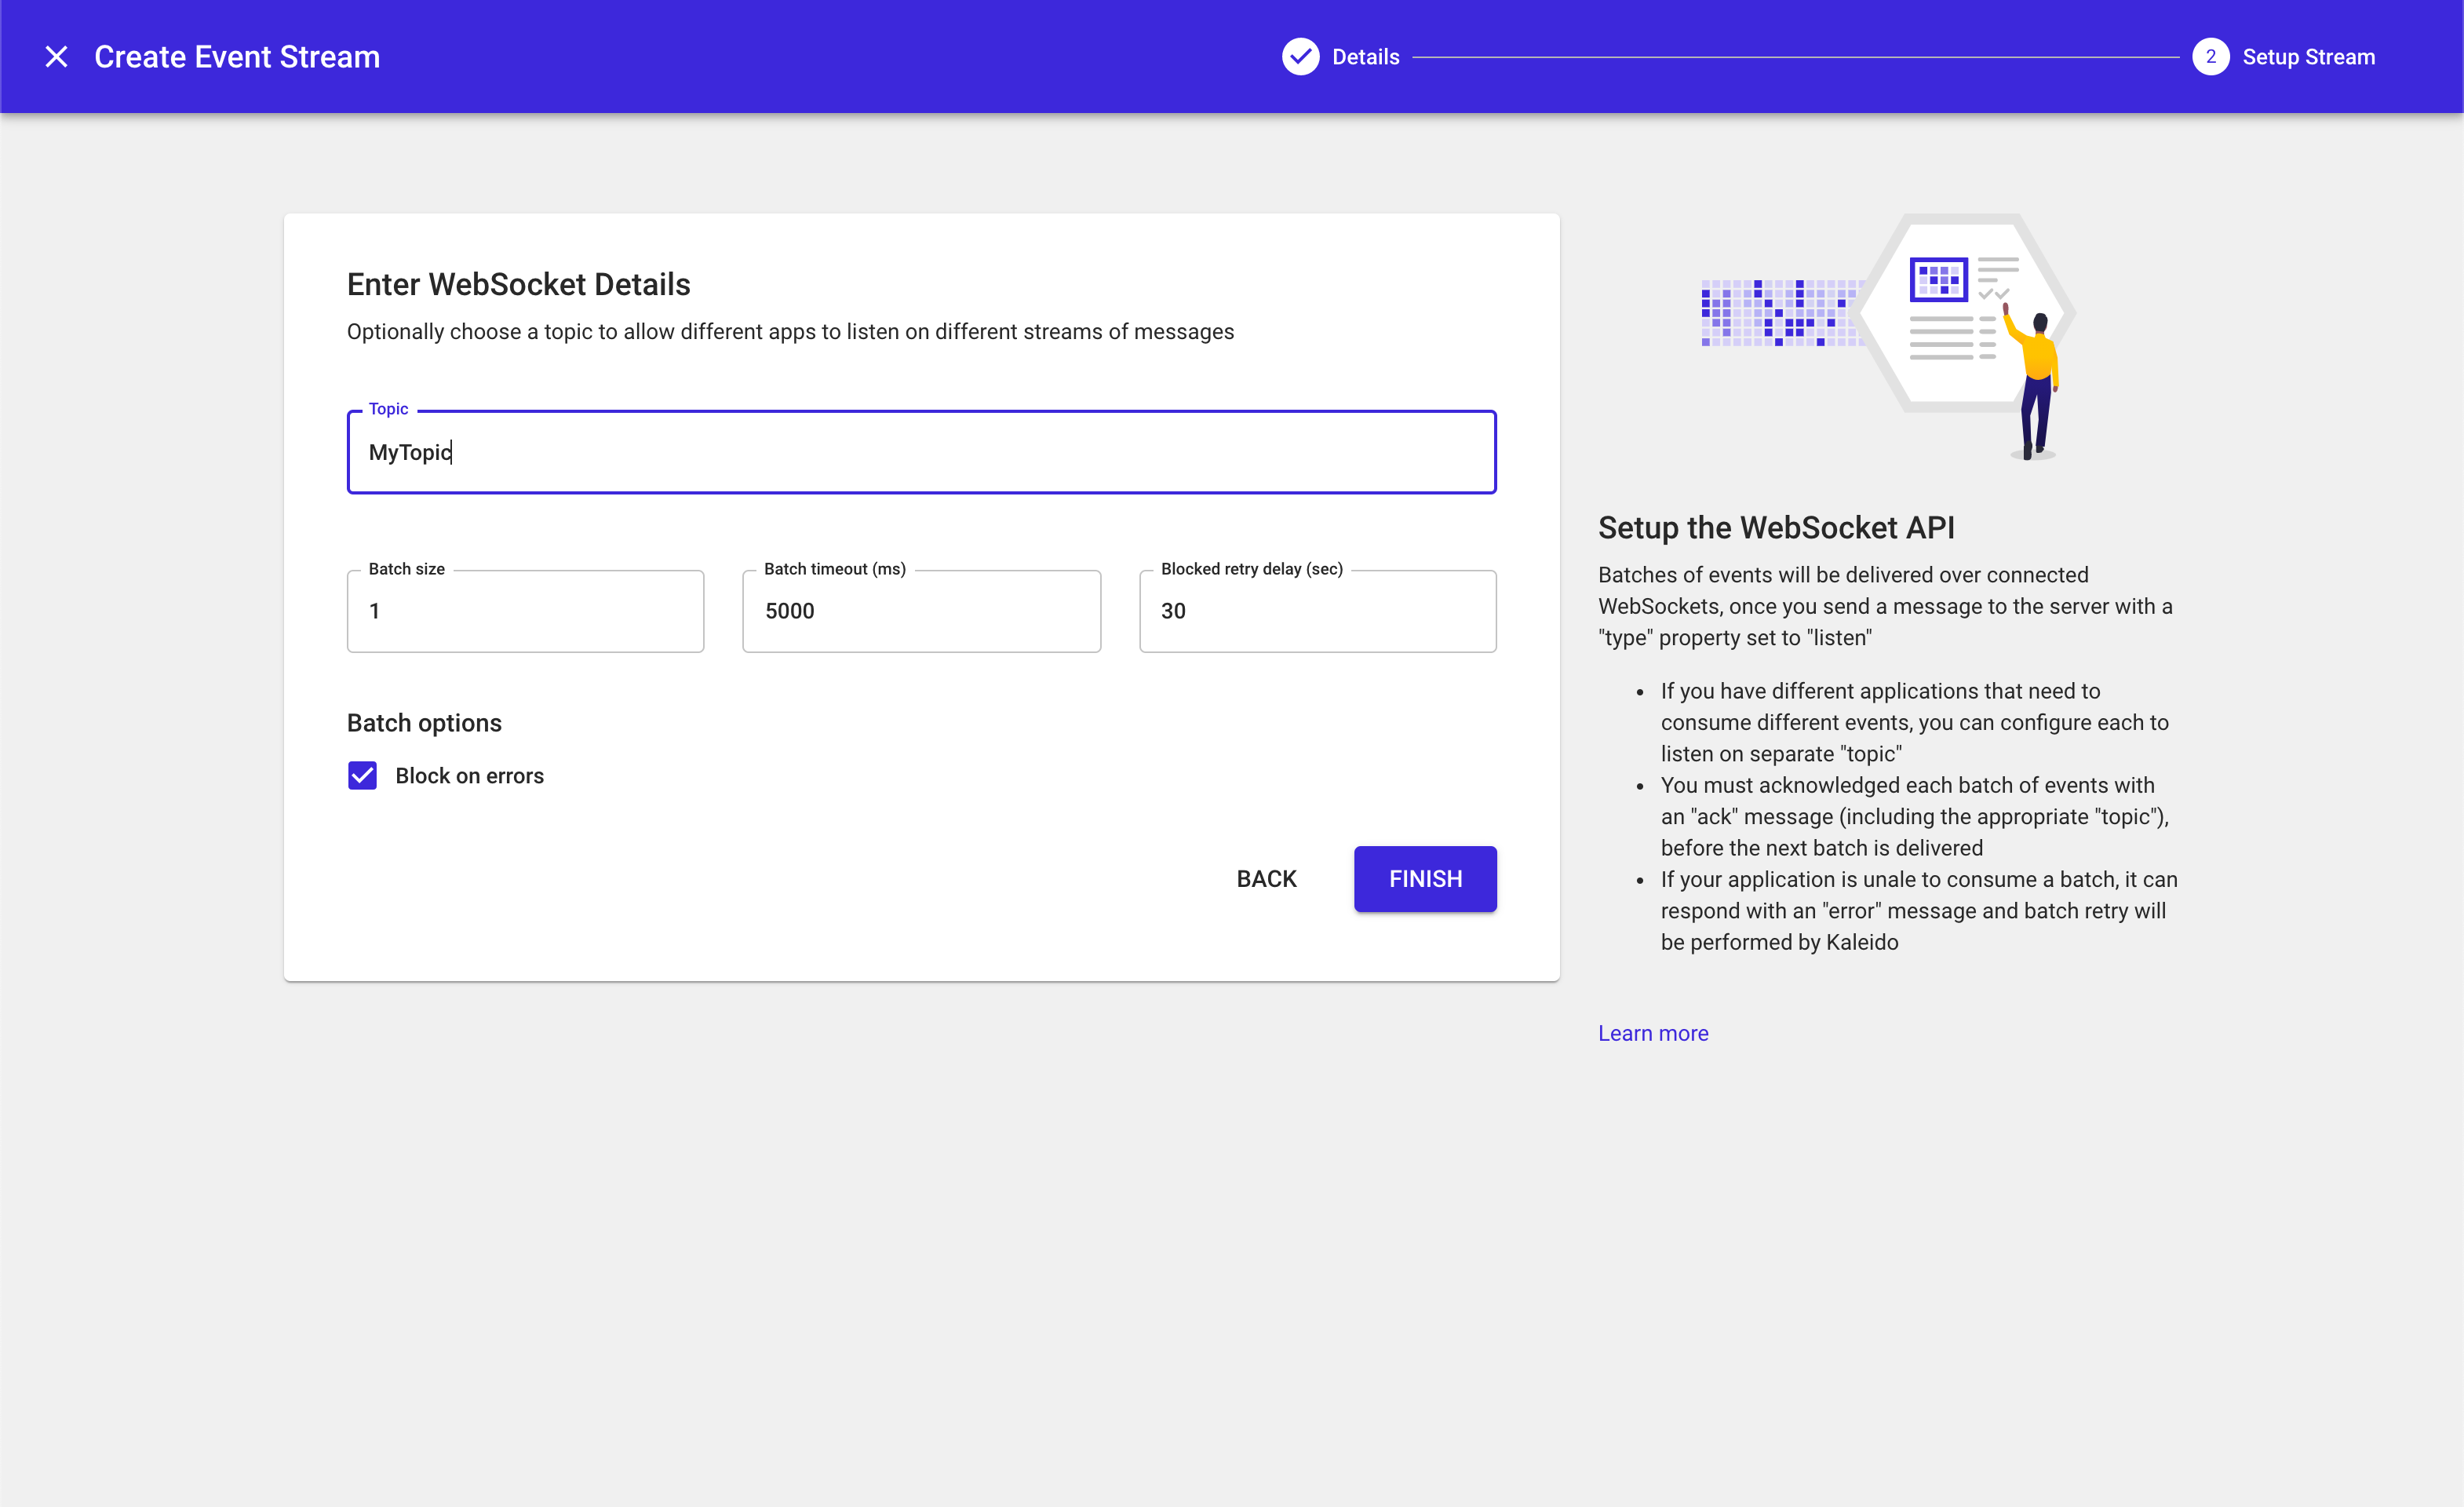
- Next, set a topic for your Event Stream. WebSocket clients will need to subscribe to this topic to receive events on this Event Stream.
- Click FINISH
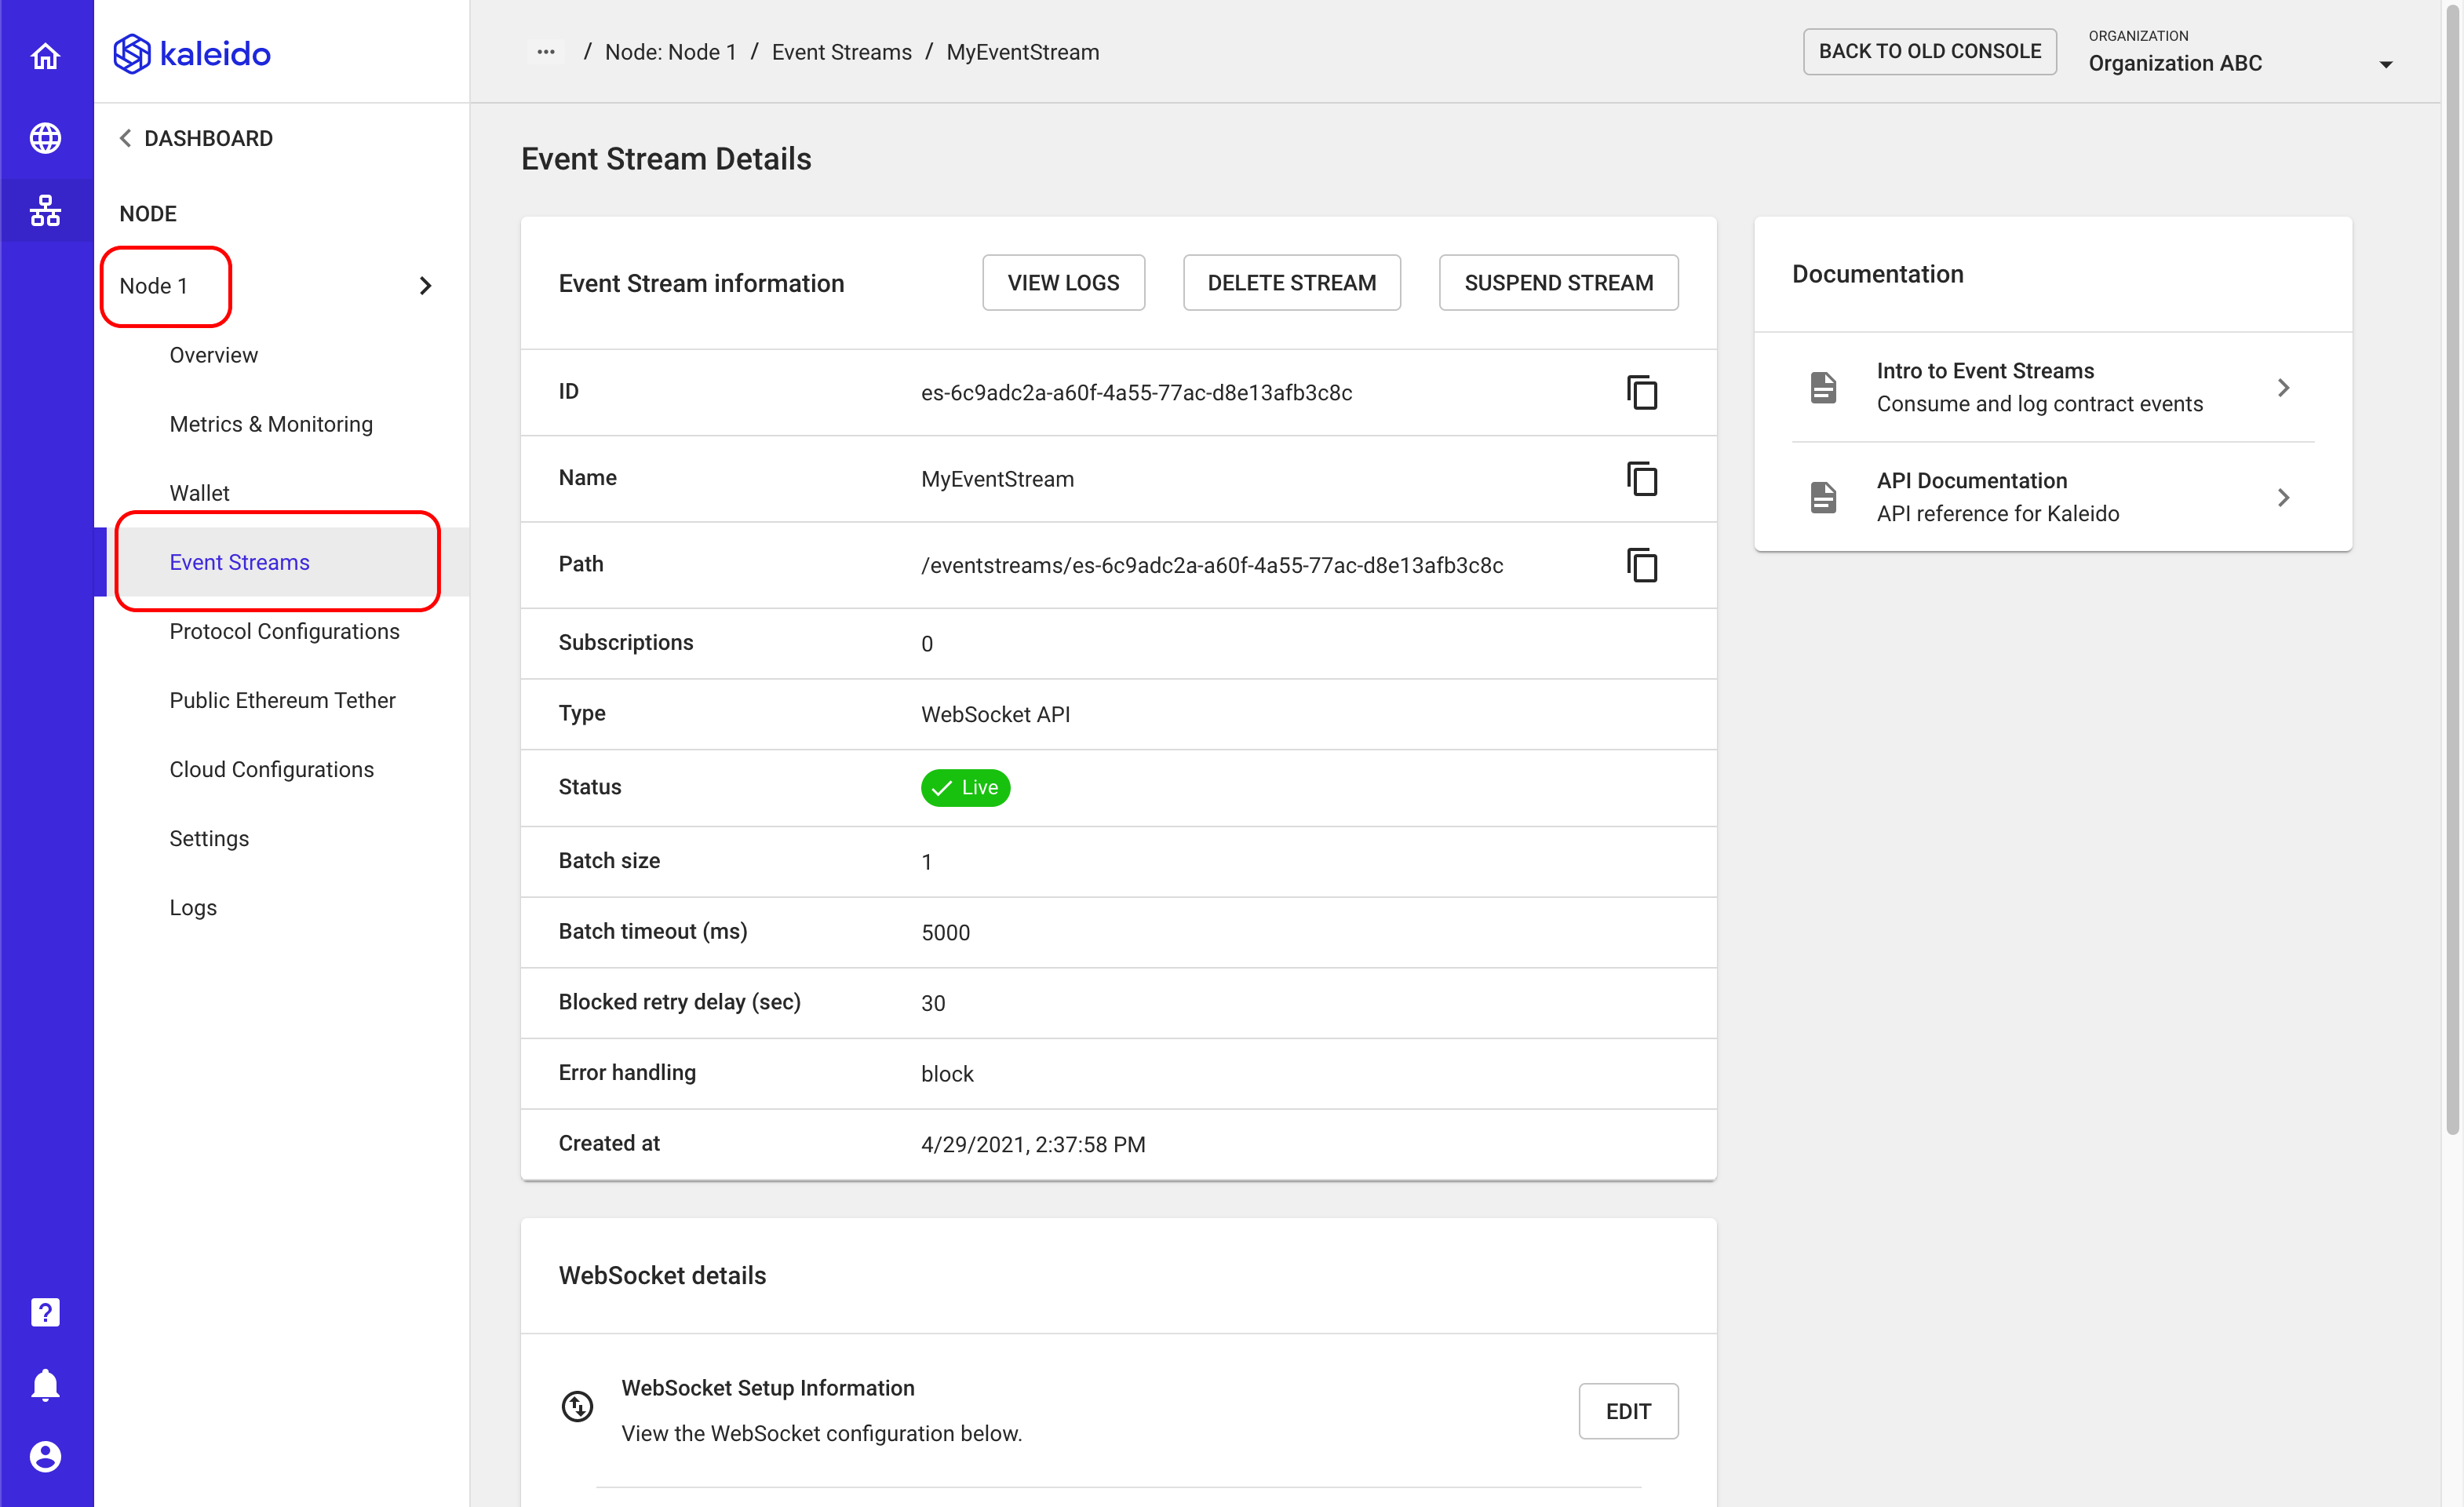
- The event stream will be persisted as a configuration within the node that it is attached to. It is viewable by accessing the node and clicking the "Event Streams" tab in the left-hand navigation.
Subscribe to an Event
- Access your event stream instance and scroll down to the bottom of the page to the "Subscriptions" section
- Click on + ADD SUBSCRIPTION
- Provide a name for the subscription (e.g.
DataStored) - Select the Gateway API containing the event you wish to subscribe to. If you do not have any Gateway APIs, you will be prompted to create one at this step
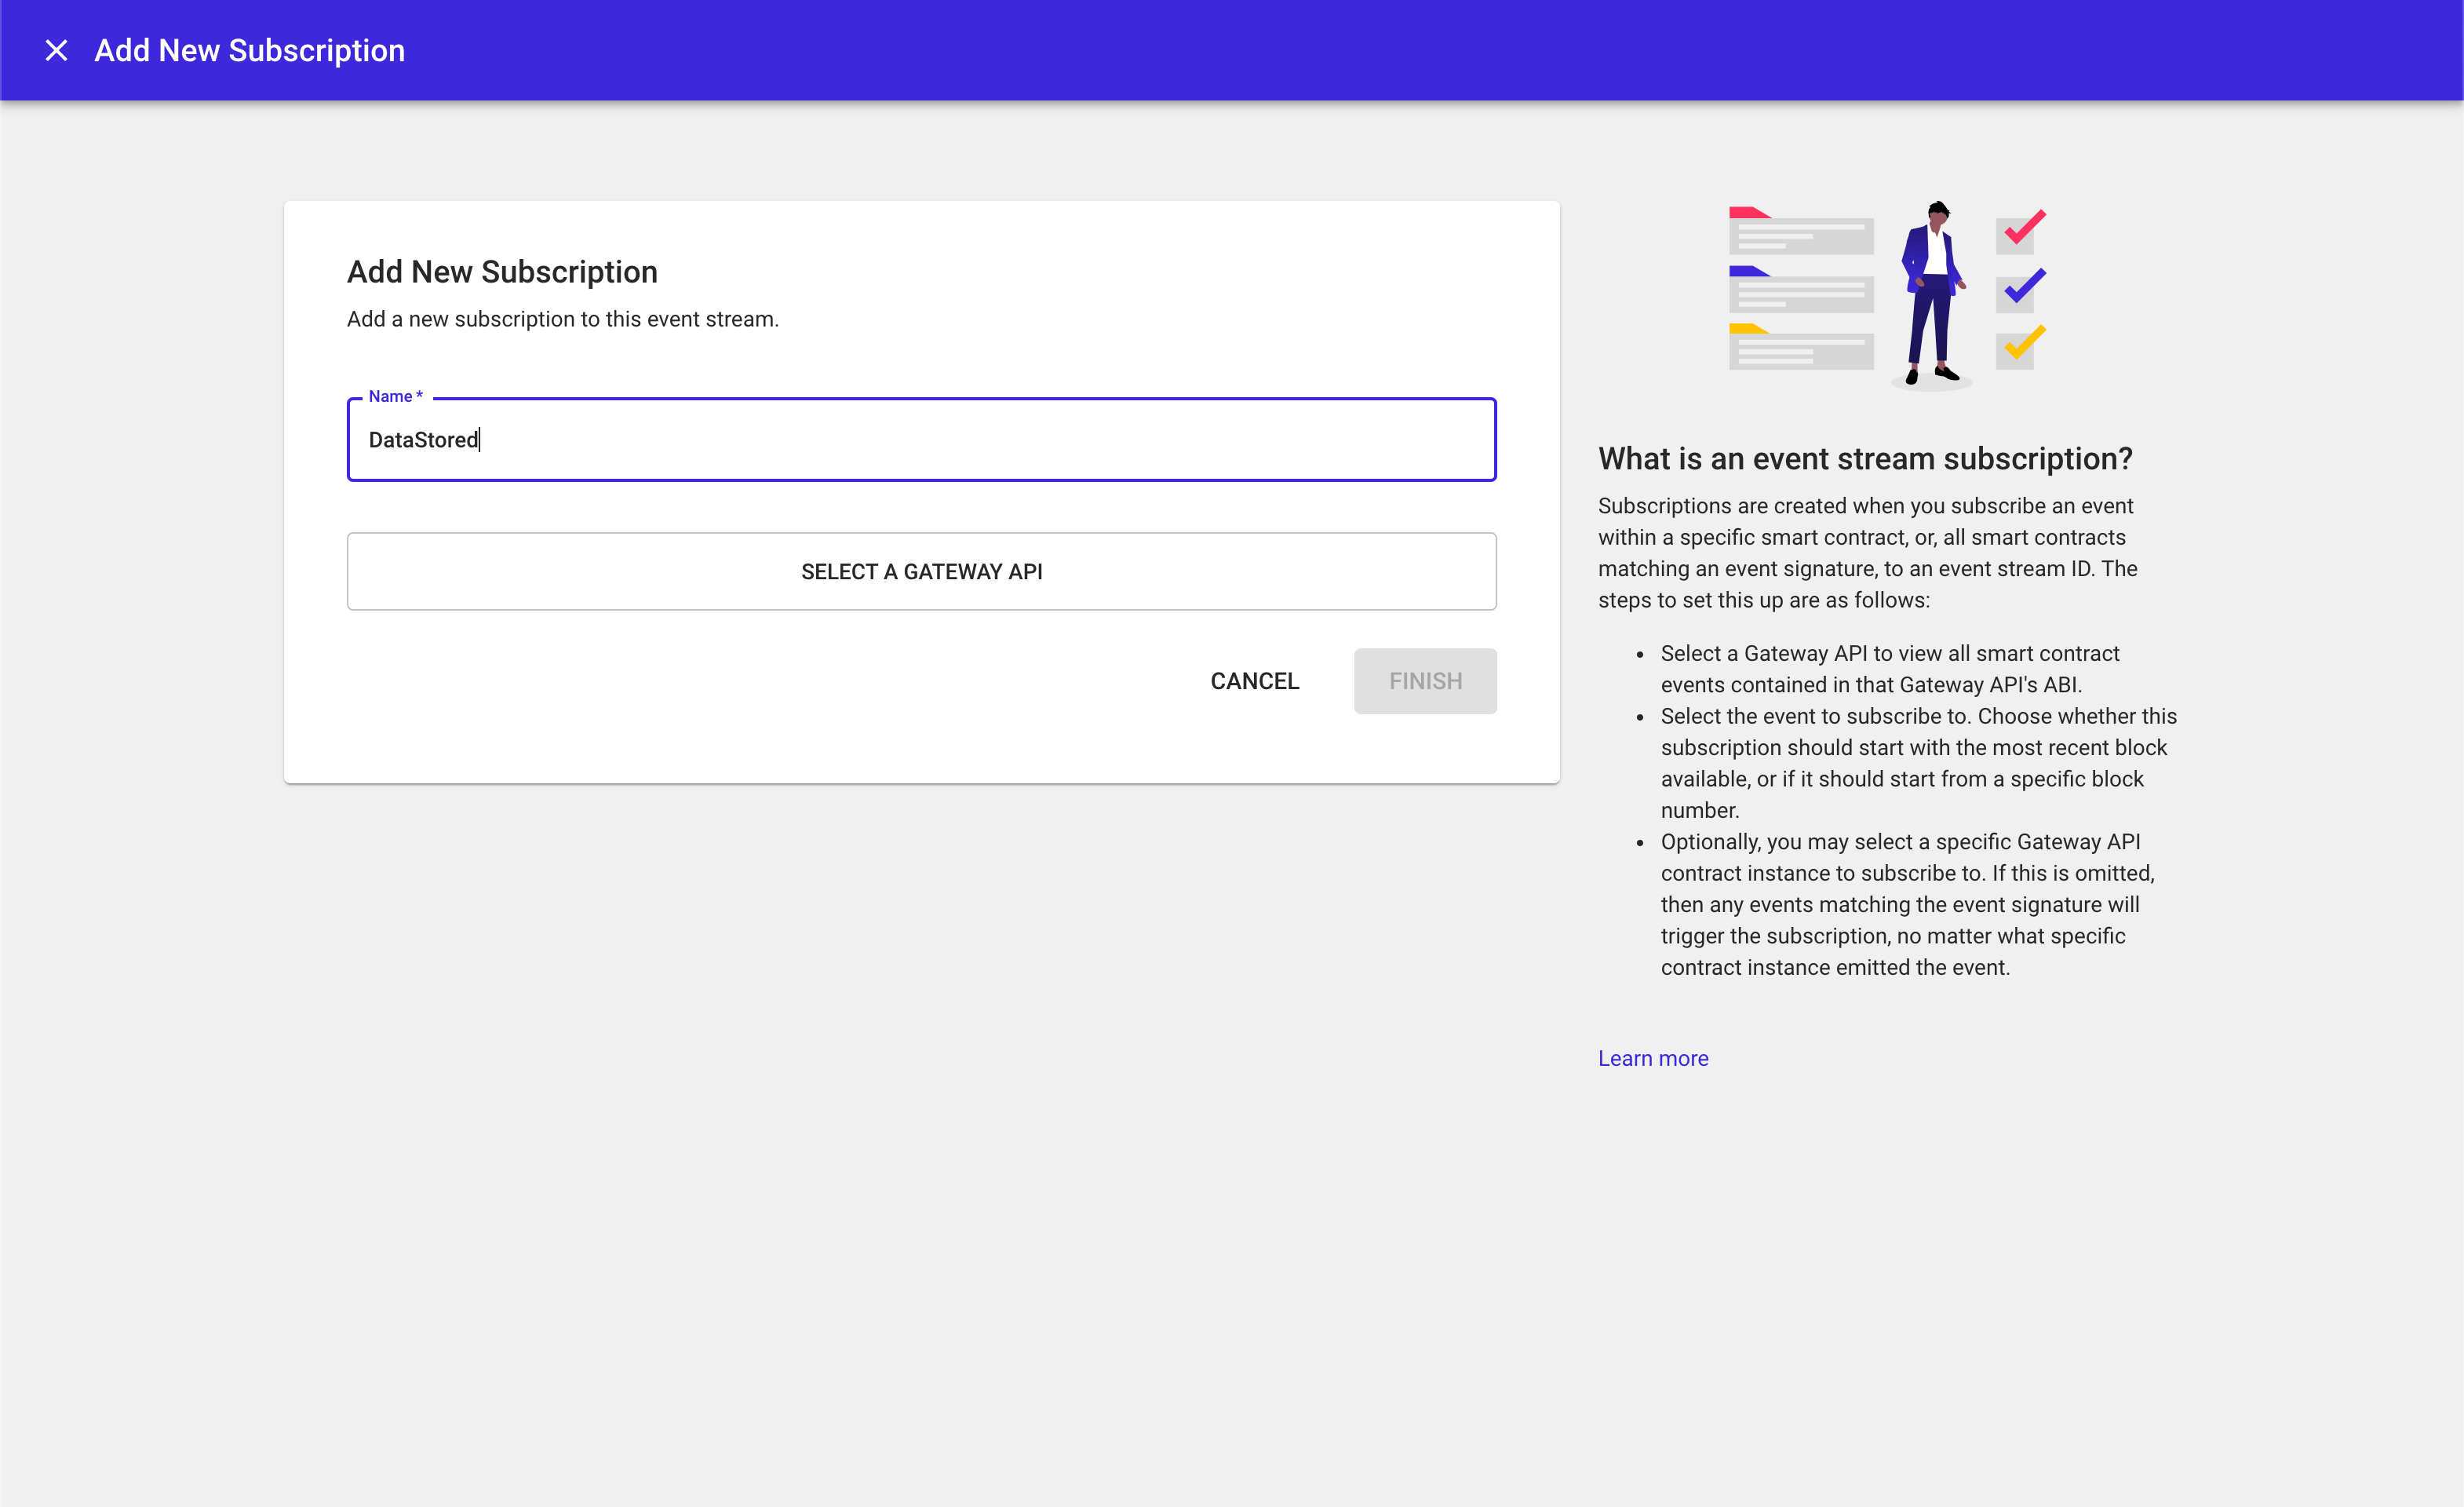
- Next, select the event you want to subscribe to (e.g.
DataStored). Kaleido will surface all available events within the Gateway API. - Use the "From Block" section to configure which block you wish to receive events from. If you want all historical events, select block 0.
- Optionally select a specific contract instance within your Gateway API to receive events from. If a specific instance is not selected, Kaleido will deliver all events matching the signature to your WebSocket client.
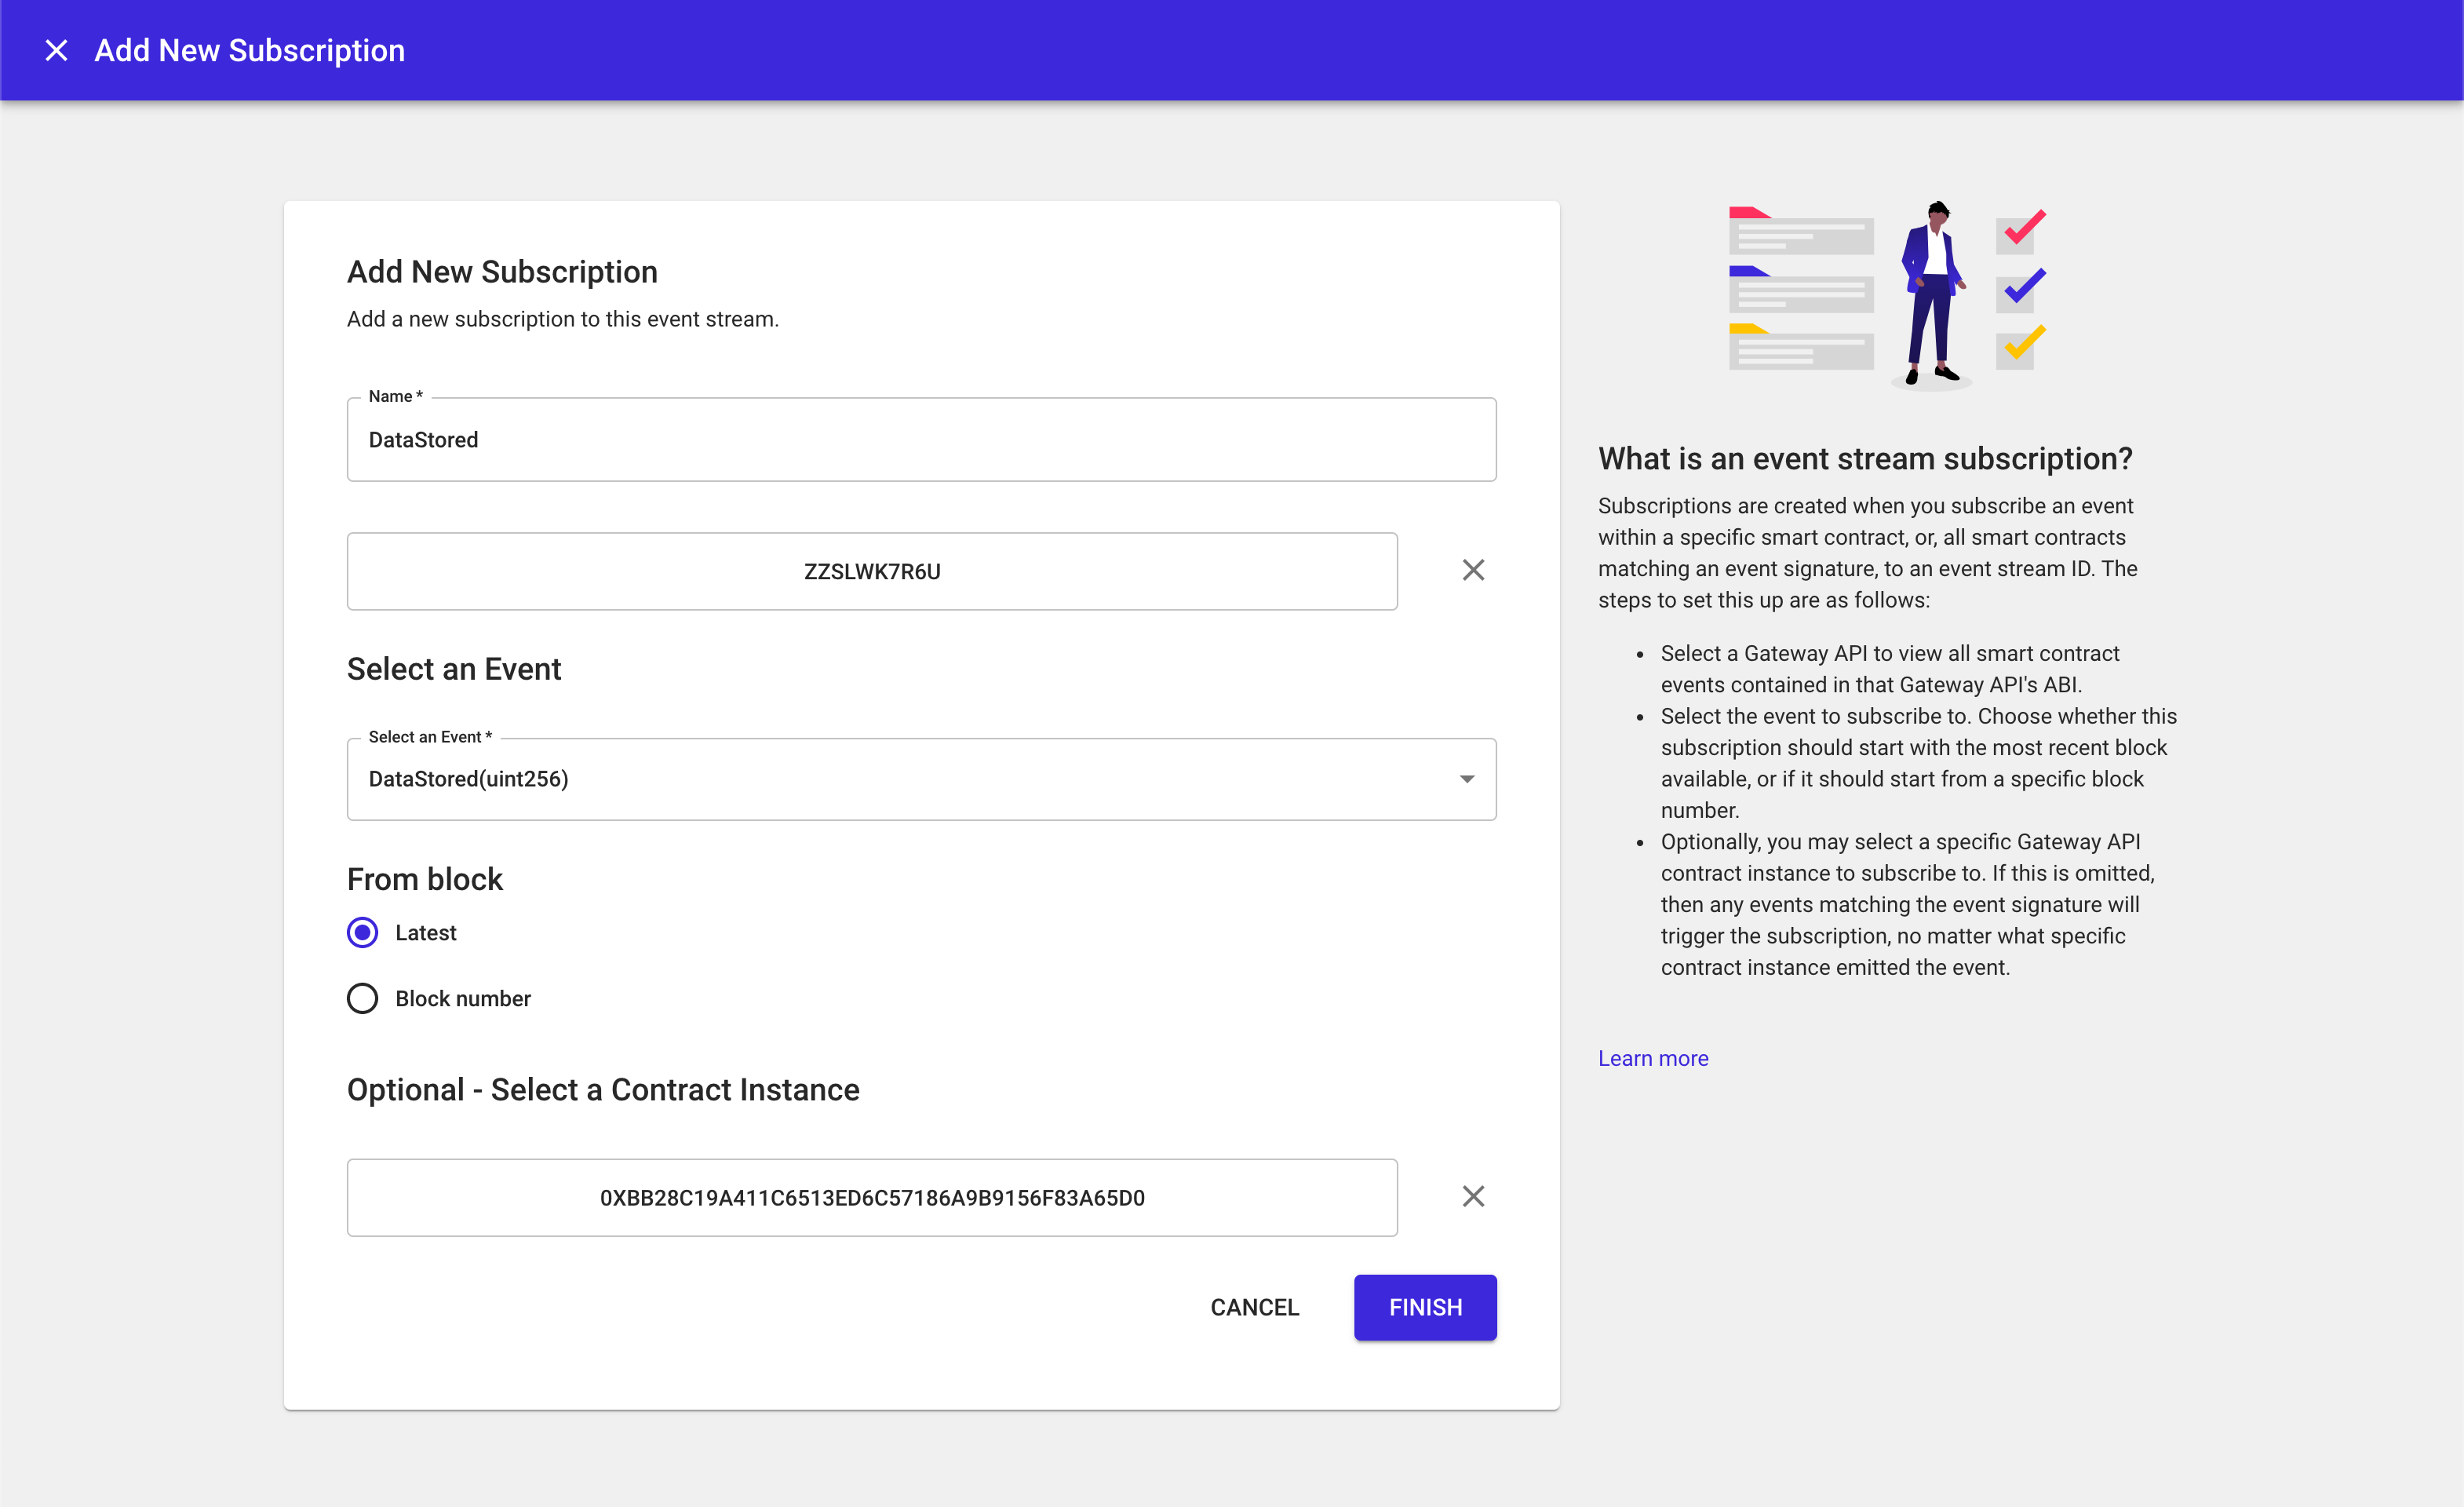
NOTE: You can use a single event stream instance to encapsulate multiple subscriptions. WebSocket messages will contain fields for the event signature, and smart contract address which can be used to parse and index the received event payloads.
Managing Streams and Subscriptions
Streams
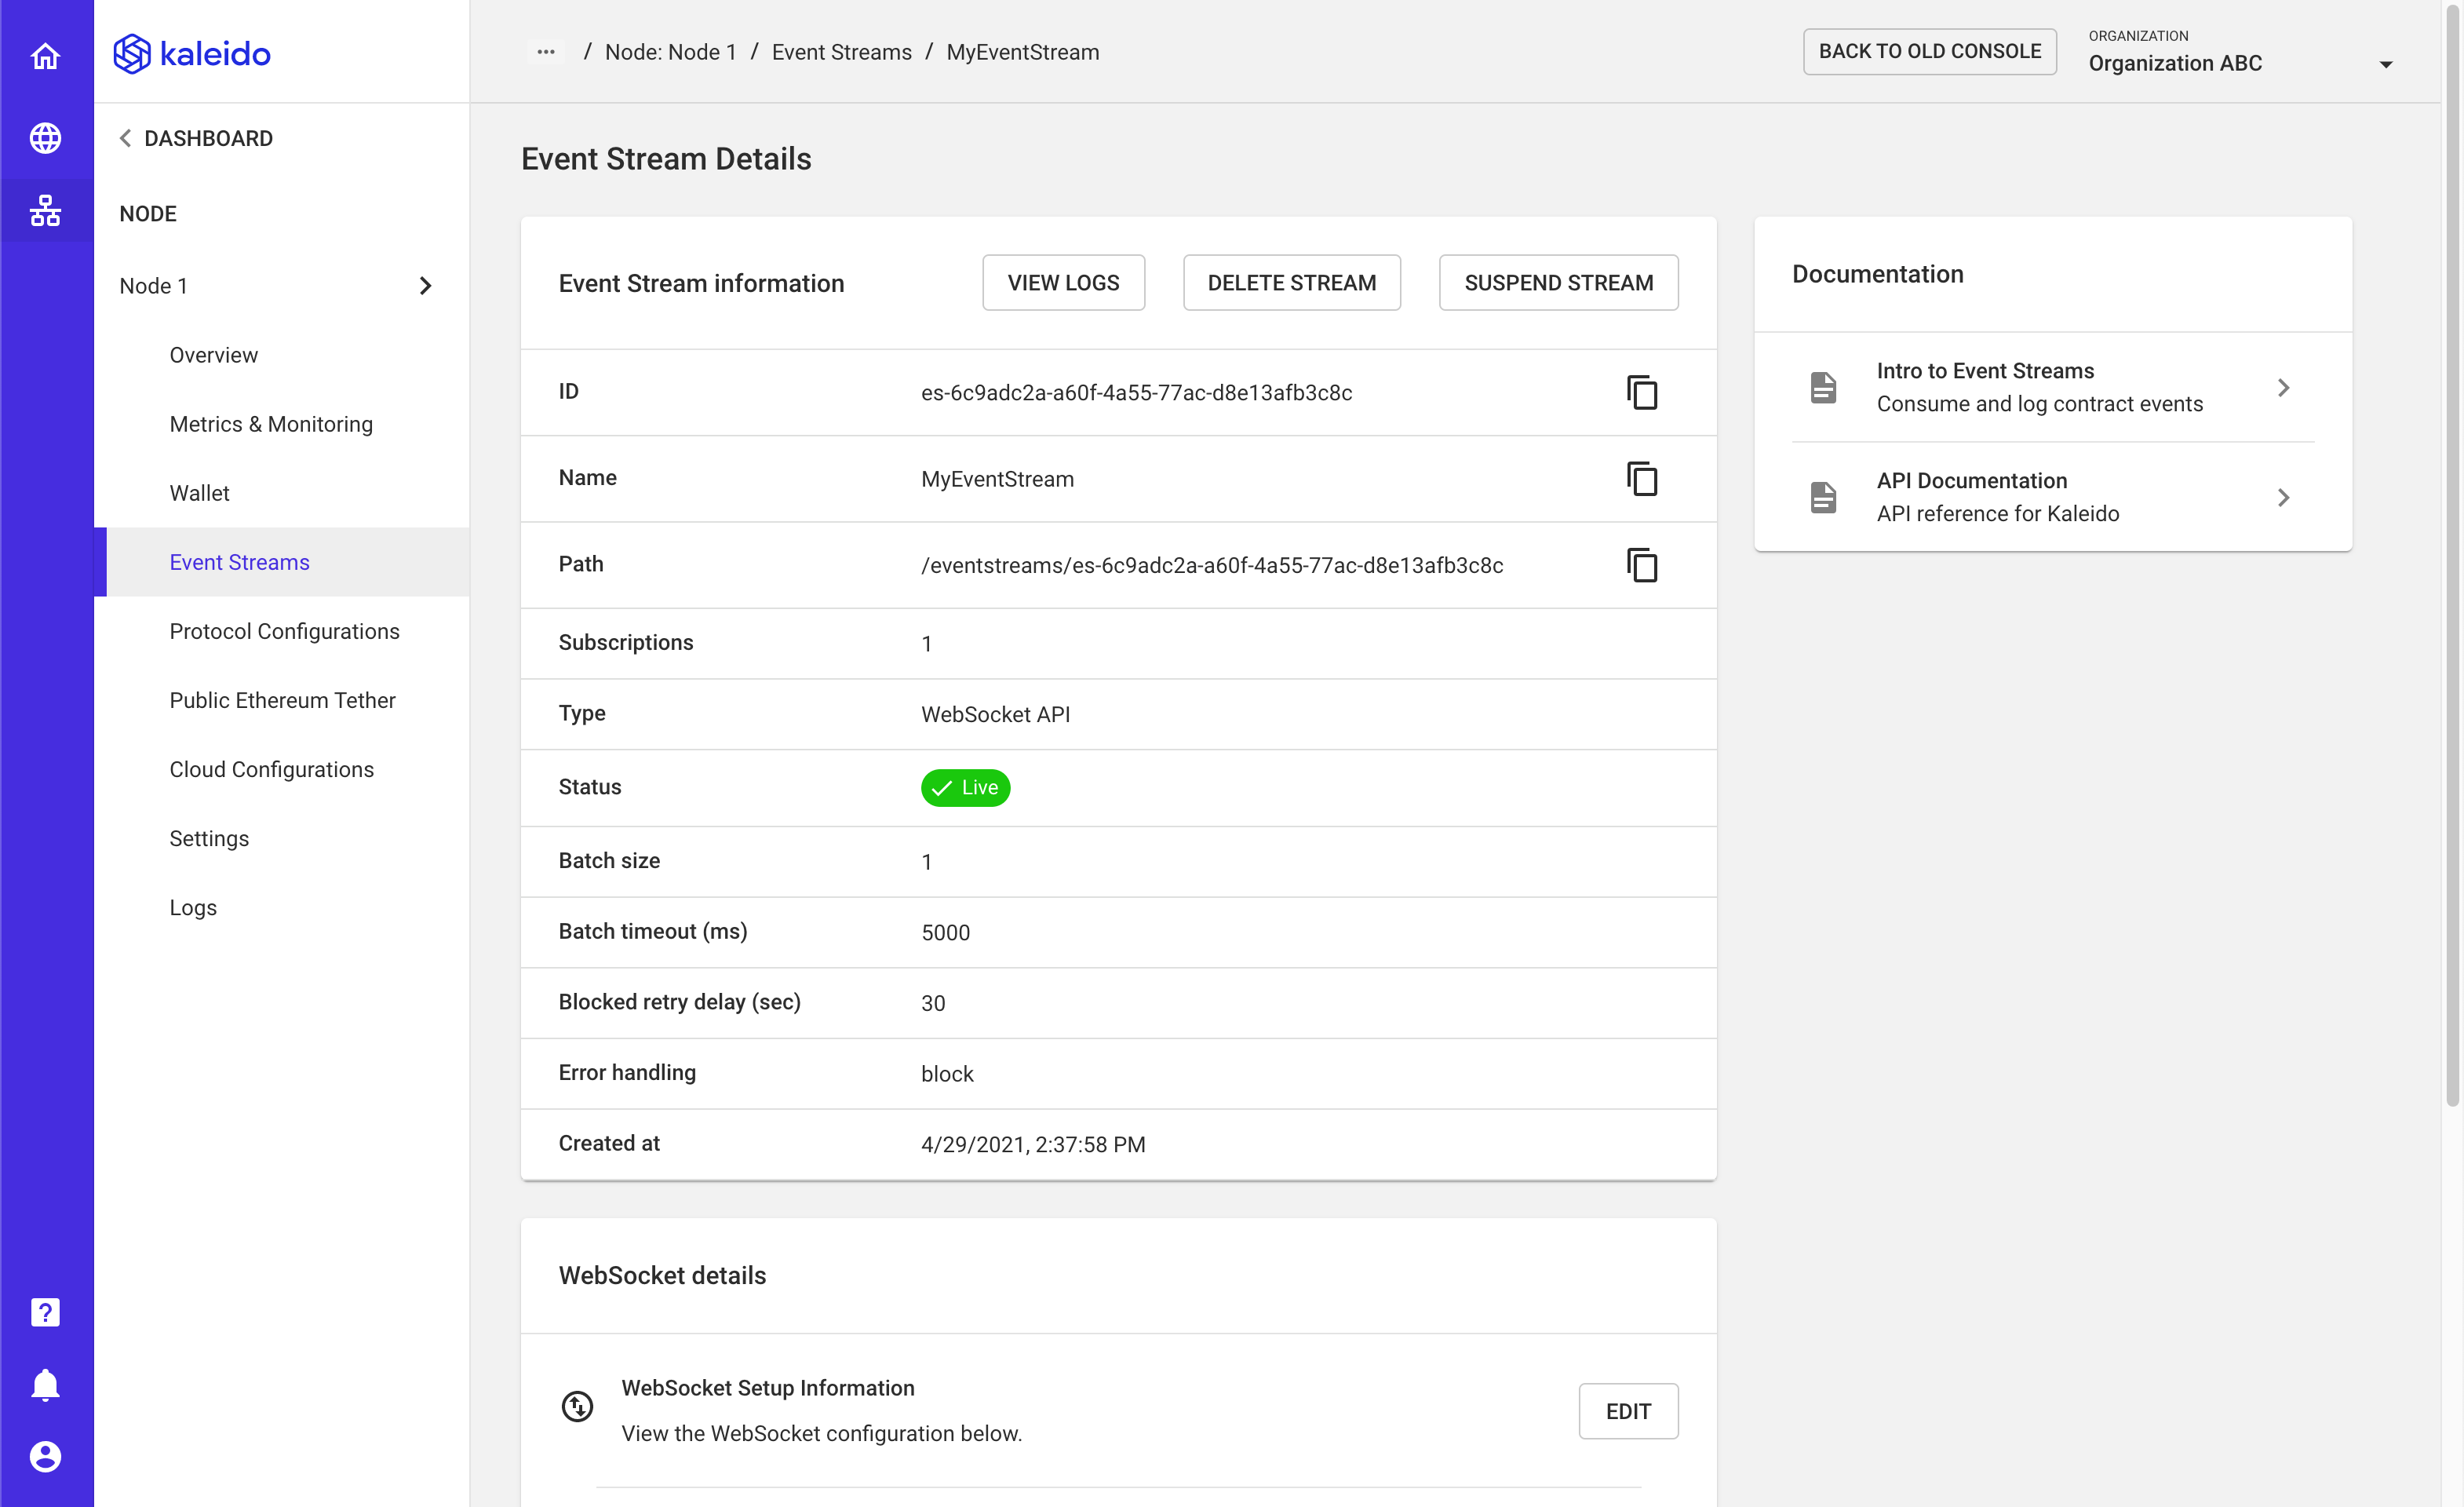
- Access the node containing the event stream you want to manage
- Click the "Event Streams" tab in the left-hand navigation
- You have four administrative options for the stream: Delete, Suspend, Resume and View Logs
- "Delete" - remove the attachment and by extension any subscriptions within the stream
- "Suspend" - pause the stream; this will also pause the delivery of events to your endpoint
- "Resume" - resume the stream; this will reactivate the stream and, based on the subscription configuration, deliver any missed events
- "View Logs" - inspect the logs for your event stream
Subscriptions
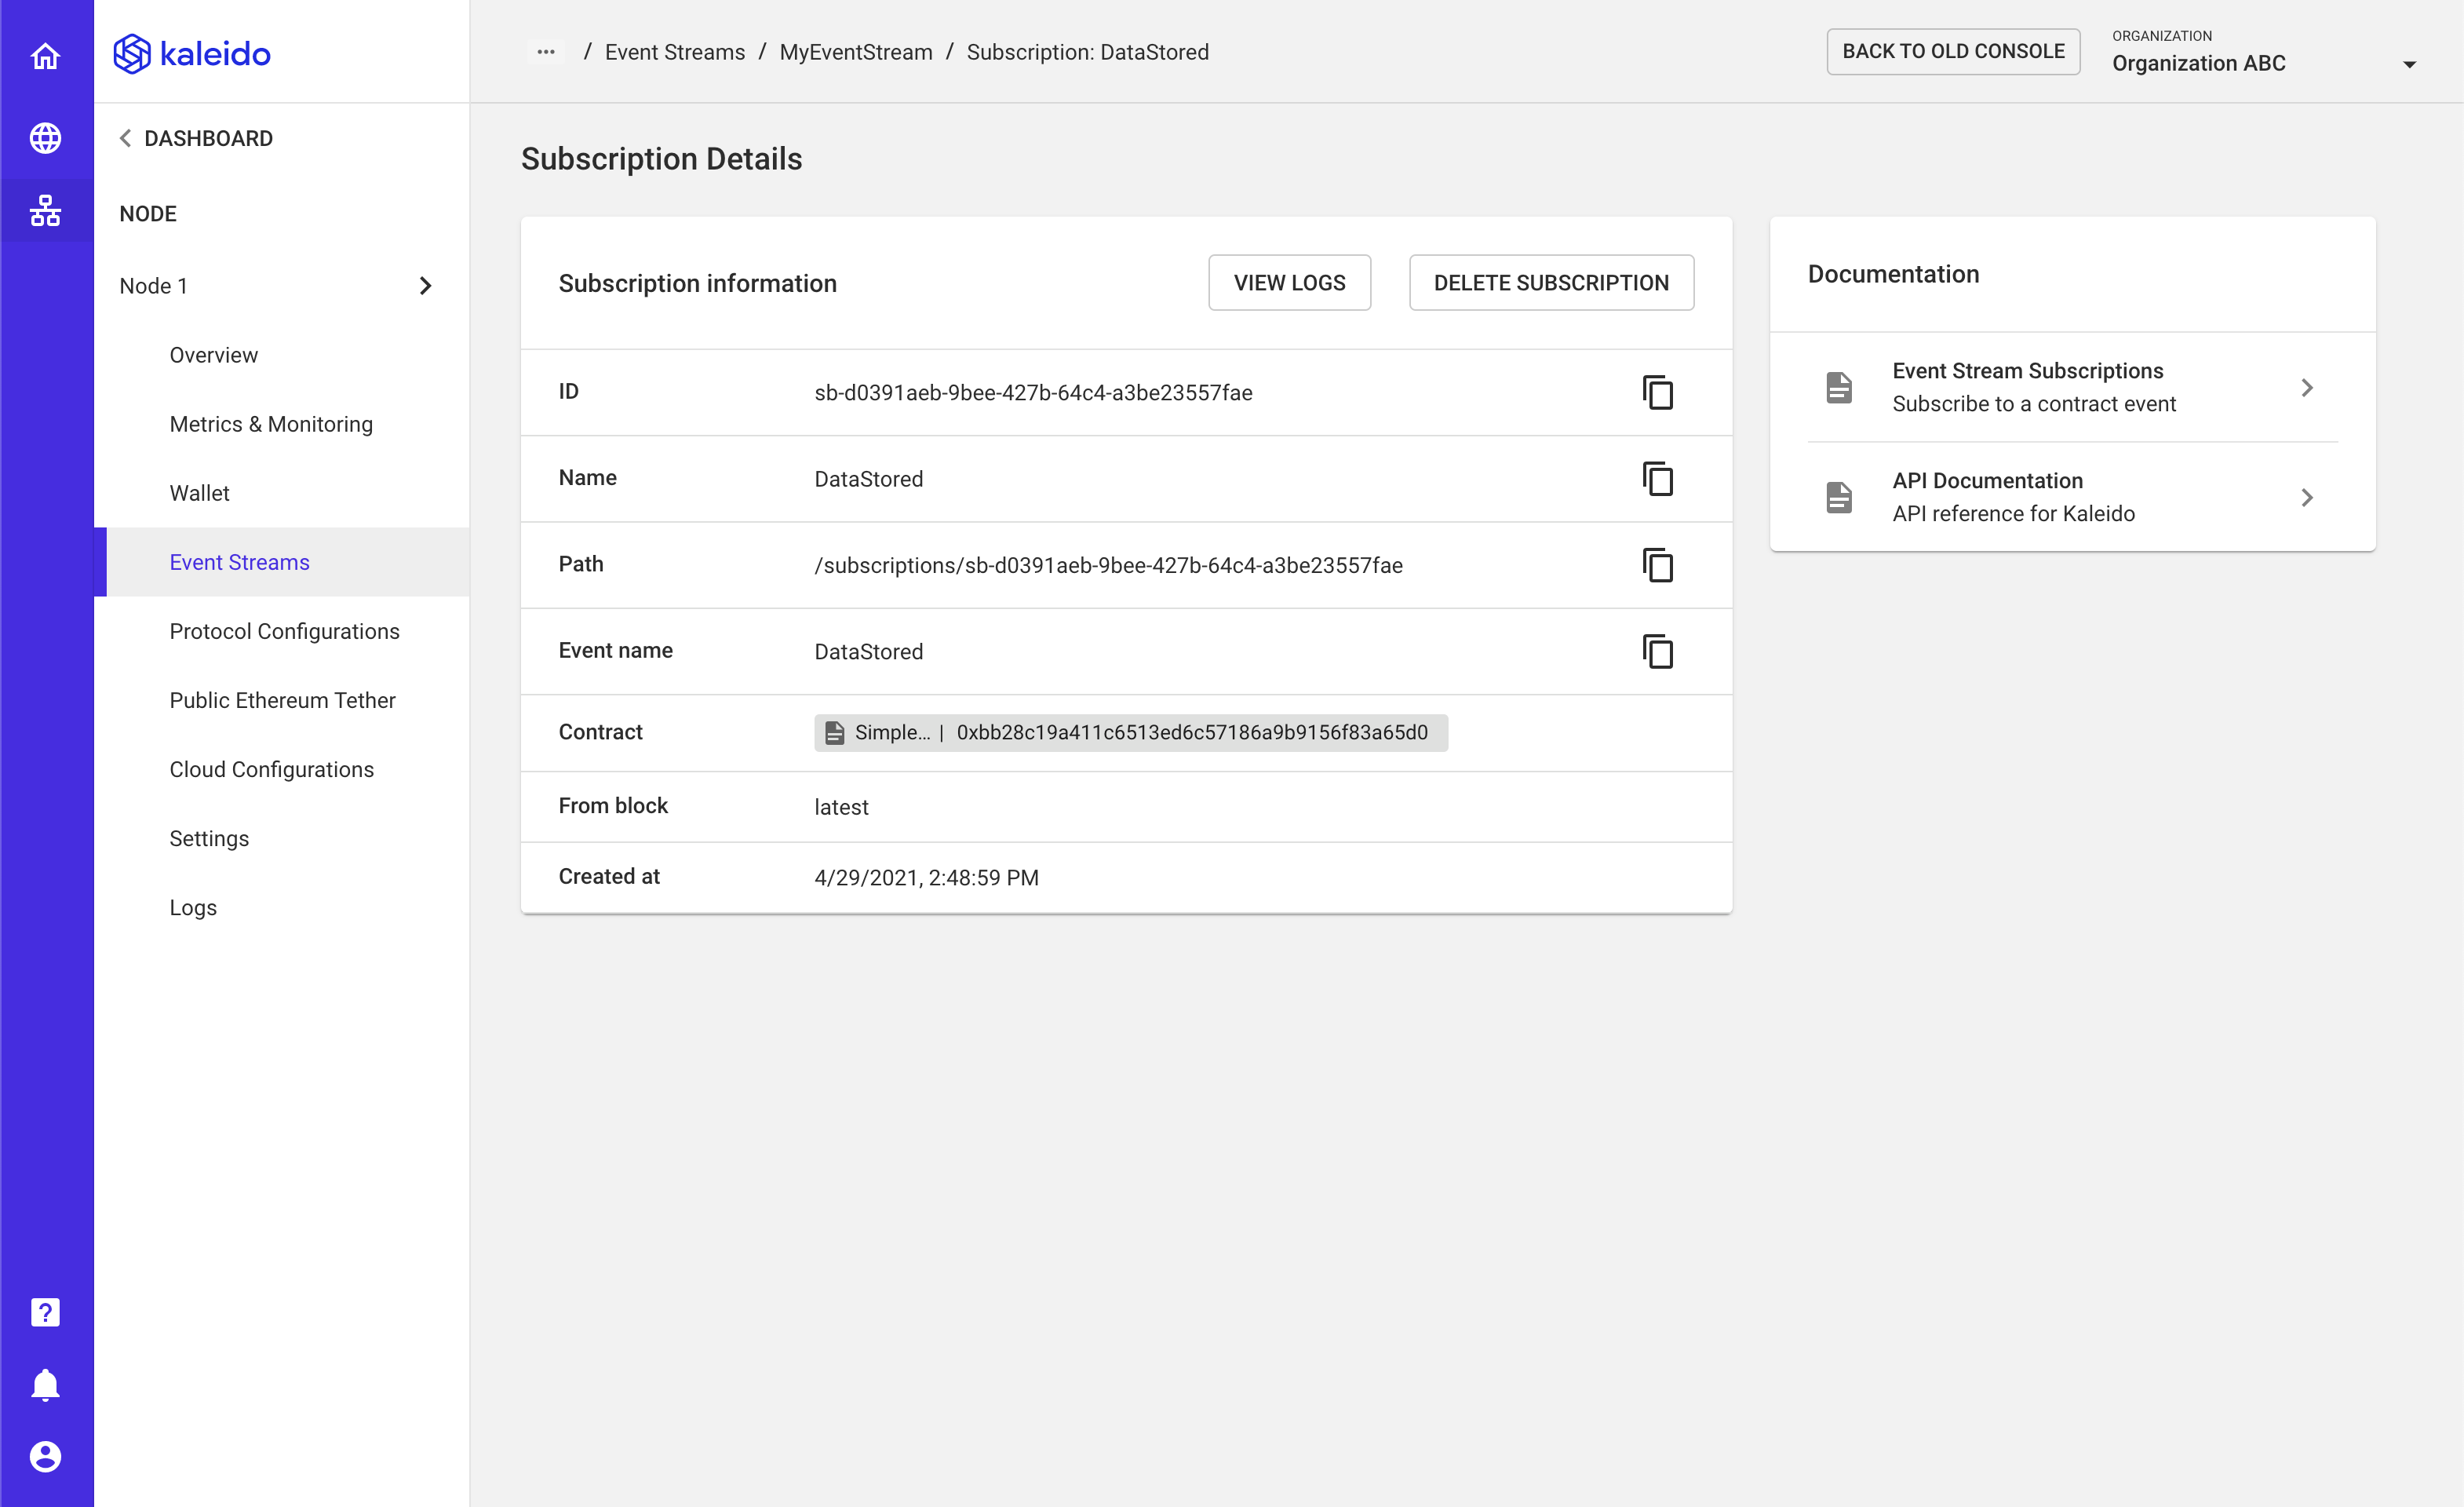
- From within your event stream details panel, scroll to the bottom of the screen and select the subscription you wish to manage
- You have two administrative options for the subscription: Delete and View Logs
- "Delete" - remove the subscription and by extension the events it is configured to emit; this is a permanent action and requires a new subscription to be applied to receive further events
- "View Logs" - inspect the logs for your subscription
Receiving events
Command line WebSocket client
At this point you could go build an app that uses a WebSocket library to connect to your event stream. However, sometimes it's easier to perform some lightweight experimentation before you write a bunch of code.
A quick and easy way to test your Event Stream is to connect a WebSocket client to it and call your smart contract to generate an event. For this example, we will be using a command line based WebSocket client called websocat. For details on how to install websocat, check out its README.md.
Connect WebSocket client
To connect our WebSocket client, you'll need to get the URL for the REST API Gateway of your Node, from the node overview screen.
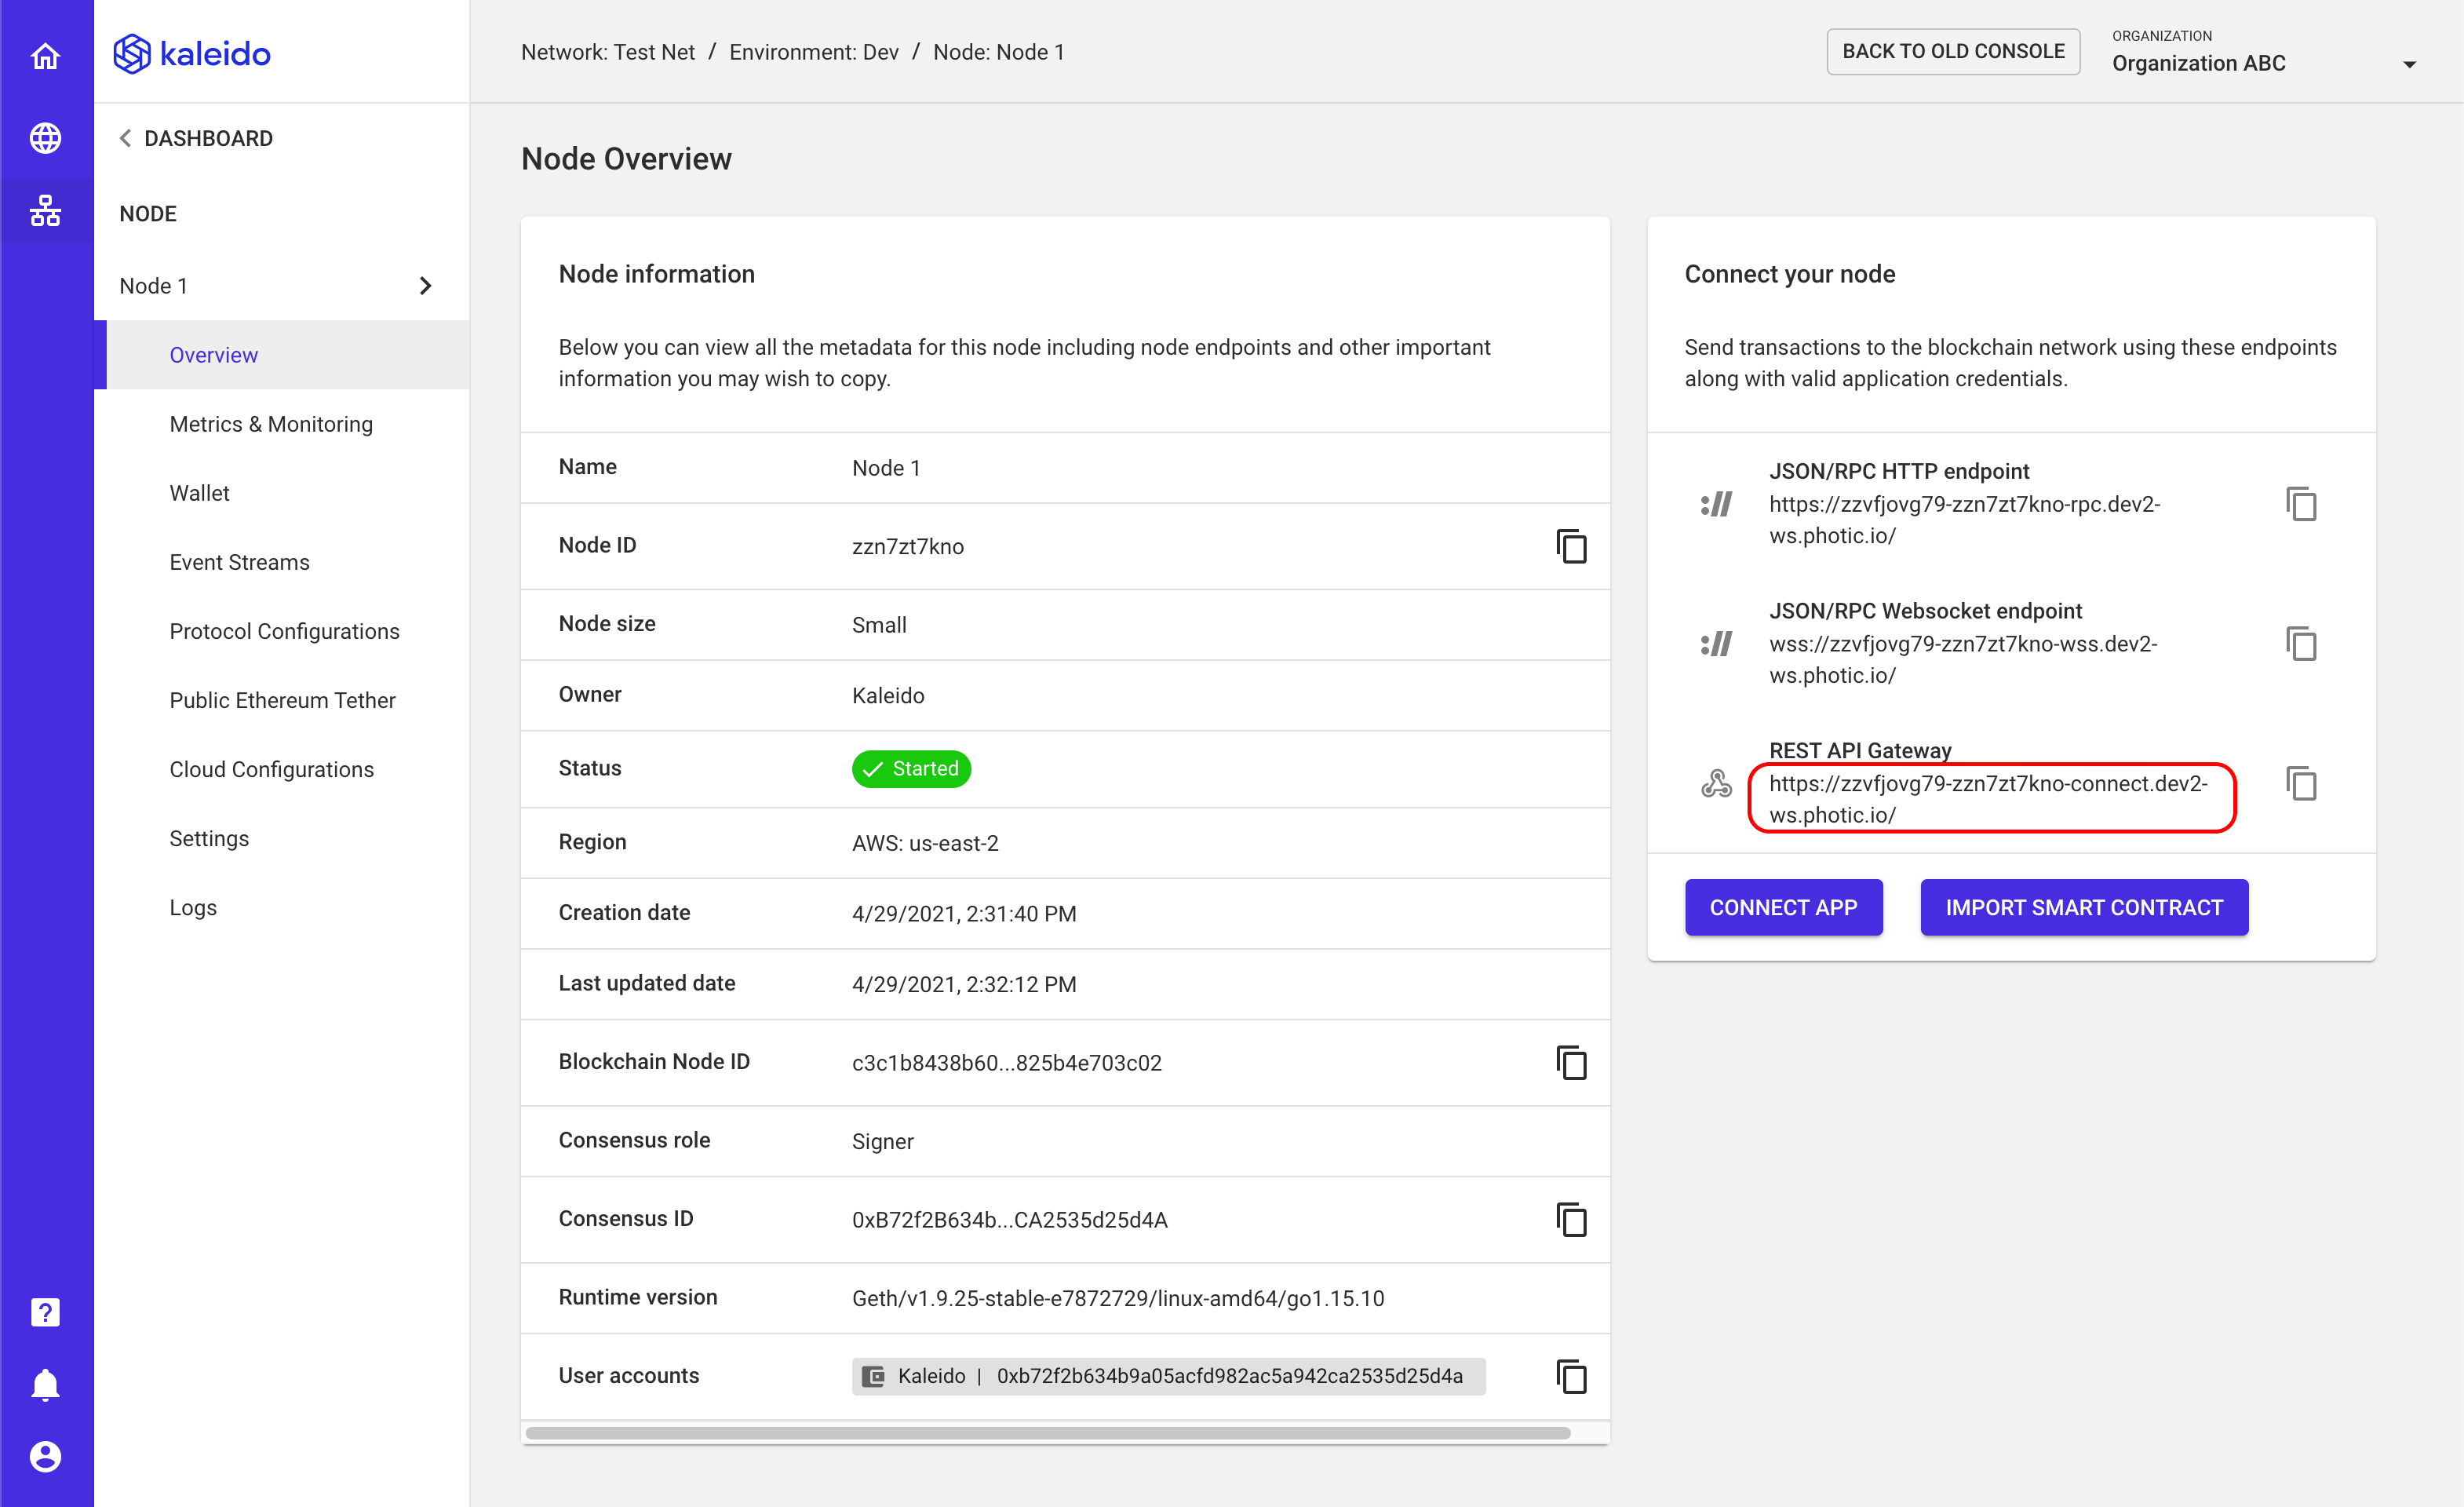
Copy this address, then change the following:
- Change
https://towss:// - Insert your basic auth credentials before the domain name
- Append
wsto the end of the URL
For example, if your REST API Gateway URL was:
Your WebSocket URL would be:
wss://zzkl6as47b:rHdI4IznGYfhZPP4vSSX084FQJAZR-yV8fTUnIbCje4@zzvfjovg79-zzn7zt7kno-connect.dev2-ws.photic.io/ws
Run the following command in your terminal:
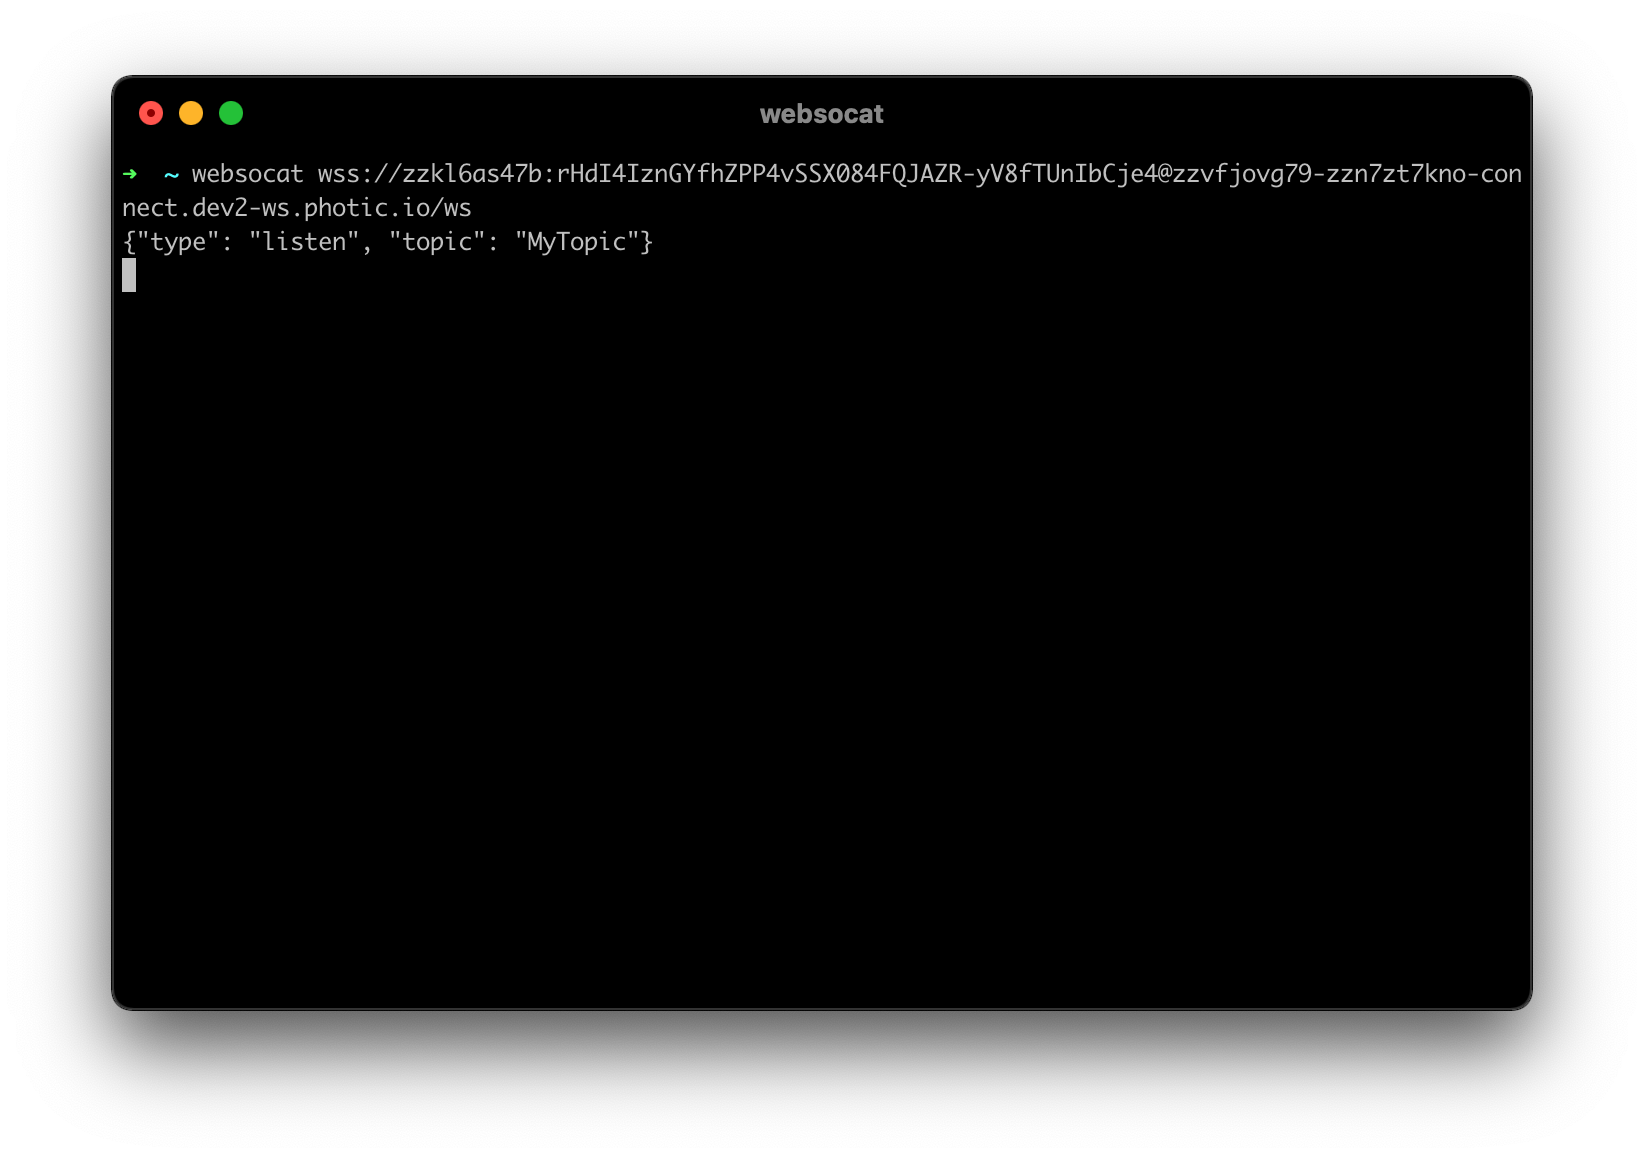
websocat wss://zzkl6as47b:rHdI4IznGYfhZPP4vSSX084FQJAZR-yV8fTUnIbCje4@zzvfjovg79-zzn7zt7kno-connect.dev2-ws.photic.io/ws
You should now be connected to your Node's WebSocket interface. Any messages you type at this prompt will be sent to the Node. Any events that your Node sends to your Event Stream will appear in this terminal as well. To start listening for events on the topic called MyTopic type the following and press Enter:
Emit an event
Now that we're listening for events, we need to actually emit an event. We can do this simply by calling our smart contract from the Kaleido dev console in our Gateway API.
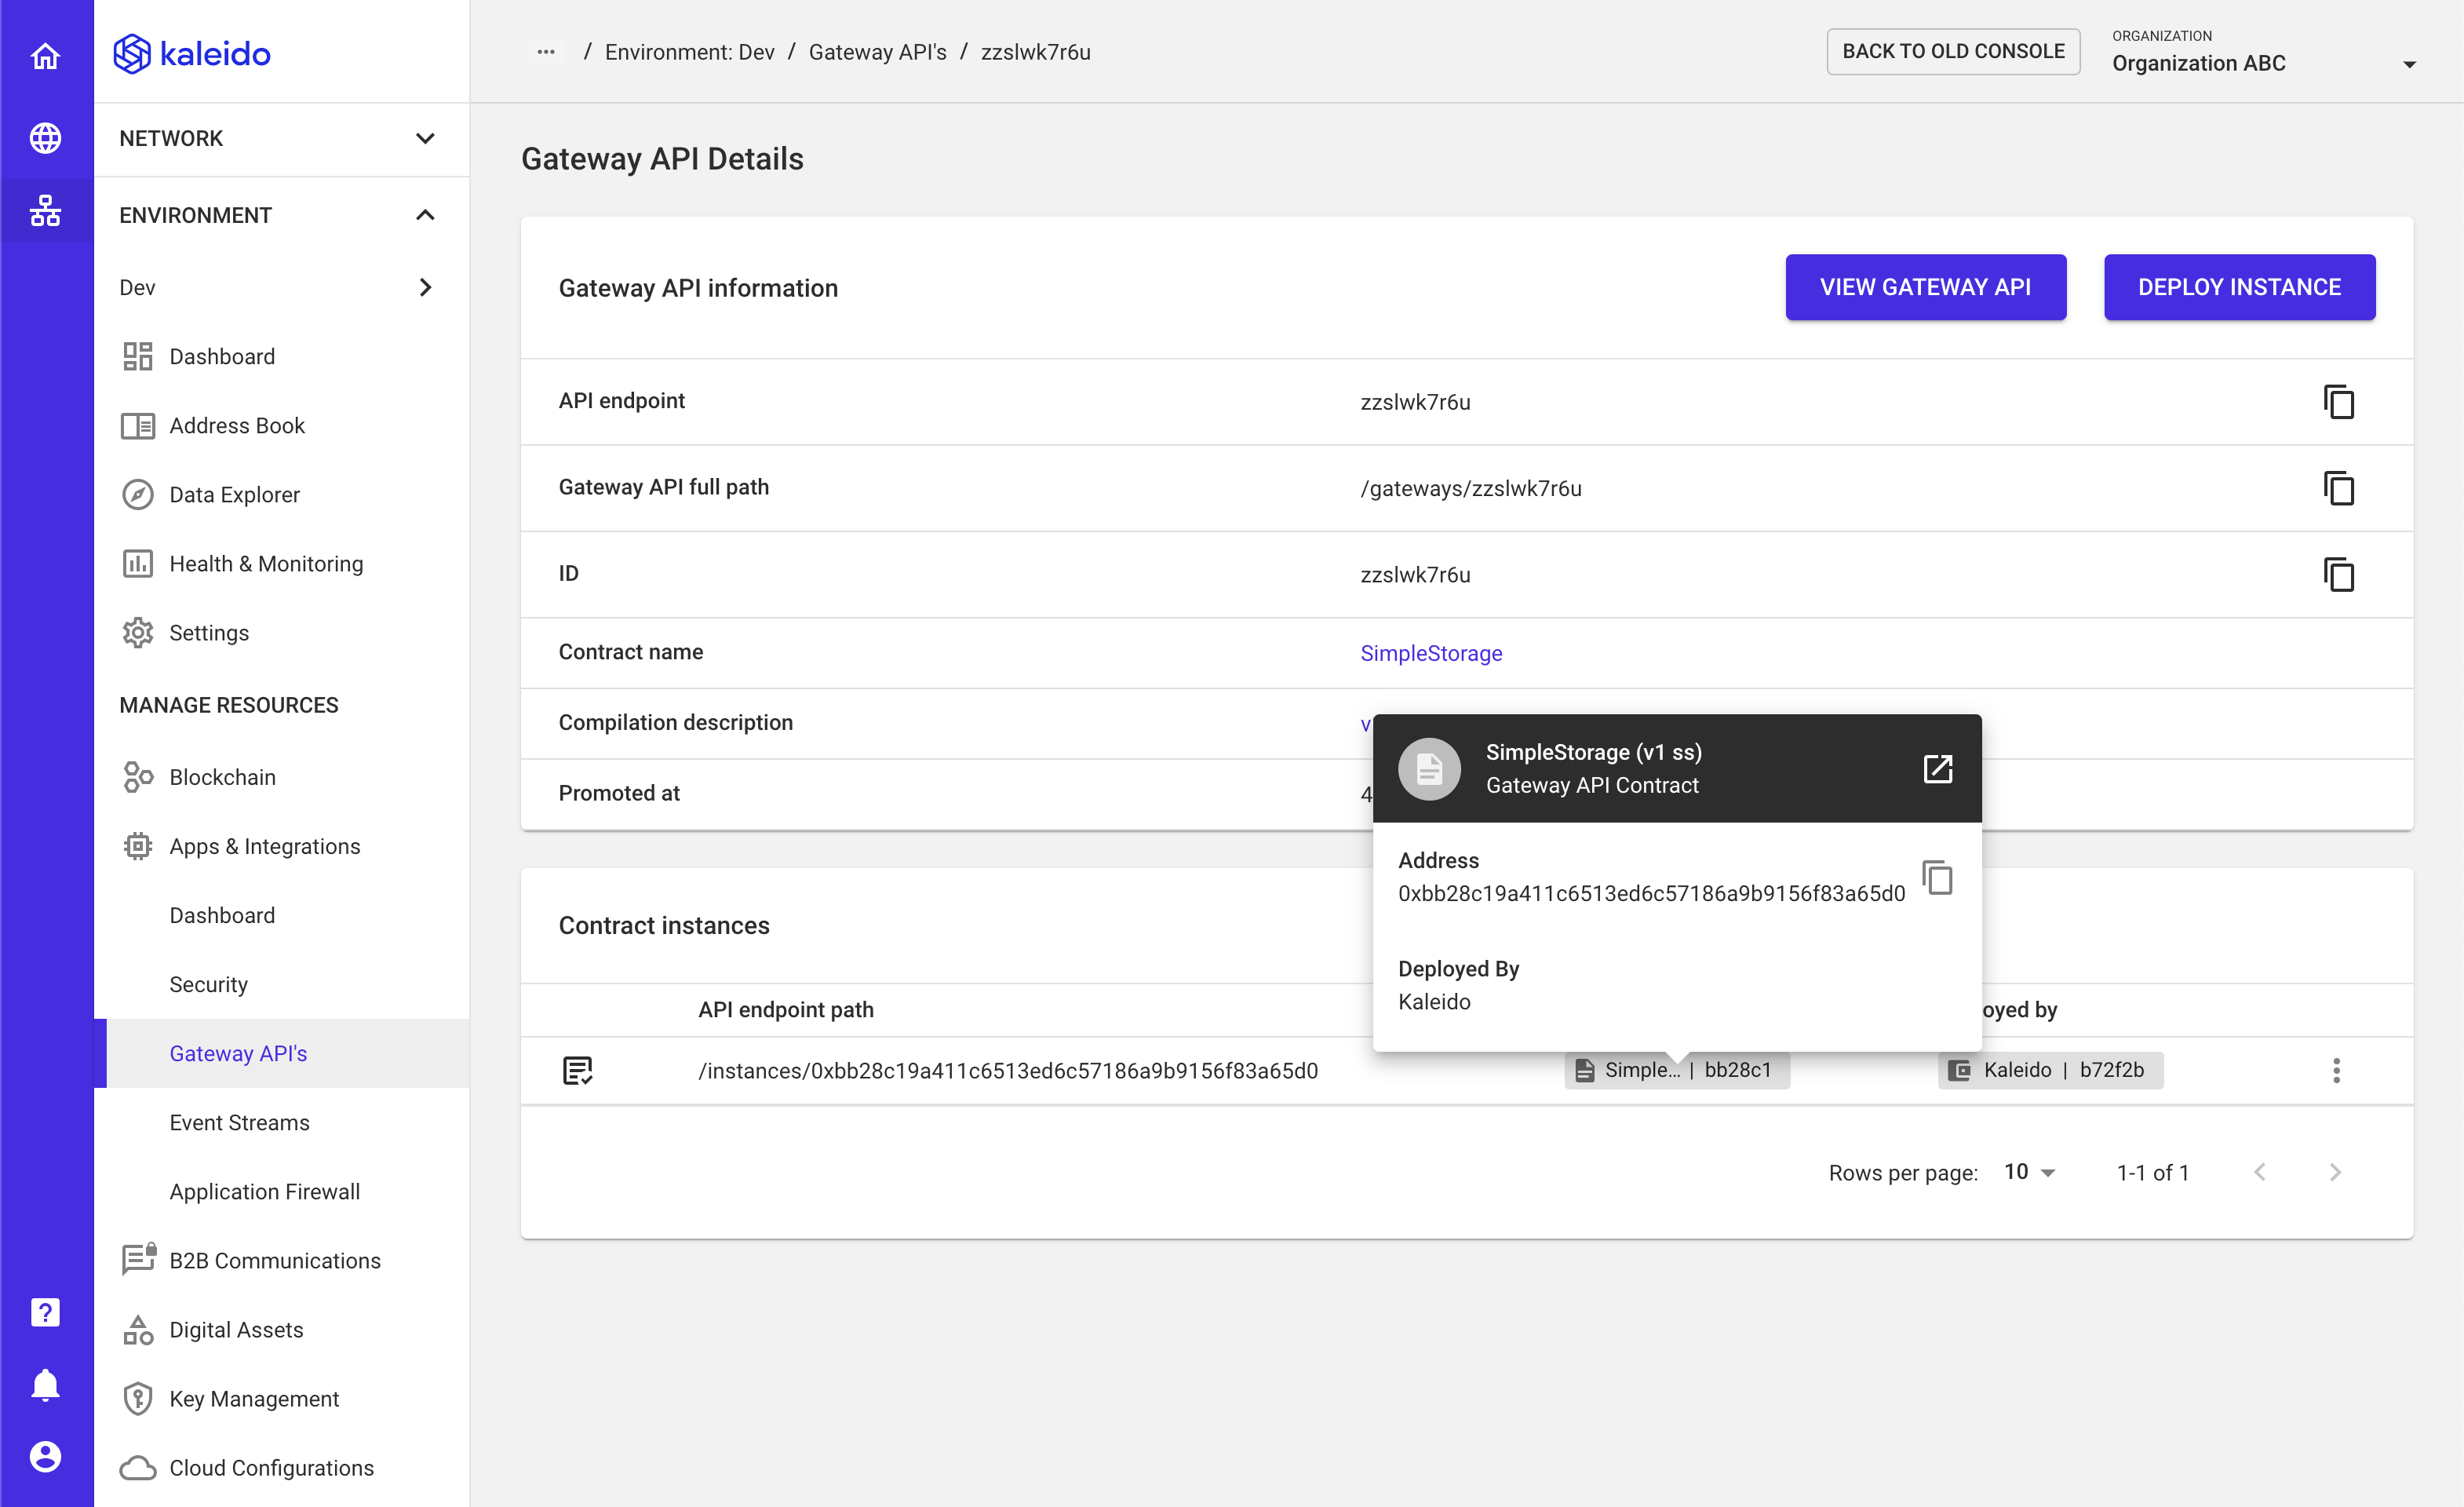
- Go to the details page for your Gateway API, and copy the Contract Address for your deployed contract.
- Then click VIEW GATEWAY API
NOTE: The below Swagger experience makes use of the
addressparameter in the/gatewaysURL route. This is a useful technique for scenarios where you have already deployed a smart contract with a web3 library and wish to use the REST API Gateway for smart contract calls, OR for cases where you have multiple on chain deployments of the same Gateway API compilation. The alternate option is to call the/instancesroute with the smart contract address specified in the path. You can access an instance directly from the Gateway API details screen by expanding the ellipsis next to an instance and selecting "View Instance."
- Click VIEW API
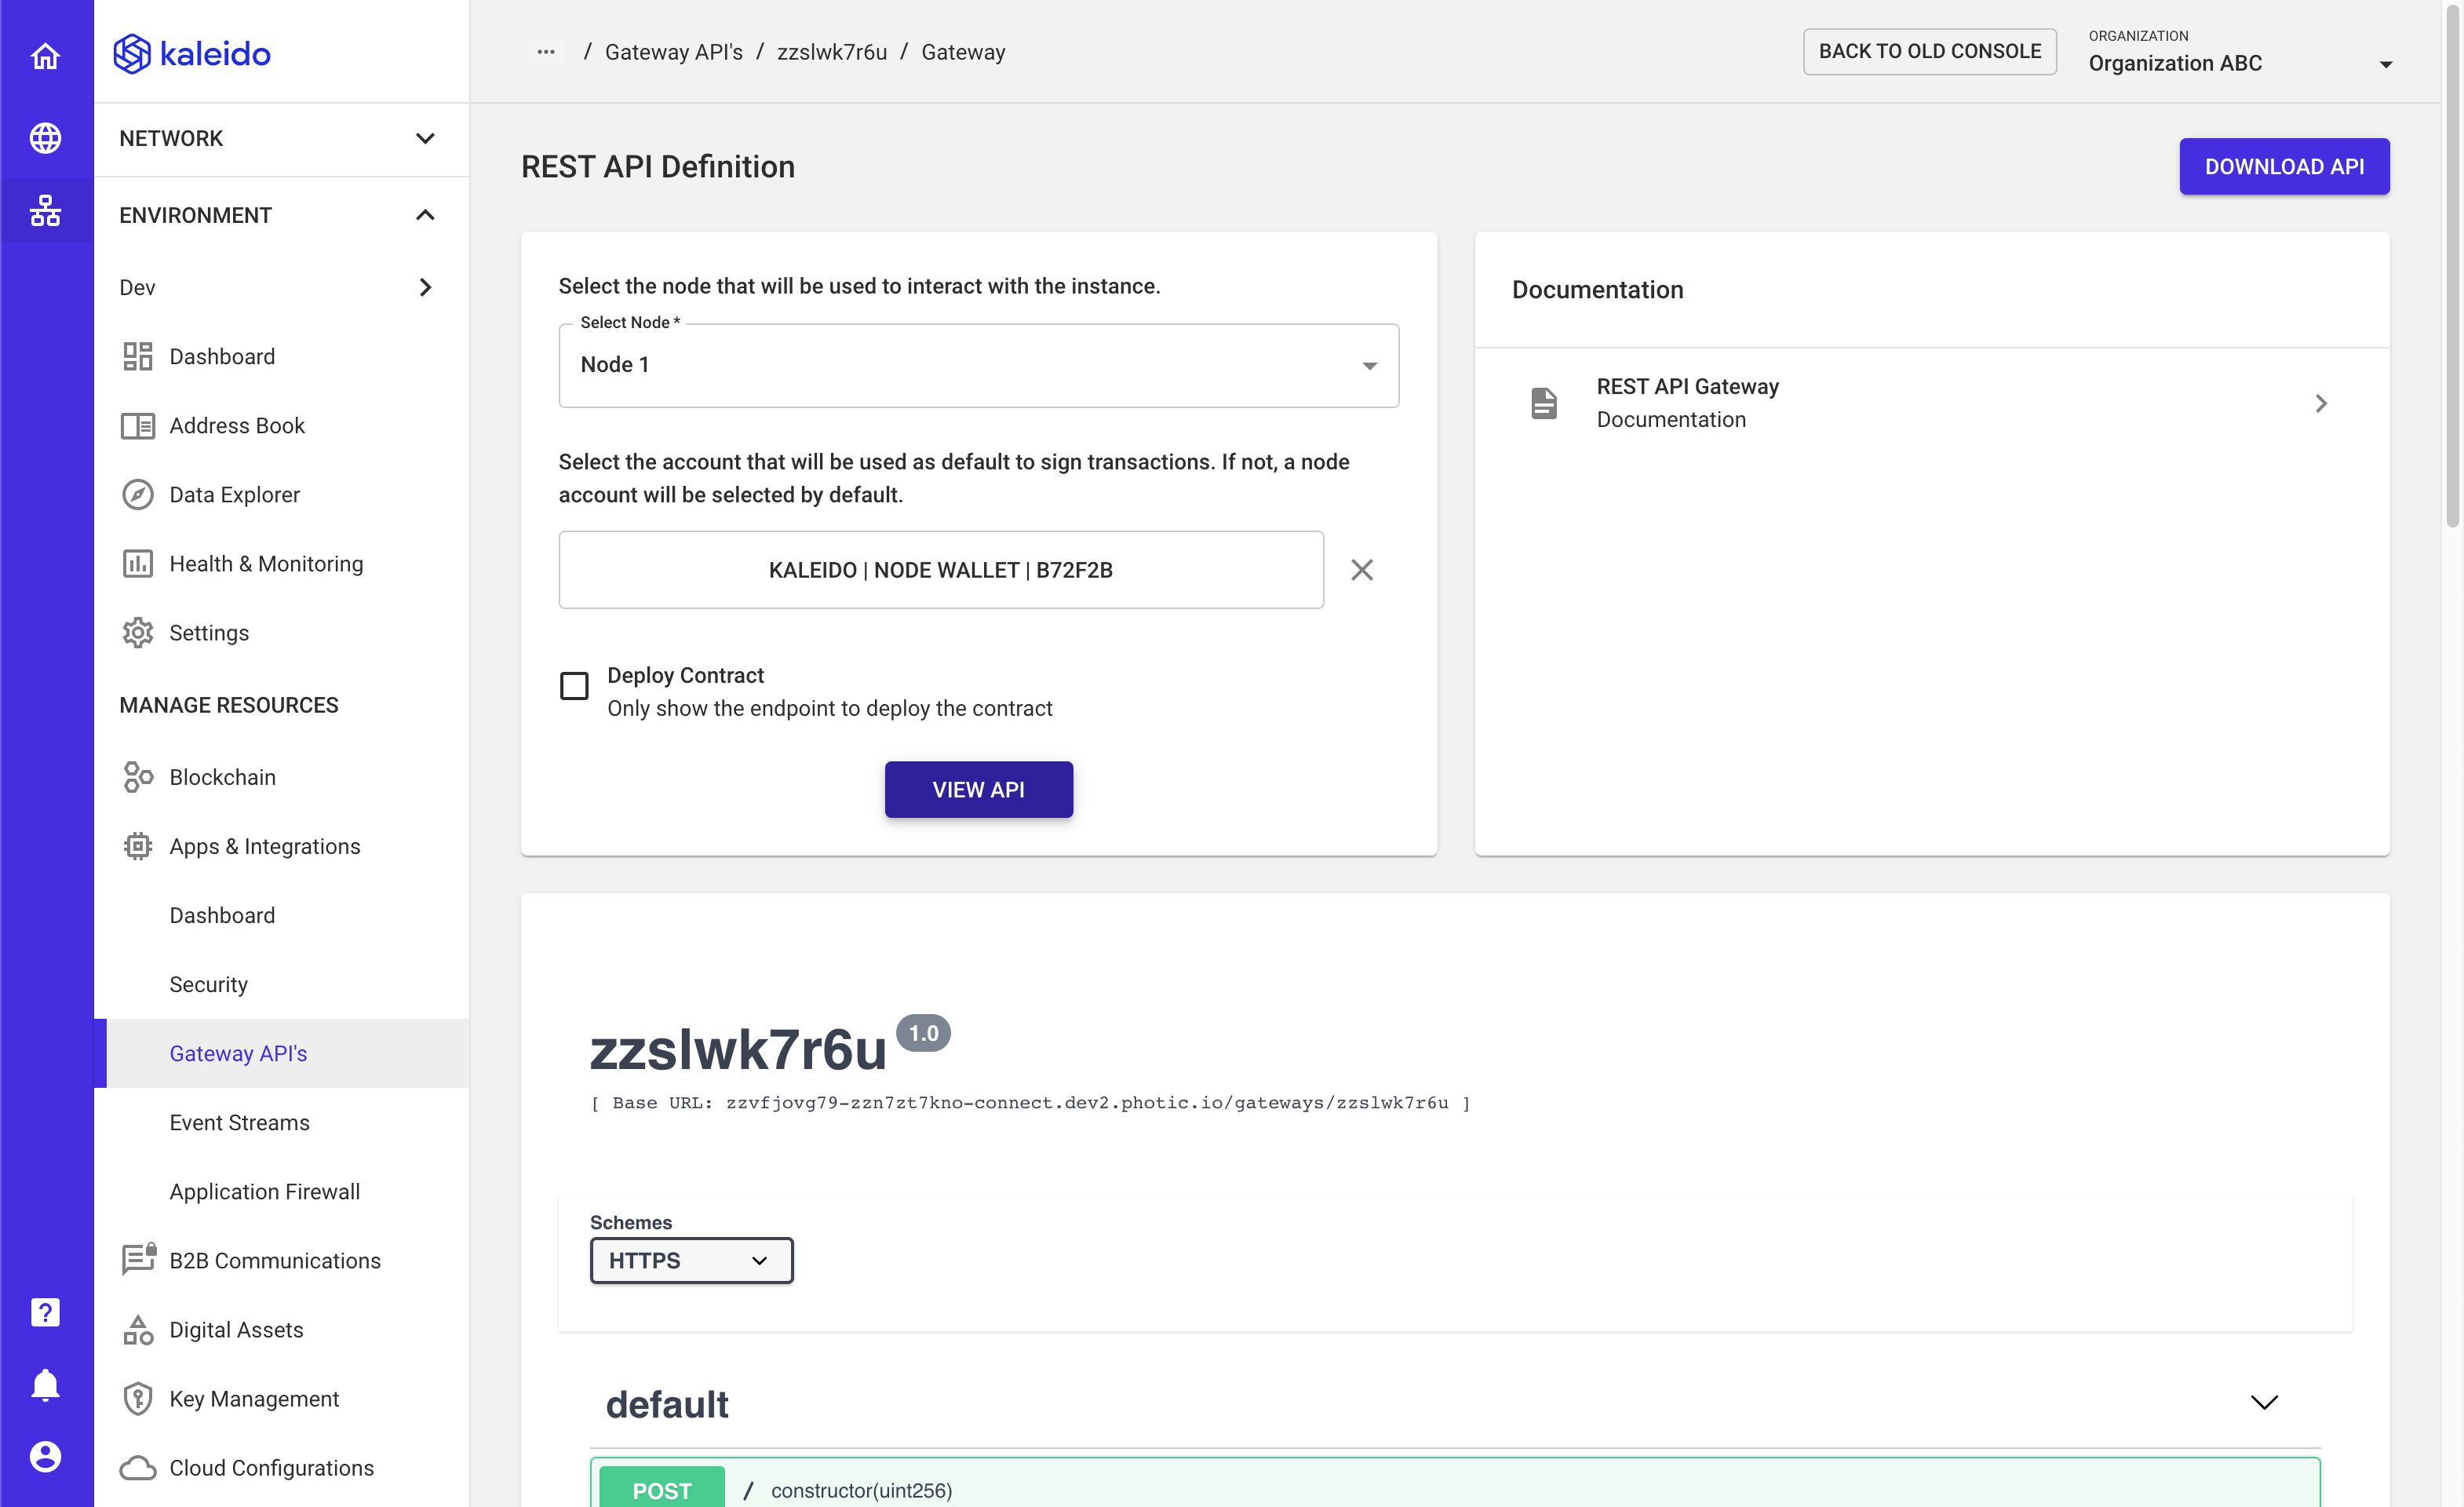
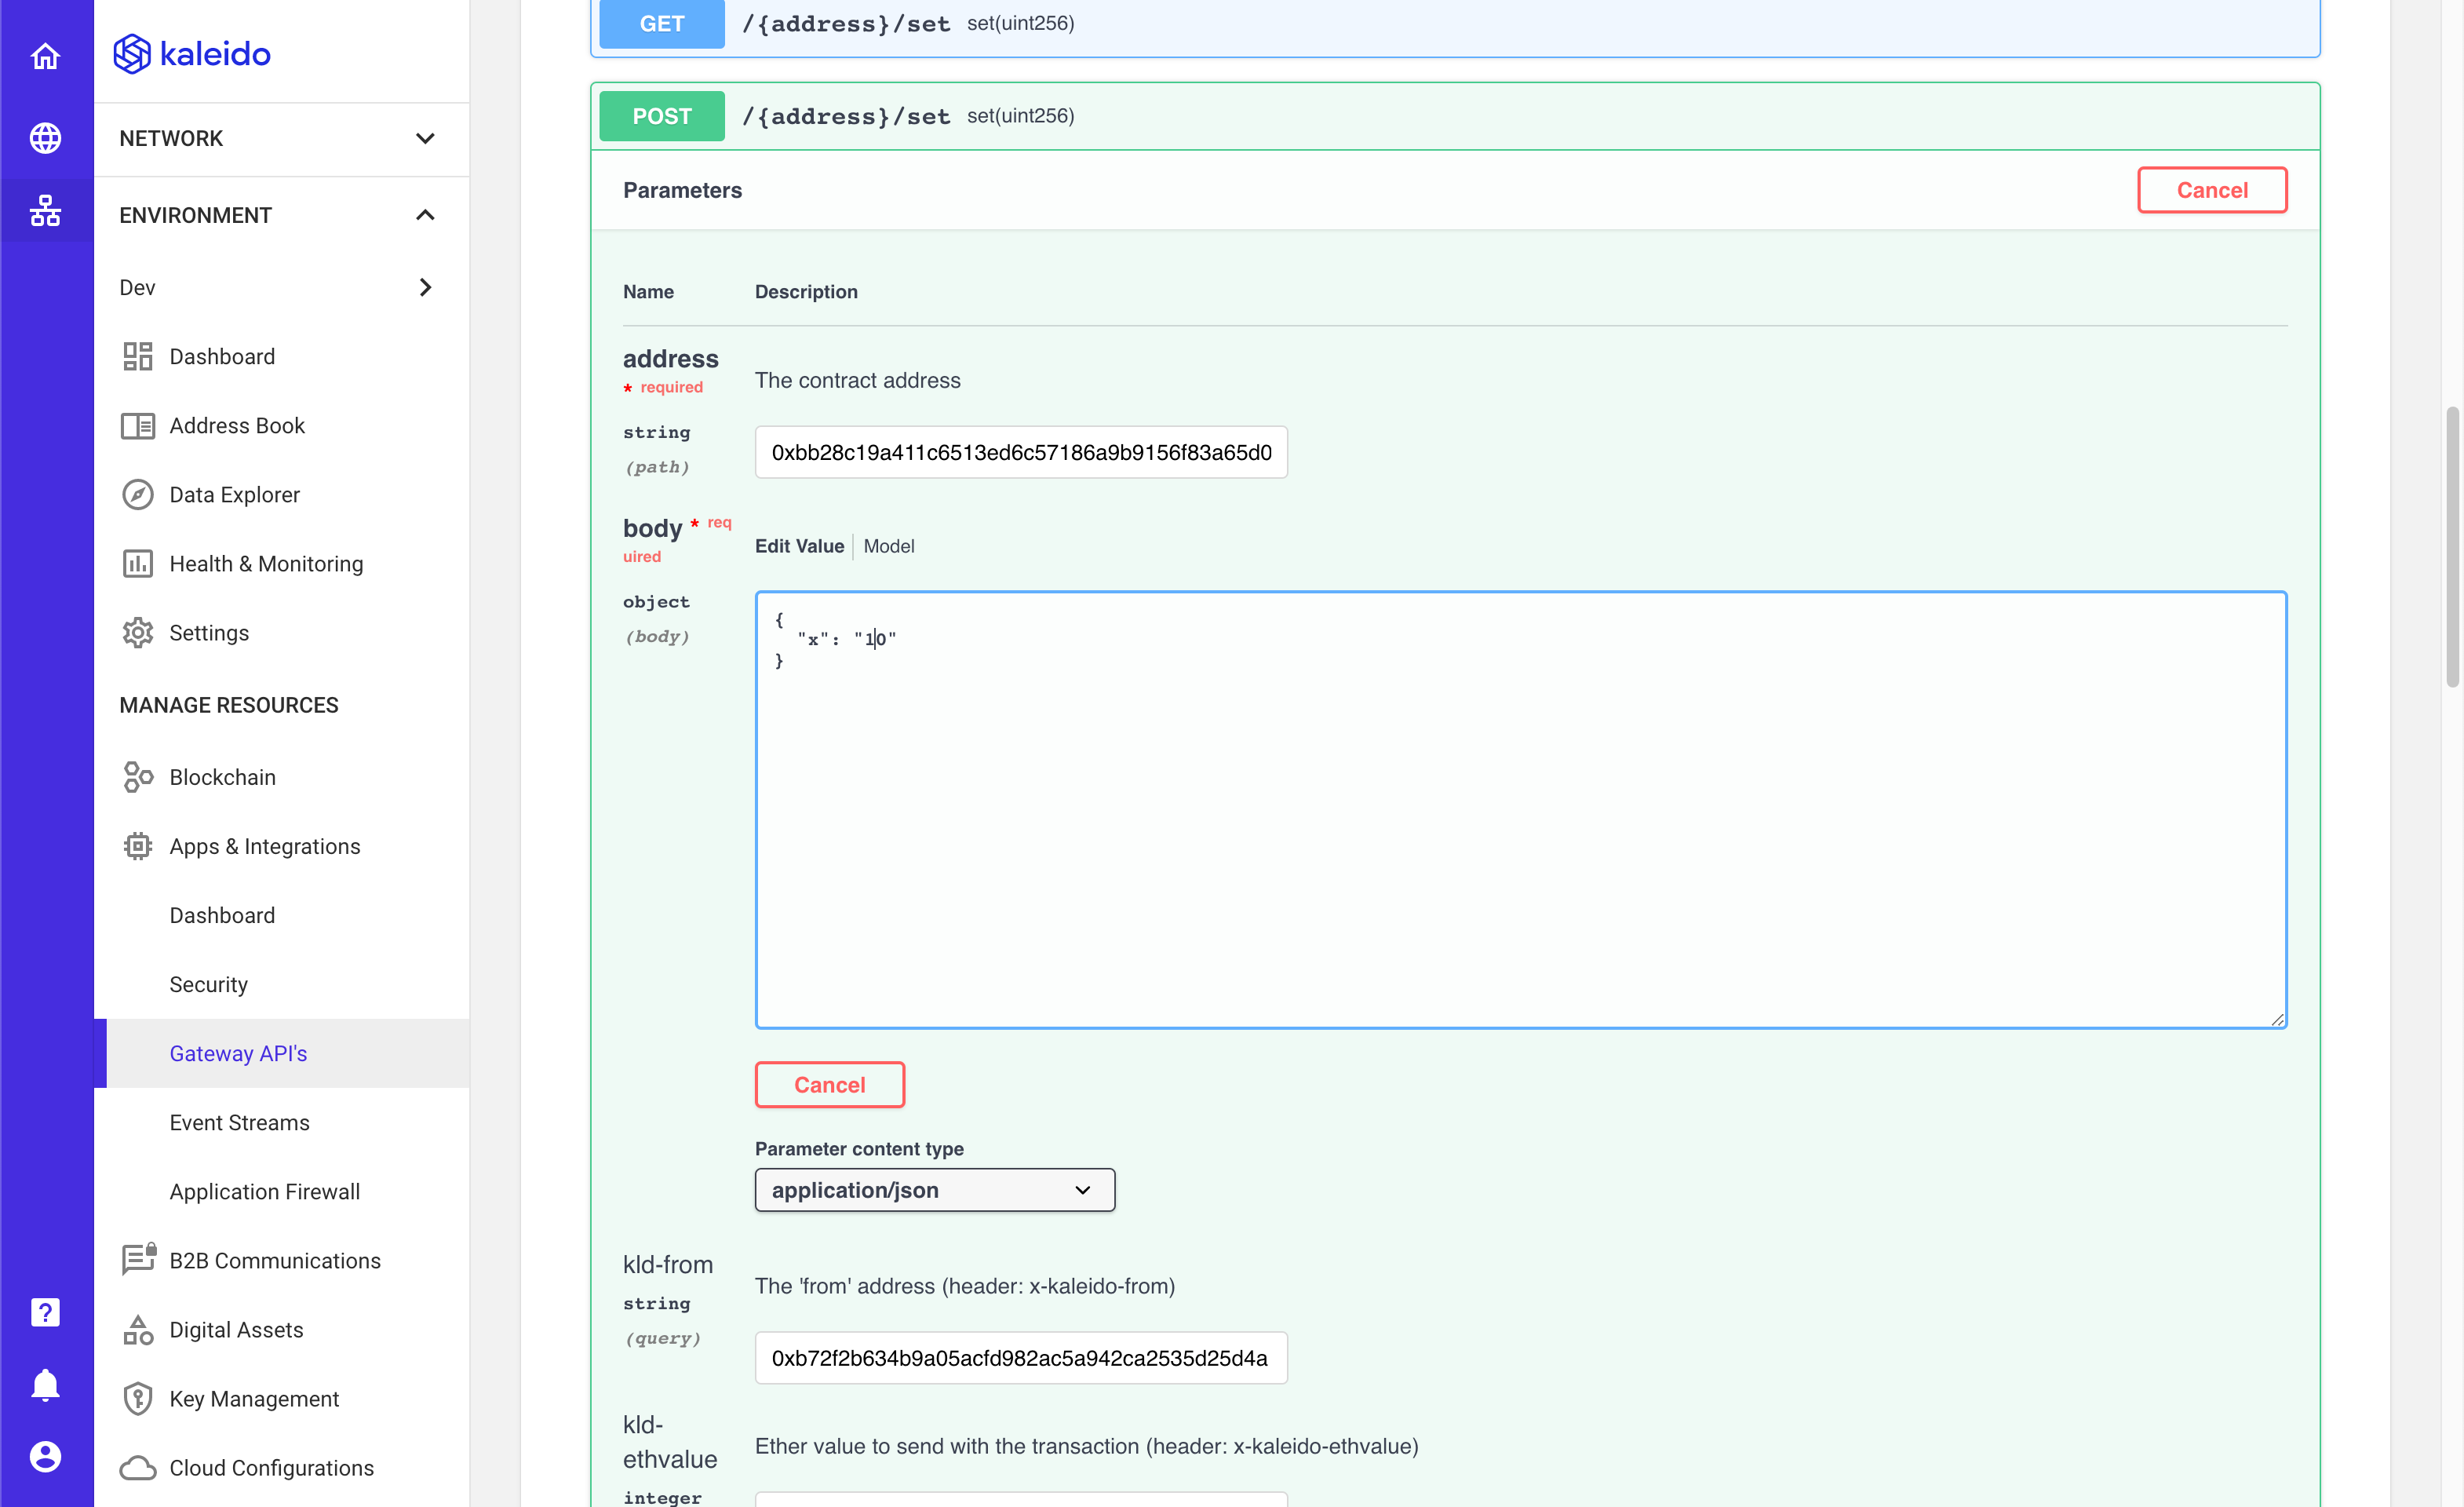
- Scroll down to
POST /{address}/set - Click Try it out
- Paste the Contract Address you copied from the previous screen
- Set a value for
xto any positive integer
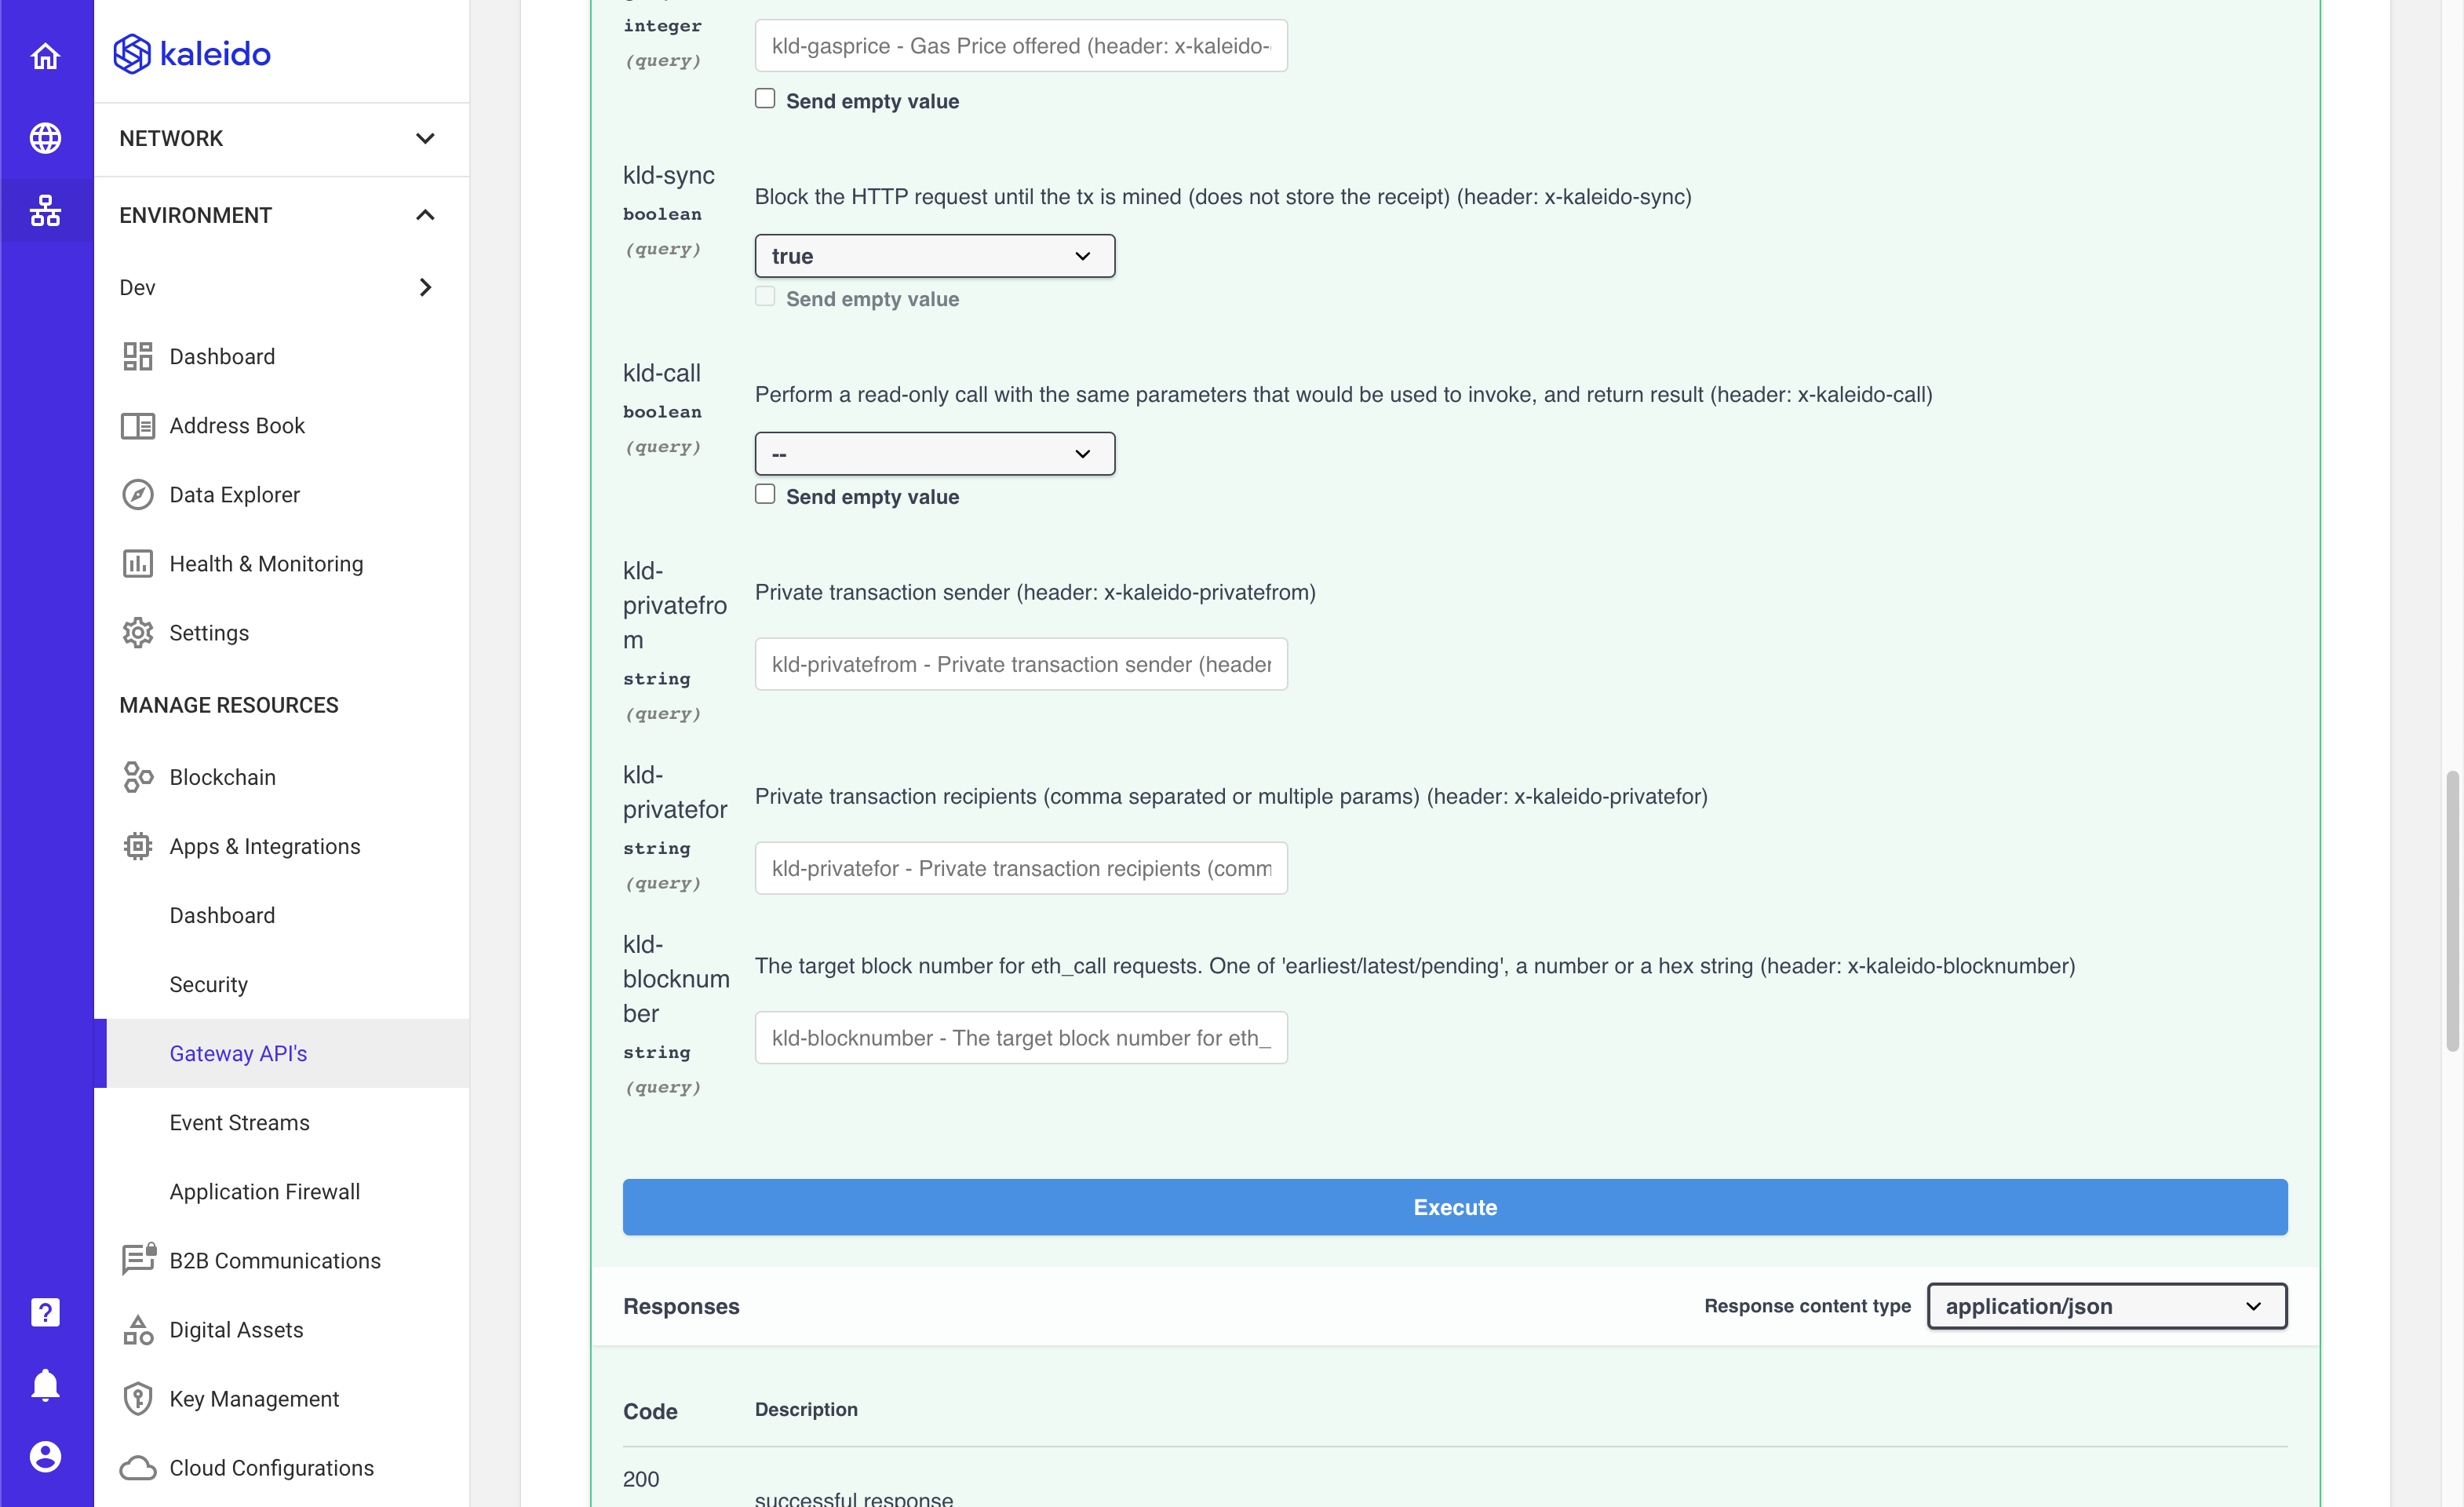
- Scroll down and click the Execute button
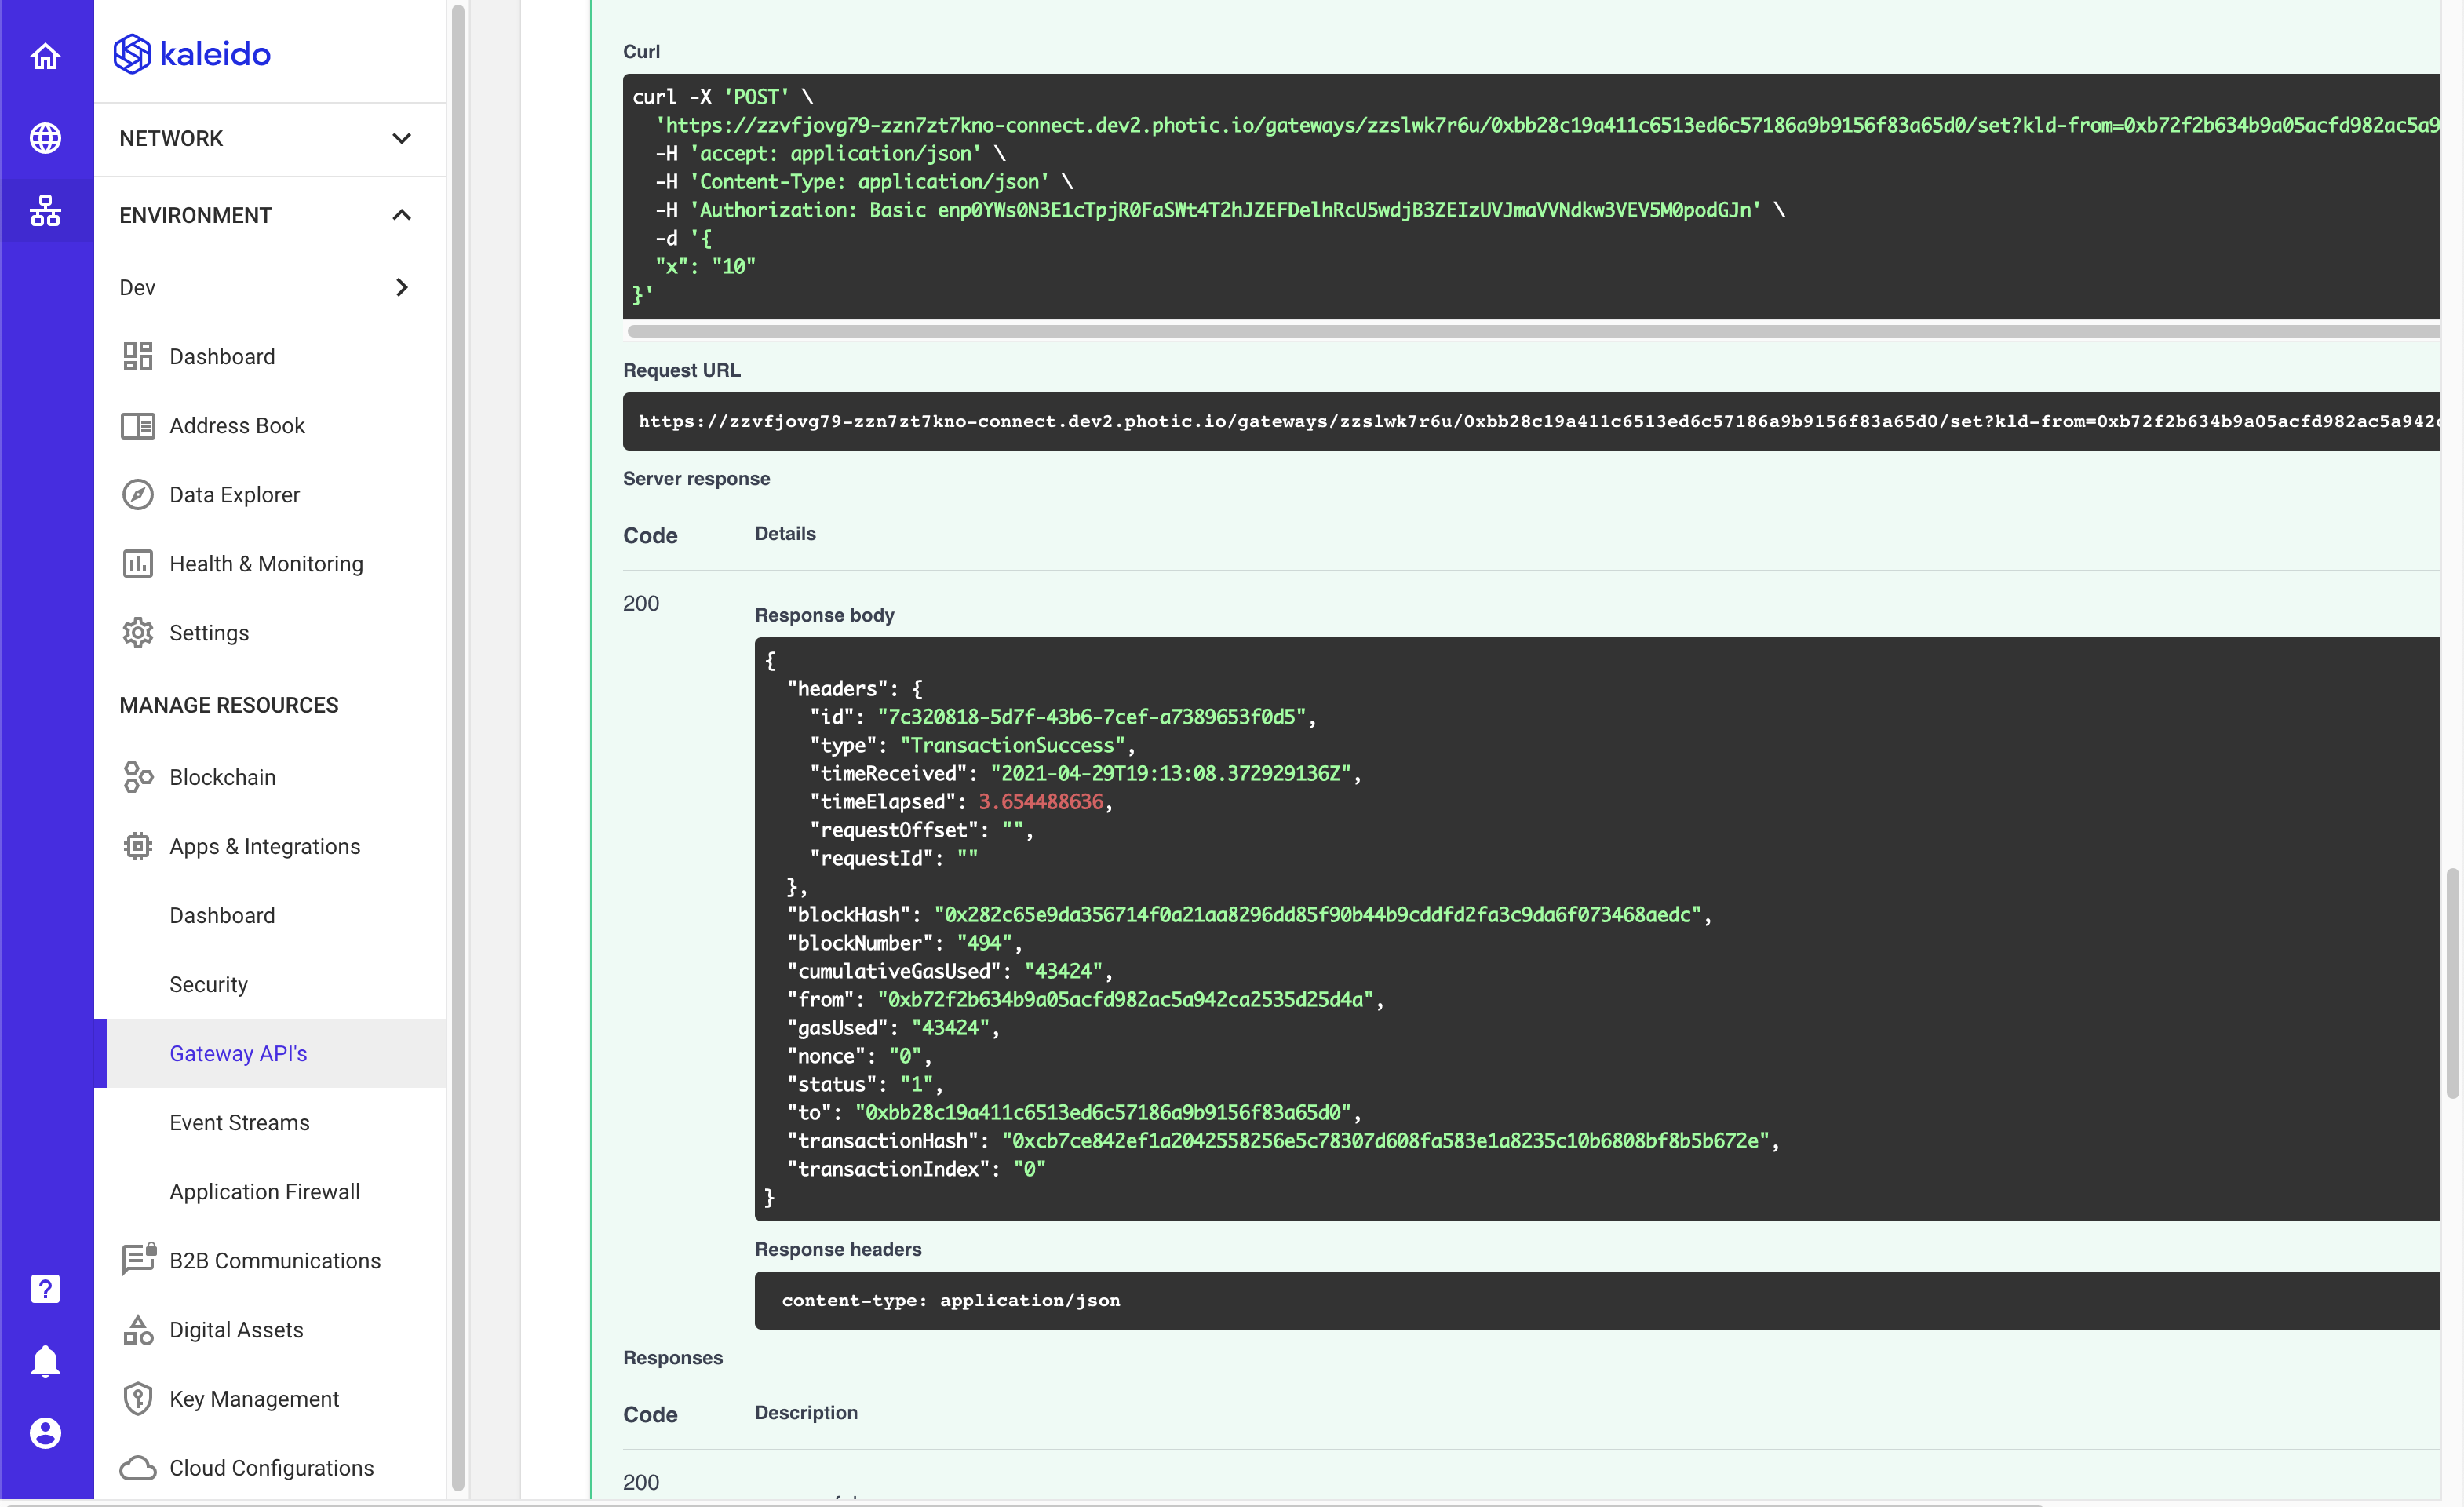
- You should get a response similar to the following
- Now, back in your command line you should now see the event! It should look something like the following:
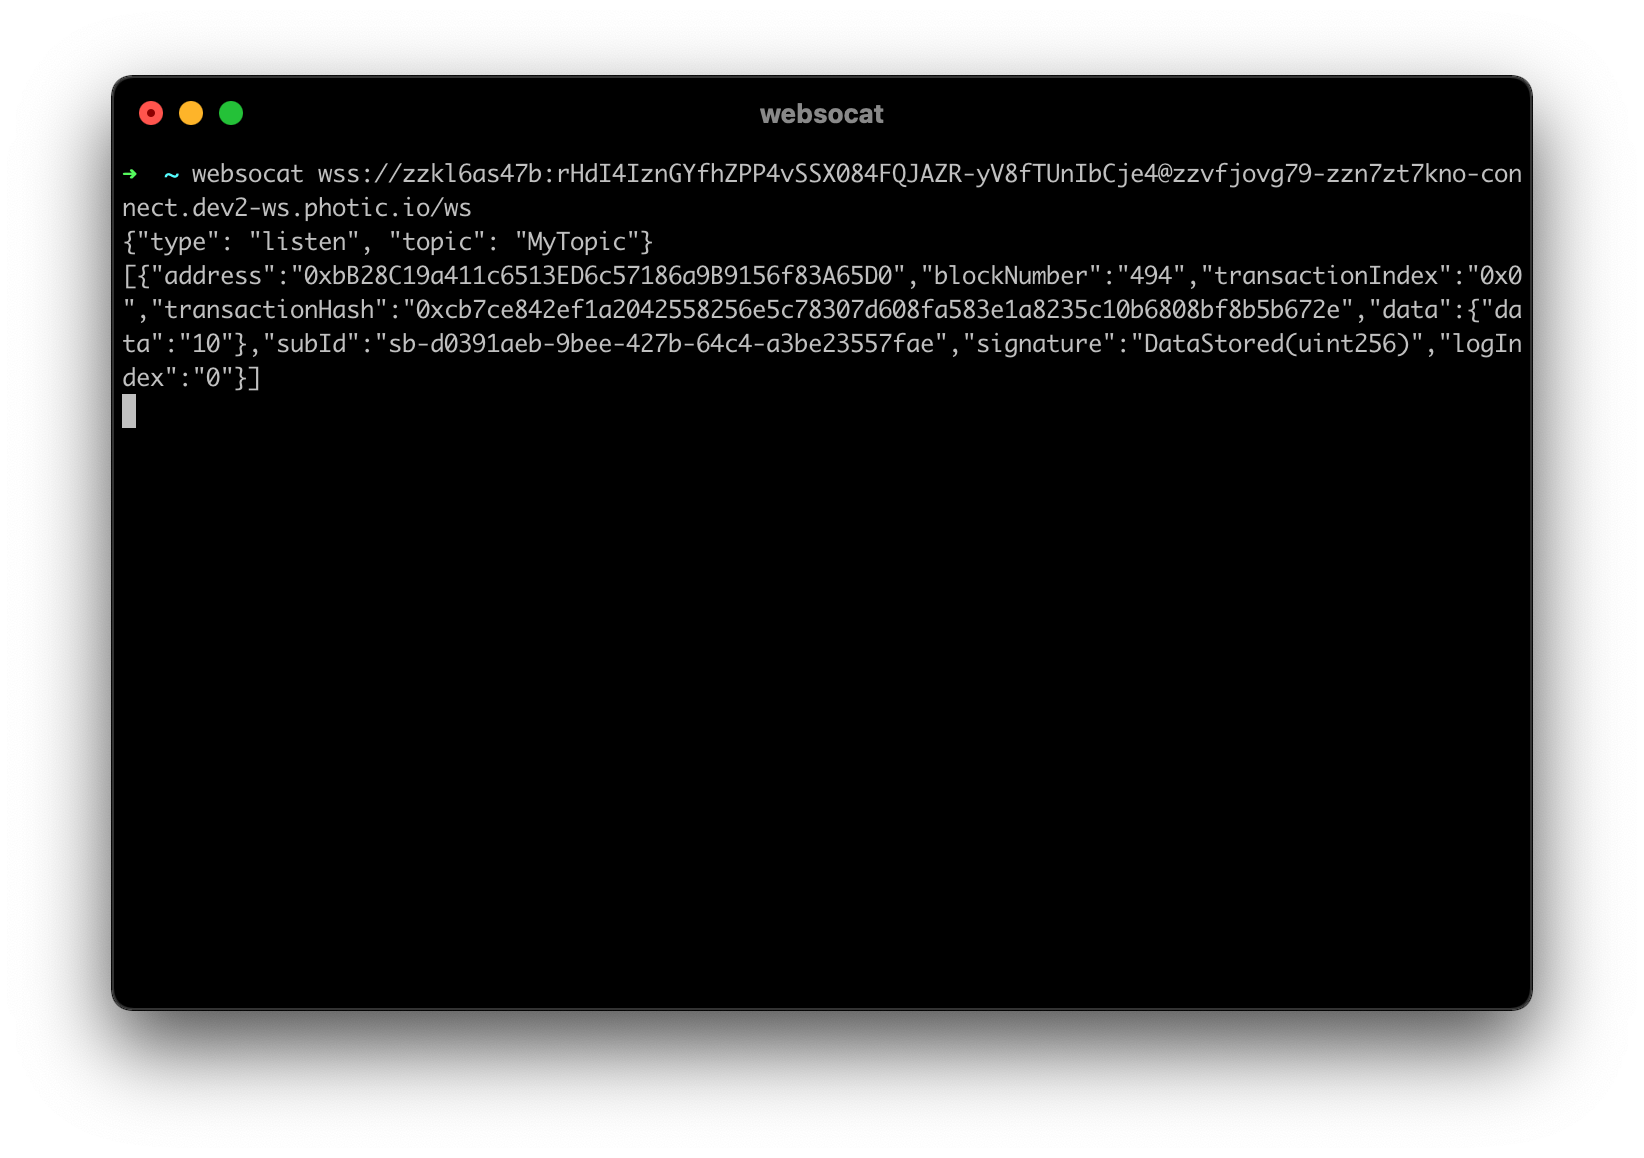
Events are sent over the WebSocket as a JSON array with a structure like the following:
[
    {
        "address": "0xbB28C19a411c6513ED6c57186a9B9156f83A65D0",
        "blockNumber": "494",
        "transactionIndex": "0x0",
        "transactionHash": "0xcb7ce842ef1a2042558256e5c78307d608fa583e1a8235c10b6808bf8b5b672e",
        "data": { "data": "10" },
        "subId": "sb-d0391aeb-9bee-427b-64c4-a3be23557fae",
        "signature": "DataStored(uint256)",
        "logIndex": "0"
    }
]
Now that you've emitted and received an event, it's your turn to go build something awesome! Hopefully this walkthrough was helpful!
