Smart Contract Management Usage
Create a Contract Project
Smart contracts can be compiled and promoted to an environment using Kaleido's smart contract management functionality. In the lefthand navigation of the console, expand the Networks section, and access Shared Assets -> Contract Projects.
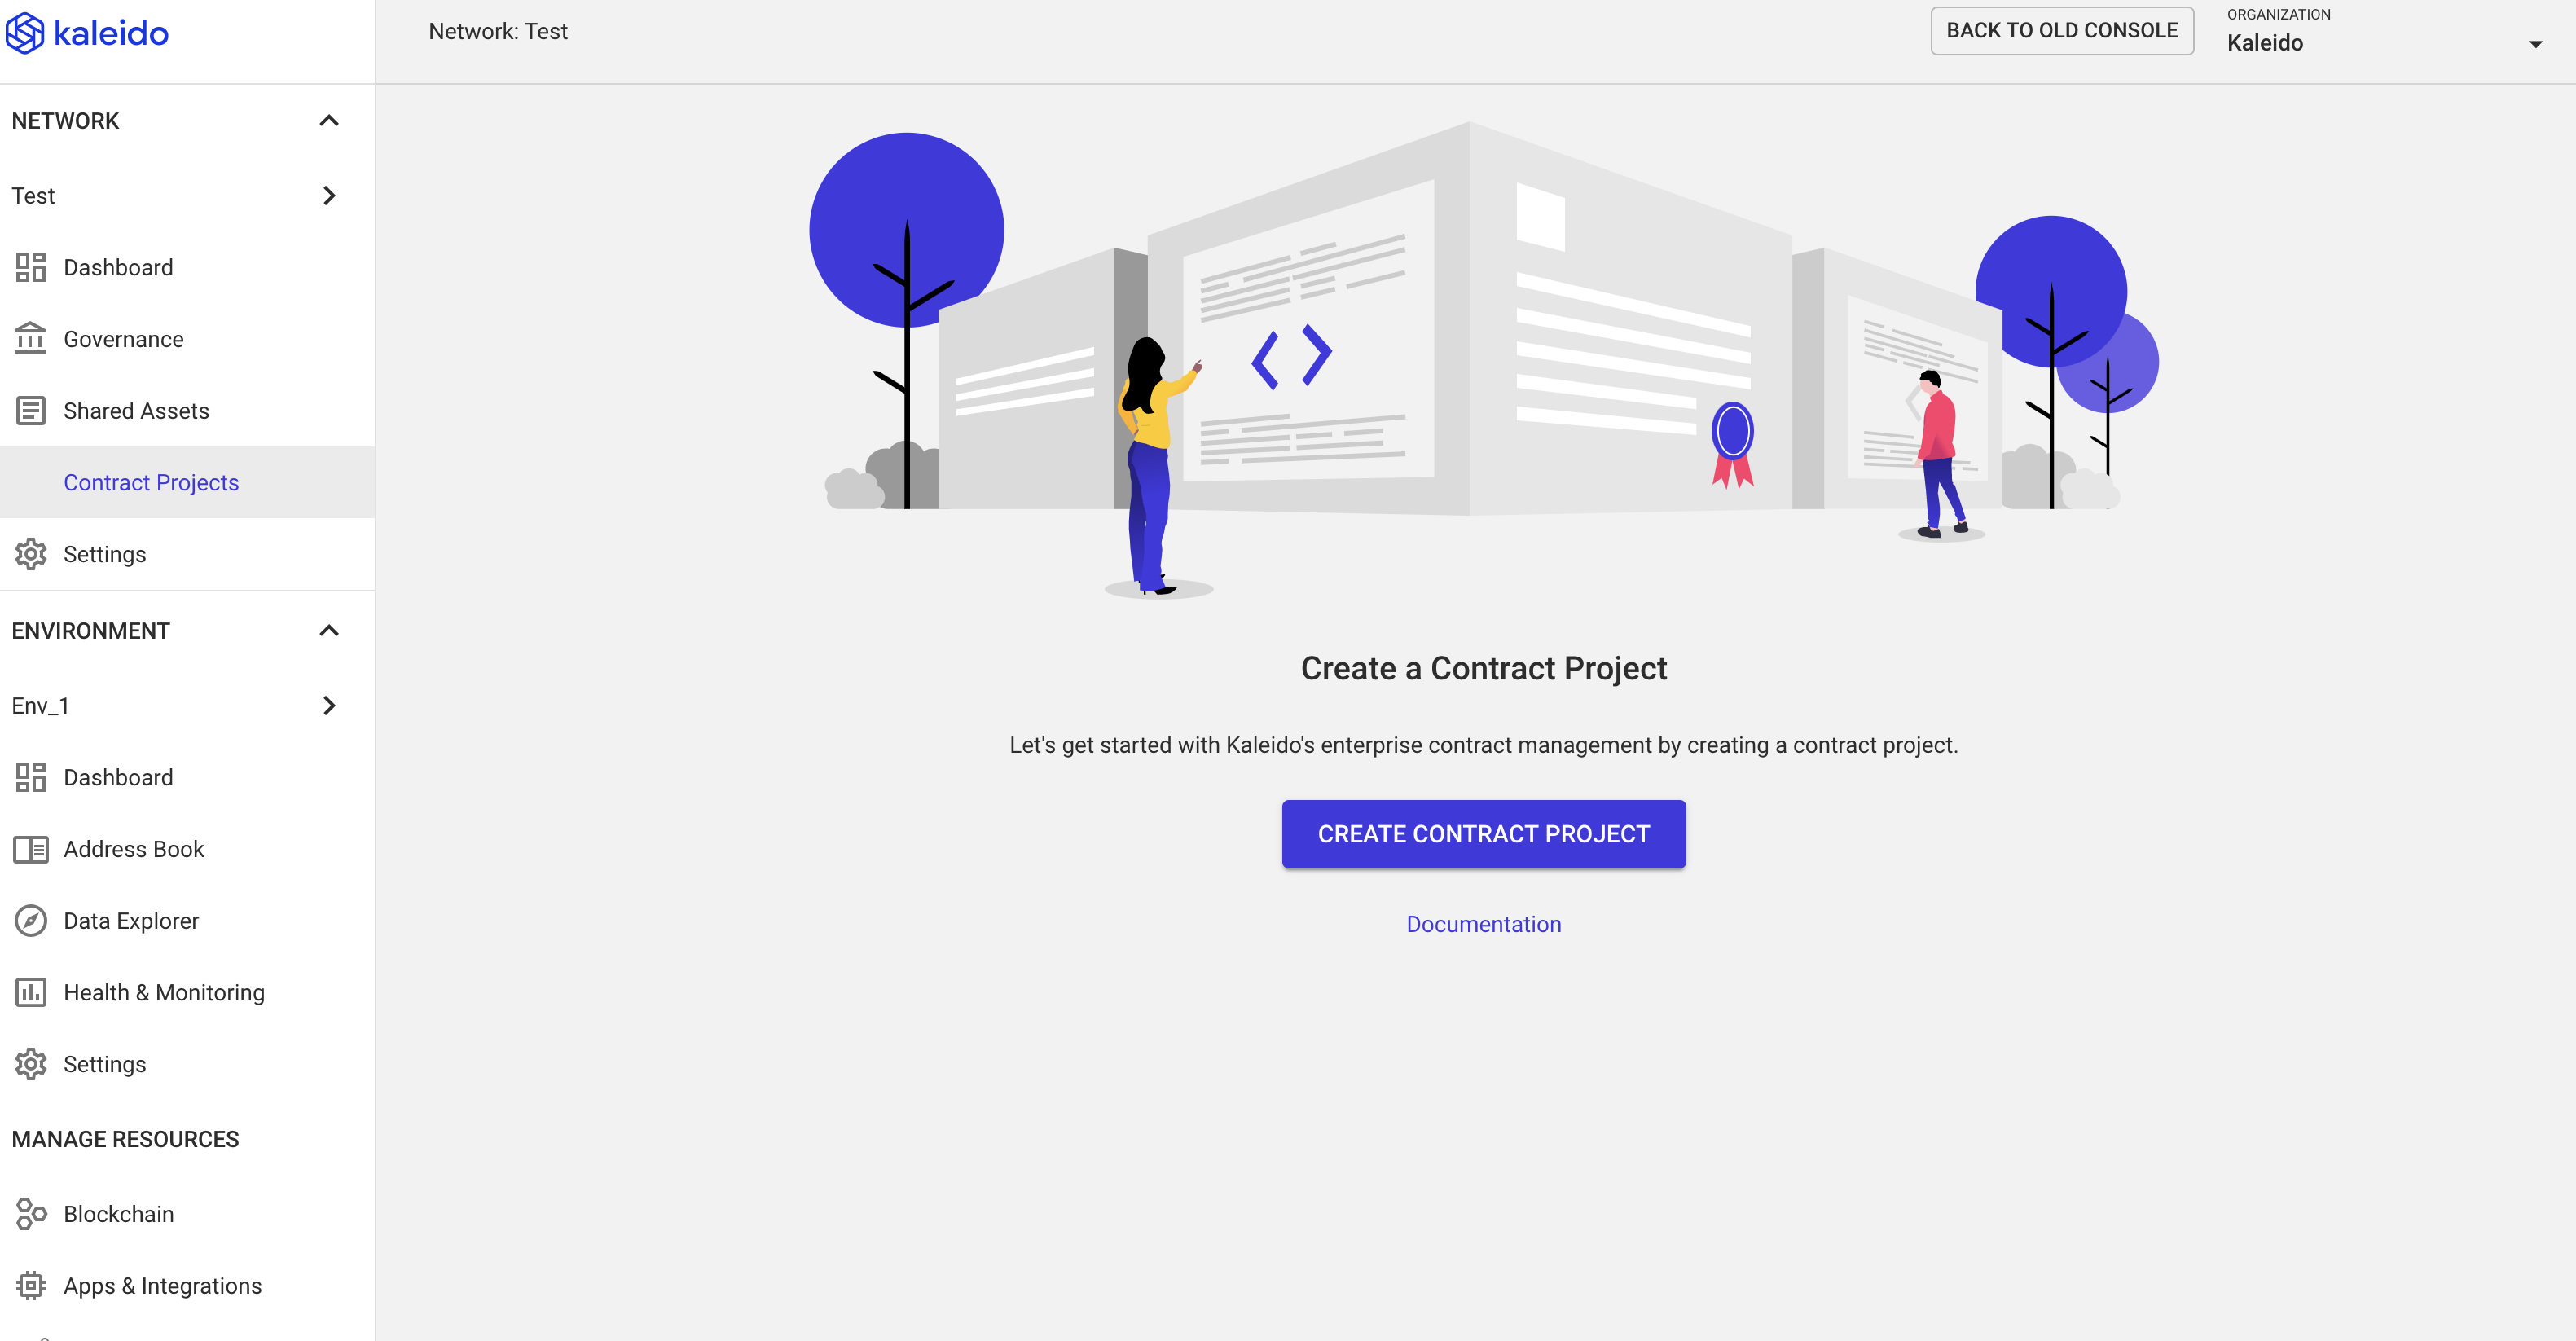
- Click
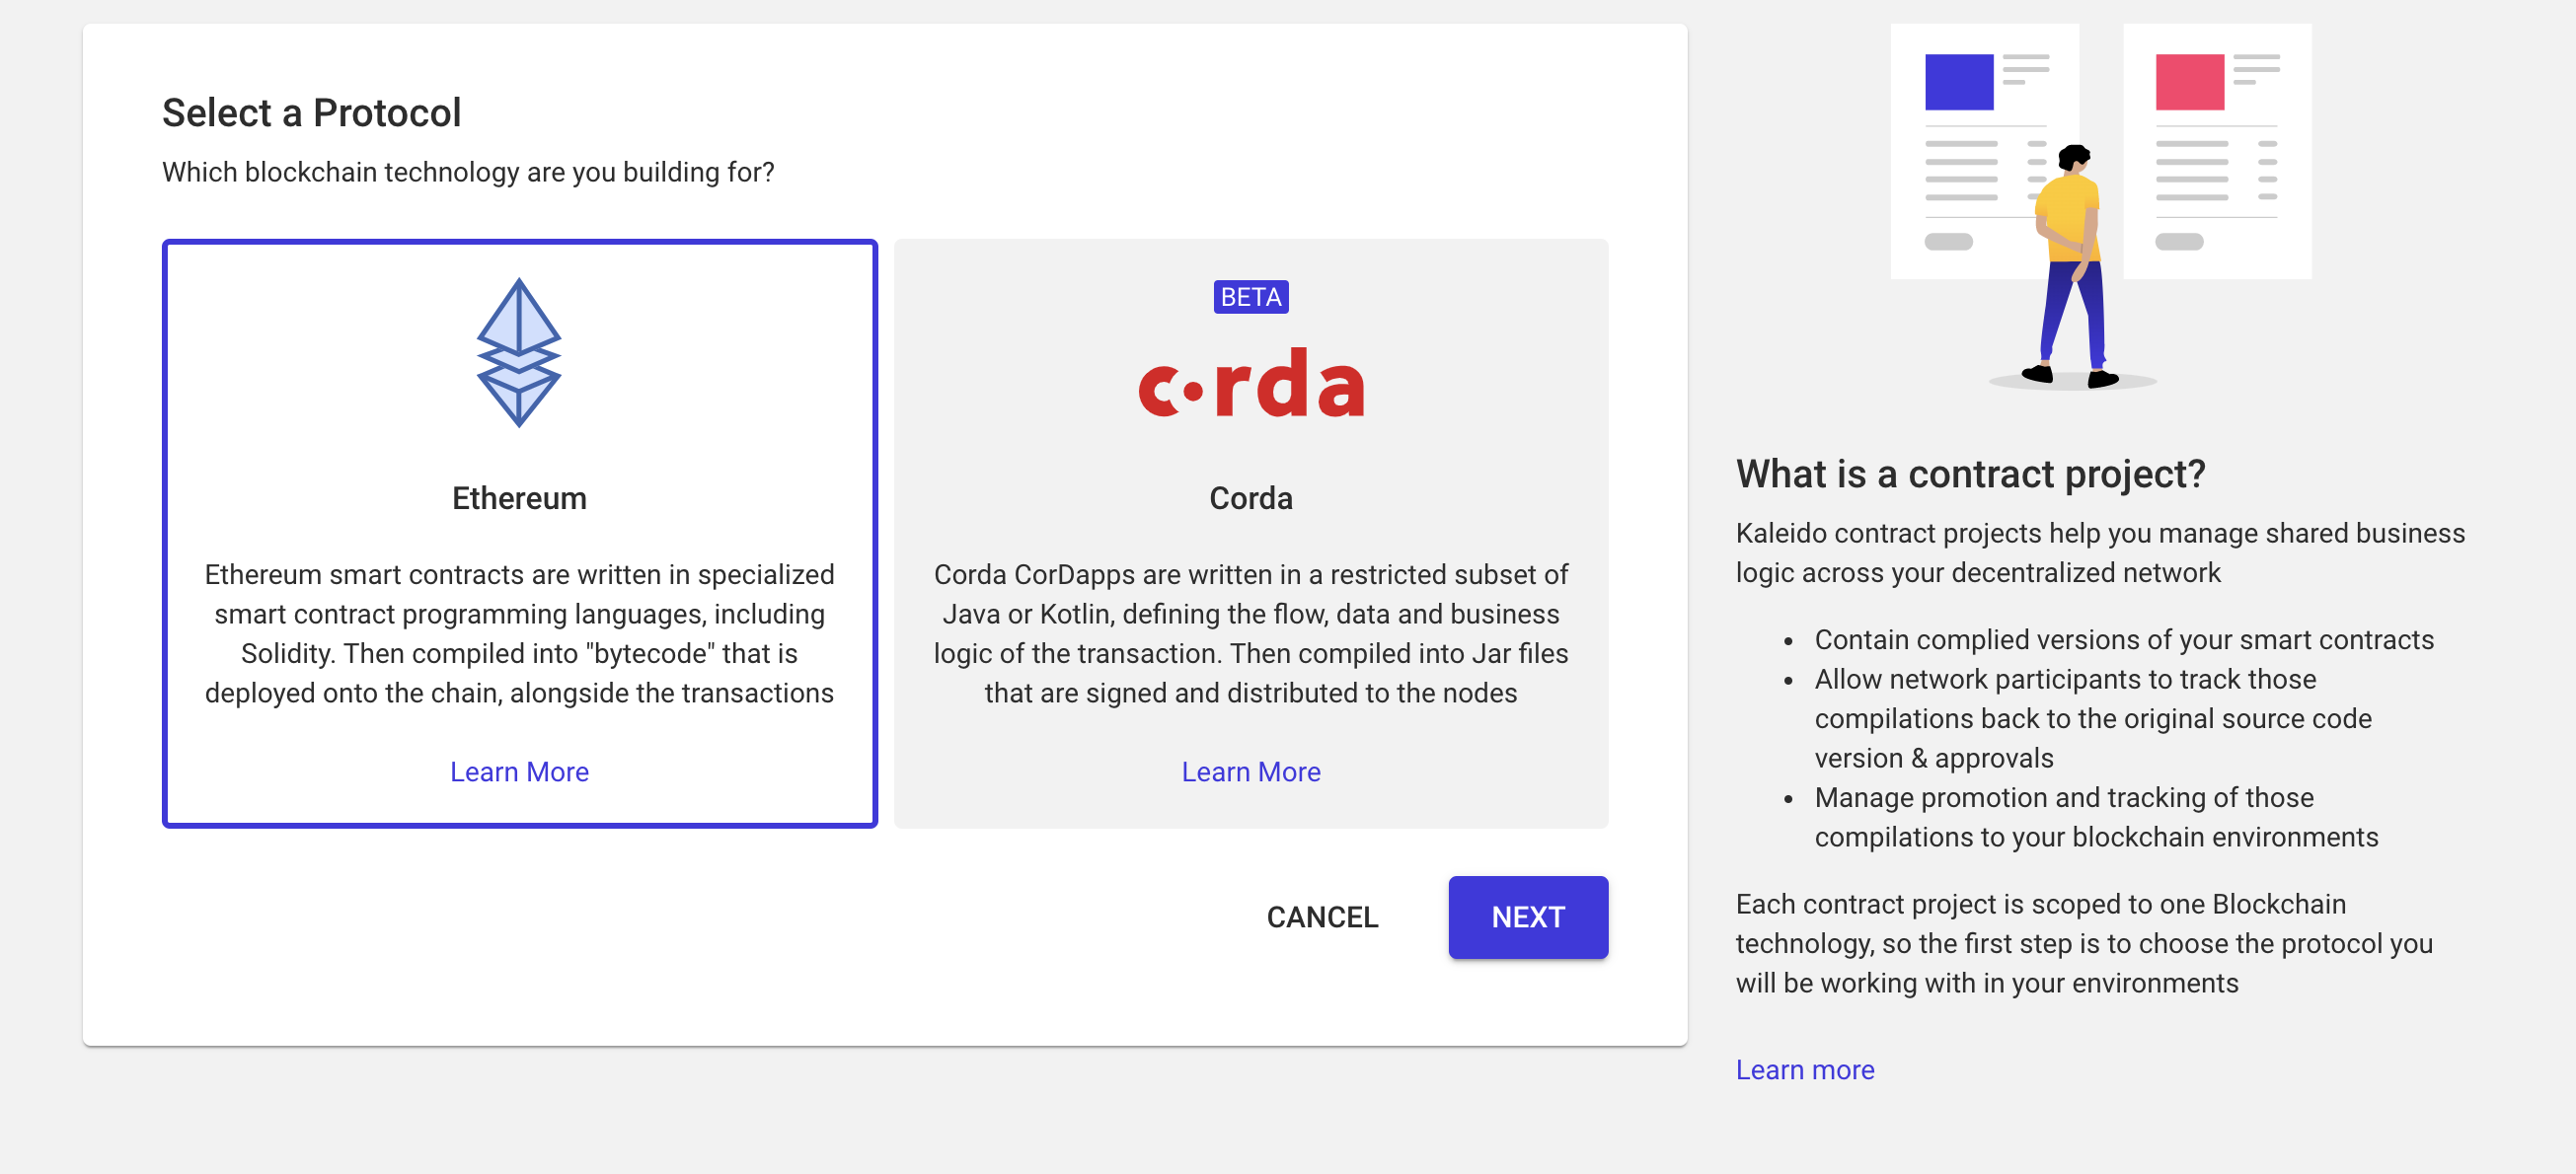
Create Contract Project. - Choose the protocol for the project. We will use Ethereum for this example.
- Provide a name for the Contract Project (e.g. "Simple Storage").
- Choose how to provide the source code. Kaleido offers three options:
- Managed compilation from Github: direct import source code from a public or private Github repository and compile, it will automatically install npm dependencies if
package.jsonis found in the imported project. Truffle projects are supported. - Upload source: direct upload of Solidity source file or an archive that includes multiple Solidity source files and their dependencies.
- Pre-compiled: compile yourself and upload the ABI and Bytecode
- Managed compilation from Github: direct import source code from a public or private Github repository and compile, it will automatically install npm dependencies if
- Refer to the Ethereum Quick Start tutorial for an example of importing a smart contract from a public Kaleido git repository.
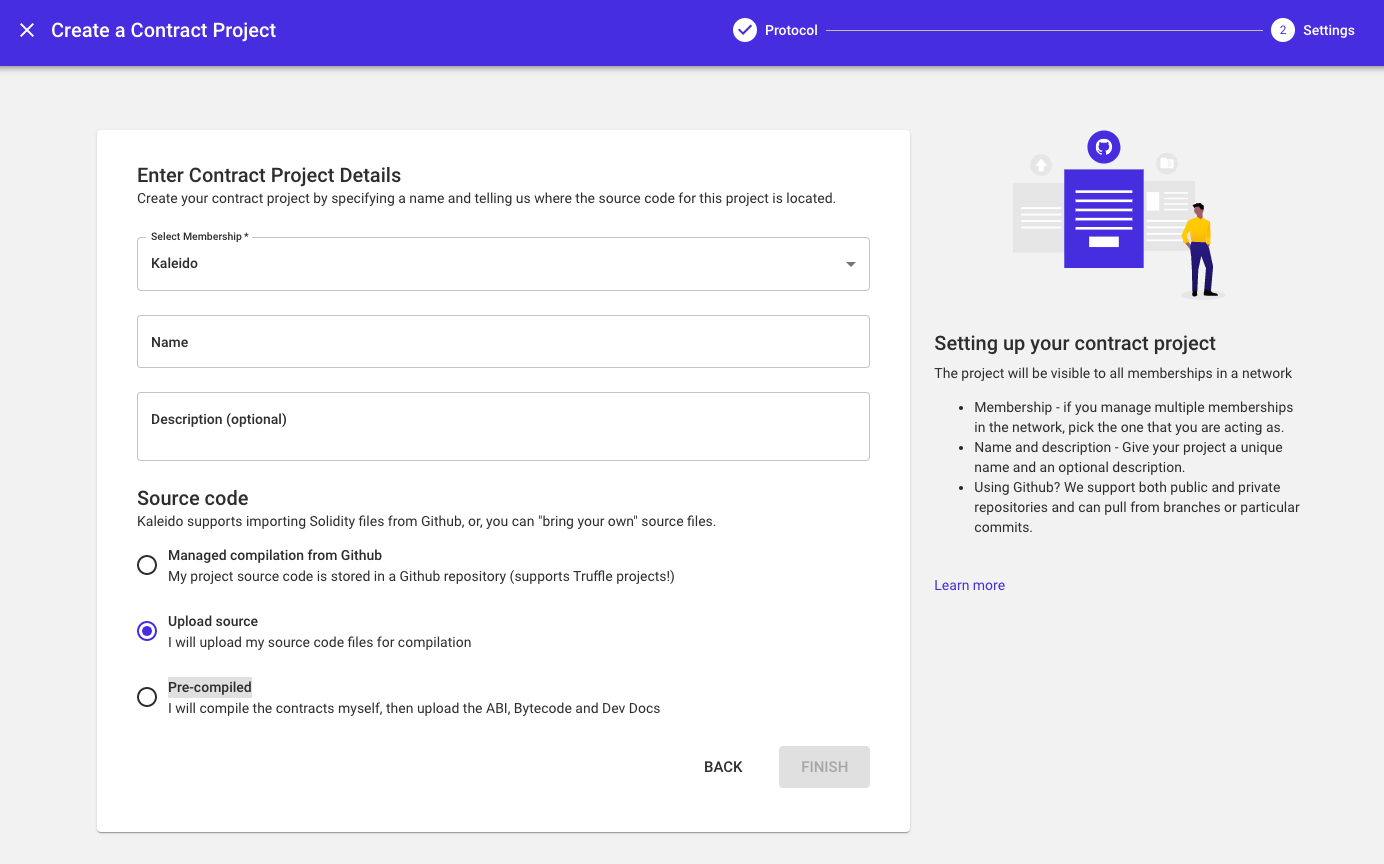
- Choose the preferred type and click
Finish. - Now a namespace for your Contract Project exists within your business network.
Add a New Compilation to Contract Project
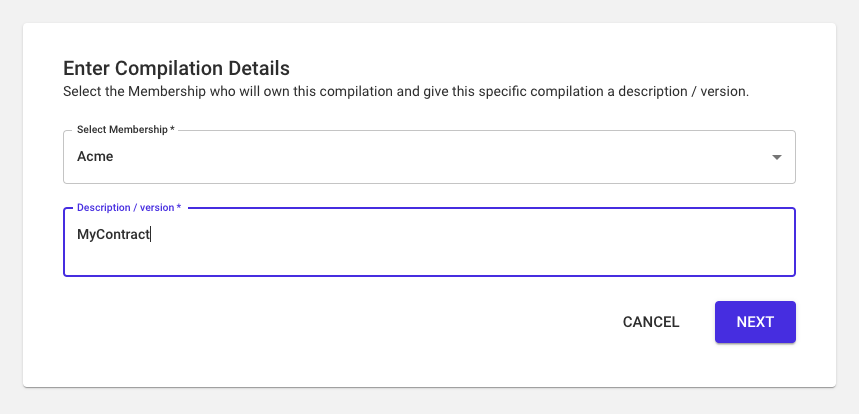
Click New Compilation to add a contract instance to the project.
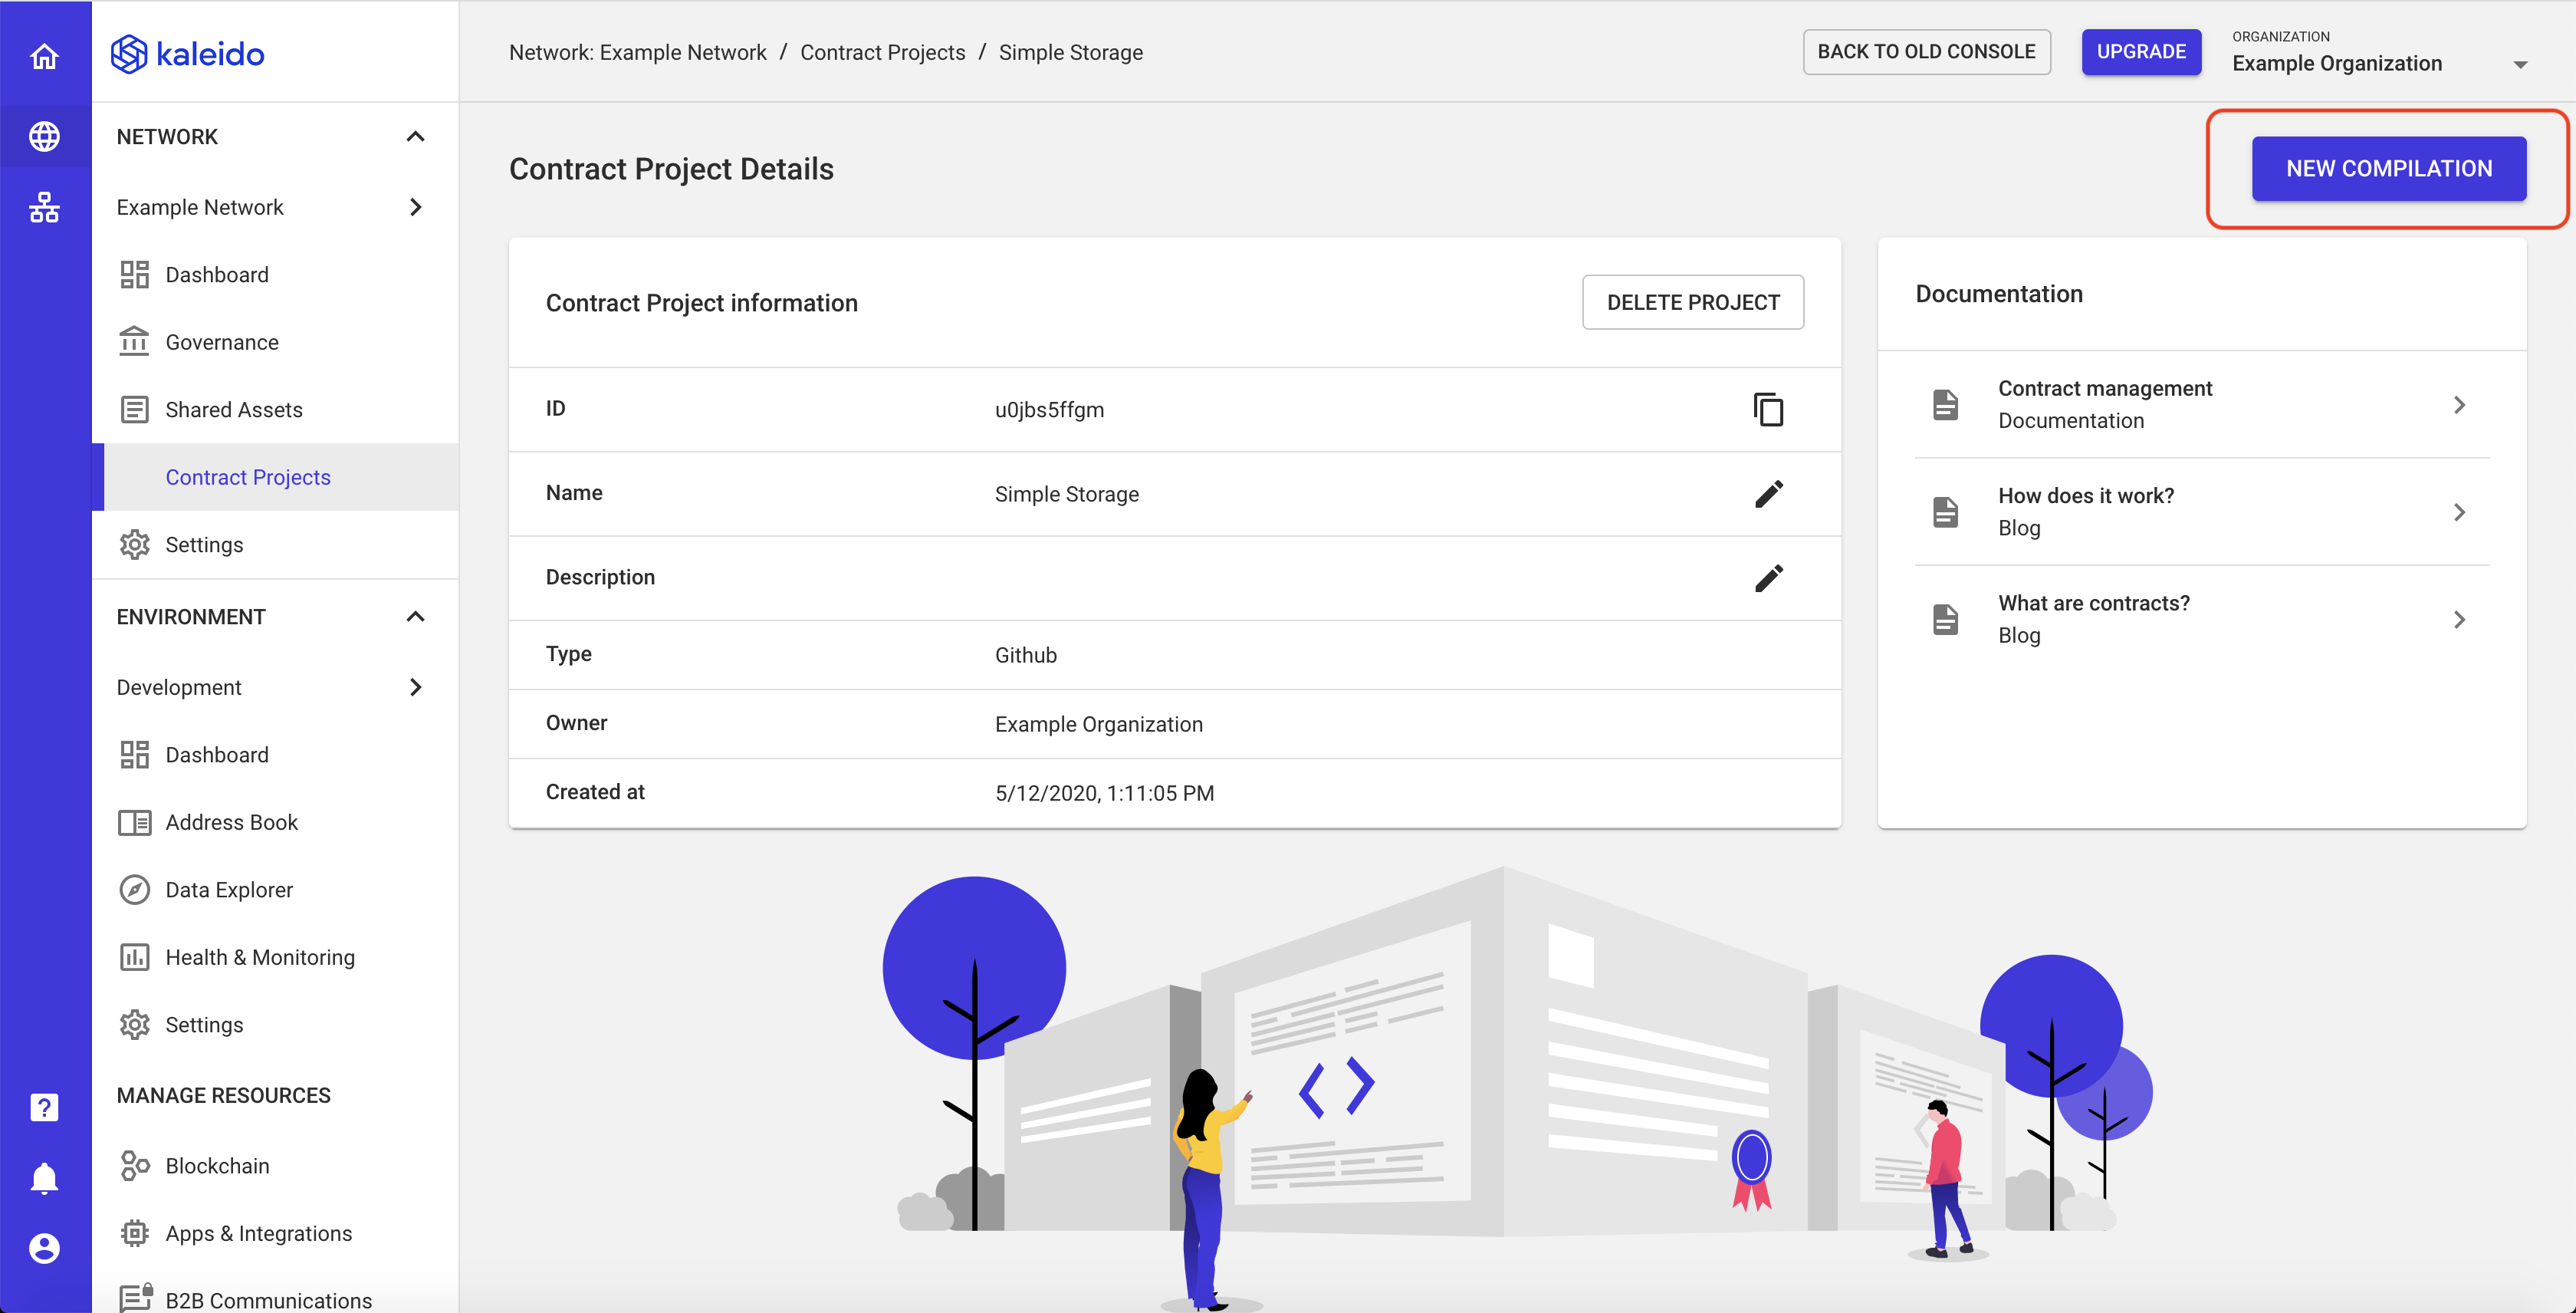
Based on the type of contract project you will be taken to the following screens.
Managed Compilation from Github
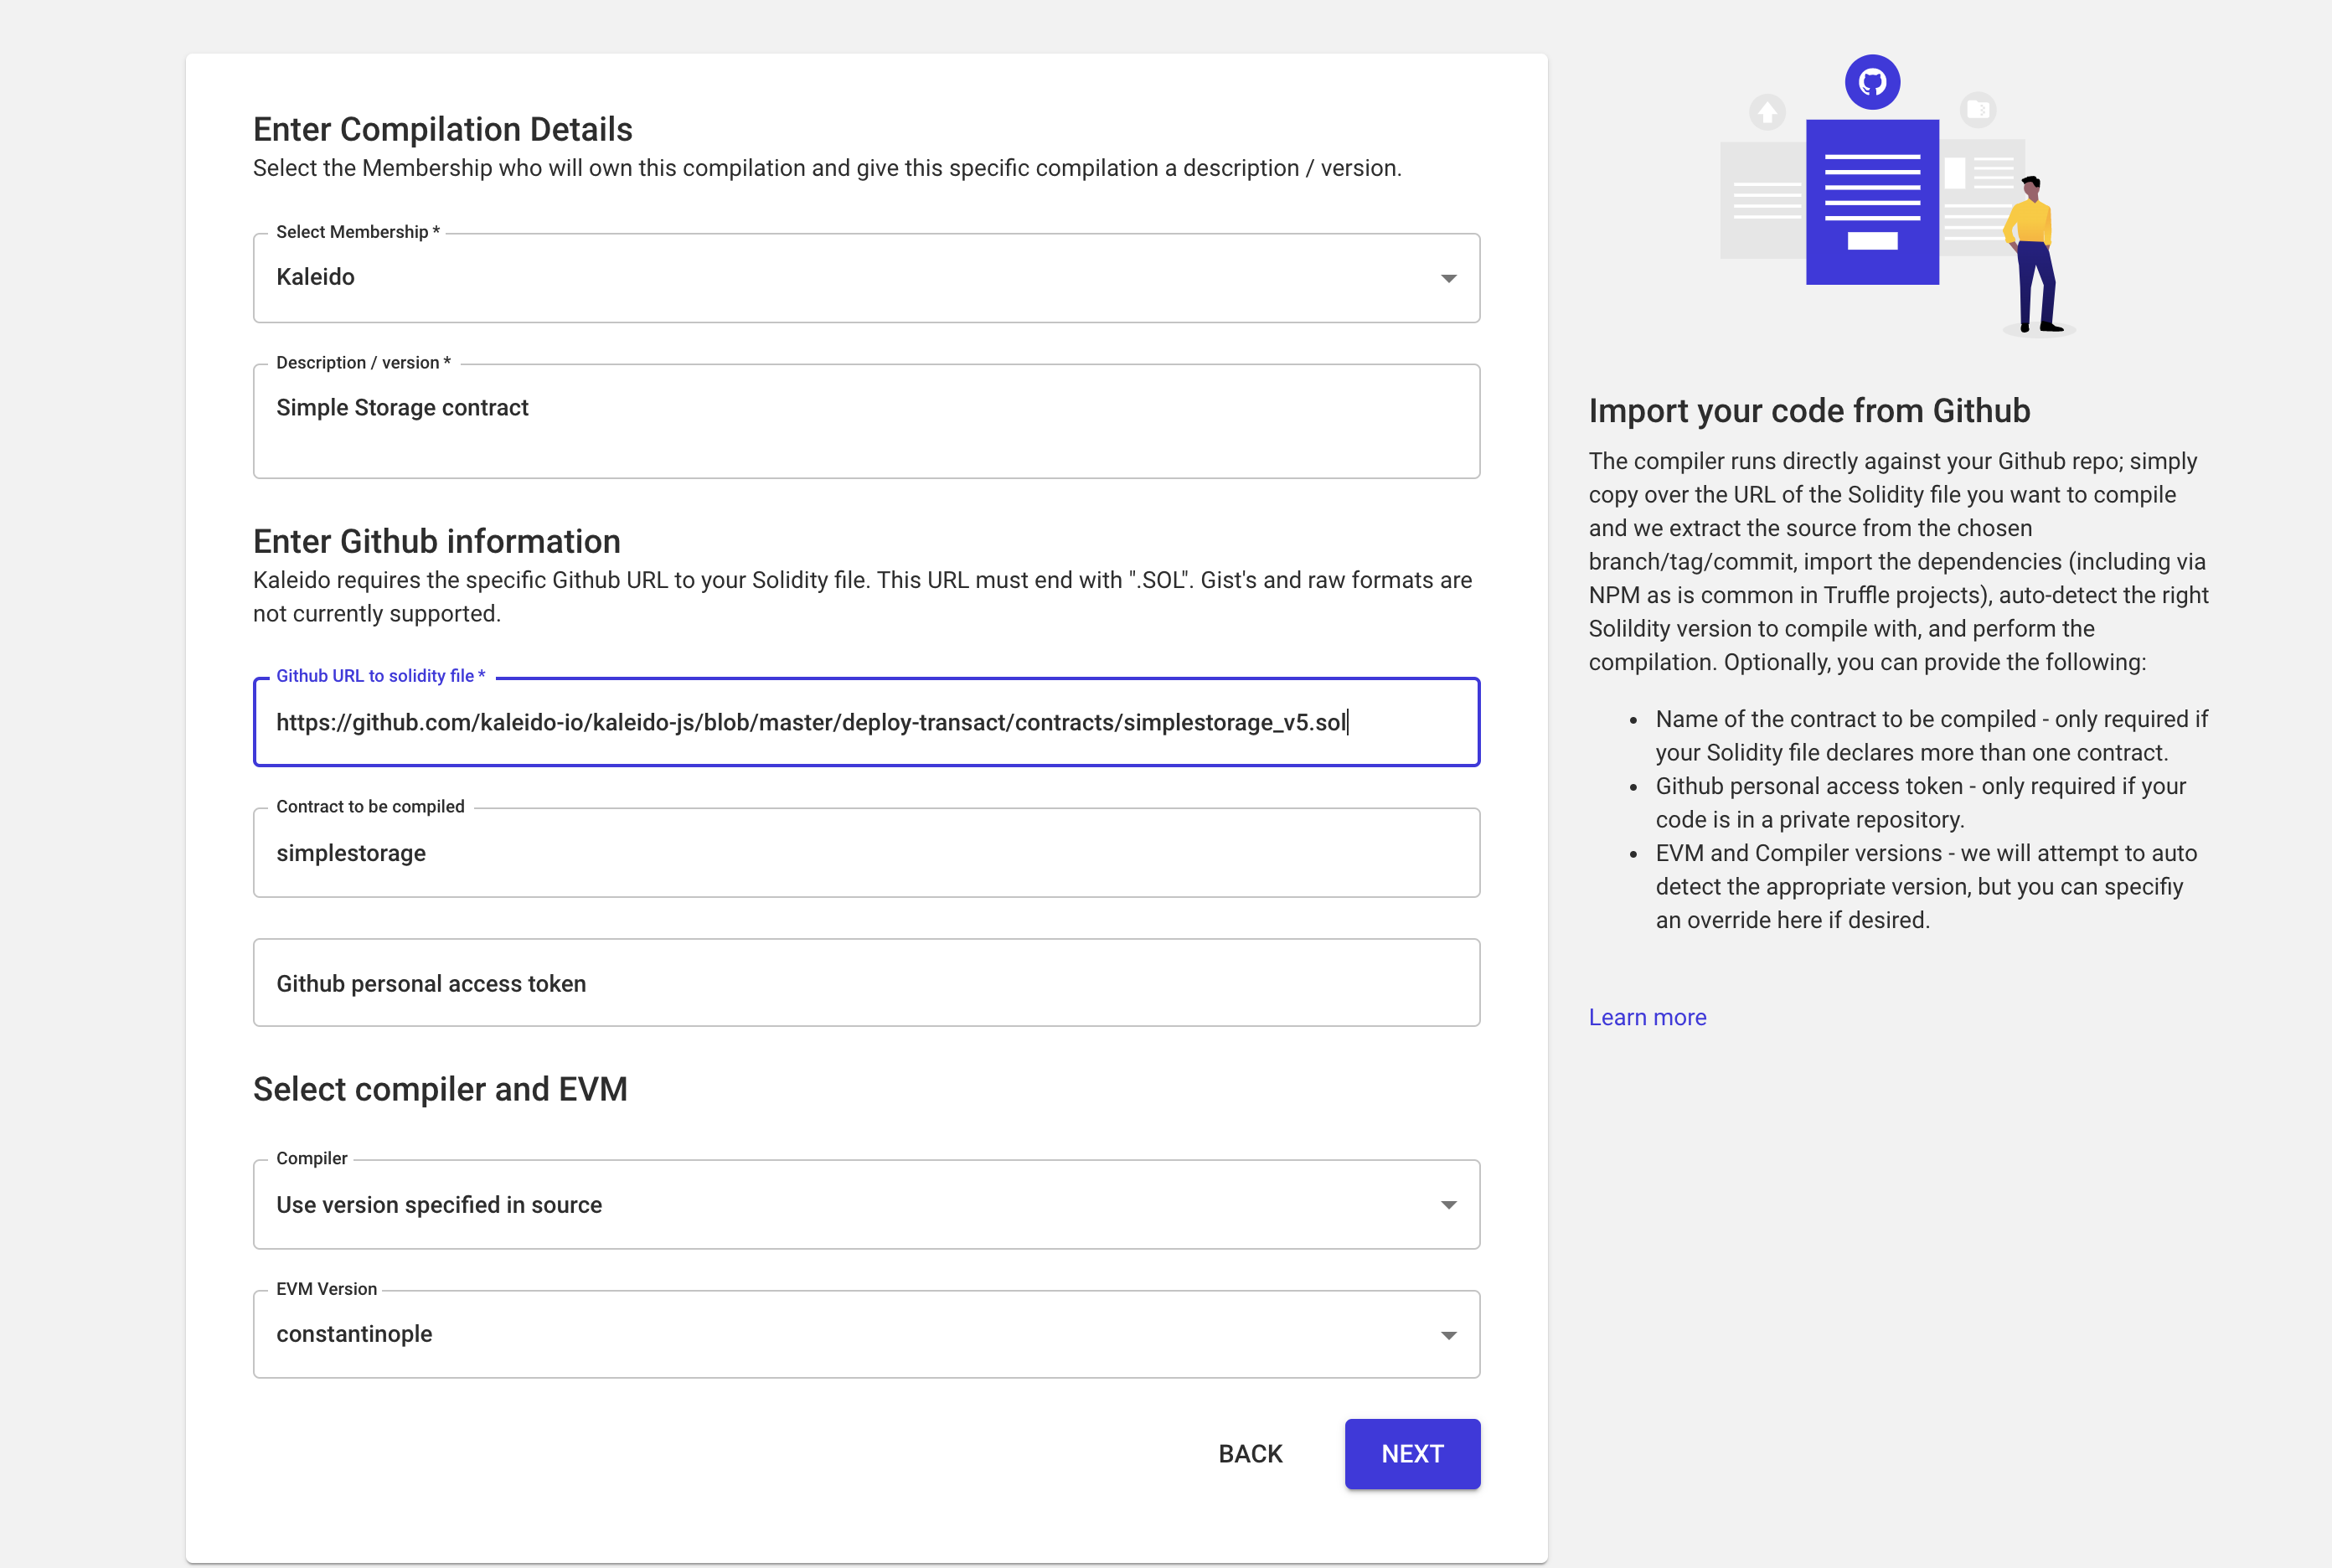
If you chose Managed compilation from Github as the project type, you can import a contract from a public or private Github repository. Simply provide the full URL to the solidity source file. In the case of a private repository, you will need to provide a Github personal access token to authenticate access. If there is more than one contract in the solidity file, you will need to provide the name of the contract that needs to be compiled.
Kaleido will auto detect the compiler version specified in your smart contract file.
Upload Source
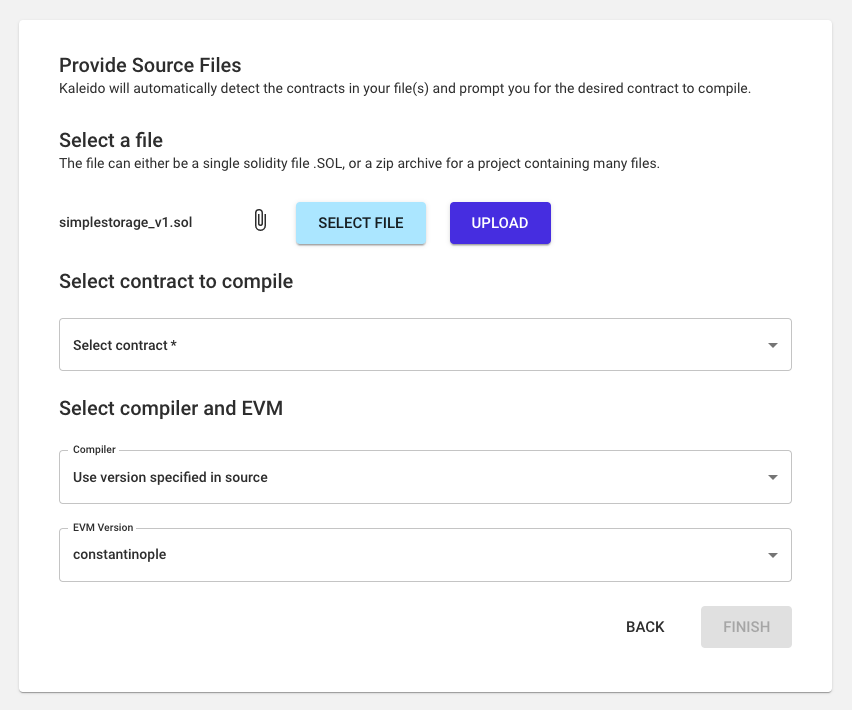
If you chose Upload source as the project type, you can upload source file directly using a .sol file upload or through a packaged .zip archive upload. Click Select File and choose the file or zip archive from your local file explorer. After clicking Upload, dropdown boxes will appear to select the contract, the compiler and EVM version. Then click Finish to generate the compilation.
If you use a .zip archive file to upload a large number of Solidity source files, note that the size limit is 10MB. In practical terms, this means if you are using a Truffle project to develop your smart contracts, you can't simply zip up the project and upload. This is because a Truffle project archive will exceed this size limit with dependencies installed. We recommend you choose the Managed Compilation from Github option as the project type for your Truffle based smart contracts. Another option is choosing the Pre-compiled project type and manually specifying the ABI and bytecode for your contracts resulting from truffle compile.
Pre-compiled
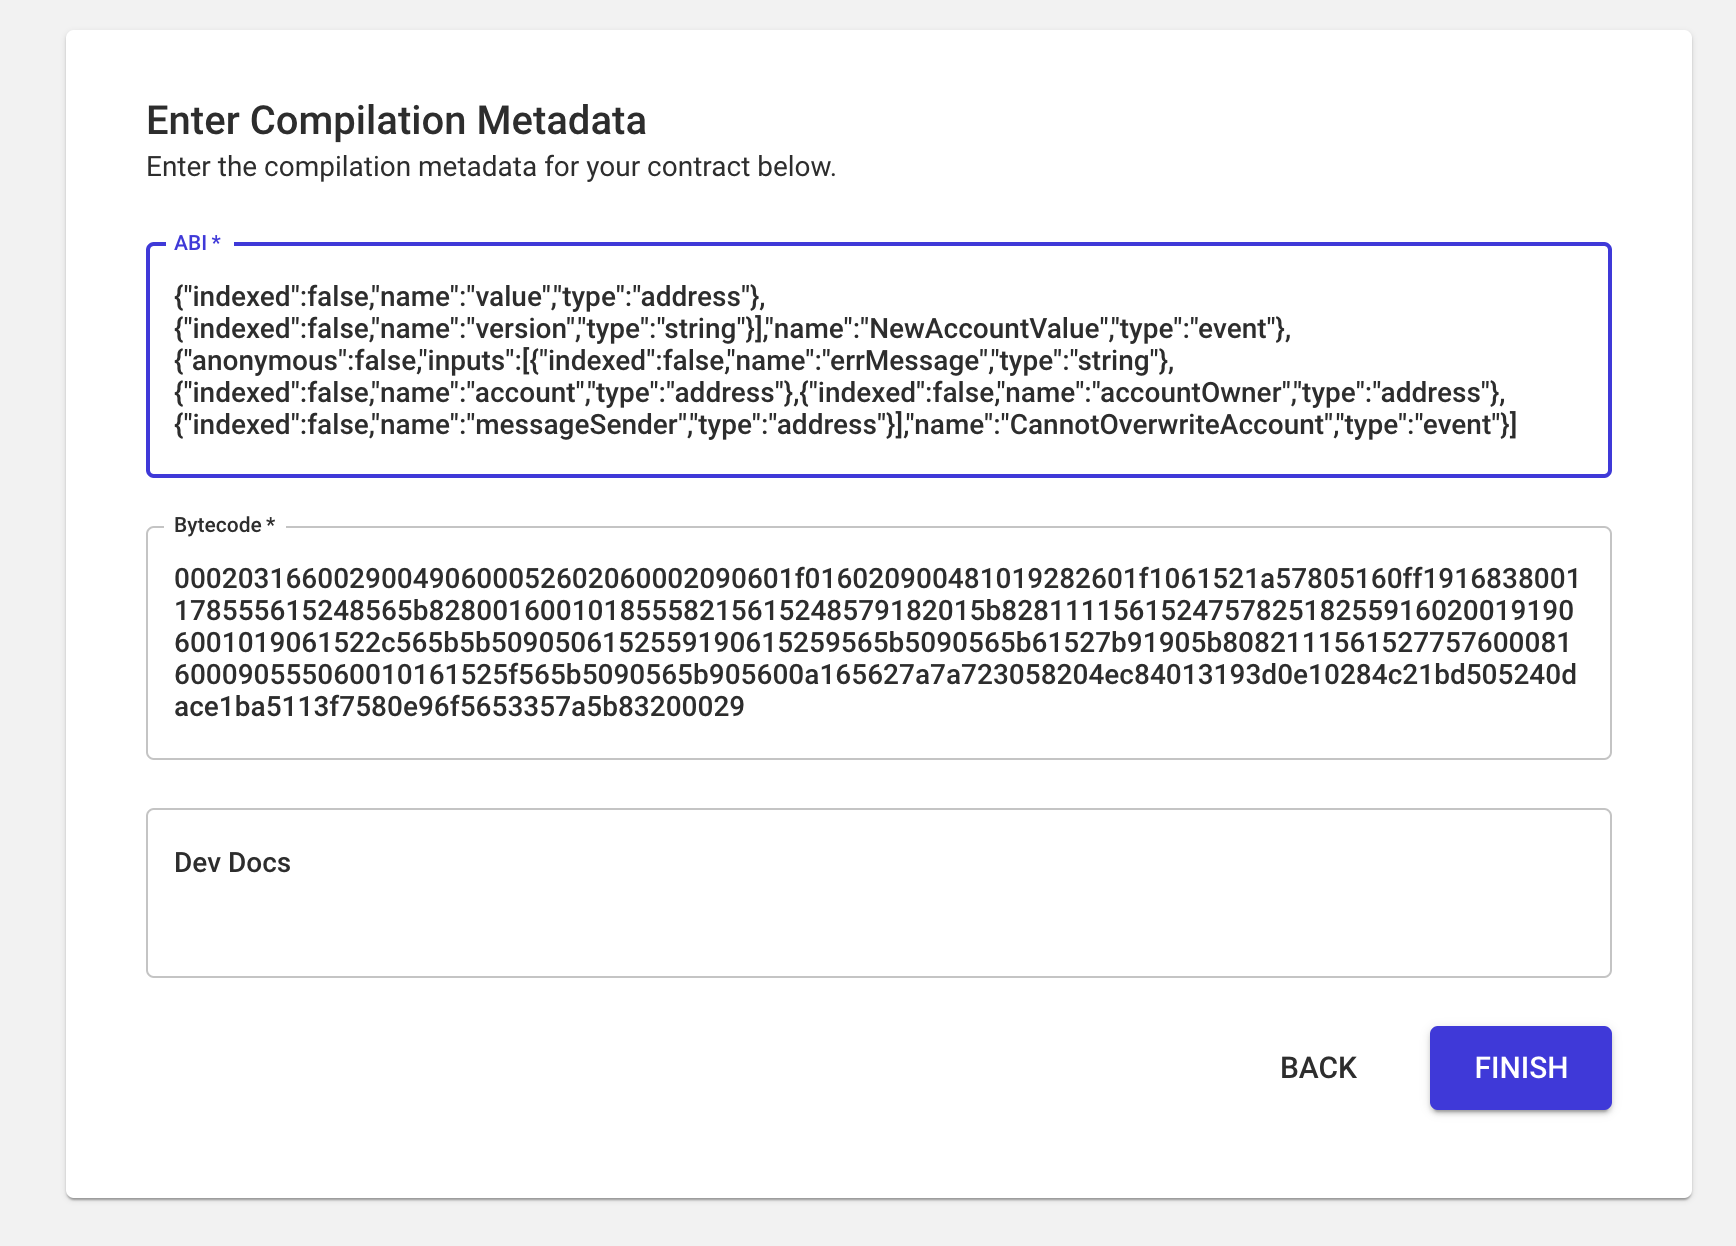
If you chose Pre-compiled as the project type, you can compile the contract yourself and paste the compiled bytecode, ABI and devdocs (optional). Then click Finish.
Promote Contract to Environment
After uploading or importing your source code, you will be shown the Compilation Details of the contract.
If the compilation fails, you can delete the compilation object and iterate on your source code or raw metadata to attempt a subsequent compilation.
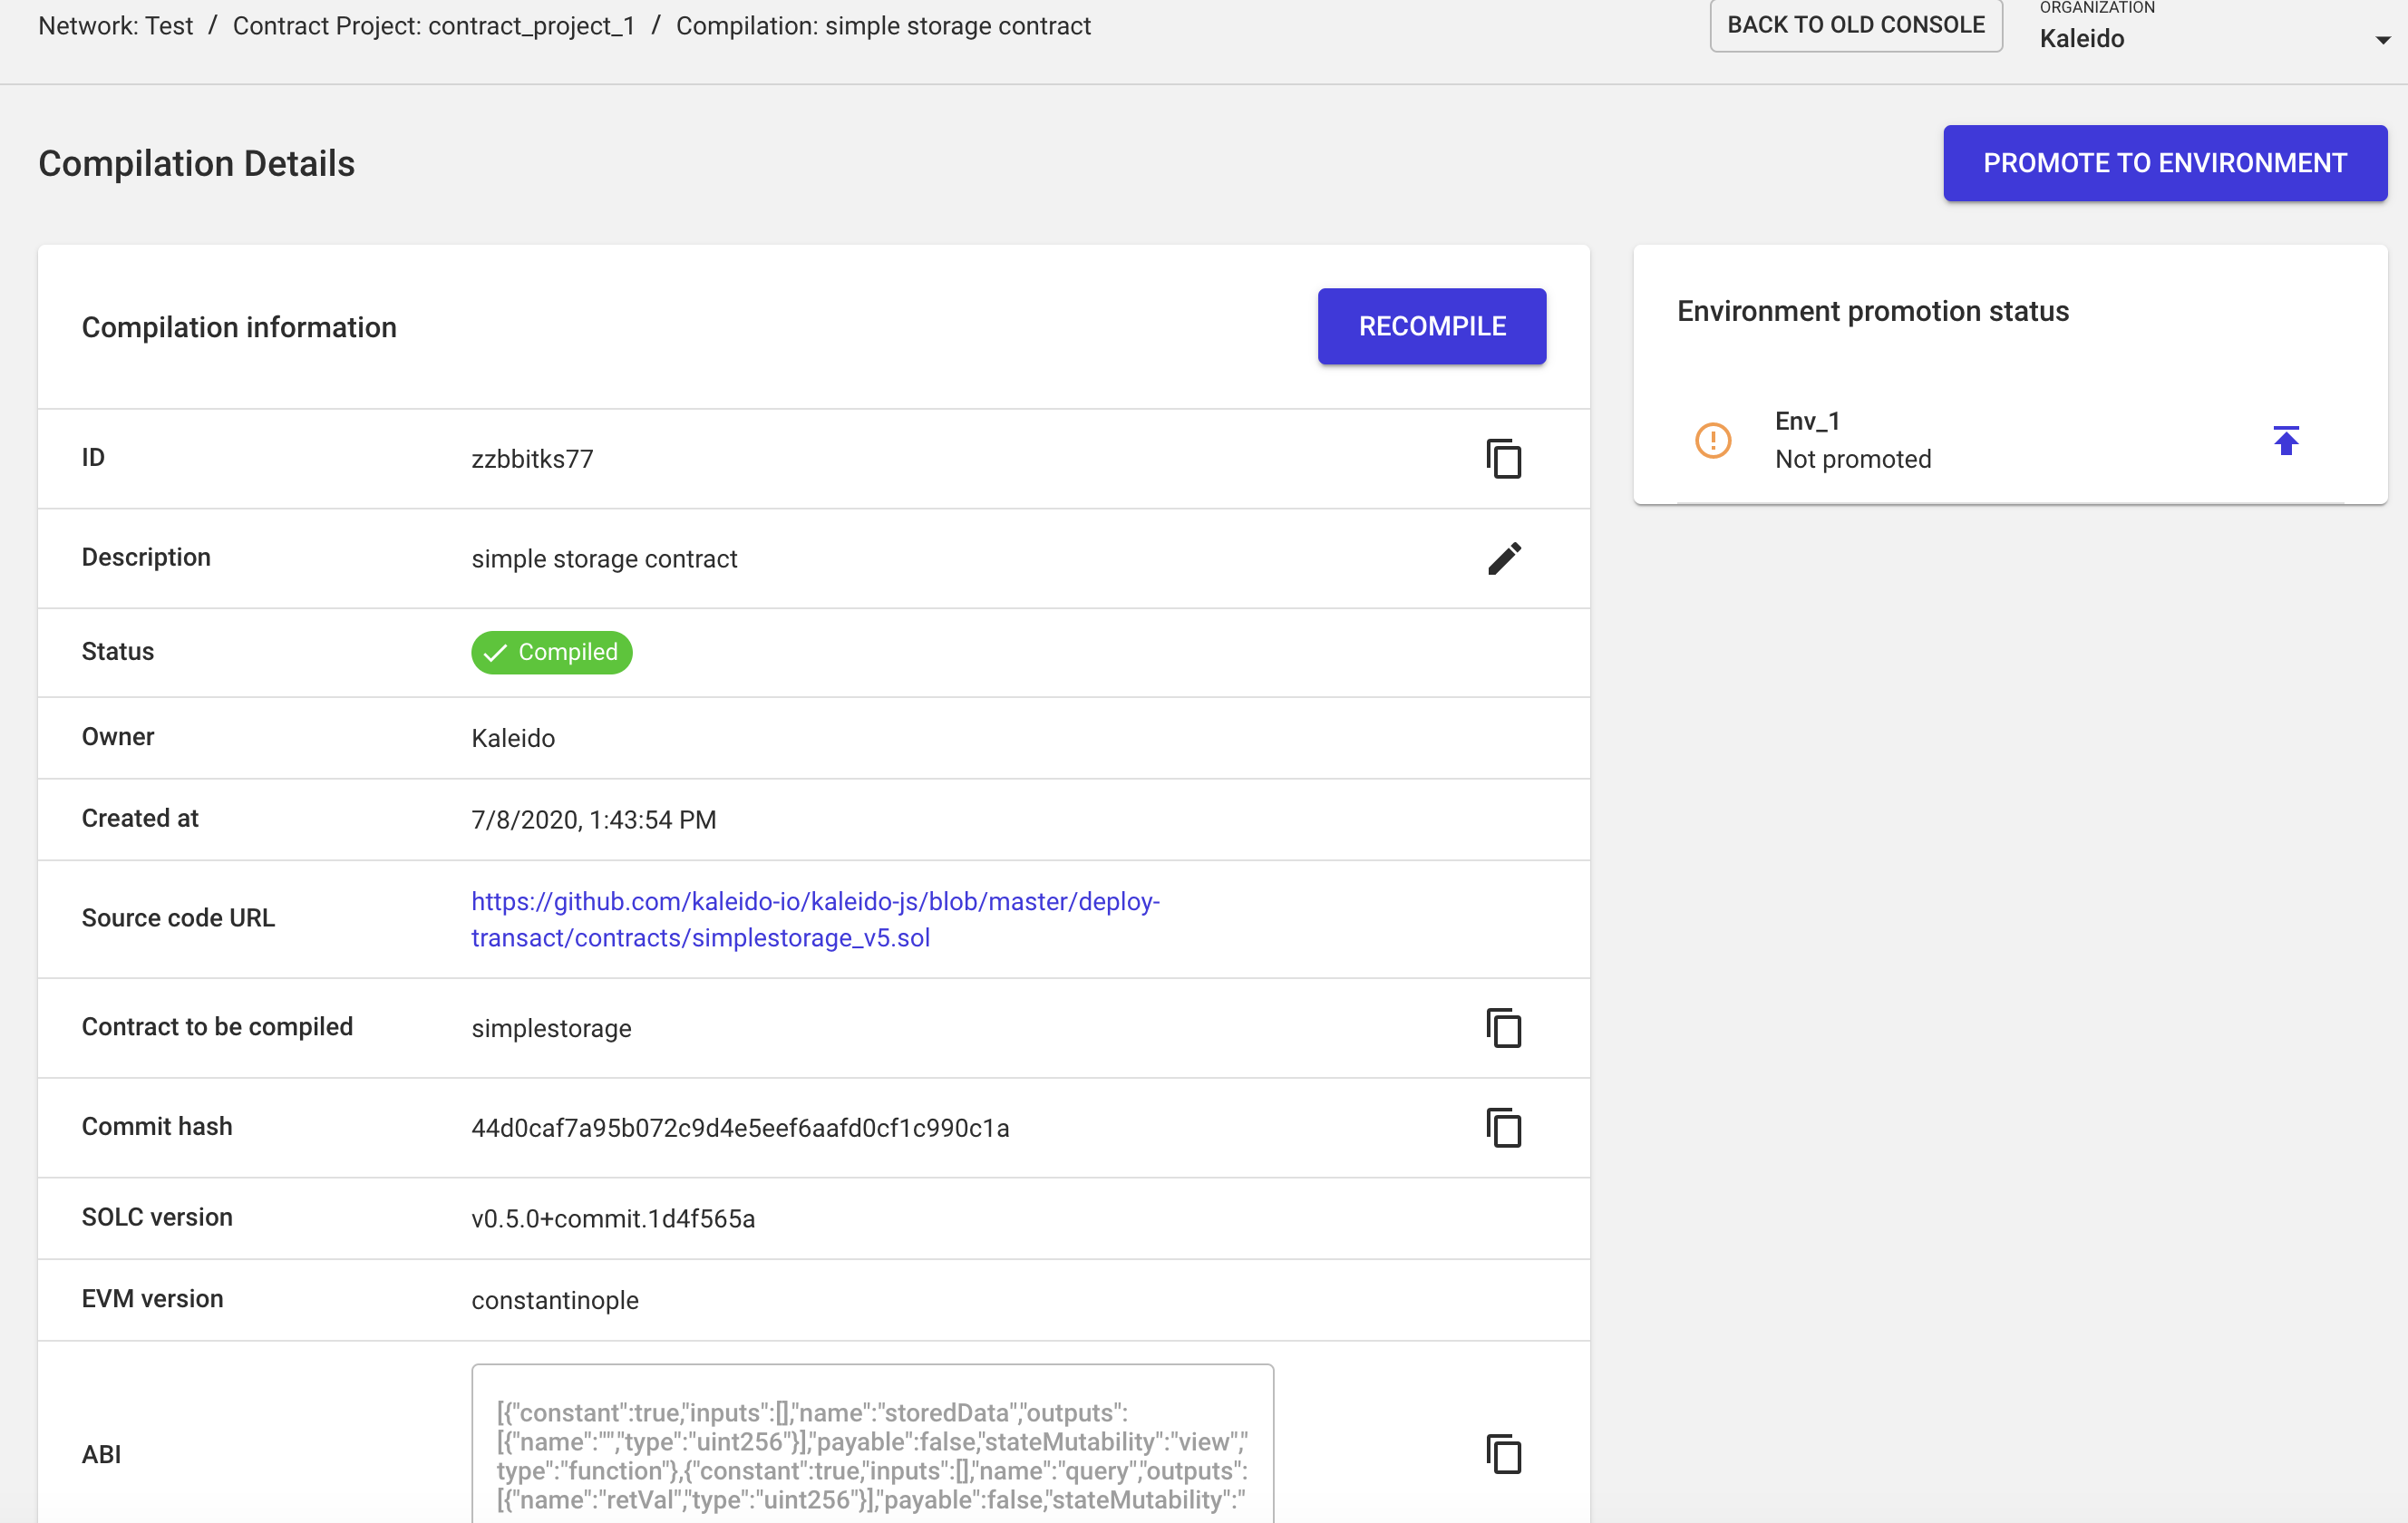
Upon a successful compilation, you have the ability to "promote" the contract to an environment. The Compilations tab in the Contract Project Details page will list all the compiled contracts (successful and failed). You can click on any successfully compiled contract to promote it to an environment. You can optionally delete any failed compilations.
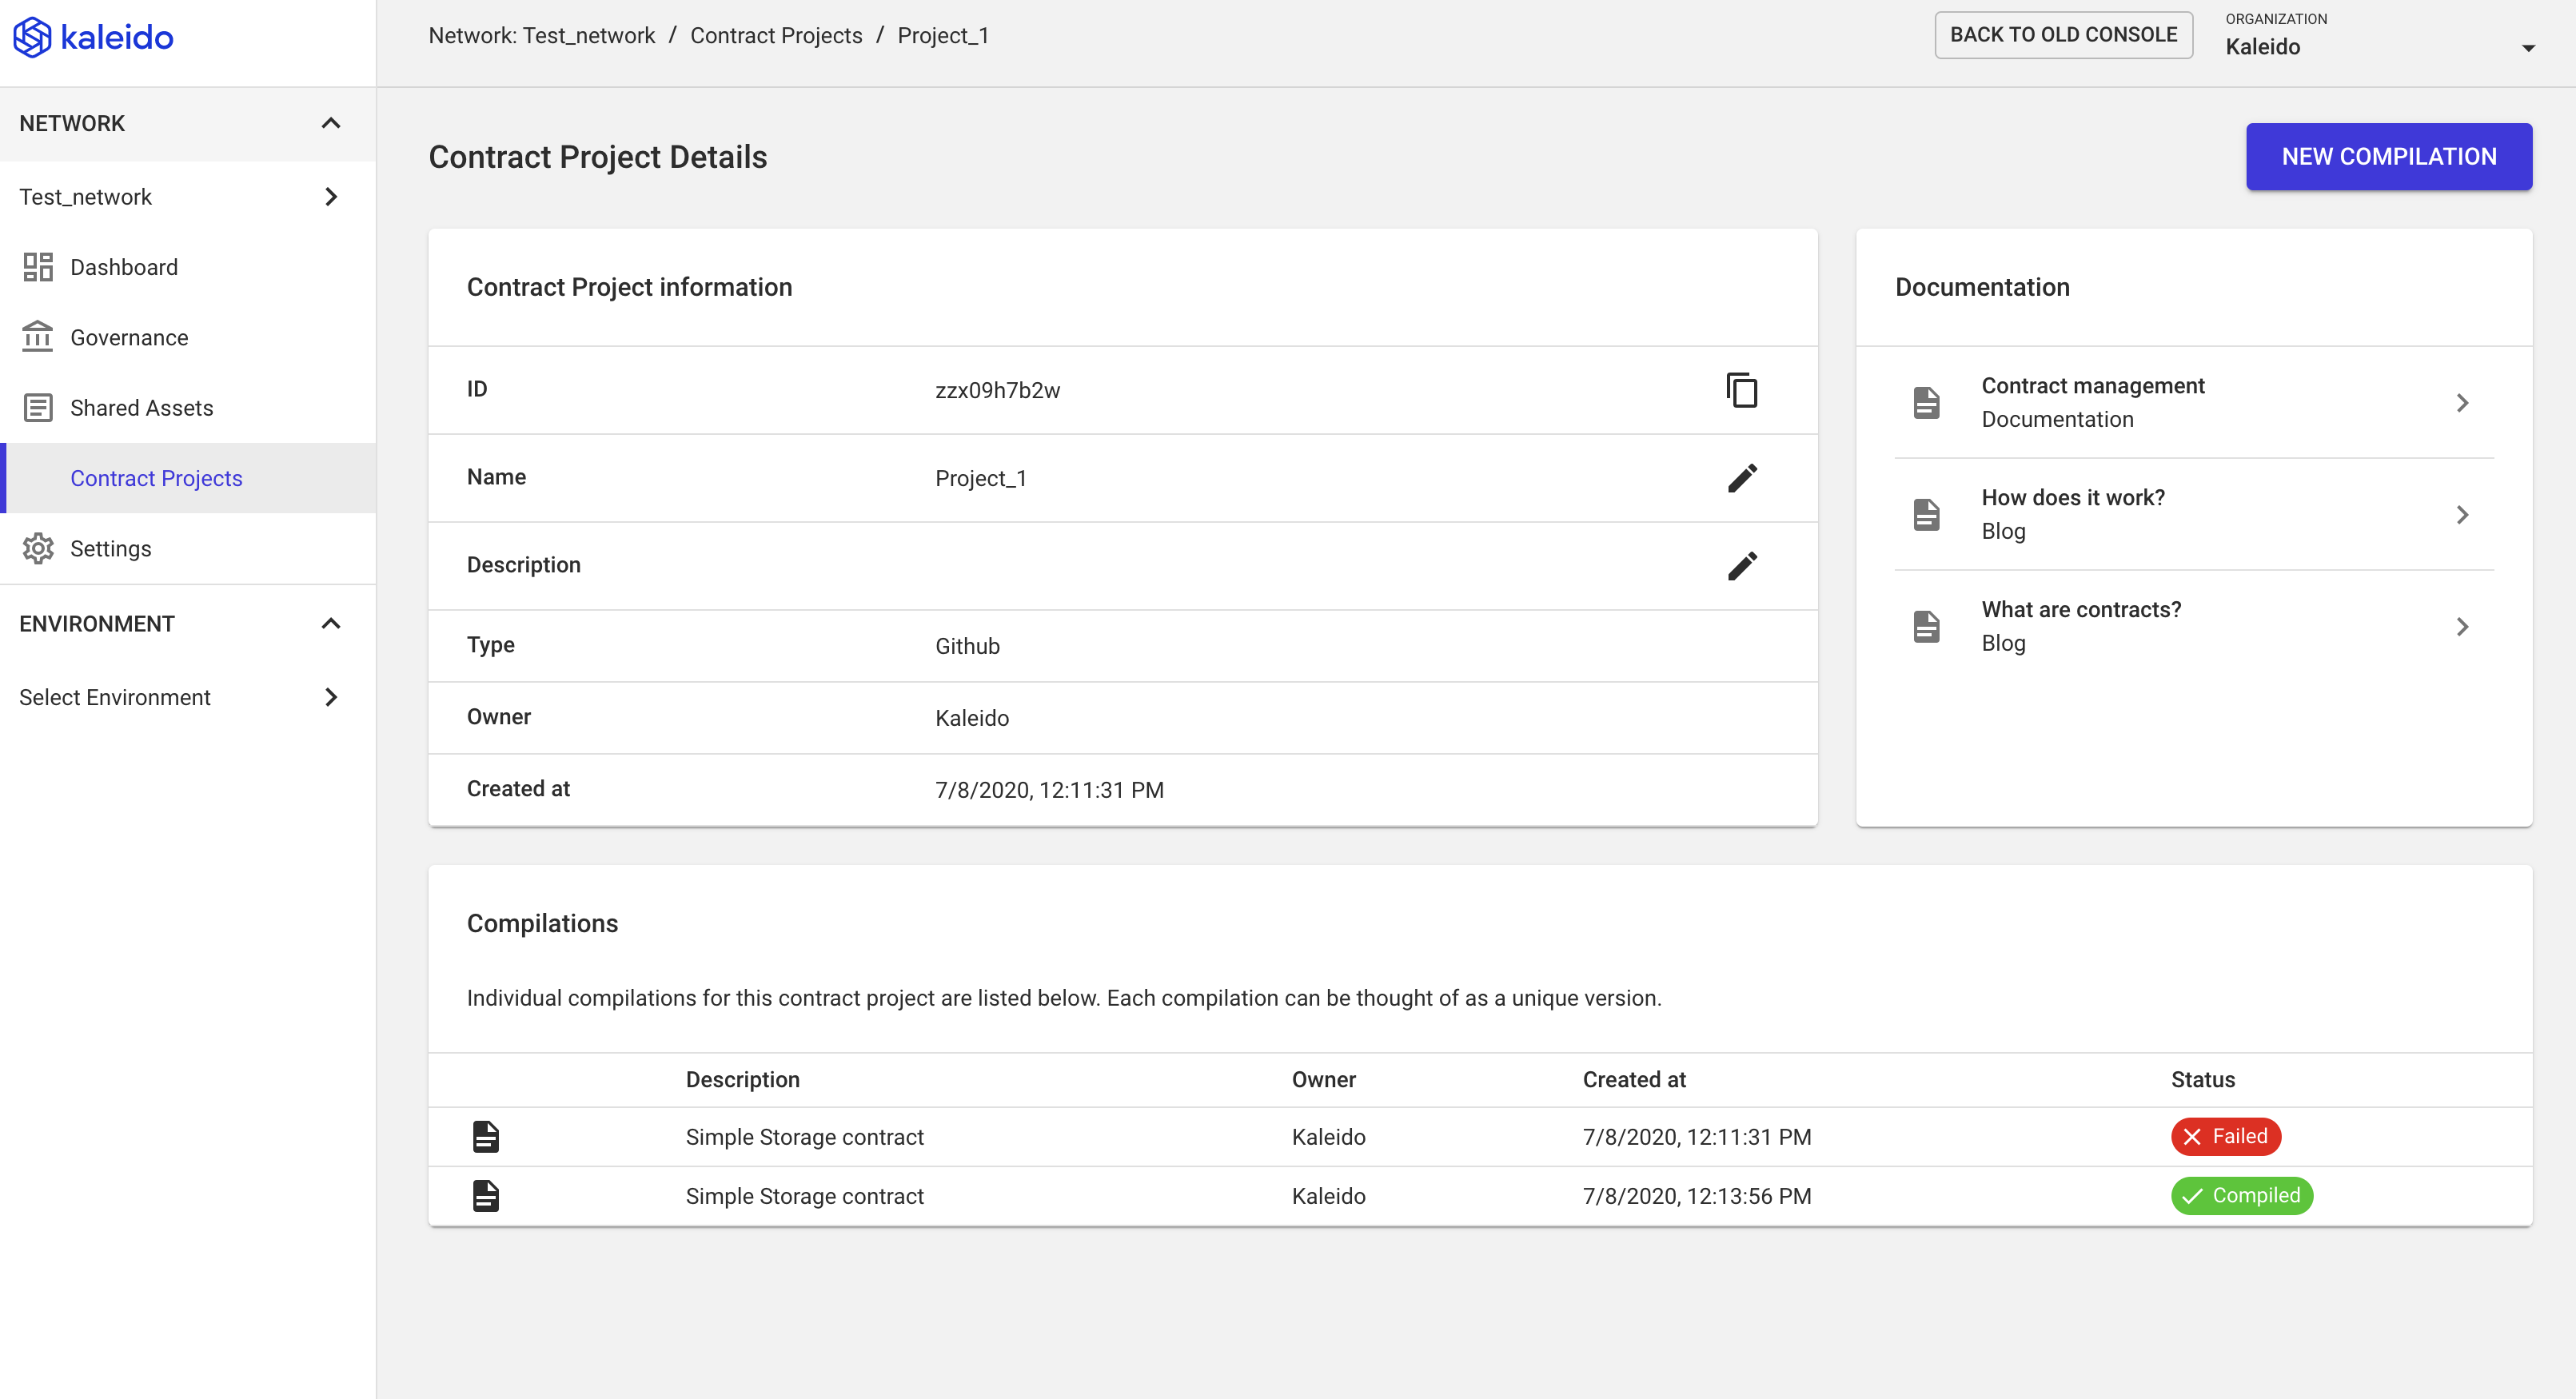
Click on the compilation you would like to promote. In the Compilation Details page, click Promote to Environment or select the specific environment from the right side of the screen. If you do not have an environment within your business network, you will need to create one in order to promote the compilation. Refer to the Ethereum Quick Start tutorial for a quick walkthrough on creating your first environment.
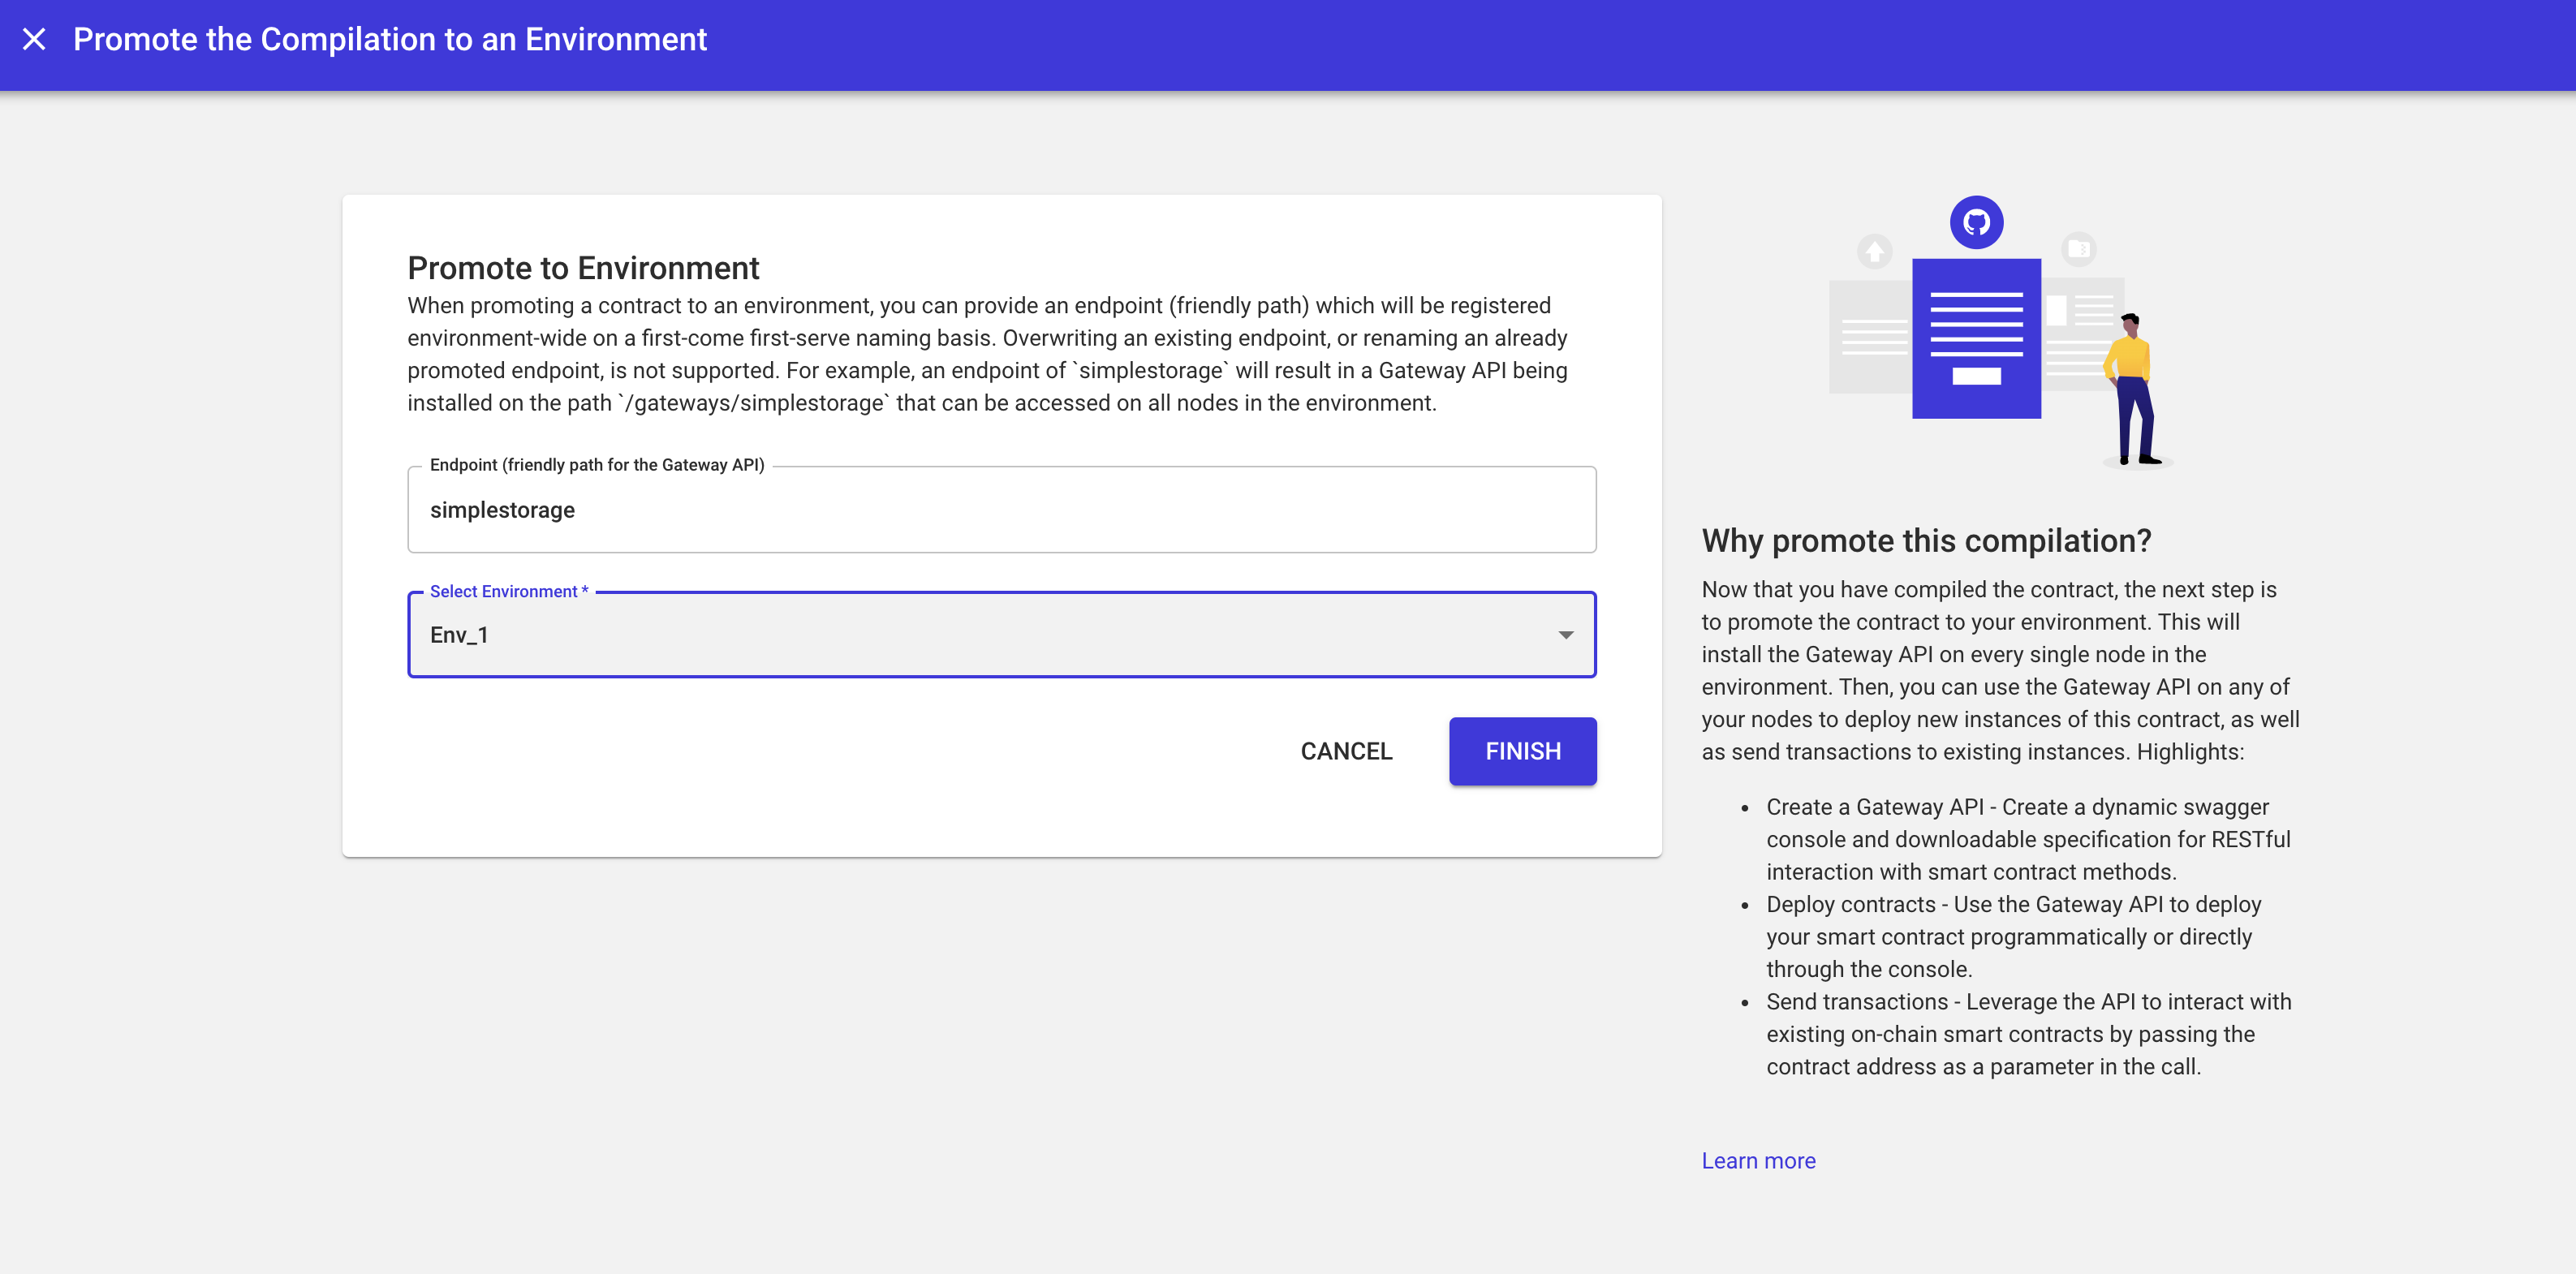
On the Promote the Compilation to an Environment page, give a friendly name for the gateway API endpoint and select the environment to which you would like to promote the contract. Then click Finish.
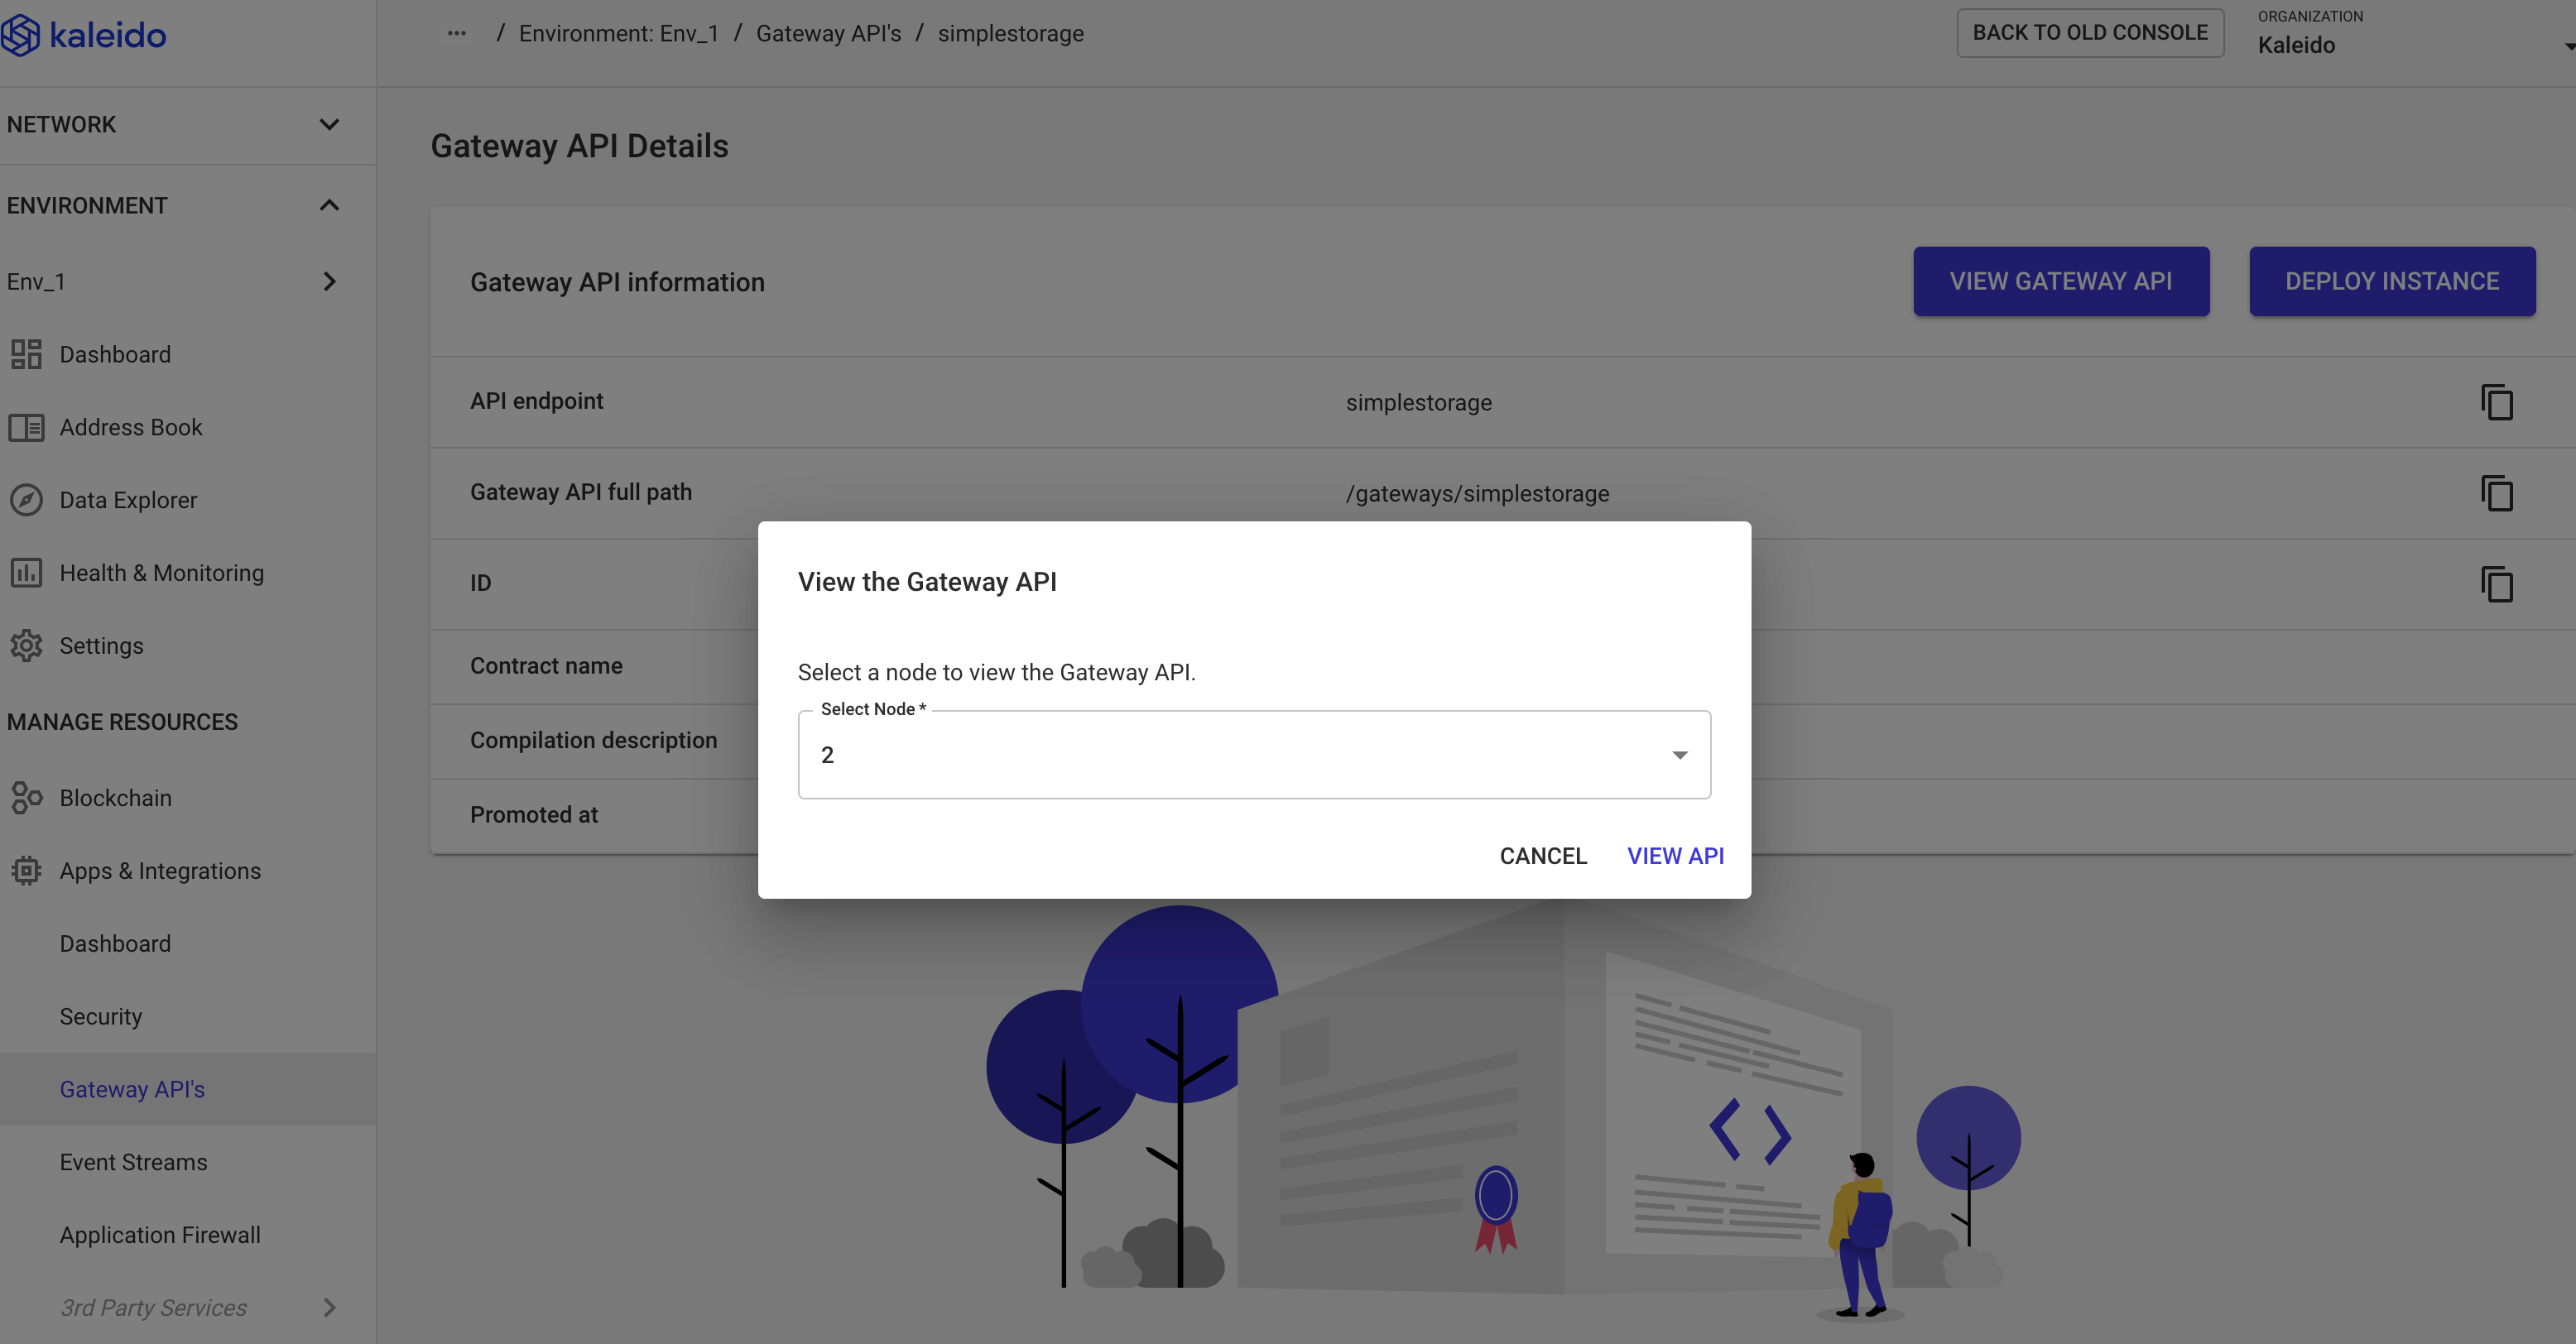
Once the contract is promoted to the selected environment, you can see the Gateway API Details page. Here you can deploy the contract to a node using the Deploy Instance or View Gateway API buttons. Both of these buttons will prompt you to select the node that will receive the incoming transaction(s) and they will also open an interactive Swagger Interface for you to interact with the contract. The Deploy Instance screen will only expose the root POST method, while the View Gateway API will show all smart contract methods within your source.
To instantiate a Gateway API (e.g. a specific compilation) make use of the root POST method within your Swagger interface and input any required arguments to the constructor in the body of your REST API call.
- Use the
kld-fromparameter to enumerate the account you want to sign the transaction. The populated address is the default Ethereum account on the node you are viewing the APIs through. - Use the
kld-registerparameter to apply a human-friendly naming convention to your smart contract instance. For example,simplestorage123.
Again, you can refer to the Ethereum Quick Start for more details on the REST API Gateway parameters.
Once a Gateway API (e.g. a specific compilation) has been deployed, you will have what Kaleido refers to as an "instance" of that compilation. You can generate multiple smart contract instances within a Gateway API. For example, you may want to use the same source code, but compartmentalize the state across different departments or geographies.
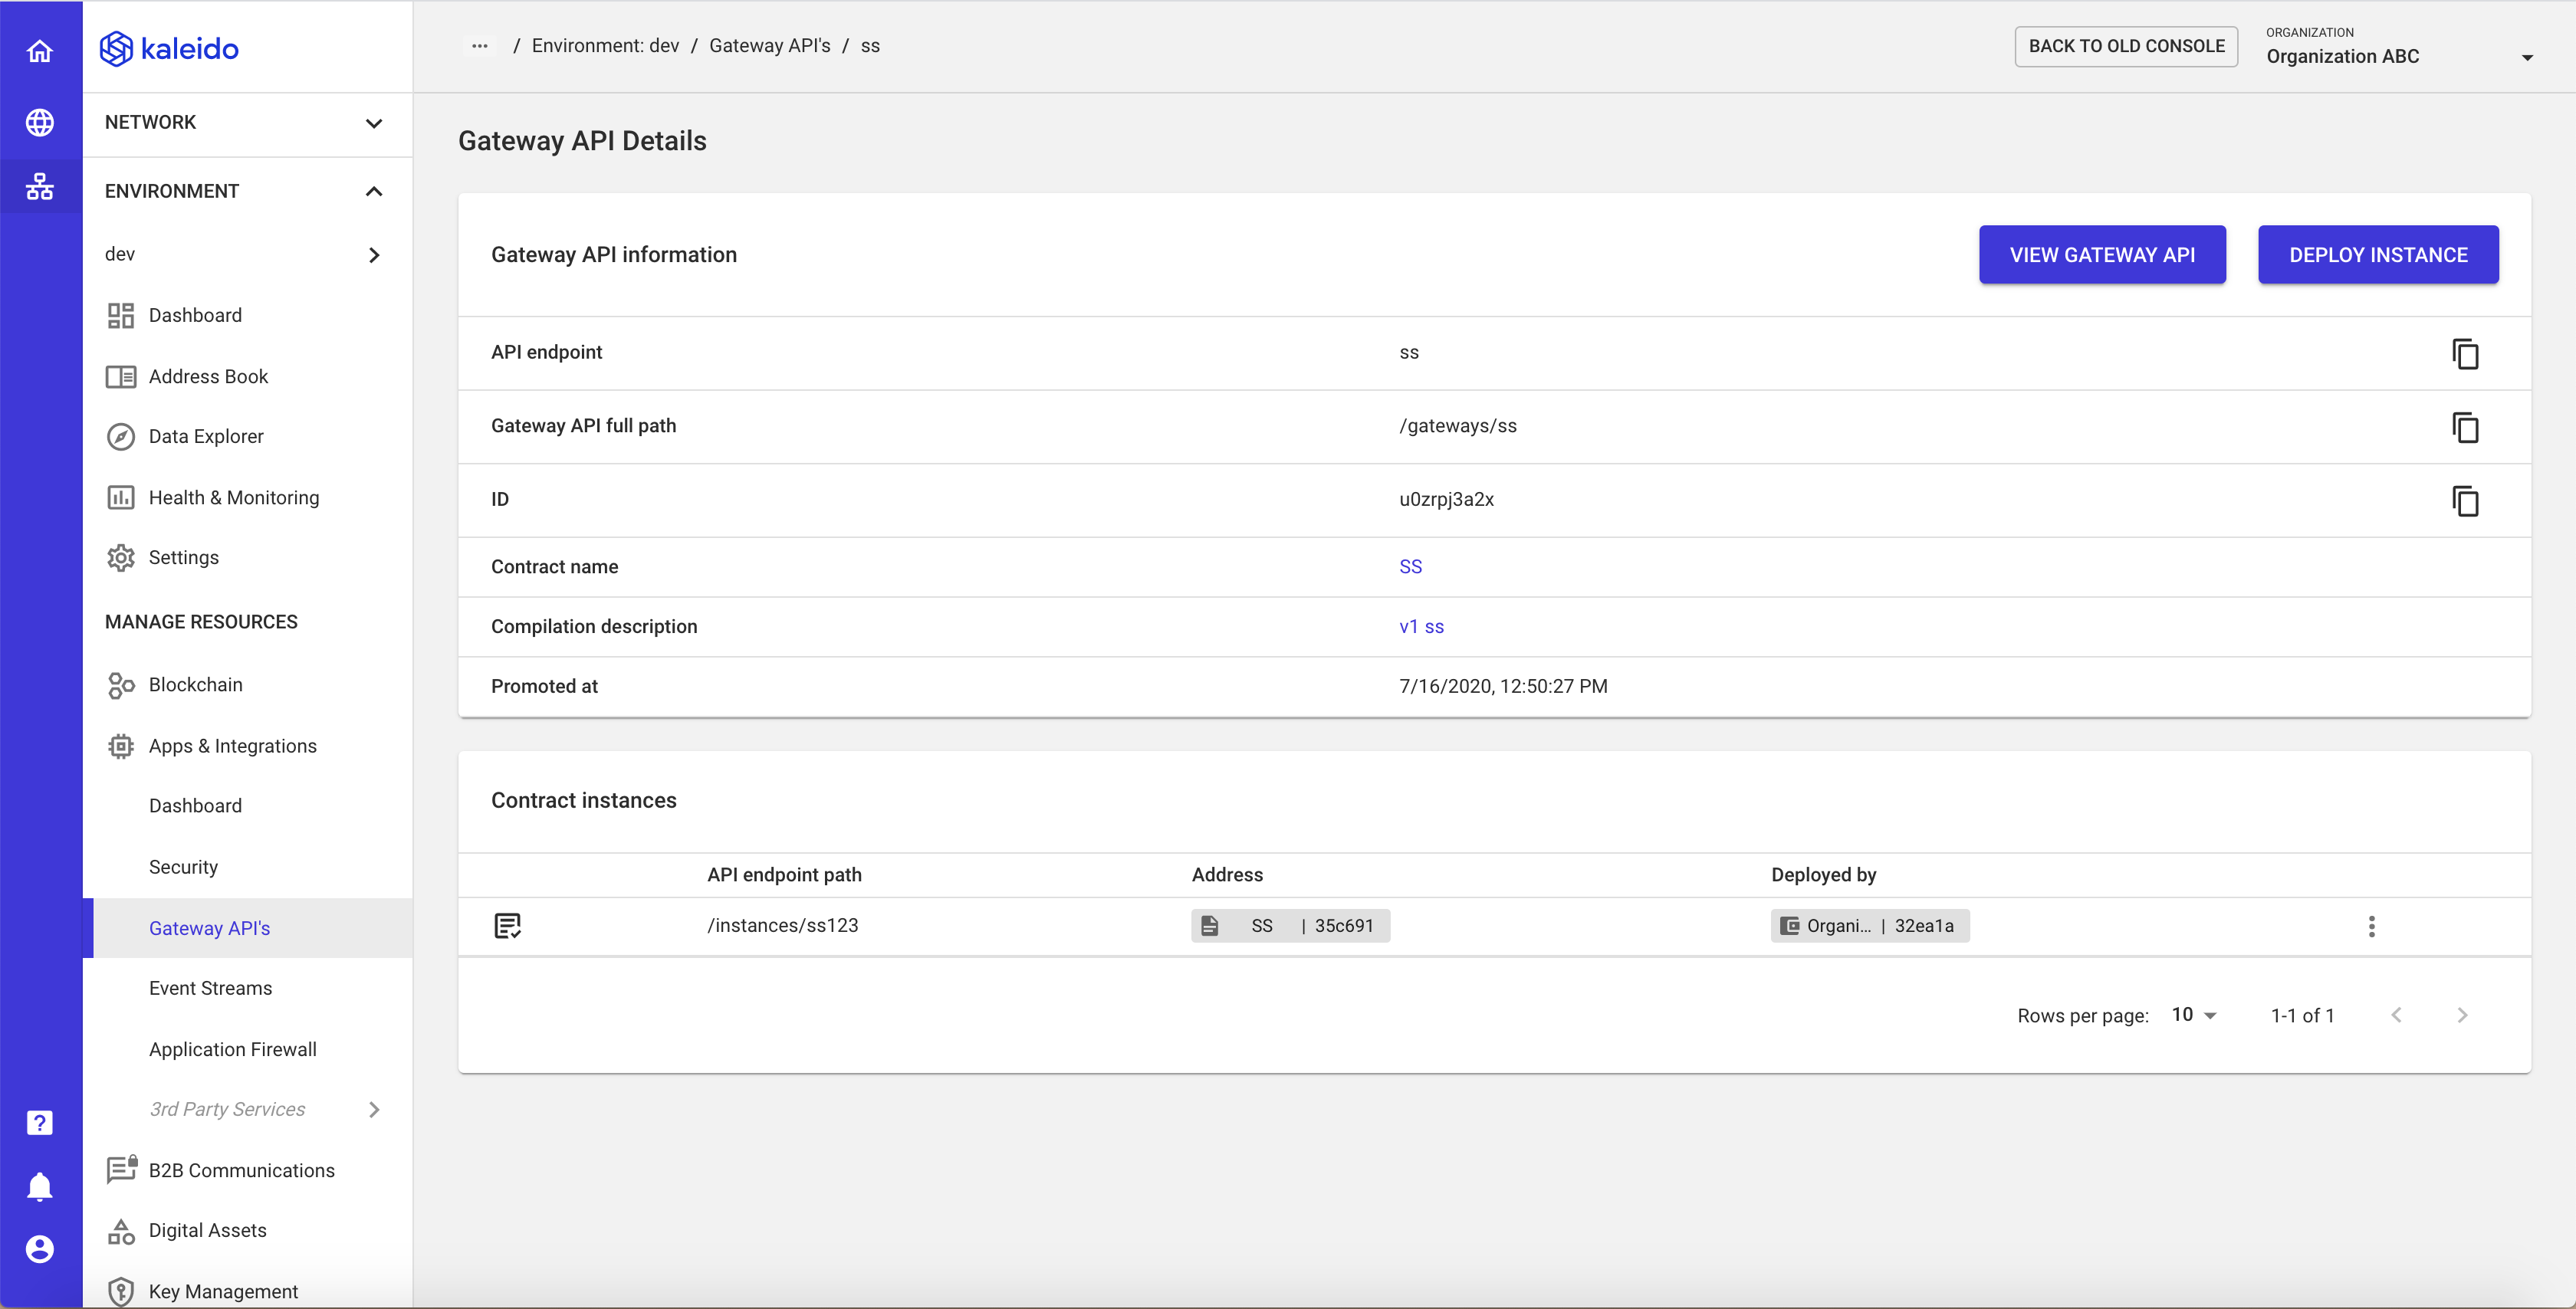
Expand the ellipsis next to your instance to interact with the smart contract.
