Verifying Reports
Refer to the Kaleido Relay whitepaper for the full architectural specification.
Download the latest report
You can download the reports for verification using one of the following methods.
Using the Console UI
The Tether service UI is only available in the Classic Kaleido Console at the moment. Click the "BACK TO OLD CONSOLE" button on the top of the page.
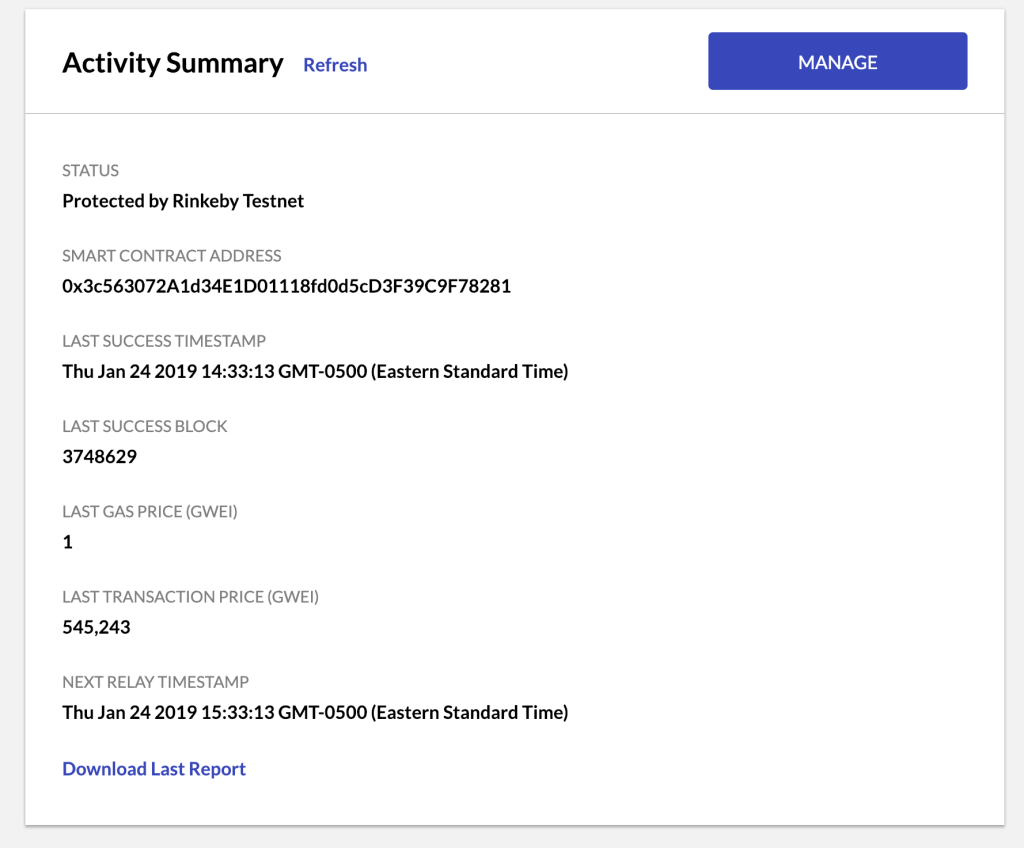
Access your Public Ethereum Tether dashboard and click the Download Last Report hyperlink.
Using the Tether Service API
You can also use the Tether service API to download the reports from the smart contract deployed to the target public Ethereum network.
The full URL to connect to the service can be obtained in the console by going to the environment dashboard. Click "Manage Resources / Apps & Integration / Security" and pick the app creds to use.
$ curl https://<appcreds_username>:<appcreds_password>@<environment_id>-<service_id>-tether.us0-aws.kaleido.io/api/v1/reports/latest
You can also get the report count and download individual reports. For details refer to the API documentation.
Calling the Smart Contract on the Target Network
You can also "skip the middle man" and directly ask the smart contract deployed on the target Ethereum network for the reports. Using the Tether service dashboard panel you can collect the following information:
- target network: Ethereum mainnet or Goerli testnet
- smart contract address
Using the below ABI specification, you can make Web3 JSON RPC calls or use one of the popular web3 libraries to download the reports from the smart contract:
function getReportCount() public view returns (uint256)
function getReportAt(uint256 index) public view returns (
            bytes32 nodeId,
            uint64 blockNumber,
            bytes32 blockHash,
            bytes32 checksum,
            uint8 v,
            bytes32 r,
            bytes32 s)
// returns the list of reports for the same blocknumber
// as the one at the designated index. These would correspond
// to the array of reports submitted together in a single tx
function getReportBatch(uint256 index) public view returns (
            bytes32[] memory nodeIds,
            uint64 blockNumber,
            bytes32 blockHash,
            bytes32[] memory checksums,
            uint8[] memory vs,
            bytes32[] memory rs,
            bytes32[] memory ss)
Inspecting the Report Content
The report is returned as one or more JSON objects (where each object correlates to an individual node’s signed state proof) and contains the following information:
- Node ID hash(es)
- Block number
- Block hash
- Checksum(s)
- v(s), r(s), s(s)
The values for r and s are the normal output for an ECDSA signature, with v serving as a recovery ID for cryptographic derivation of the signature’s corresponding account address. The nuances of elliptical curves and the associated signing algorithms are beyond the scope of this documentation, however, the following article – A (Relatively Easy to Understand) Primer on Elliptic Curve Cryptography – is a good place to start if you’re interested in learning more about the underlying constructs of ECDSA. For those in search of a deeper understanding behind the core primitives of elliptic curve cryptography, this article by Vitalik Buterin is an excellent resource.
Assume an environment with three nodes. For example:
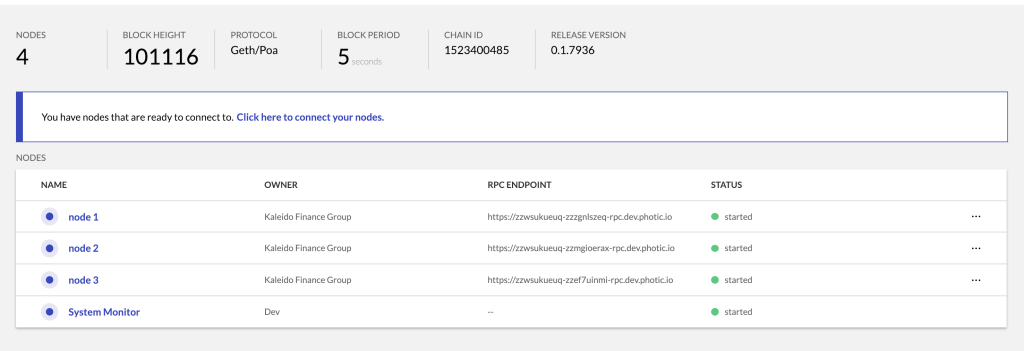
A downloaded state report for this environment would look similar to the following:
[
    {
        "nodeIdHash": "0x1a0c5087e279cb9941a2661da10821a0784f1e9dcbbc44add1912ac5a2f9f9b3",
        "blockNumber": "101169",
        "blockHash": "0xea8d2cca7c58263602860b723ec9da5cc5f8a6f22197e22b90fa42a8af928433",
        "checksum": "0xd95117e40a74ed7f72e9def25ad53ac5927683a3b7c7a2efba5045e37ad4f9fc",
        "v": "28",
        "r": "0x32357a9cfb30821b1071a2d2bdd59ee5444250ff51bbc77fb57408d3c142bb8e",
        "s": "0x46de6bad76ead4ad2af7e77415b6422c1c6affaf4343ec548b846e265dbe2940"
    },
    {
        "nodeIdHash": "0xcc814cf744fffb78797fe0dc6666e13734741d17e1deb0e2098f29d007343426",
        "blockNumber": "101169",
        "blockHash": "0xea8d2cca7c58263602860b723ec9da5cc5f8a6f22197e22b90fa42a8af928433",
        "checksum": "0x235bffbde1db601db7a4d2145faf2019c4e7ed801b9a7d43fea8bc5b6d0d5c29",
        "v": "28",
        "r": "0x43b9a1f18a98de5feba9848197c4a7cfd8718080e4fd54a683d9f9eb4c2a4210",
        "s": "0x7cefa80e2994a4520a5f78eb0480bfd4b4b146d3d5c011bf3fc4ba2f40c9875a"
    },
    {
        "nodeIdHash": "0x407f869854e60ab38465a5ba26afe528793f23454b931d4d5548b1b0753cb543",
        "blockNumber": "101169",
        "blockHash": "0xea8d2cca7c58263602860b723ec9da5cc5f8a6f22197e22b90fa42a8af928433",
        "checksum": "0x63503425bc60bad29862db73696b0171b7f05f9e3f06495951e8168d151c0efd",
        "v": "27",
        "r": "0x8b7e00d0c71fee10fb9d6a7b3e26a3a4c918c6721b06e72ed4be6ac0cb8b0c3f",
        "s": "0x0c2f87ee7fe50992b3b837d5d74bd8d58aa1bec1c40c794139e431d5228ae4b7"
    }
]
The report will contain a unique JSON object for each node in the environment, with the individual objects represented in the same order as the nodes on the environmental screen. For example, node 1 maps to the first JSON object with a nodeIdHash value of 0x1a0c5087e279cb9941a2661da10821a0784f1e9dcbbc44add1912ac5a2f9f9b3. Whereas node 2 maps to the second object with a nodeIdHash value of 0xcc814cf744fffb78797fe0dc6666e13734741d17e1deb0e2098f29d007343426 and so on, until all of the nodes in the environment are accounted for.
Verify using the node details helper panel
Navigate to the environment running your tether service. Click the node you wish to verify a report for. Scroll to the bottom of the screen and find the "NODE ID HASH" value. Match that with the nodeIdHash value of a downloaded report object.
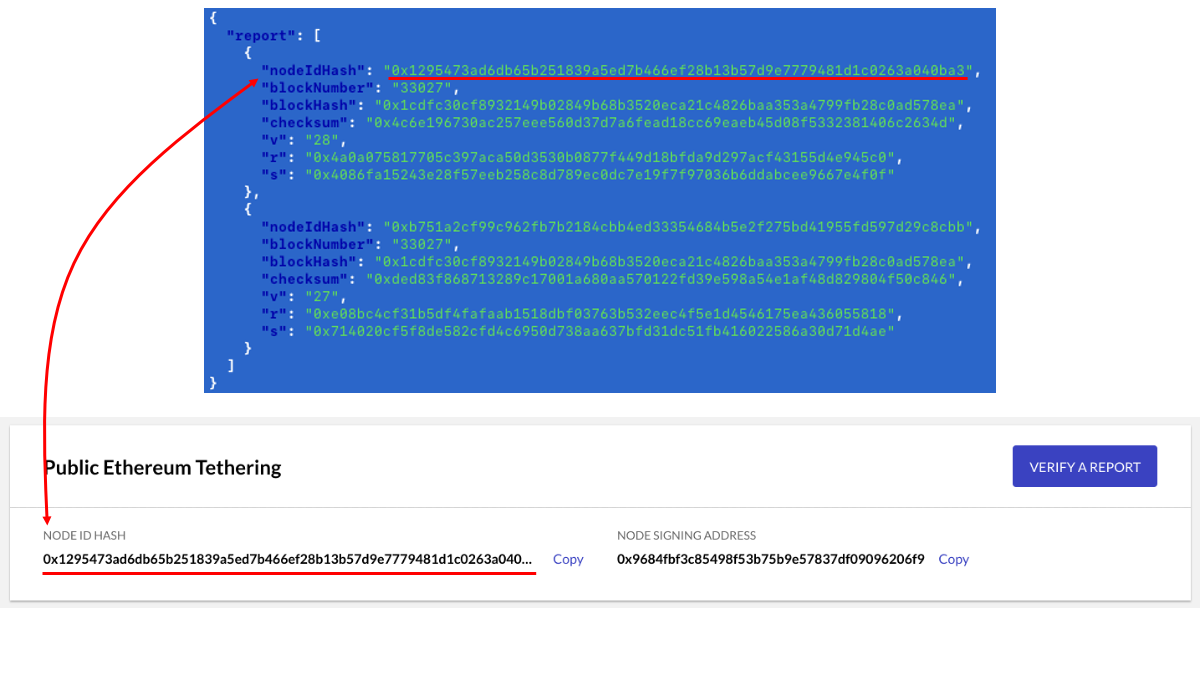
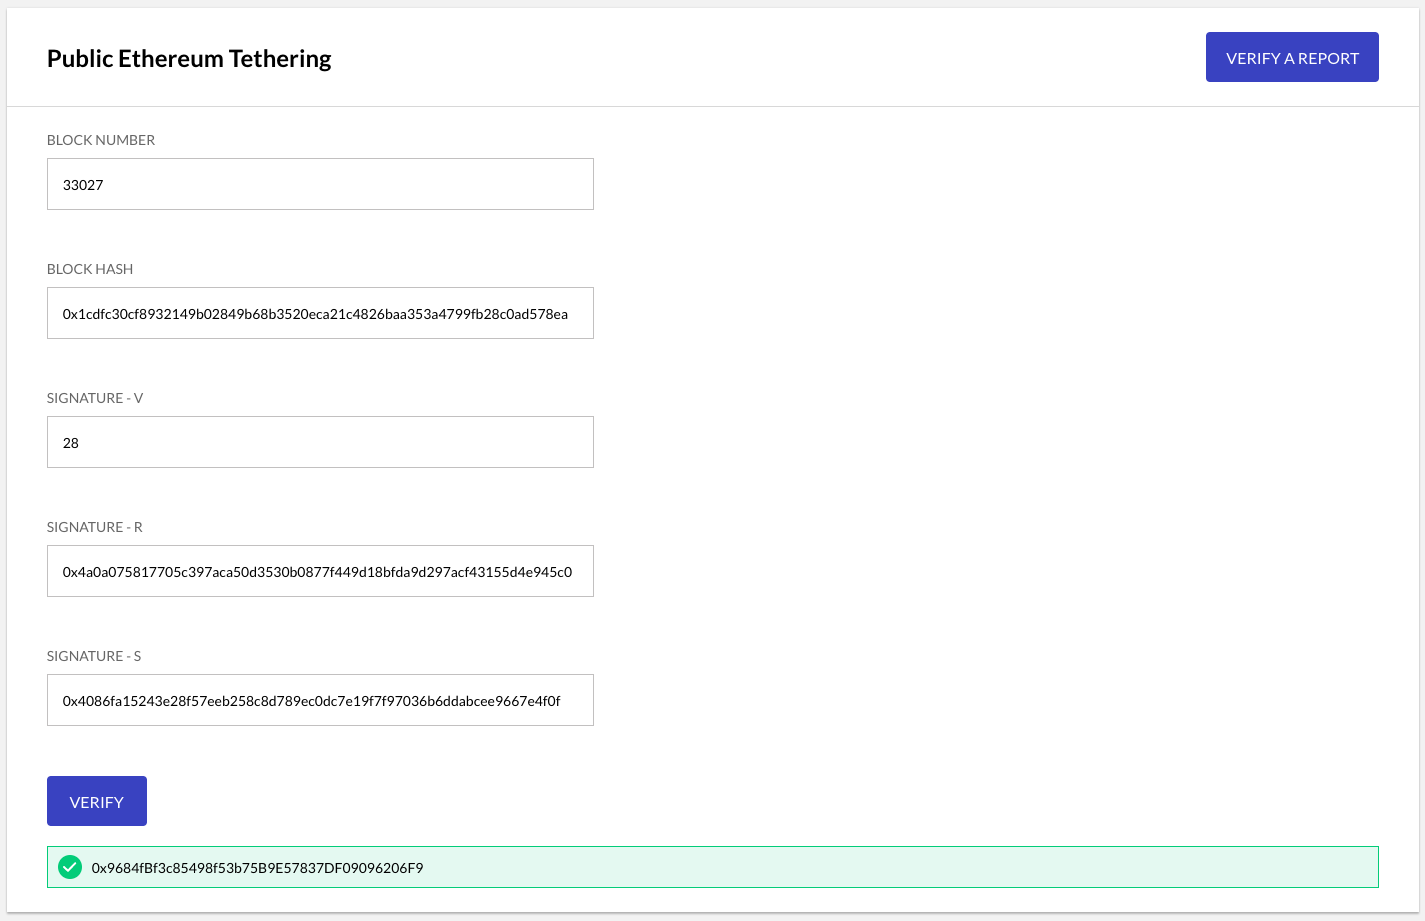
Click the "VERIFY A REPORT" button.
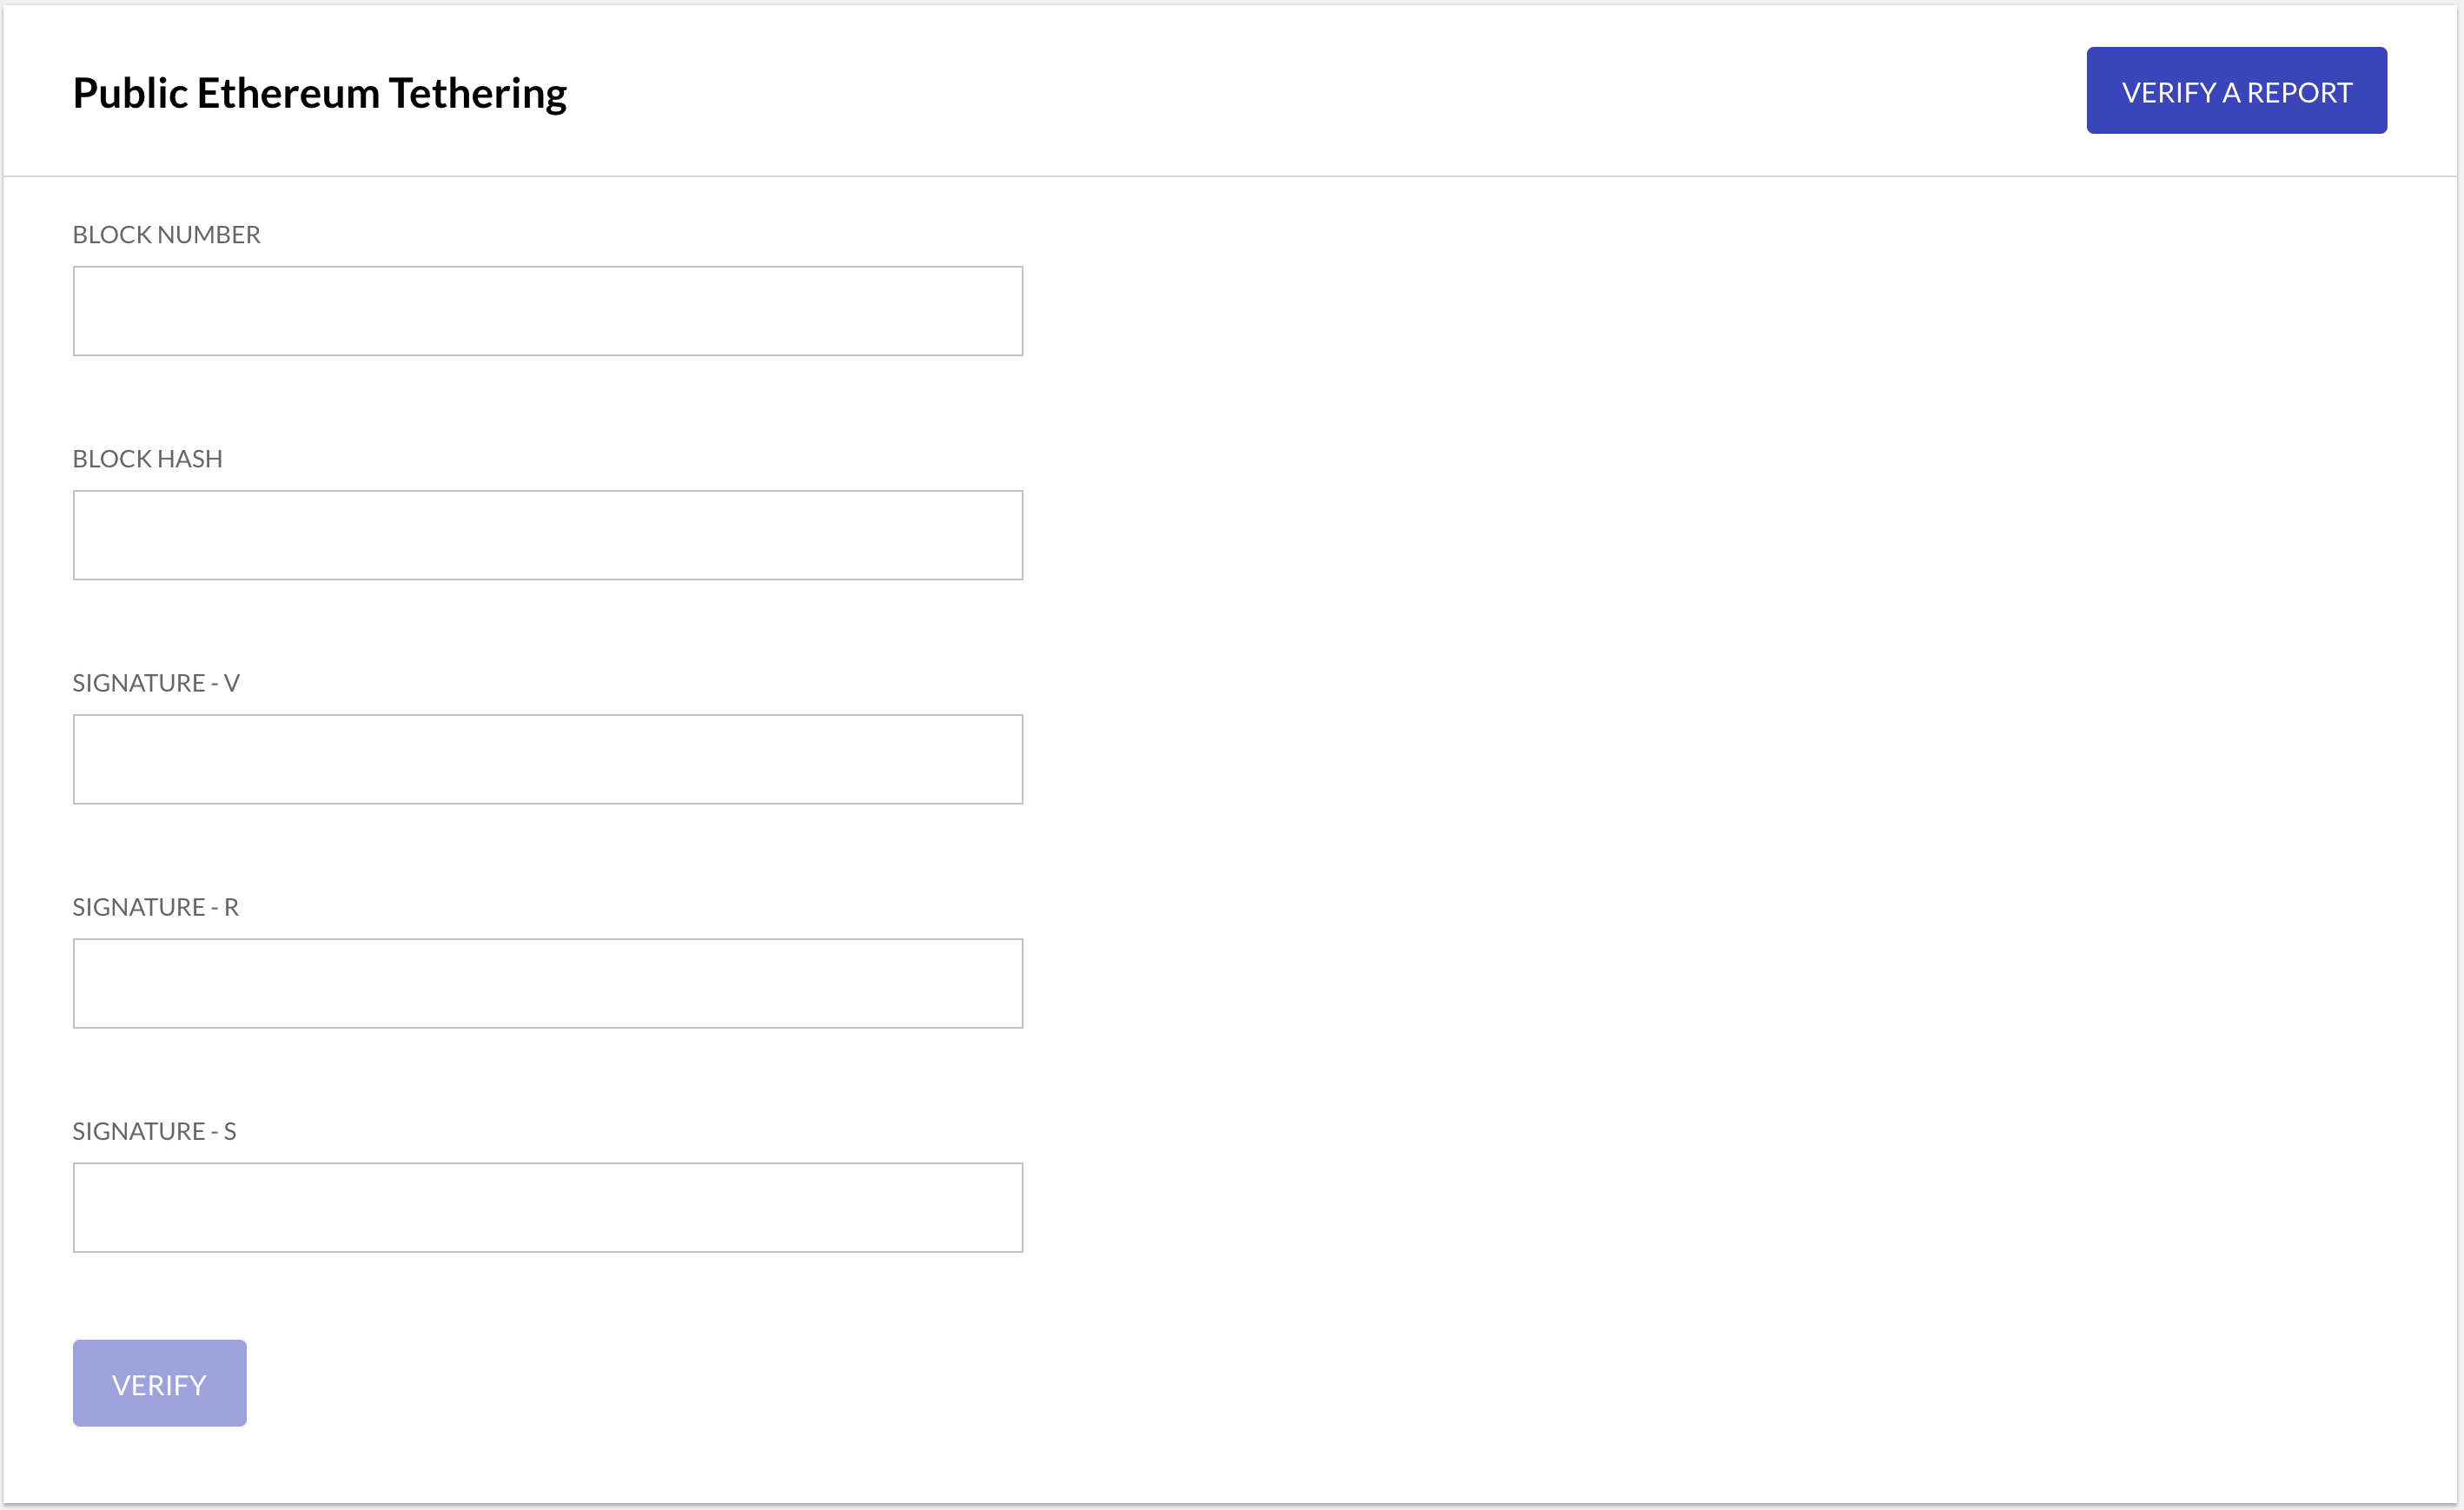
Use the report JSON object for your node, identified above, to fill in the verification form with the required values for Block Number, Block Hash, Signature-V, Signature-R and Signature-S.
Because the report signature is generated by signing the hash of Node ID + Node ID Hash + Block Number + Block Hash, using the node's p2p identity private key, verification is considered successful if the recovered signature address matches the node's private key. The verify function assembles the pre-hash string from the collected form values, and pass it along with the values for the digital signature – v, r and s – to the eth.accounts.recover method in order to cryptographically derive the address of the signing address.
If the ensuing result matches the Node Signing Address, then the report is considered verified.
Note the verification all happens in your browser
Programmatically Verify a State Report
The following section explains how to programmatically verify a downloaded state report using secp256k1 ECDSA cryptographic recovery maths. Note that this is the same mechanism used behind the scenes by Kaleido to verify the node’s signing address against the supplied arguments.
Before starting, ensure that you have Node.js and its accompanying package manger installed on your machine.
If you don’t have them, they can be downloaded here.
For the sake of consistency, we will once again leverage the JSON object for node 1 as the frame of reference for this exercise:
{
    "nodeIdHash": "0x1a0c5087e279cb9941a2661da10821a0784f1e9dcbbc44add1912ac5a2f9f9b3",
    "blockNumber": "101169",
    "blockHash": "0xea8d2cca7c58263602860b723ec9da5cc5f8a6f22197e22b90fa42a8af928433",
    "checksum": "0xd95117e40a74ed7f72e9def25ad53ac5927683a3b7c7a2efba5045e37ad4f9fc",
    "v": "28",
    "r": "0x32357a9cfb30821b1071a2d2bdd59ee5444250ff51bbc77fb57408d3c142bb8e",
    "s": "0x46de6bad76ead4ad2af7e77415b6422c1c6affaf4343ec548b846e265dbe2940"
}
First, navigate to a working directory on your local machine and initialize a node project. For example:
We aren’t concerned with any dependencies or alternate metadata in the package.json, so press ENTER until the basic file is generated.
Next, install the web3 modules. Our program needs access to the Ethereum APIs in order to perform the cryptographic recovery of the account address. More on this at the conclusion.
Now, create a javascript file named index.js at the root of your directory. You’ll notice that, by default, this file is specified in the package.json as the main entry point for the application.
Populate the program with the following template code:
let Web3 = require("web3");
let web3 = new Web3();

let payload = {
    nodeId: "zzzgnlszeq",
    nodeIdHash:
        "0x1a0c5087e279cb9941a2661da10821a0784f1e9dcbbc44add1912ac5a2f9f9b3",
    blockNumber: 101169,
    blockHash:
        "0xea8d2cca7c58263602860b723ec9da5cc5f8a6f22197e22b90fa42a8af928433",
};

let msg = JSON.stringify(payload);

let result = web3.eth.accounts.recover(
    msg,
    "0x1c",
    "0x32357a9cfb30821b1071a2d2bdd59ee5444250ff51bbc77fb57408d3c142bb8e",
    "0x46de6bad76ead4ad2af7e77415b6422c1c6affaf4343ec548b846e265dbe2940"
);

console.log(result);
With the exception of nodeId, all of these values are extracted from the node’s state report JSON object. The 10 character string for nodeId is withheld from the publicly pinned transaction because it serves as the only uniquely identifiable piece of user information. All of the other values are either indecipherable or meaningless to any user attempting to glean state report details from the publicly callable smart contract.
The nodeId string can be easily ascertained by accessing the environmental panel in the Kaleido console and viewing the Node Details screen for the targeted node. Ensure that this page also displays the same nodeIdHash value that you see in the state report. If you’d like to manually verify the hashed representation of the Node ID, you can feed it to a SHA256 algorithm in your terminal. For example:
This returns:
Which, when prepended with 0x for proper hex representation, leaves us with the same value displayed in the state report.
Go ahead and run the program with the sample values:
It will return us 0xAcA169A8418d3902E01DcC91C04a7161524a02Dc, the exact string for Node Signing Address displayed in the screenshots above.
Use a Different Report
To verify your own unique report, edit all of the placeholder values in the program and make sure to:
- Specify the block number as an integer and not a string; do NOT include quotations
- Pass the four arguments to the recover method exactly as follows:
eth.accounts.recover(msg, v, r, s) - Specify
v, the recovery ID, in hexadecimal representation. 27 is0x1band 28 is0x1c
Under the covers the stringified JSON object defined as variable msg will be enveloped with \x19Ethereum Signed Message:\n" + message.length + message and hashed using Keccak256. The outputted value is the same as the checksum string in the state report and is ultimately what will be signed using the node’s private key. You can generate the same checksum string for your report by passing the stringfied JSON object to the eth.accounts.hashMessage method and logging the output.
Refer to the web3 API documentation for additional details around the hash, sign and recover methods.
